

Wondering how you can add Disney Plus to Roku?
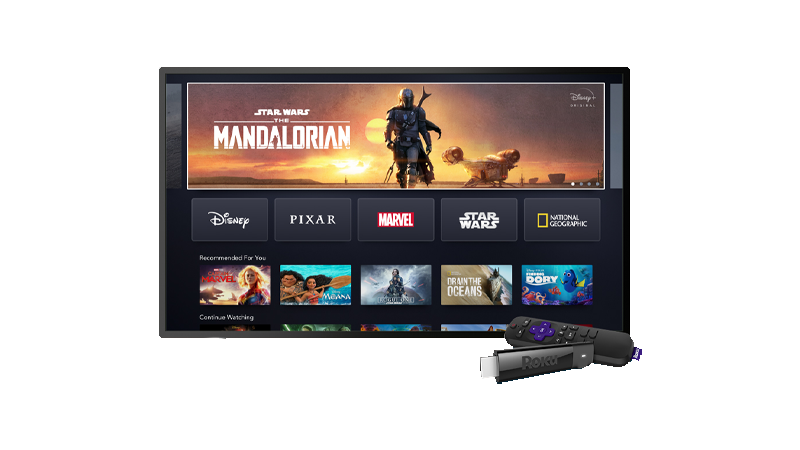
Disney Plus is one of the best streaming services in the world. It features shows from Marvel, Pixar, Star Wars, and more.
With that, you definitely want to include the service on your Roku.
Fortunately, you have come to the right place.
In this guide, we will tell you everything you need to know on how to add Disney Plus to your Roku device.
Let’s get started!
Unsupported Devices
Sadly, not all Roku devices support Disney Plus. If you see your device on the list, it means that it won’t be able to run the app:
- Streaming Stick 3400X
- Roku 3420X
- Roku HD 2500X
- Roku 2 HD 3000X
- Roku 3050X
- Roku 2 XS 3100X
- Roku LT 2400X
- Roku 2450X.
Consider upgrading your Roku device if your current one is one the list.
Adding Disney Plus to Roku
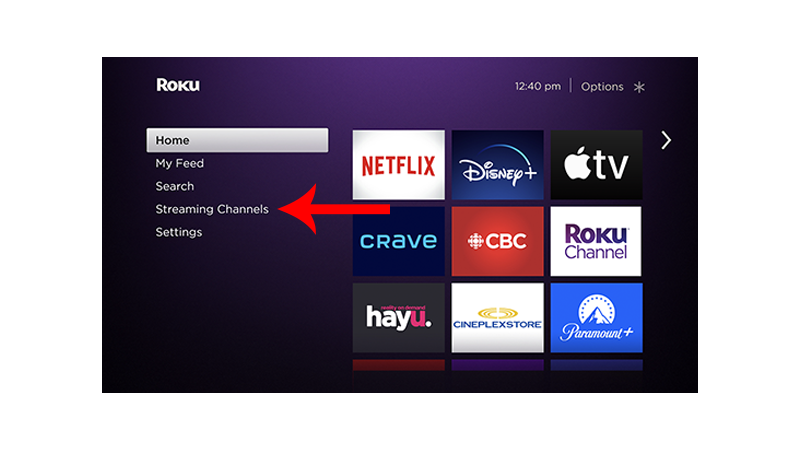
You can add Disney Plus to Roku the same way you do with any channel. First, you’ll need to head to the streaming channels store. From there, you can install Disney Plus.
See the steps below to guide you through the process:
- Open the Streaming Channels Store on your Roku.
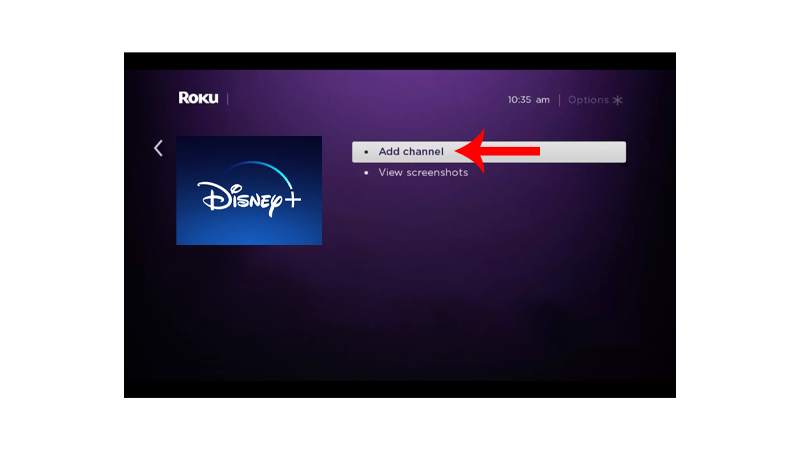
- Next, look for Disney Plus.
- Select the app.
- Click Install and follow the prompts.
Once done, you should be able to see Disney Plus on the home screen.
Upon opening Disney Plus, you’ll be prompted to sign in or sign up. If you are allowed to sign up directly through the app, your subscription will be billed and managed through Roku.
Note
- Keep in mind that you’ll need more advanced Roku devices to take advantage of 4K, HDR, or Dolby Atmos.
- Even if your device can run Disney Plus, this doesn’t mean that all features are available.
- As a good measure, any Roku device that was released in 2021 or later should support 1080p resolution at a minimum.
Cancel Disney Plus on Roku
It’s best to subscribe to Disney Plus using a web browser so you’re billed independently.
This should allow you to track your expenses easier. Sign up process will also be faster since you don’t have to use a remote to enter your information.
Canceling your Disney Plus subscription is much easier too if you signed up via the web.
However, if you’ve subscribed directly through Roku, here’s what you need to do:
- On your home screen, select Disney Plus.
- Push the Asterisk button on your remote.
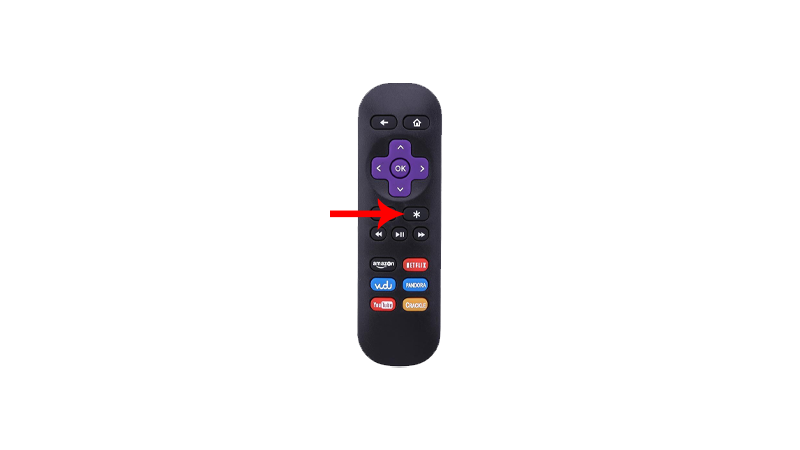
- Choose Manage Subscription from the pop-up menu.
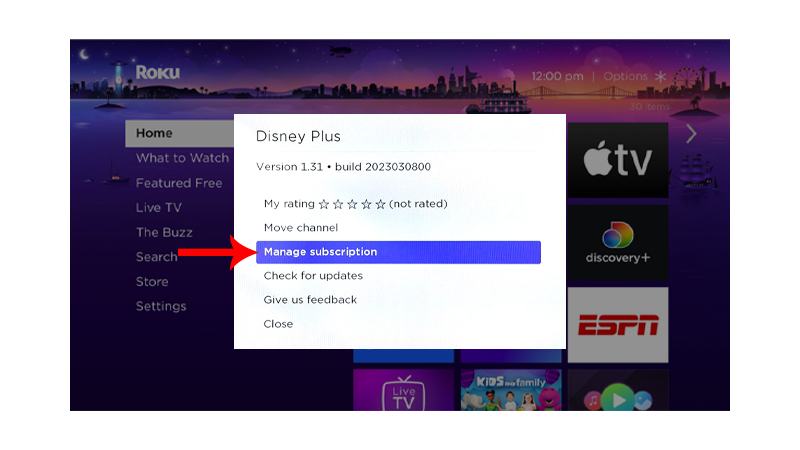
- Select Cancel Subscription and follow the prompts.
Another way to cancel your subscription is to visit Roku’s site and access your account. From there, go to Manage Your Subscriptions and click Unsubscribe next to Disney Plus.
Does It Matter Which Roku Device You Get for Disney Plus?
No. Luckily, it won’t matter what Roku device you are using as long as you can install Disney Plus.
However, you may not be able to enjoy features such as 4K streaming if you own an older Roku device.
Due to this, you’ll want future proof and get the latest model if you are just about to purchase one.
Here are some recommendations:
- Roku Express 4K+
- Roku Streaming Stick 4K
- Roku Streaming Stick 4K+
- Roku Ultra
- Roku Streambar
Disney Plus Not Working?
As long as your Roku is not on the unsupported list above, Disney Plus should work.
Most likely, Disney Plus is not working due to incorrect setup process or internet connectivity issues.
1. Restart Your Roku
If you encounter issues on Disney Plus, you can try restarting your Roku device.
This should resolve temporary issues that occurred during use. Restarting your device should clear corrupted data from its system memory.
Here’s what you need to do:
- Press the Home button on your Roku remote.
- Now, scroll and select Settings.
- Go to System > Power.
- Choose System Restart and follow the prompts.
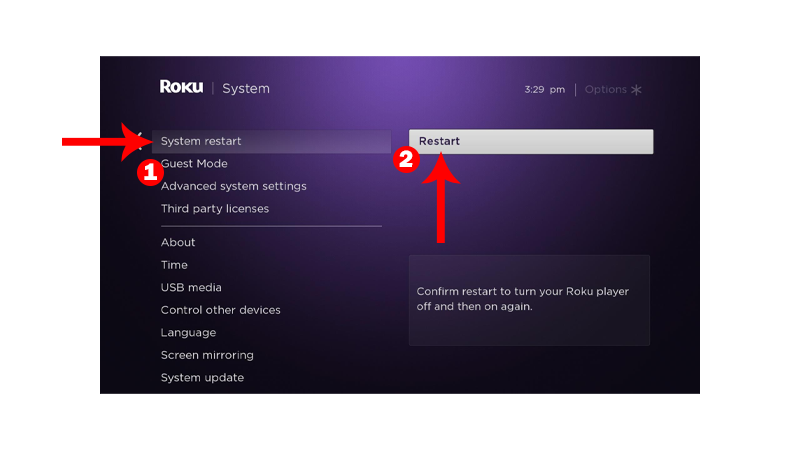
Once done, go back to Disney Plus to check if the problem is solved.
2. Check Your Network.
Slow or unstable internet connection could also be the reason Disney Plus is not working on your Roku.
Disney Plus requires at least 5 Mbps download speed to stream in the lowest resolution. If you watch 4K titles, you’ll need at least 15 Mbps.
To check if your network meets the requirement, run a test using Fast.com to measure its current speed.
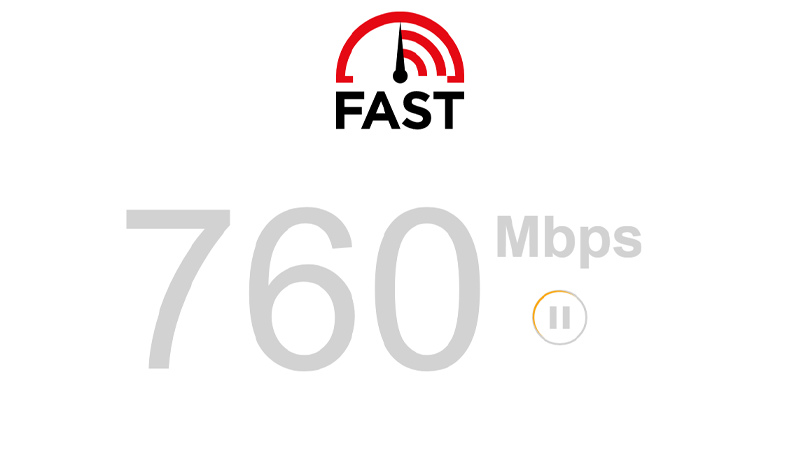
If your network speed is below 5 Mbps, try restarting your router if the bandwidth for your plan is above 5 Mbps.
- Locate the power cable of your router/modem.
- Disconnect the power cable and wait for 5 to 10 seconds.
- Reconnect the cable and wait for your router to initialize.
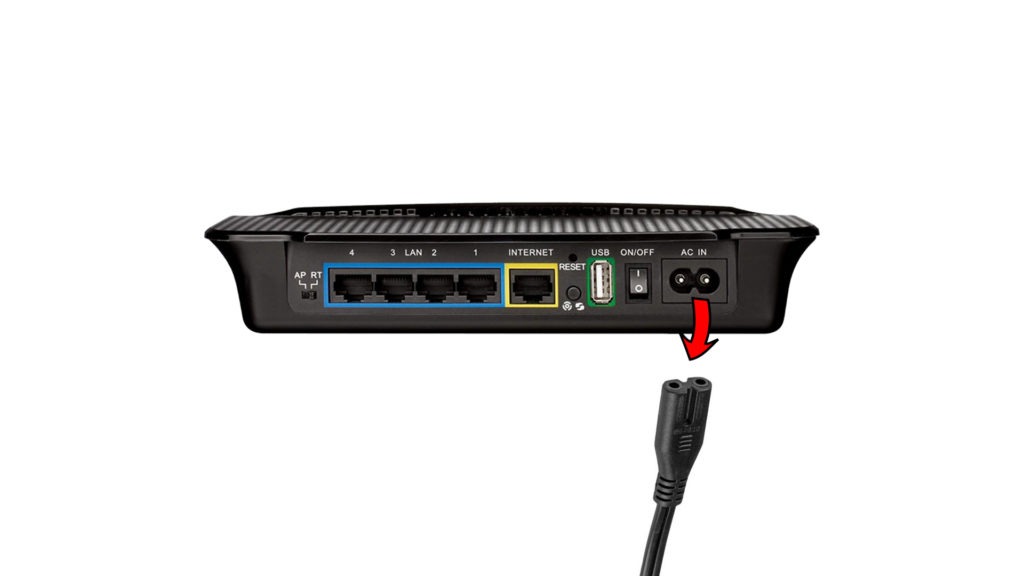
Once done, perform another test to check if the problem is solved. If not, contact your provider and ask them to resolve the issue.
3. Update Your Roku.
If Disney Plus is still not working, make sure that your Roku device has the latest firmware available.
This should rule out compatibility issues with Disney Plus and errors on your system that prevents the service from working properly.
Follow the guide below to update your Roku:
- Press the Home button on your remote.
- Next, scroll down and select Settings.
- Go to System > System Update.
- Click on Check Now and follow the prompts.
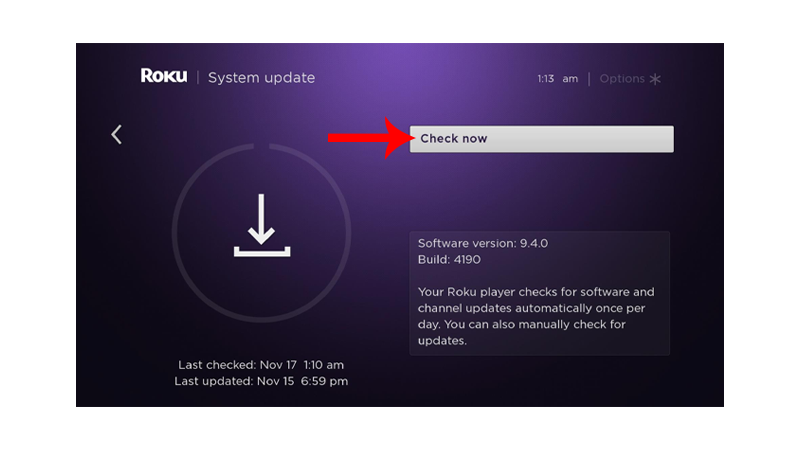
Note
The system update screen will show the current software and build version, along with the date and time of the latest update.
Go back to Disney Plus after updating your streaming device to check if the problem is solved.
That ends our guide on how to add Disney Plus to your Roku device. If you have questions, please let us know in the comment section, and we’ll do our best to answer them.