Want to know how you can solve your AirPods Pro 2nd Gen case battery drain issue?
If you own a pair of AirPods Pro 2nd Gen, you may have noticed that you need to charge its case even when you’re not using it.
Unfortunately, this is a known issue that causes a lot of frustration to AirPods Pro 2nd Gen owners.
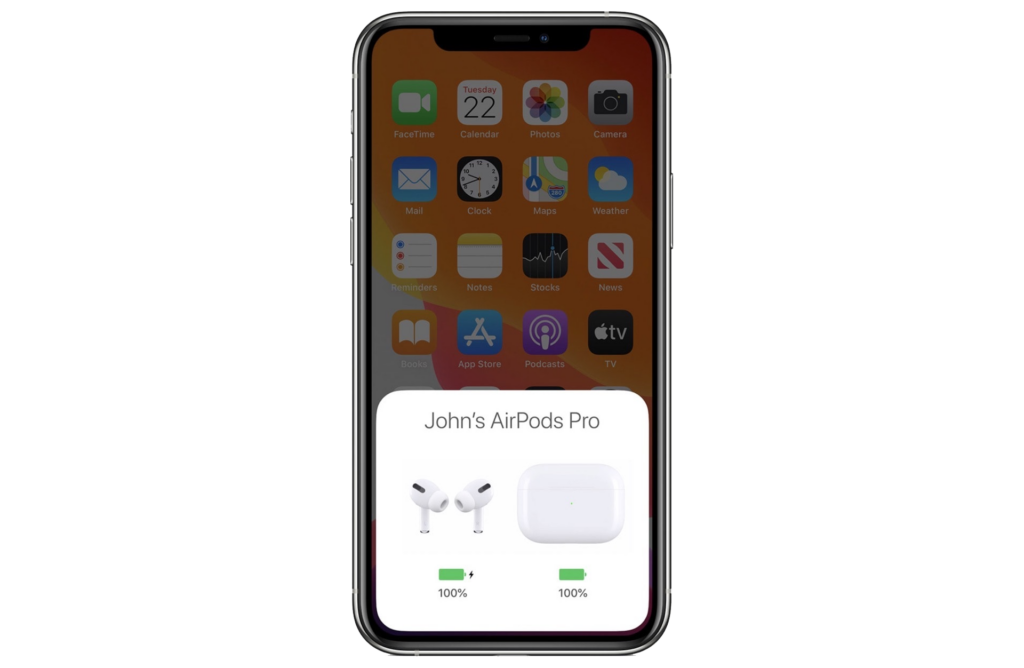
Since you rely on the charging case to recharge your AirPods on the go, this issue is a persistent issue that should be resolved right away.
Today, we’re going to show you how to fix your AirPods Pro 2nd Gen case if it suffers from battery drain issues.
Let’s begin!
1. Reset AirPods Case.
As suggested by Apple, you need to reset your AirPods case if you encounter problems using it. This should fix minor issues with your AirPods Pro and its charging case.
Resetting your AirPods Pro should also refresh the connection with your paired device.
Here’s what you need to do:
- Put your AirPods Pro in the charging case and close the lid.
- Wait for 30 seconds.
- Open the lid of the charging case and put your AirPods Pro in your ears.
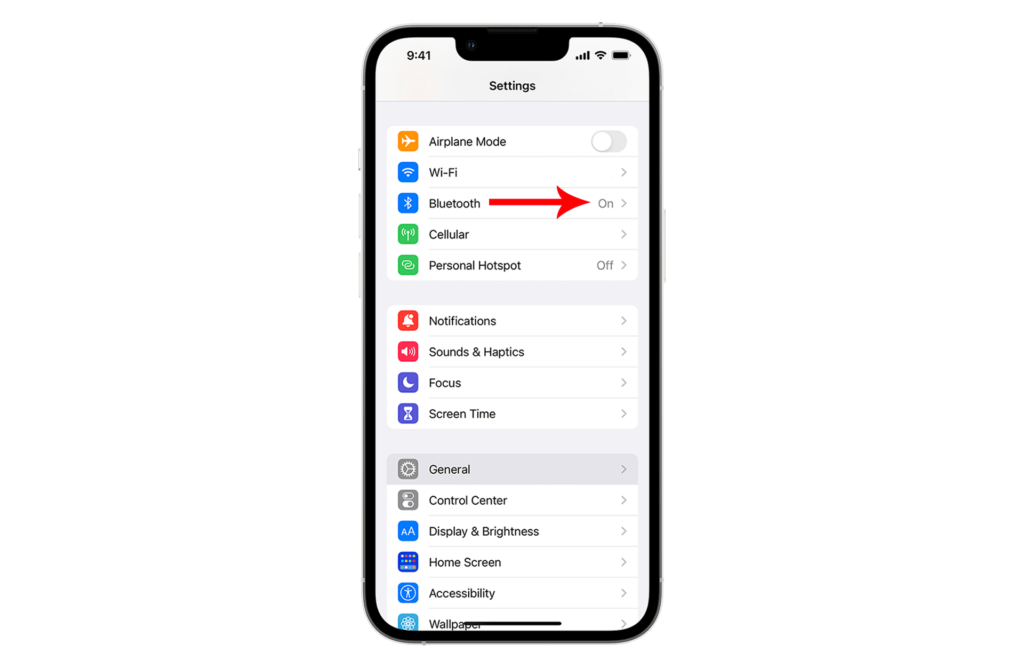
- On your iPhone, go to Settings > Bluetooth.
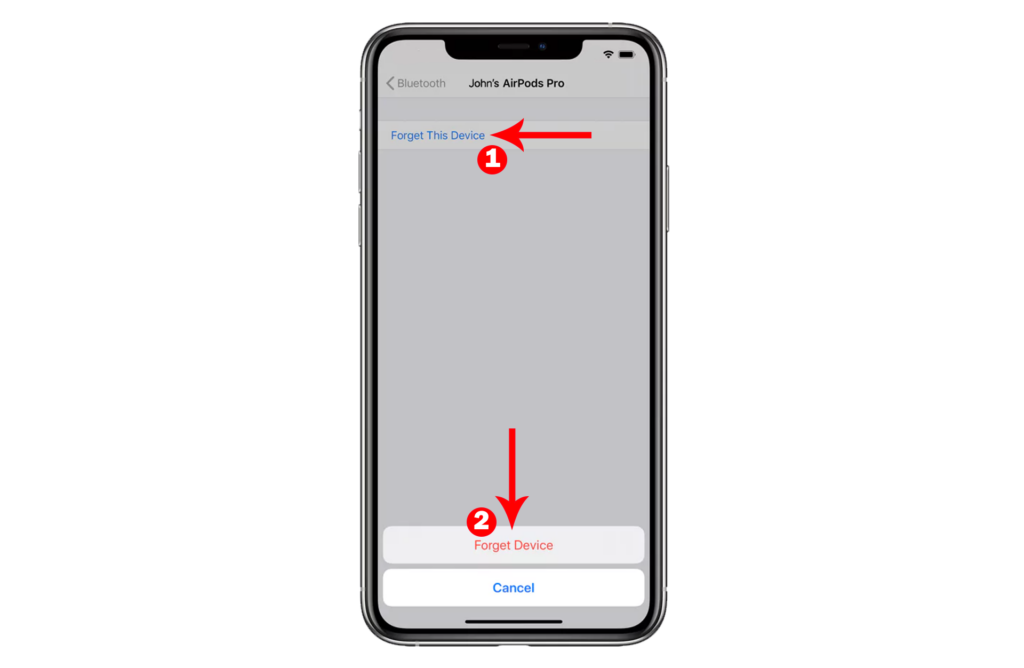
- Tap on your AirPods Pro and choose Forget This Device. Follow the prompts to continue.
- Put back your AirPods Pro in the case and keep the lid open.
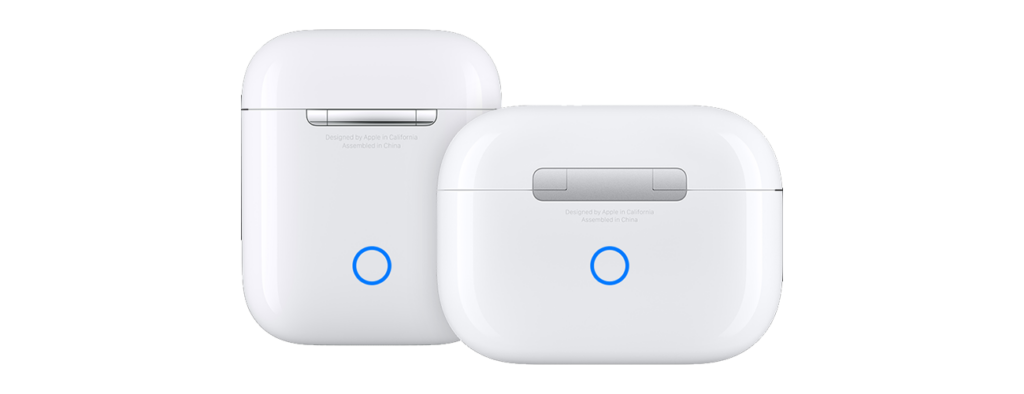
- Next, press and hold the Setup button until the status light flashes amber and then white.
- Reconnect your AirPods to your device.
Observe if you’ll still experience unusual battery drain with the charging case.
2. Drain Your Battery.
A user shared that the drain issue was solved after draining the batteries of the charging case. What they performed is essentially battery calibration.
By draining their AirPods’ battery, they reset the battery gauge. This allows their device to display accurate charge levels.
It’s possible that the charging case shows that it has 100% battery but actually has less than that.
Here’s what you need to do:
- Use your AirPods Pro until it’s drained.
- Put it back in the charging case and wait for its battery to get fully charged.
- Now, use your AirPods Pro again.
- Repeat this process until the battery in the charging case is fully drained.
- Leave your AirPods Pro in the charging case overnight without being charged.
- Finally, connect the charging case to the charger.
Use your AirPods Pro and observe if you’ll encounter battery drain issues with the charging case.
3. Enable Optimized Battery Charging.
With the release of iOS 14, Apple introduced the Optimized Battery Charging feature for AirPods, to help improve the longevity of your AirPods Pro battery.
Your iPhone will learn your charging routine and will wait to charge your AirPods past 80% until you need to use them.
However, it’s possible that this feature has a bug or glitch that causes drain issues with your AirPods Pro.
Try disabling the feature in the meantime until Apple releases an update.
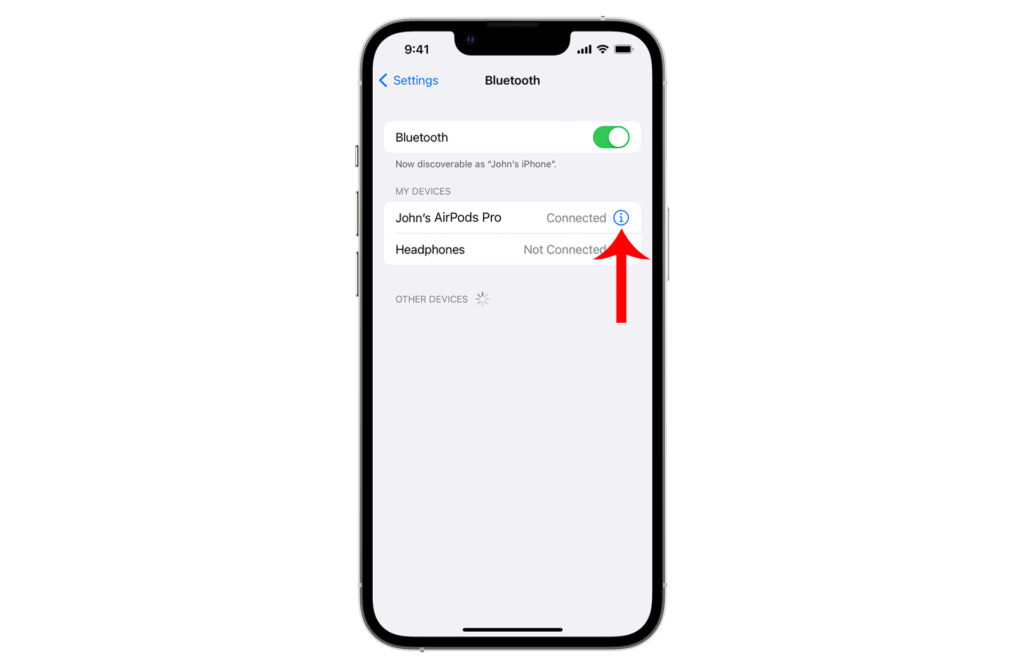
- Open Settings on your iPhone.
- Now, access Bluetooth and find your AirPods Pro.
- Tap the (i) button beside it.
- Look for Optimized Battery Charging and disable it.
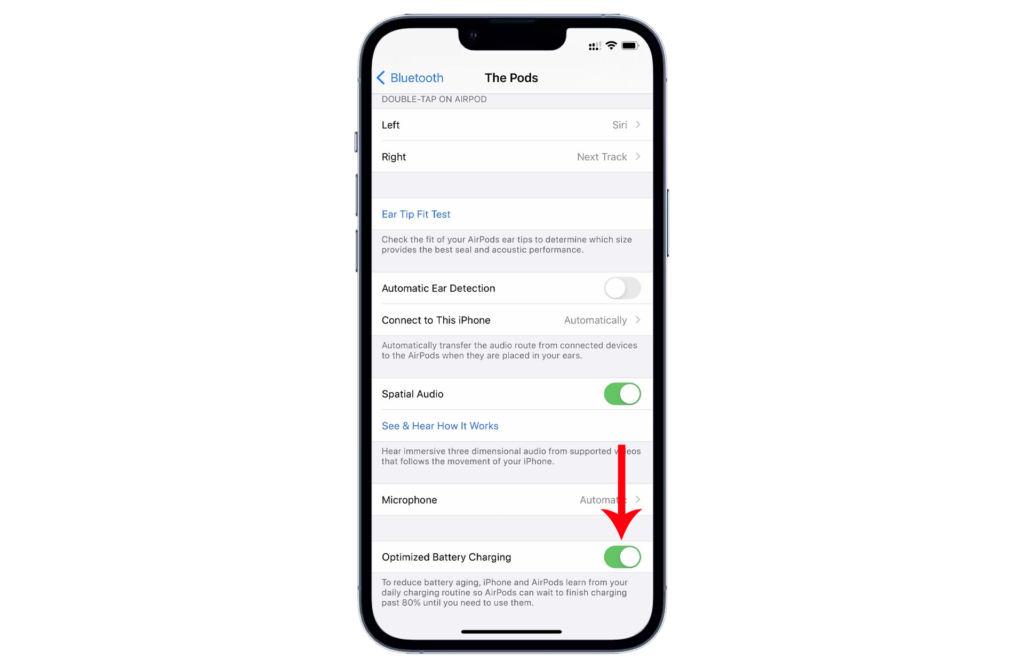
Try charging your AirPods Pro and its case afterward.
Once fully charged, use your AirPods Pro normally. See if the charging case would still drain its battery.
4. Disable Automatic Ear Detection.
Ear detection is one of the best features of the AirPods Pro.
However, the sensors used for this feature can consume more battery than usual. This explains the unusual battery drain on your AirPods Pro.
If you want to save some juice, follow the steps below to disable automatic ear detection:
- Go to the Settings app on your iPhone.
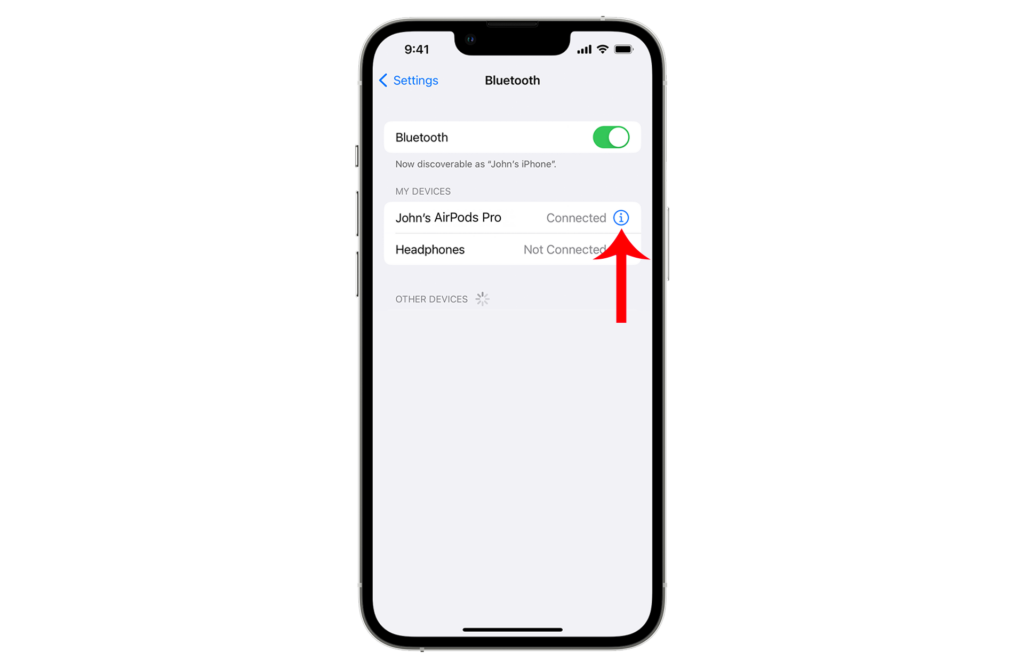
- Now, tap on Bluetooth.
- Under My Devices, find your AirPods Pro.
- Tap the (i) button beside it to access its settings.
- Find the Automatic Ear Detection feature and tap the toggle switch beside it.
- Reconnect your AirPods Pro to your iPhone.
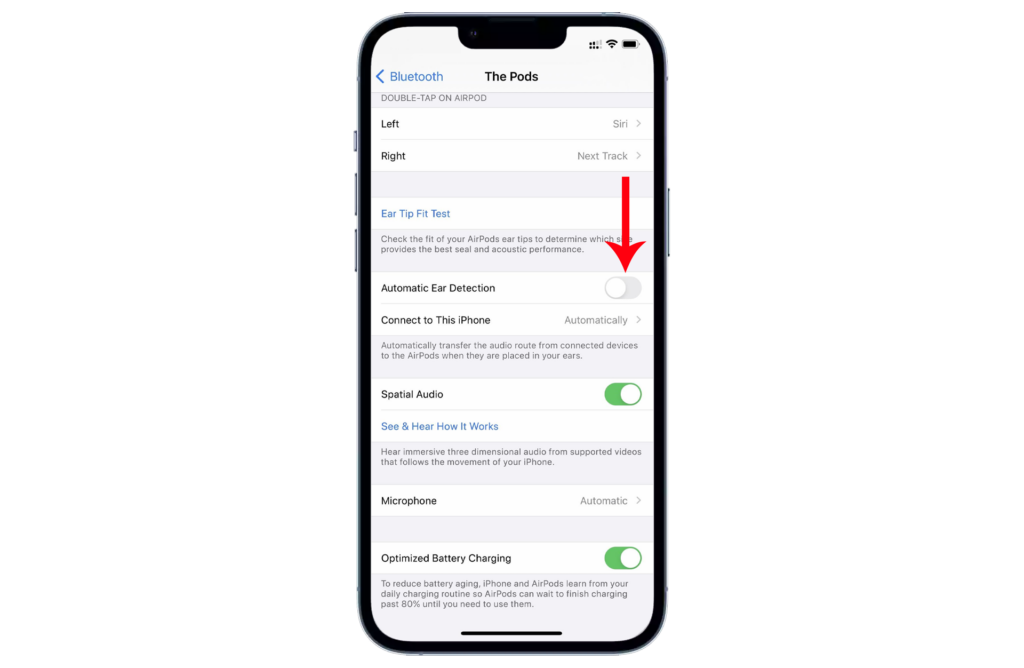
Observe if you’ll still encounter battery drain issues with your AirPods Pro 2nd Gen case.
5. Update AirPods Firmware.
Firmware updates are delivered automatically to your AirPods. This happens while it is charging and in the Bluetooth range of your iPhone, iPad, or Mac
You can use your paired device to check the firmware version of your AirPods.
If you’re using an iPhone or iPad, here’s what you need to do:
- Open Settings on your device.
- Now, tap on Bluetooth and find your AirPods.
- Tap on (i) button to access its settings.

- Scroll down to the About section and find the firmware version.
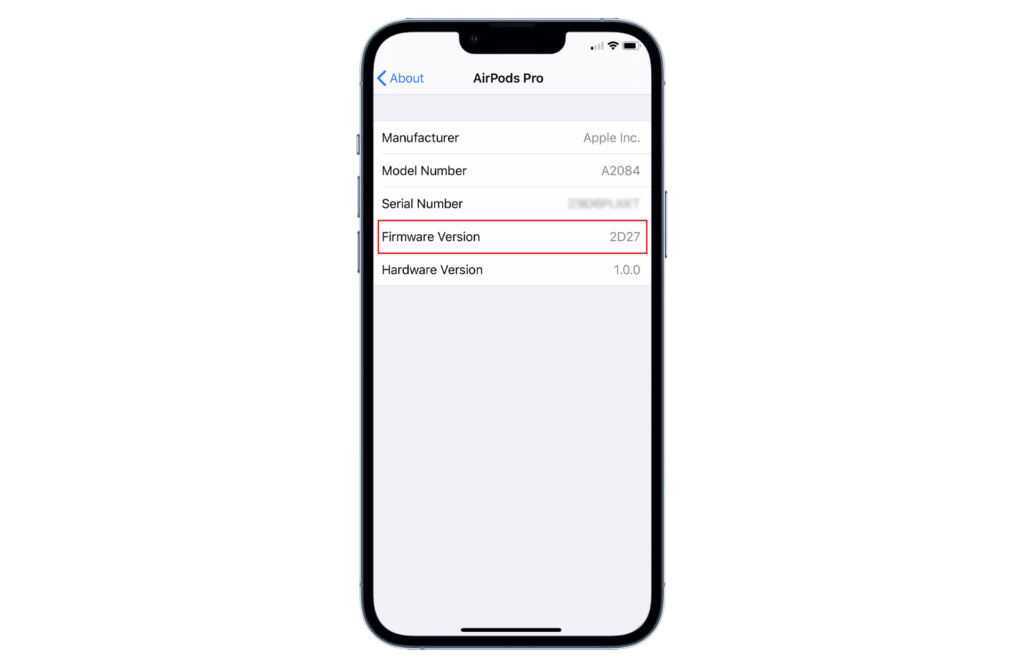
For Mac users, here’s how you can check your AirPods’ firmware:
- Click on the Apple icon in the upper left corner of your screen while pressing the Options key on your keyboard.
- Now, click on System Information.
- Click on Bluetooth and look under your AirPods for the firmware version.
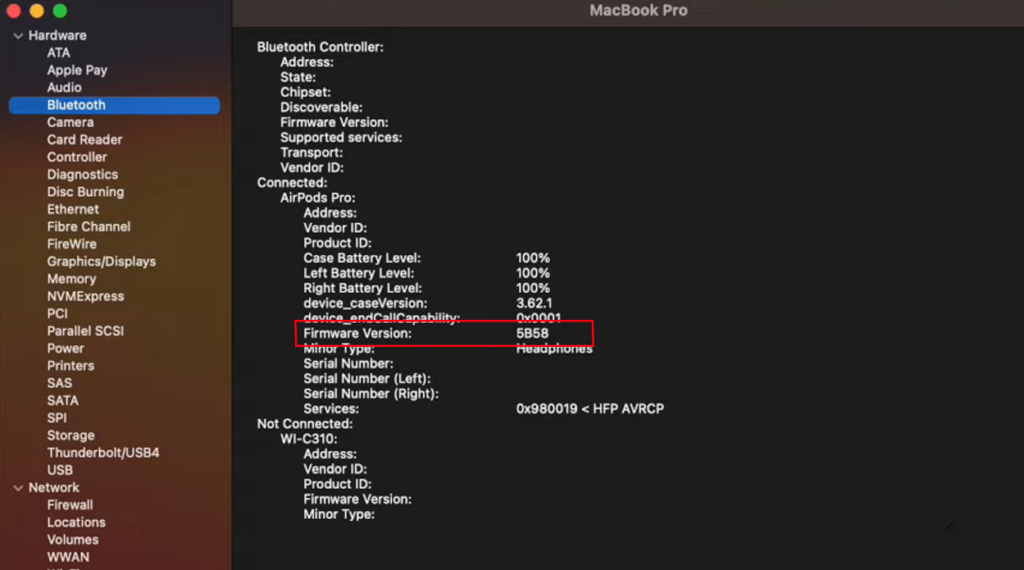
Refer to Apple’s firmware updates page to see if your device has the latest firmware.
If not, leave your AirPods charging and place it within your iPhone, iPad, or Mac that is connected to Wi-Fi.
This should update your AirPods firmware and patch battery-related issues.
6. Contact Apple Support.
If none of the solutions above worked, the last thing you can do is seek help from the experts.
Visit the nearest Apple Store to have your AirPods checked by a technician. Your AirPods Pro might have a hardware-related issue and needs to be replaced.

Before bringing in your device, check if it is still covered by warranty.
If you don’t have time to visit a physical store, you can head to Apple’s support page to speak with a representative.
From there, you can discuss your options on how you can get your AirPods Pro repaired.
That brings us to the end of our guide on how to fix your AirPods Pro 2nd Gen case if it suffers from battery drain issues.
If you have questions or other concerns, don’t hesitate to leave a comment below, and we’ll do our best to help you out.


