Do you see a cached preview error on After Effects?
Adobe After Effects is an essential tool for creative and professional video editors. This is one of the most used tools for content creation and is arguably one of the best post-processing software.
While it’s one of the best, this doesn’t mean that Adobe After Effects is flawless.
Sadly, there are a handful of errors that you might encounter while using Adobe After Effects. One of these errors is the ‘cached preview error’, which occurs when viewing the progress of your projects.
In this guide, we will show you how to fix the cached preview error on Adobe After Effects.
Let’s get right into it!
1. Restart After Effects.
One of the quickest ways to fix the cached preview error on After Effects is to restart the program. Adobe After Effects might be using too many system resources, which causes the software to run into errors.
To fix this, simply save your project and close the app. After a few seconds, relaunch it, and preview should work as it should.
2. Restart Your Computer.
Before tweaking your configurations, the first thing you should do when you encounter errors on After Effects is to restart your system. This should allow your computer to reload its resources and eliminate temporary bugs and glitches.
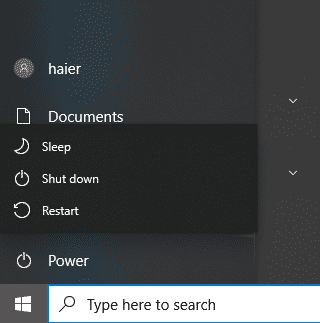
For Windows users, here’s what you need to do:
- On your keyboard, press the Windows key to open the Start Menu.
- After that, click on the Power Options tab.
- Finally, choose Restart from the menu.
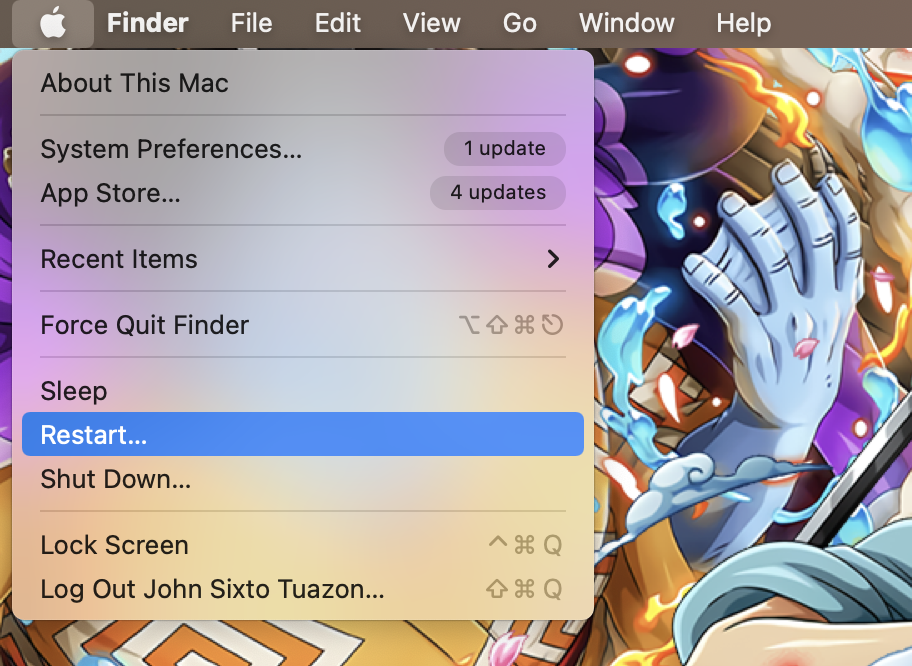
If you’re using a Mac, see the steps below:
- First, open the Apple Menu in the upper left corner of your display.
- Now, select the Restart option.
- Lastly, confirm your action by clicking the Restart button in the dialog box.
Once done, go back to After Effects to check if the problem is solved.
3. Purge Your RAM & Disk.
As you apply more effects to your After Effects project, it uses more disk space and RAM. If your system runs out of resources, After Effects might struggle to load the preview of your project, which explains the cached preview error.
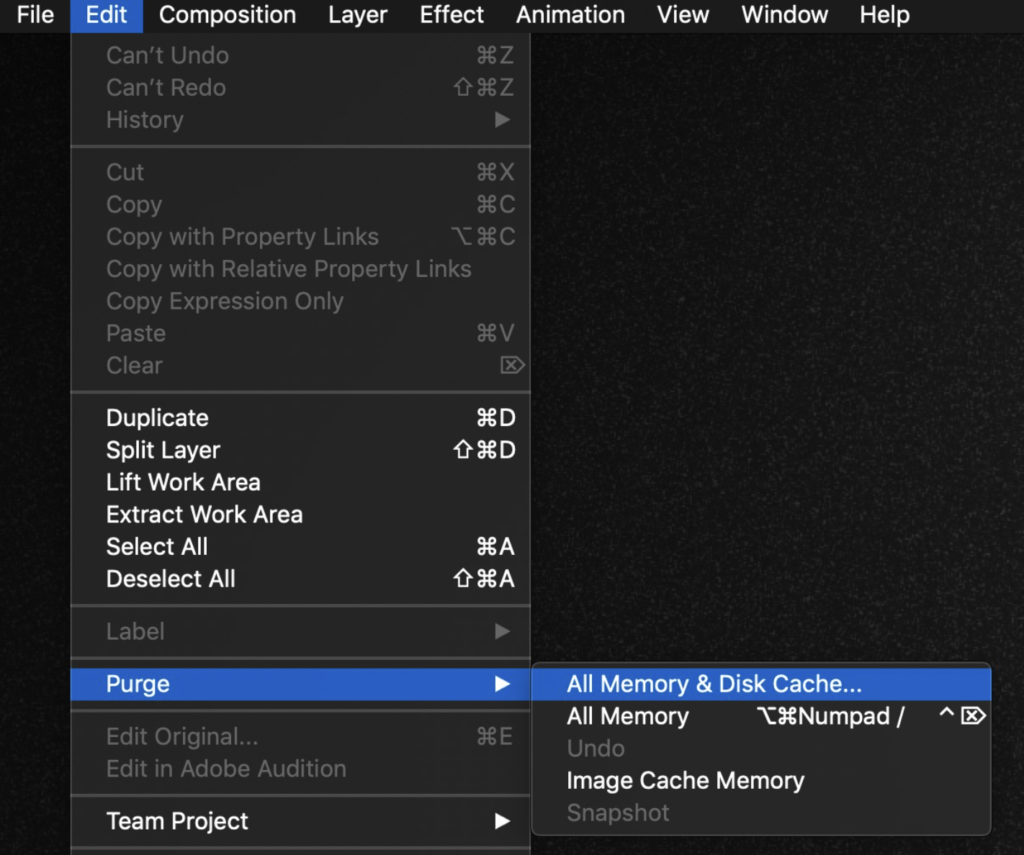
To avoid this, see the steps below to purge your RAM and disk space:
- First, open Adobe After Effects on your computer.
- After that, click on Edit and hover your cursor over the Purge tab.
- Lastly, click All Memory & Disk Cache.
Restart the software afterward and check if the cached preview error still occurs.
4. Tweak Your Memory Settings.
If you’re using multiple Creative Cloud apps at the same time, you might want to dedicate more memory to After Effects if you use it more. This way, other Adobe CC apps won’t consume your system memory, and the cached preview error will be avoided.
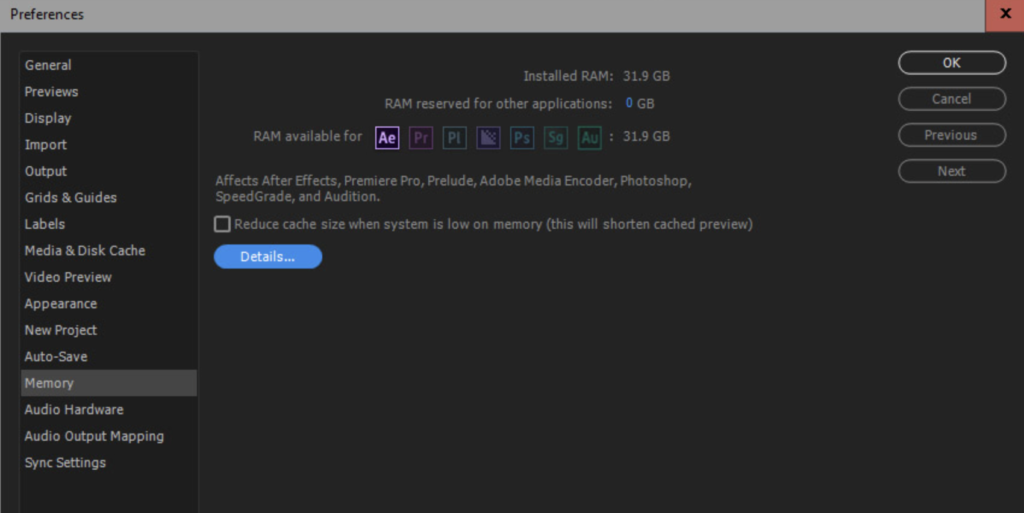
Here’s what you need to do:
- On Adobe After Effects, click on the After Effects tab.
- Now, navigate to Preferences > Memory.
- Finally, change the value of ‘RAM Reserved for Other Applications’ to a lower number.
Save the changes afterward and see if you’ll still encounter the cached preview error on Adobe After Effects.
5. Close Unused Applications.
For low to mid-level systems, it’s advisable to close unnecessary applications in the background when running After Effects. Since the software uses a lot of resources, leaving unused applications open will only put more load on your system.
Check your Taskbar (Windows) or Dock (macOS) and close the applications you don’t need for your project.
Go back to After Effects afterward and check if the problem is solved.
6. Change Your Preview Quality.
Another way to reduce the load on your system when running After Effects is to reduce the preview quality. Instead of running your previews at full resolution, you can tone it down to make it easier for your computer to render the preview.
Here’s how you can change your preview quality:
- Launch Adobe After Effects on your computer.
- After that, click the Resolution tab in the preview window. It will be located at the bottom of the window next to the timeline indicator.
- Finally, set your preview quality to Half or lower.
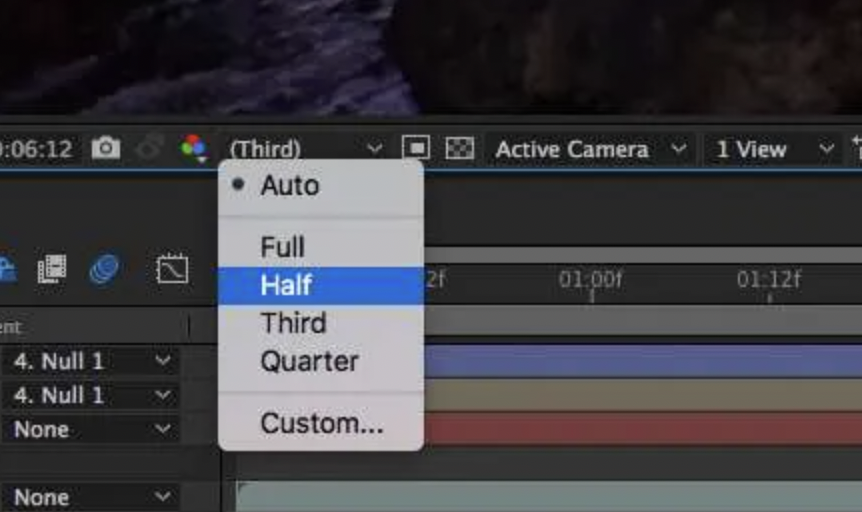
Once done, try viewing your project to see if the error message still occurs.
7. Increase Your Disk Cache.
After Effects uses disk caching to improve its performance. Basically, the software stores data that has been recently processed to a cache in case you need it again. This is a lot faster than retrieving the data from your storage every time.
Check out the guide below to increase your disk cache size:
- First, open After Effects on your system.
- After that, go to the After Effects tab and click on Preferences.
- Now, access the Media & Disk Cache tab.
- Lastly, increase the value of the Maximum Disk Cache Size tab.
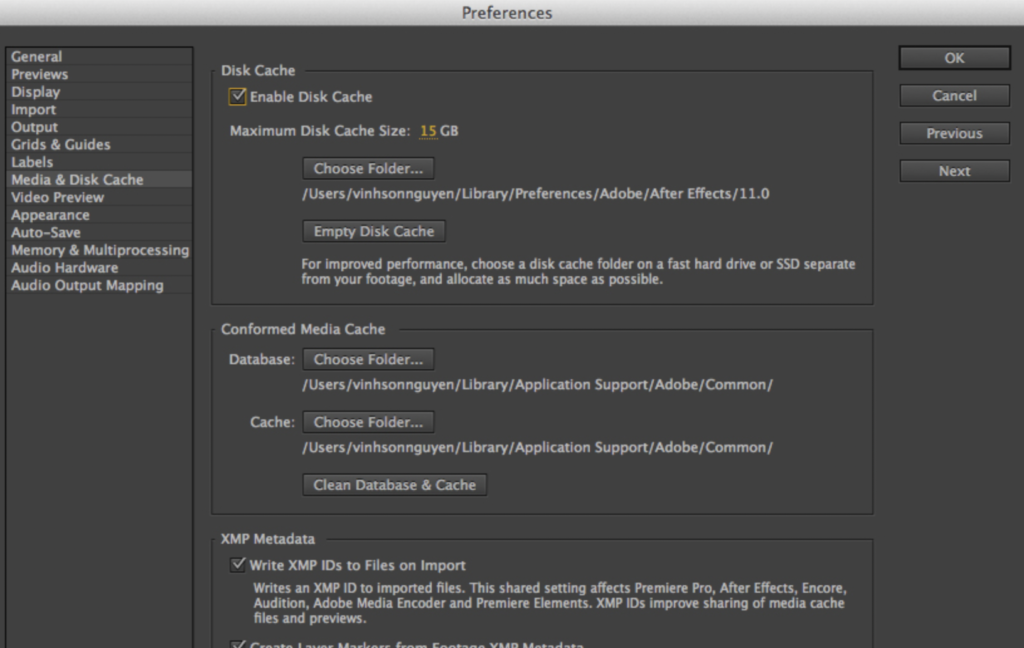
Save the changes and restart After Effects. Try working on your project as you would and see if the cached preview error still occurs.
8. Clean Database Cache.
At this point, we recommend clearing your cache media database if you still encounter the cached preview error on After Effects. This should eliminate corrupted files from your project and reduce the load on your system.
Follow the steps below to guide you through the process:
- First, open Adobe After Effects on your computer.
- After that, navigate to After Effects > Preferences > Media and Disk Cache.
- Lastly, click the Clean Database & Cache option under the Cache section.

Go back to your project afterward and check if the problem is solved.
9. Reinstall Adobe After Effects.
If none of the solutions above worked for you, the last thing you can do is reinstall the software on your computer. This should ensure that you have the latest version of After Effects and there are no corrupted data on your system.
On Windows, here’s how you can delete After Effects:
- Launch the Control Panel on your computer.
- Next, click on Uninstall a Program and find Adobe After Effects.
- Finally, right-click on the app and choose Uninstall.
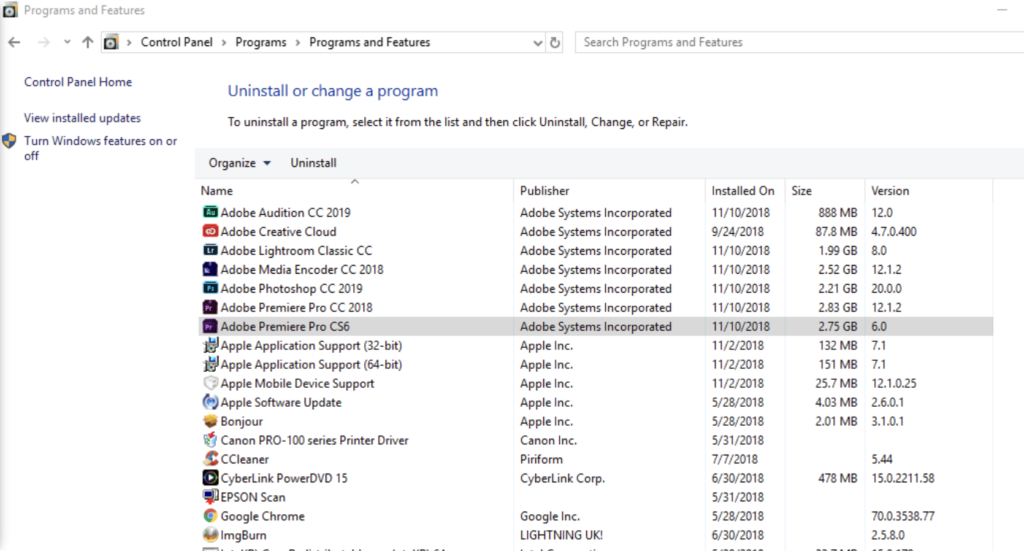
For macOS users, launch Finder on your computer, go to the Applications tab and drag Adobe After Effects to the Trash.
After removing After Effects, reinstall the app and see if the problem is solved.
That ends our guide on how to fix the cached preview error on Adobe After Effects. If you have questions, please let us know in the comment section, and we’ll do our best to answer them.
If this guide helped you, please share it. 🙂


