Constantly encountering the Cannot send audio messages error on iPhone?
The voice message feature has made it to the default messages app on iPhone with the release of iOS 16. Unfortunately, it doesn’t come free of bugs and glitches.
While the feature is pretty convenient, especially when you have too much to say but no energy to type, it can become quite troublesome when you start receiving the Cannot send audio messages error on iPhone.
To deal with the issue on your own, take the help of our detailed guide. We’ve listed some of the best fixes for the stated problem.
So let’s begin!
1. Switch to Wi-Fi.
If the voice message fails to deliver even then, you might want to check your network connection. A stable network is required for audio messages to be delivered and received on your iPhone. So if you’re using Cellular Data, switching to a Wi-Fi network might do the job.
Here’s how to do it:
- First, launch the Settings app on your device.
- Then, tap on Cellular.
- Turn off the toggle next to Cellular Data to disable it.
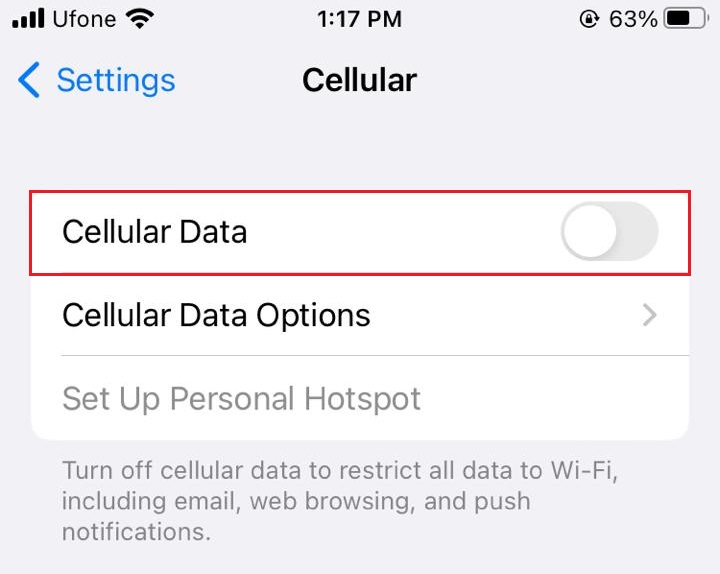
- After that, go back to Settings and tap on Wi-Fi.
- Now turn on the toggle for Wi-Fi.
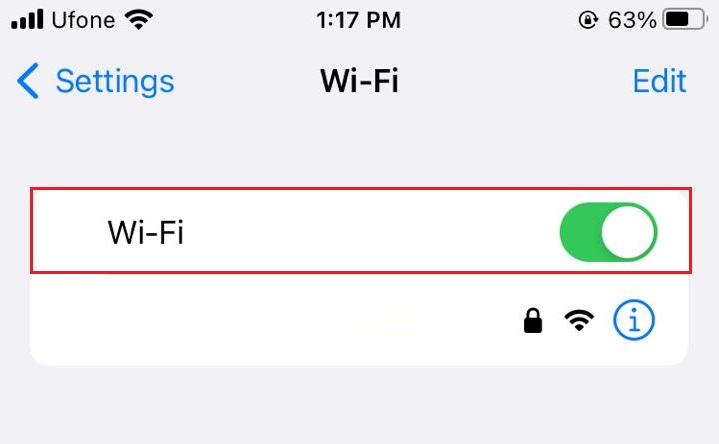
In case you’re already using Wi-Fi, check your internet speed. Contact your internet service provider if you find that your internet speed is slower than usual.
2. Switch to 5GHz Frequency Band.
For those that own a dual-band Wi-Fi router, switching to a 5GHz frequency band from a 2.4GHz frequency band might be able to resolve the Cannot send audio messages error on iPhone. Doing so, your internet speed will be significantly increased.
In case it doesn’t work, your internet service could be experiencing downtime, and you’ll need to contact your provider to have them fix the issue.
3. Restart the Messages App.
If you still encounter the Cannot send audio messages error on iPhone, the next basic step is to force close the Messages app and relaunch it after a few minutes. This will refresh the app, eliminating any temporary glitches that may prevent messages from being delivered.
Follow the steps below to do it:
- For newer iPhone models, swipe up from the bottom of the screen and stop in the middle of it to open the App Switcher. For older iPhone models, press the Home button twice to launch the App Switcher.
- Swipe left and right until you locate the Messages app.

- Then, swipe up from the app’s preview to quit it.
- After that, launch the app again from the home screen.
Now, see if the Cannot send audio messages error on iPhone is resolved or not.
4. Reactivate iMessages From Settings.
You can also try restarting iMessages from your device settings to give the default messaging service a fresh start. Your app data will download again, possibly removing cache and hidden bugs within the service.
- Go to the Settings app from your iPhone.
- Next, tap on Messages.
- Tap on the toggle next to iMessages to turn off the service.
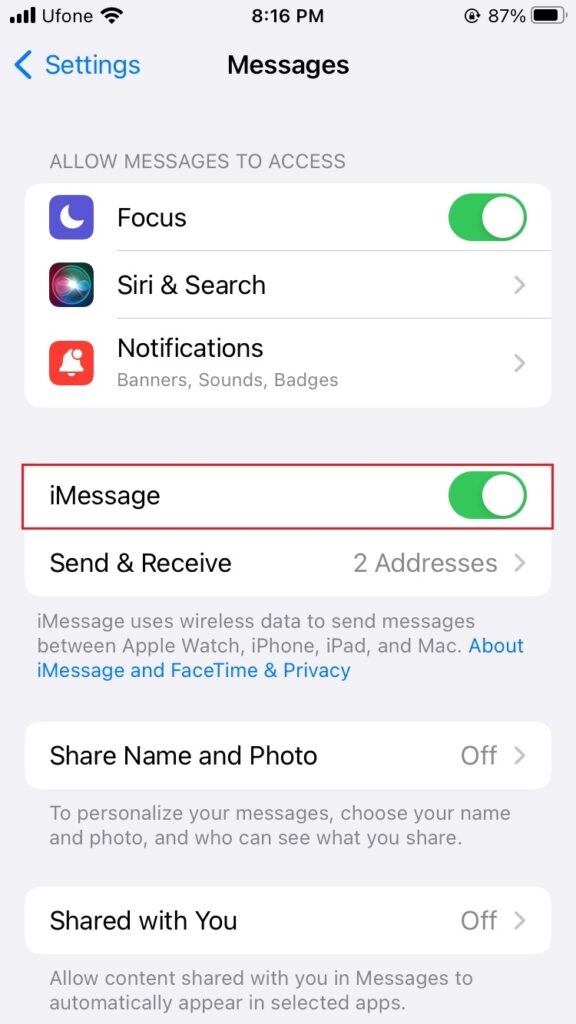
- Wait for a few moments before reactivating the service by tapping on the same toggle.
Once you’ve enabled the iMessages feature, also ensure that the correct email and phone number are added in the send and receive section. Afterward, check if the Cannot send audio messages error on iPhone is fixed. Otherwise, move to the next method.
5. Restart Your Device.
Just as most bugs in applications can be removed by restarting the apps, a few temporary bugs in your device software can also be eliminated by rebooting it. All temporary data and cache are deleted this way, restarting the applications, services, and features on your device.
To do so, follow the steps below:
- For older iPhone models, press and hold down the Home button and the Side button simultaneously. For newer iPhone models, press and hold down the Side button and either of the Volume buttons simultaneously.
- Next, drag the slider across the screen.
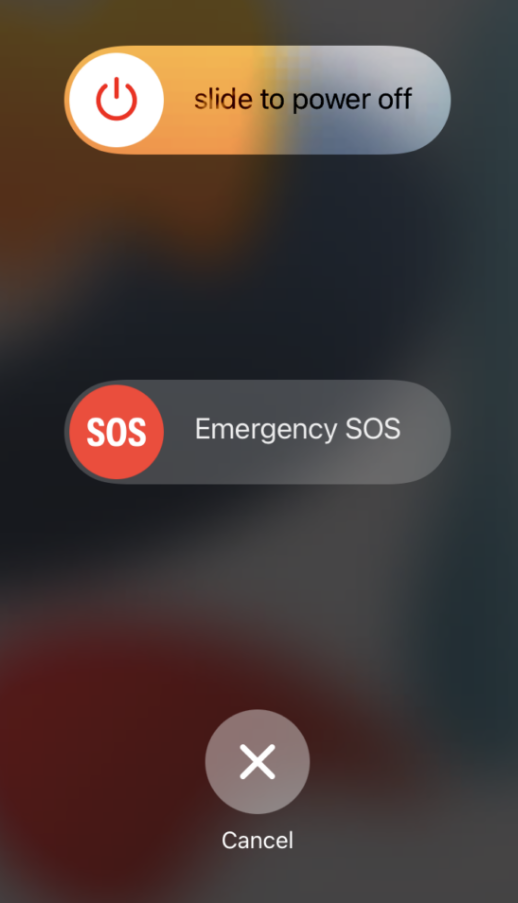
- After a few moments, press and hold down the Side button until you see the Apple logo appear on the screen.
This should solve the Cannot send audio messages error on iPhone.
6. Disable Sound Recognition.
While the Sound Recognition feature helps notify you of sounds like a crying baby, doorbell, siren, etc., it may occasionally interfere with other audio-related services on your device, resulting in unknown errors.
Many users have been able to resolve the Cannot send audio messages error on iPhone by disabling the Sound Recognition feature. You may do the same by following these steps:
- Open the Settings app on your device.
- Then, go to Accessibility.
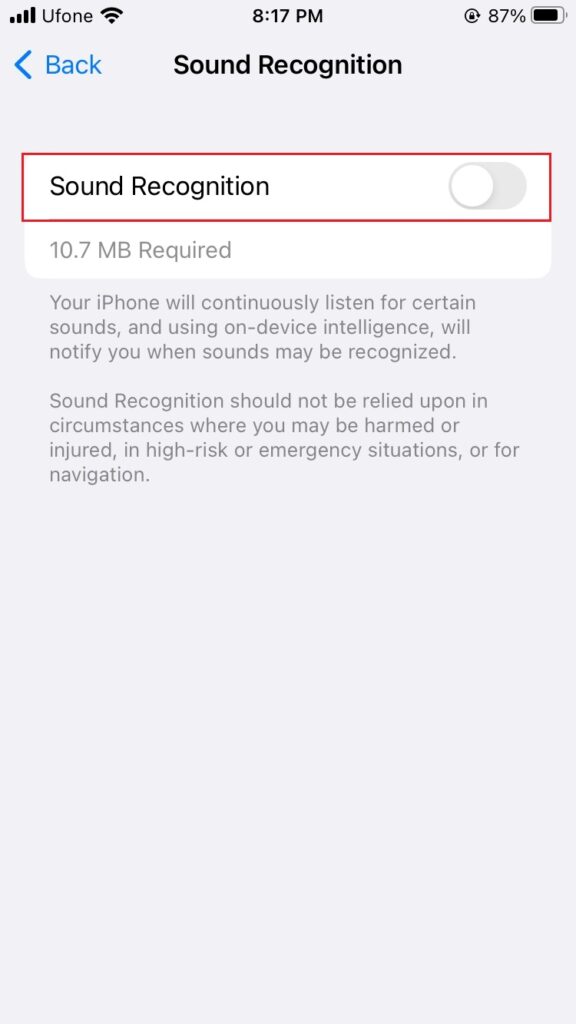
- Tap on Sound Recognition under the Hearing section.
- Switch off the toggle next to Sound Recognition to disable it and check if you’re able to send audio messages on your iPhone.
7. Update Your iOS.
Since the issue is pretty widespread, Apple may release an official worldwide fix for all its users. For this, you’ll need to constantly look for a new iOS update. Immediately install the latest version whenever it’s available to update your Messages app and eliminate the bug causing the Cannot send audio messages error on iPhone.
Here’s what you need to do:
- First, go to Settings.
- Then, tap on General.
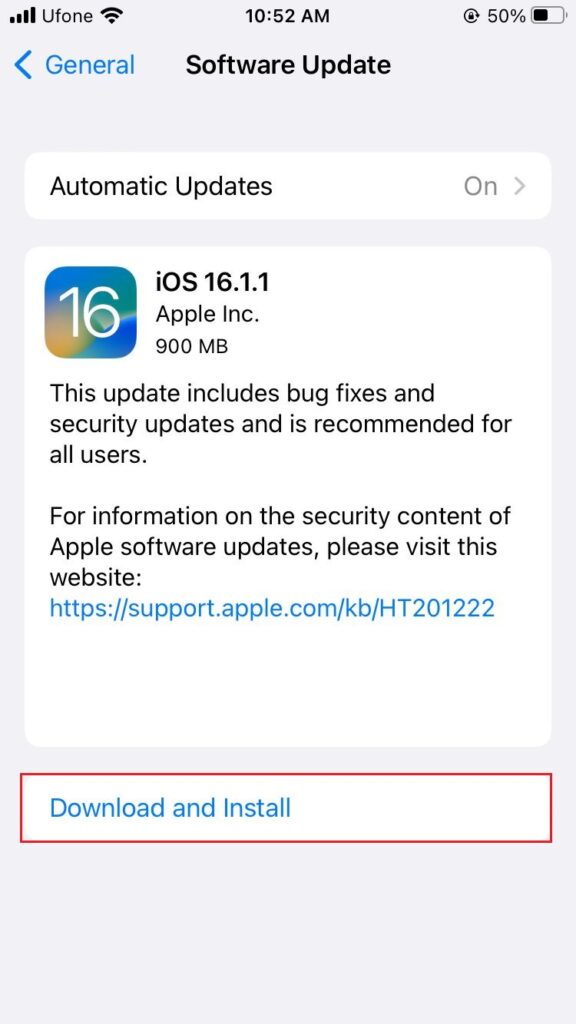
- From there, select Software Update.
- If there’s any update available, tap on Download and Install.
Keep in mind that updating your iOS requires sufficient battery and a strong internet connection. So, connect to a stable Wi-Fi network and charge your iPhone before updating.
8. Send Voice Memos Instead.
In case you’ve been unsuccessful in resolving the Cannot send audio messages error on iPhone, you can follow this method as a workaround. Simply record your message in the Voice Memos app and share it with your contacts via iMessage.
To do so, use the steps below:
- First, launch the Voice Memos app.
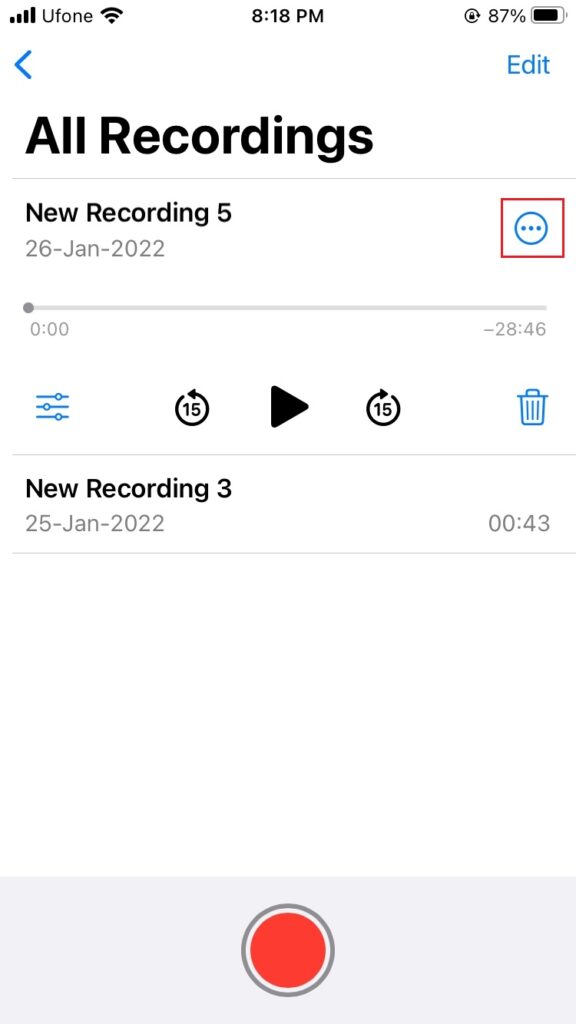
- Once the Voice Memos list appears, tap on the recording you wish to send.
- Then, tap on the three dots icon.
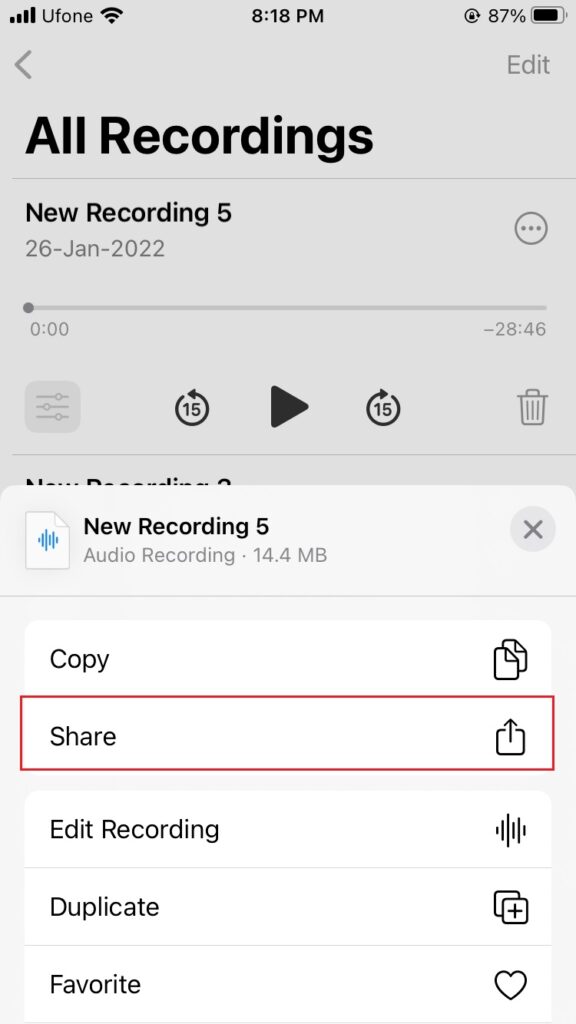
- From the pop-up options that appear, select Share.
- Next, choose the contact you want to share it with and tap on Done.
This ends our guide on how to fix Cannot send audio messages error on iPhone. If you have further queries regarding this topic, use the comments section below. We’ll get back to you in no time.
If this guide helped you, please share it. 😊


