Want to connect your iPhone to Macbook without USB?
To say wires are one of the reasons our technology has come a long way wouldn’t be a lie. However, most users have always had a problem when it comes to dealing with wires. So we first shifted to wireless peripherals and then to Bluetooth connectivity.
Apple, in this case, has been great in providing users with services like AirDrop, Screen Mirroring, etc. Apple ID is another way of connecting all your Apple devices running on the same account. It automatically syncs any setting that you’ve changed across all other devices.
In other words, USB has simply been removed from all scenarios as so many excellent alternatives are available. And that’s exactly what we’ll be covering in this guide, the different ways you can connect iPhone to MacBook without USB.
So what’s the wait for? Let’s get started!
1. Connect to the Same Wi-Fi Using the Finder App.
Using the Finder app is the most common way to connect your iPhone to Macbook without USB. After following this method, you will be able to easily sync your data, such as files, photos, videos, etc., between the two devices.
Keep in mind that for this method to work, you will need to connect to the same Wi-Fi with your Mac and iPhone. Additionally, setting up wireless syncing through Wi-Fi requires connecting your iPhone to a Mac via a USB cord. Once you’ve set it up, you won’t require the USB cable to do subsequent syncs.
Here’s what you need to do:
- Start by selecting Finder from the dock of your Macbook.

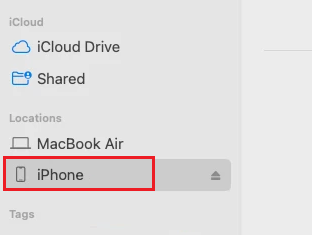
- From the left pane, look for your iPhone under the Locations section.
- Next, click on the Trust button if you’re connecting your iPhone to the Mac for the first time.
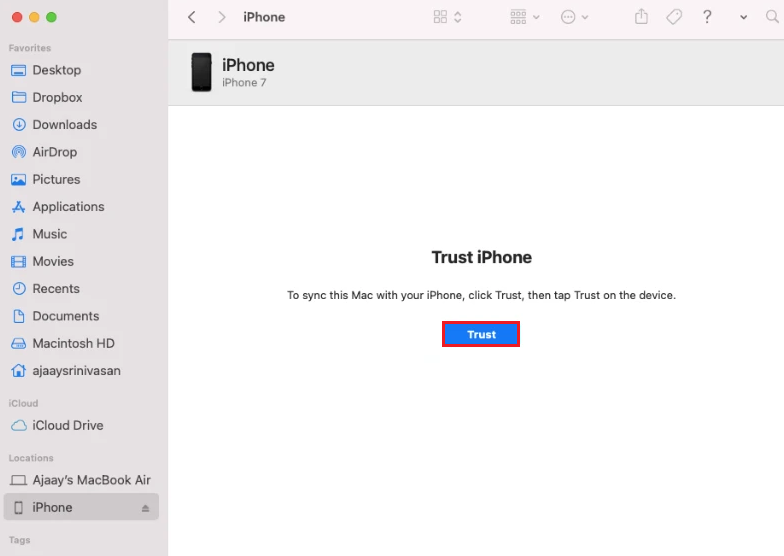
- At the same time, tap on Trust from the pop-up notification that appears on your iPhone.
- Once your iPhone is connected, you will be able to see it in Finder. Now, head to the General tab from the top, and click on the box next to Show this iPhone when on Wi-Fi.
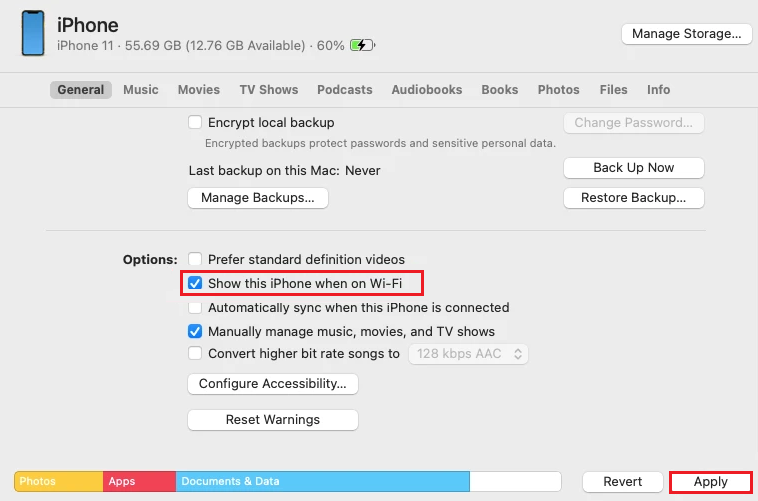
- Then, choose Apply from the bottom-right corner to save your changes.
You will still be able to see your iPhone in the Finder app even after disconnecting the iPhone cable from your Mac.
2. Use iCloud.
If your iPhone and Macbook aren’t connected to the same Wi-Fi, using iCloud is another way to connect iPhone to Mac wirelessly. iCloud in iOS devices allows you to save all your data in a cloud, which will be synced and available for all your devices. This way, you can store and share files, notes, photos, etc., between your iPhone and Macbook.
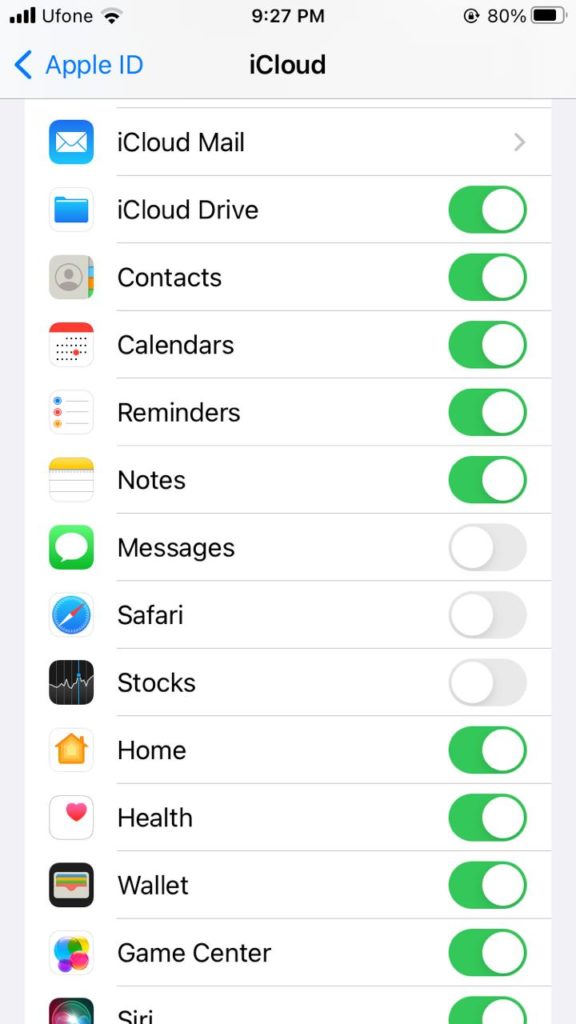
You will need to enable iCloud from both of your devices for this approach to work. Here’s how you can do that on your iPhone:
- The first step is to turn on and set up iCloud. To do so, head over to the Settings app.
- Next, tap on your Apple ID from the top.
- Select iCloud.
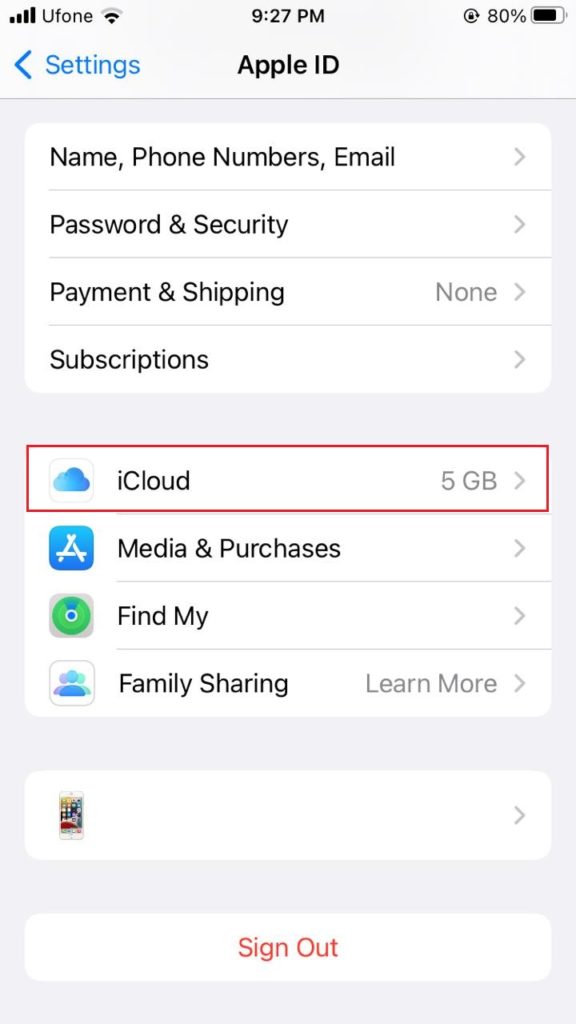
- Then, activate the toggle for each app and service you want to enable iCloud for.
From your Mac, perform the steps given below to enable iCloud:
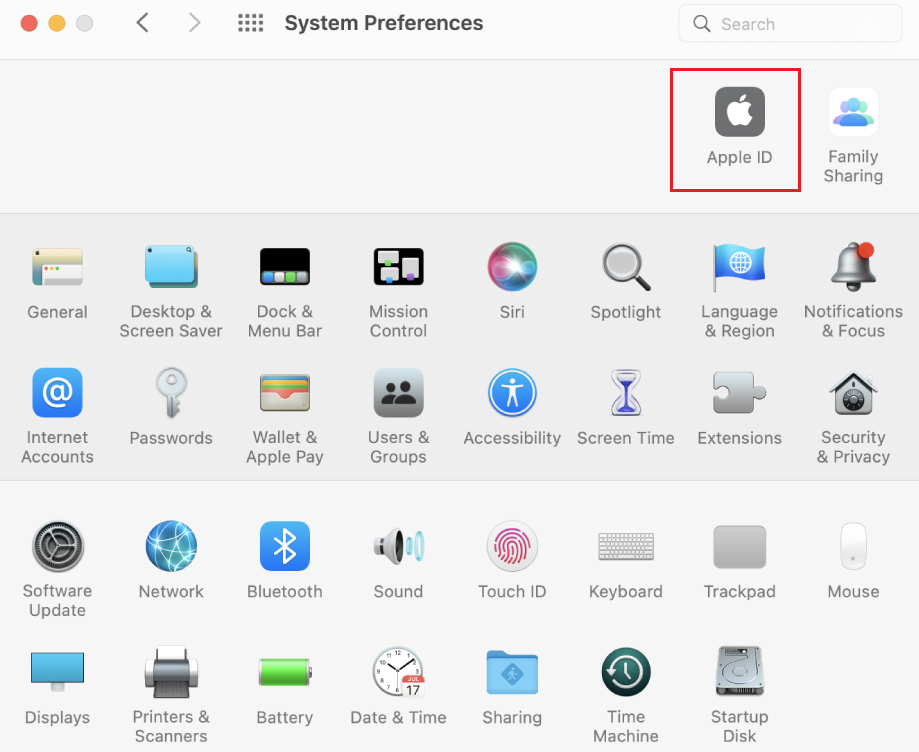
- Begin by clicking on the Apple menu from the top and selecting System Preferences.
- After that, click on Apple ID.
- From the left pane, choose iCloud.
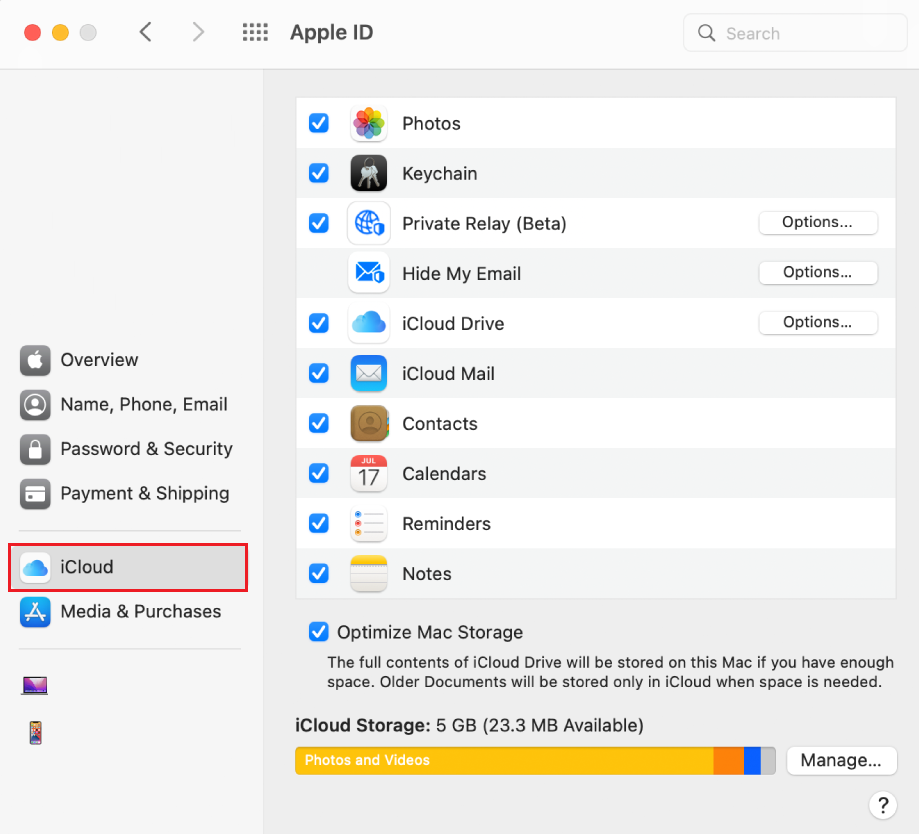
- Now, click on the box next to the apps and services you wish to sync with your Mac.
3. Connect Using iPhone’s Hotspot.
Many smartphones come with a Personal Hotspot that enables you to set up a Wi-Fi hotspot using your phone’s mobile data. In this way, the hotspot created can be used by your Mac to search the web while being connected to your iPhone.
Keep in mind that this method only works when your iPhone and Macbook are using the same Apple ID. Now, set up a personal hotspot on your iPhone by following these steps:
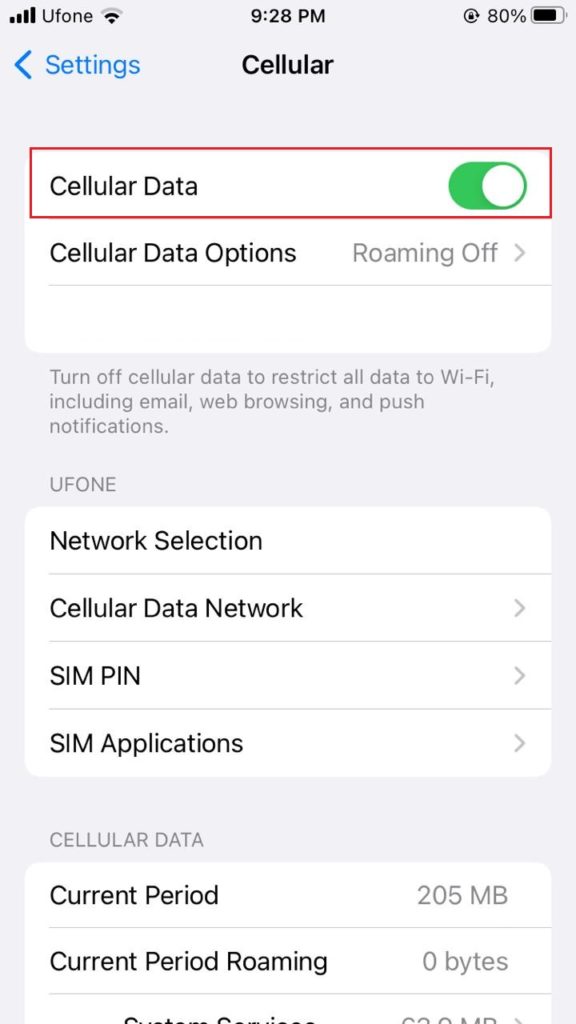
- Launch the Settings app on your iPhone.
- Select Cellular and turn the toggle on for Cellular Data.
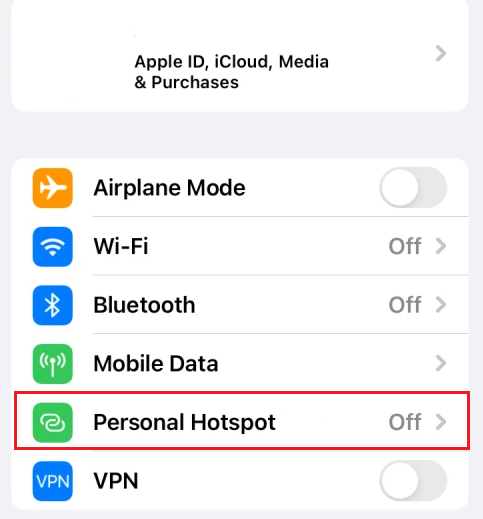
- Head back to Settings and tap Personal Hotspot.
- Turn on the toggle for Allow Others to Join.
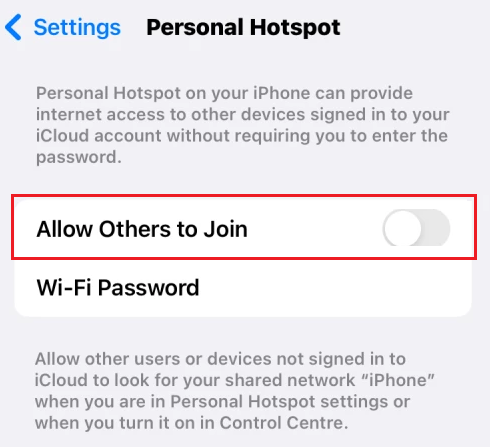
- From the pop-up prompt that appears, choose Turn on Wi-Fi and Bluetooth. This will turn on your iPhone’s hotspot.
Next, use your Macbook to connect it to your iPhone’s hotspot. Simply do this:
- From the Menu bar on your Mac, select the Wi-Fi icon on the top-right side of the screen.
- Next, turn the toggle on for Wi-Fi.
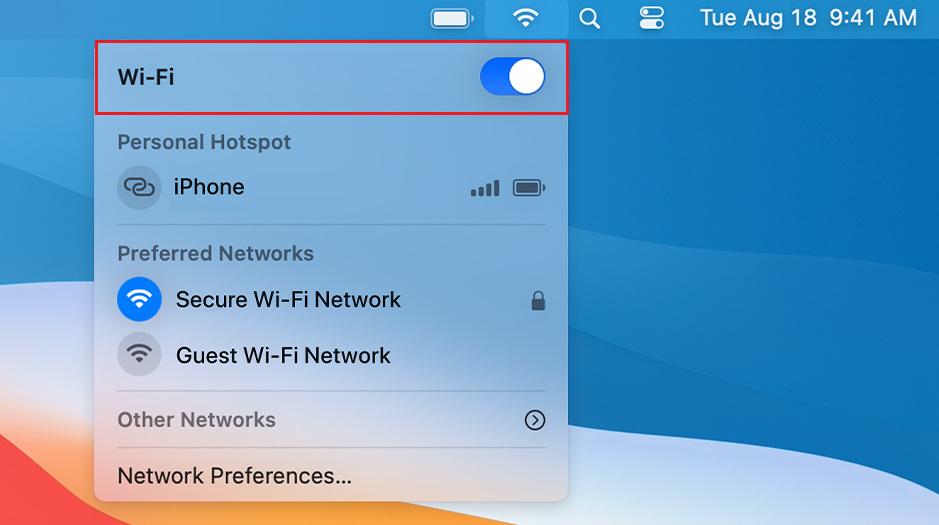
- Look for your iPhone under Personal Hotspot.
- Once your Macbook is linked to your device’s hotspot, the hotspot icon next to your iPhone will change from gray to blue.
4. Enable AirDrop.
Most of the time, users connect iPhone to Macbook wirelessly to transfer data from one device to another. The AirDrop feature in Apple allows you to do just that. By using this feature, you can send and receive files, media, contacts, locations, etc.
Before using the AirDrop feature, ensure that both your devices are within 30 feet of one another and that you have turned on Bluetooth and Wi-Fi on both iPhone and Mac. Then, follow these steps below on your iPhone:
- To send a file with Airdrop to Mac, find it on your iPhone and tap on the Share icon from the lower-left corner.
- Next, choose AirDrop.
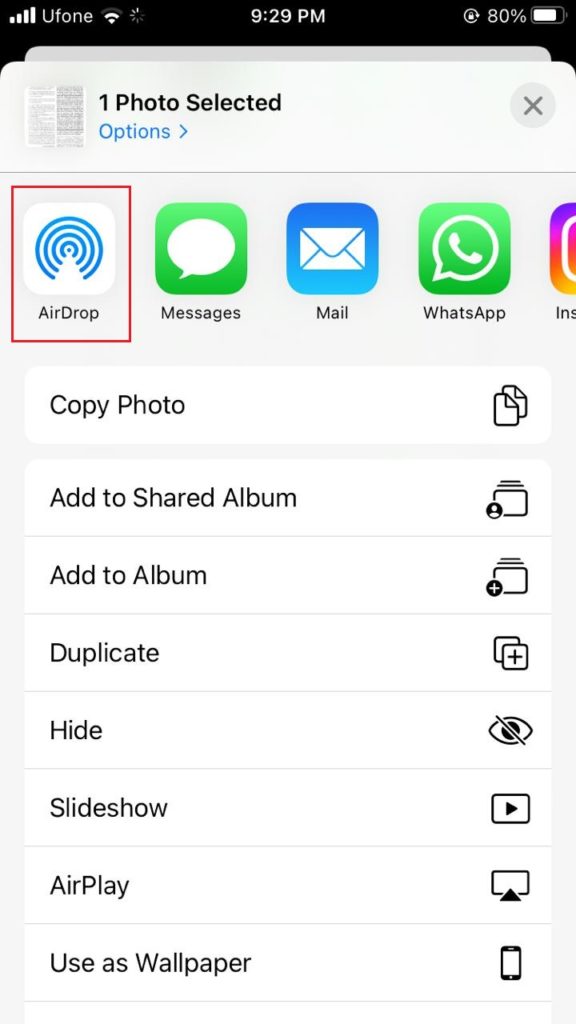
- Under Devices, select your Mac, and the file will be transferred with your Macbook.
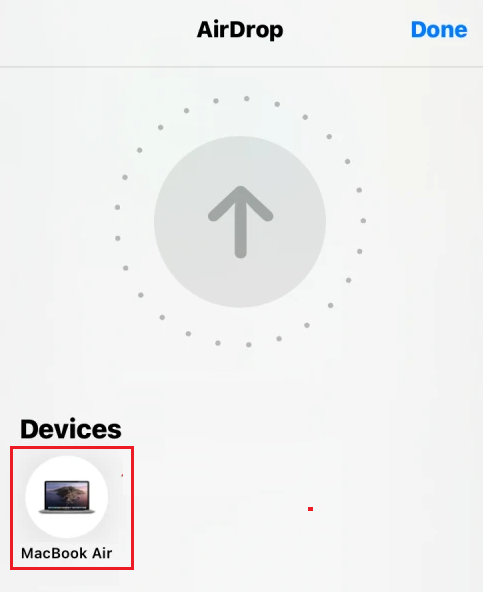
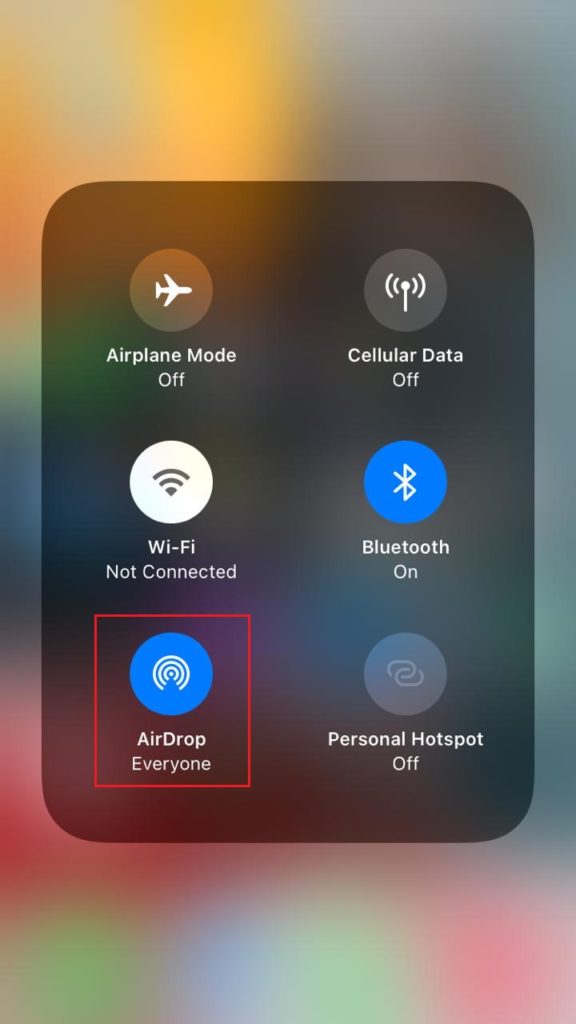
- To receive a file, you first have to enable Airdrop. Go to the Control Center from your iPhone and press and hold either the Bluetooth or Wi-Fi icon.
- Then, tap on AirDrop.
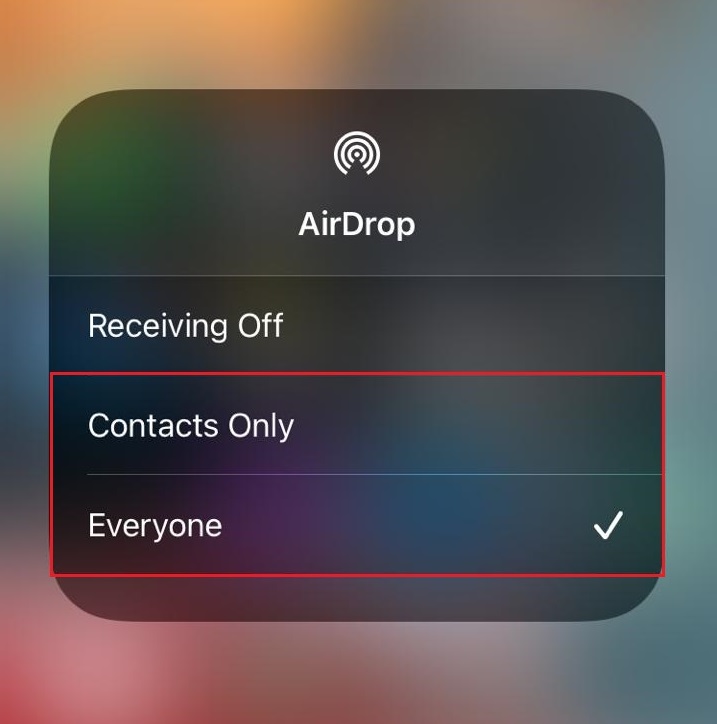
- Next, choose from either Contact Only or Everyone. This will enable AirDrop on your iPhone, after which you will be able to receive files from your Macbook.
5. Use Bluetooth.
Another method for connecting your iPhone to a Macbook without a USB cable is through Bluetooth. Once both your devices are linked, you can transfer files and use various continuity options such as Airdrop, etc.
So, turn on Bluetooth from both devices to proceed with this method. Then, follow these steps from your iPhone:
- Go to Settings.
- Tap on Bluetooth and turn on the toggle next to Bluetooth.
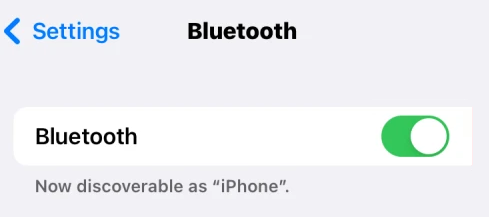
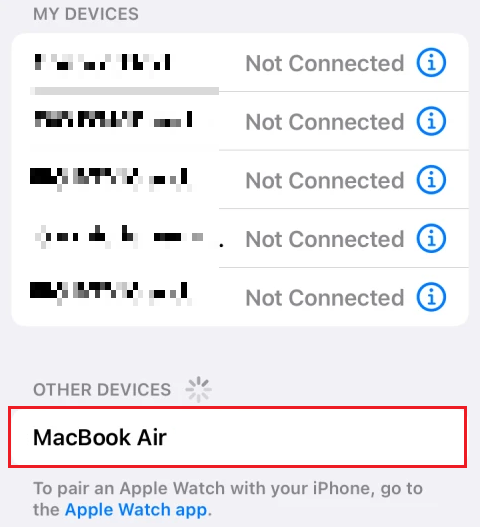
- You will see the recently connected devices under My Devices. If you’ve never connected your Mac to your iPhone before, do it now by looking under the Other Devices section. From there, tap on your Mac to pair your devices together.
Here’s what you should do on your Mac:
- Click on the Apple menu from the top-left corner of your Mac and choose System Preferences.
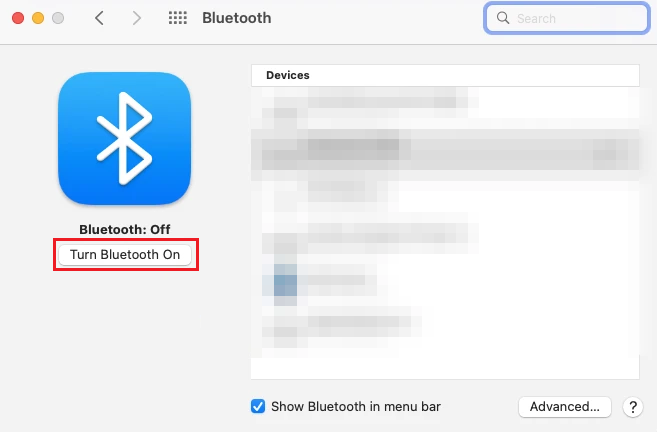
- Afterward, click on Bluetooth.
- From the left side, select Turn Bluetooth On.
- Look for your iPhone under Devices and click on the Connect button next to it.
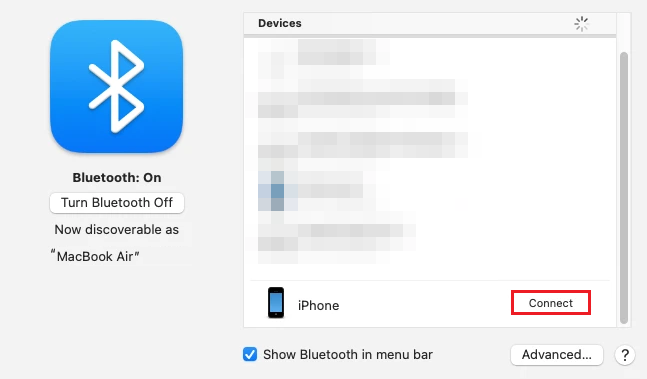
- After verifying your device, your iPhone will be connected to your Macbook via Bluetooth.
6. Enable Handoff.
Handoff is an excellent tool that lets you work on something simultaneously from your iPhone and Mac. You can begin a task on one Apple device and resume it on another by using the Handoff feature.
To use this feature, make sure that both your iPhone and Macbook use the same Apple ID and that Wi-Fi and Bluetooth are enabled on both of these devices.
Simply follow these from your iPhone:
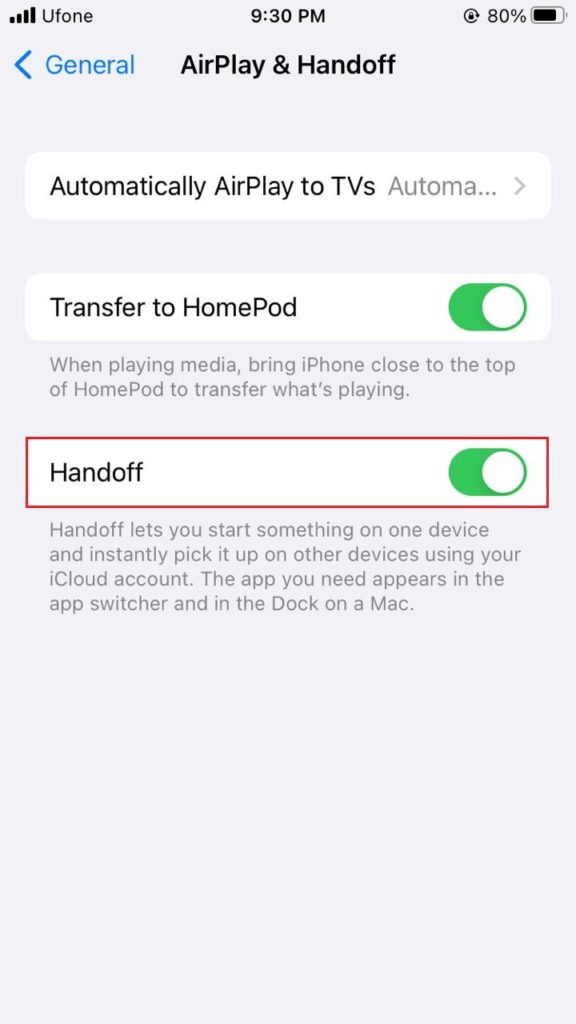
- Open the Settings app and tap on General.
- Next, select AirPlay and Handoff.
- From the next screen, turn the toggle on for Handoff.
Afterward, perform these steps on your Mac:
- Click on the Apple menu on the menu bar and select System Preferences.
- Then, choose General.
- On the next screen, click on the box for Allow Handoff between this Mac and your iCloud devices located at the bottom.
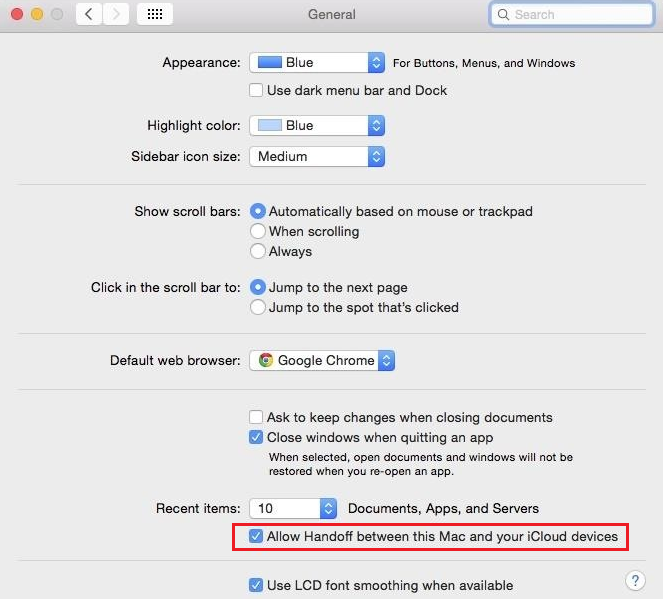
After you’re done, you can easily utilize Handoff to switch from the app on iPhone to Mac or vice versa by clicking on it from the dock.
This concludes our guide on how to connect iPhone to Macbook without USB. If you have any confusion or question, use the comments section below. We’ll offer further assistance.
If this guide helped you, please share it. 🙂


