

Need to copy your iPhone backups to an external HDD?
We all know you cannot put all your trust solely on an electronic device to keep your data safe. For this reason, we create backups of our devices and store their data on a secondary device, sometimes even more.
Now being an Apple fan has its own share of perks, but we cannot ignore the limited amount of options we get alongside. This is evident especially when creating a backup of your iPhone on a Mac since the backup files are large and the Mac storage is limited.
If it wasn’t for Apple’s limited features, you could have easily transferred this data onto an external hard drive. Unfortunately, Apple doesn’t feature such an option. But that doesn’t mean you’ll have to rely entirely on the Mac local storage. In this guide, we’ll be covering in detail how you can easily copy your iPhone backups to an external HDD.
So, let’s get straight to it!
1. Create A Backup of Your iPhone.
There is no direct method to create a backup of your iPhone on an external hard drive. What you can do instead is move the backup to the external HDD once the backup is created on the Mac.
This brings us to our first step. Now, there are two ways to create a backup of your iPhone on your Mac, and we’ve covered them both.
The first method involves using iTunes. Here’s how to do it:
- First, connect your iPhone and Mac using a USB and turn them ON.
- Then, go to iTunes from the launchpad.
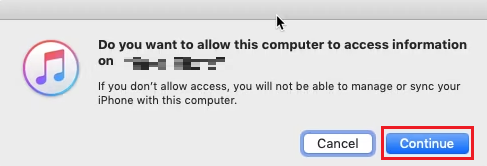
- After you connect your iPhone to the Mac, allow the Mac access to your iPhone by clicking Continue on iTunes.
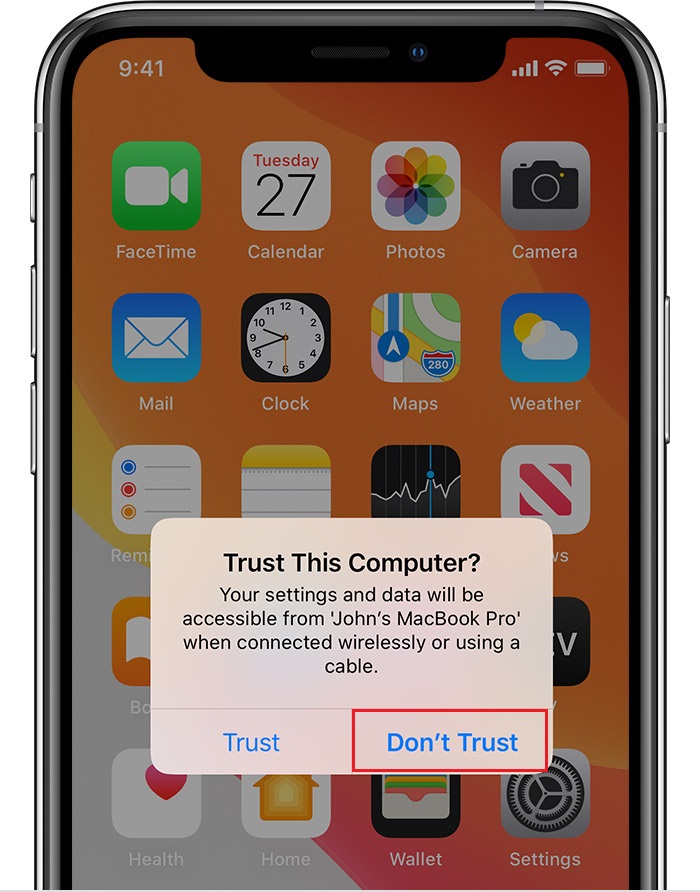
- A message Trust this Computer will appear on your iPhone’s screen. Click the Trust button and enter your password.
- Click on the iPhone icon at the top-left corner of the screen. You will be able to see your device’s content.
- From the left sidebar, select Summary.
- Scroll down to find the Backup sections and click on Back Up Now under the Manually Back Up and Restore label.
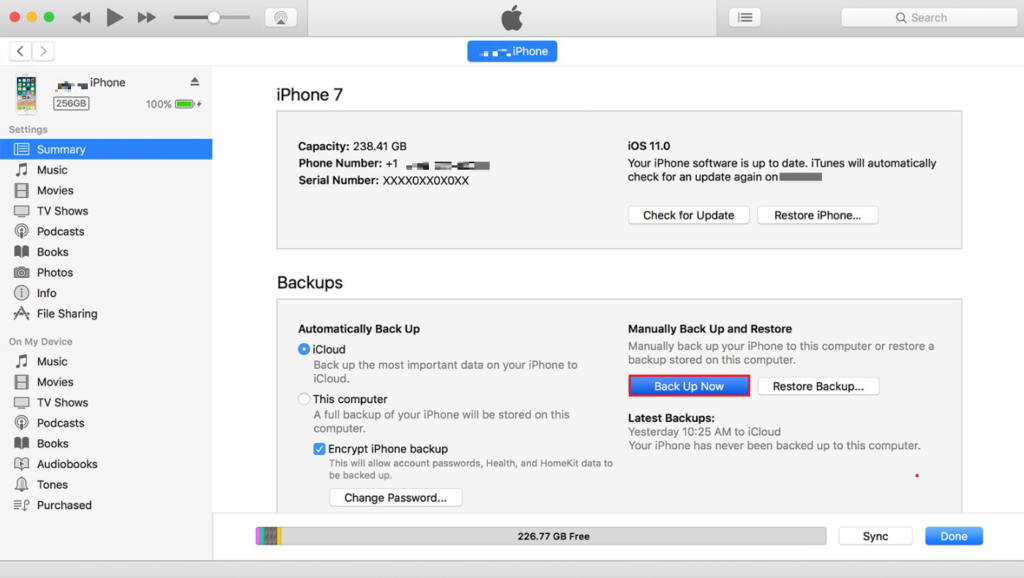
- A backup of your iPhone will be created, and its progress will be shown on top of the window. After it is complete, you can unplug your iPhone.
You can also create your iPhone’s backup on your Mac using Finder. Here’s how:
- Switch on your iPhone and Mac.
- Unlock the two devices and connect them using a USB cable.
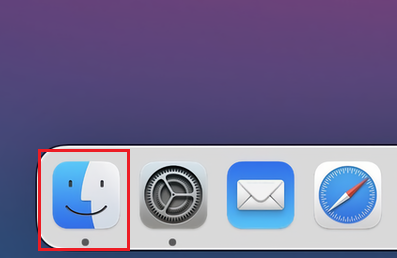
- Then, launch the Finder app on your Mac.
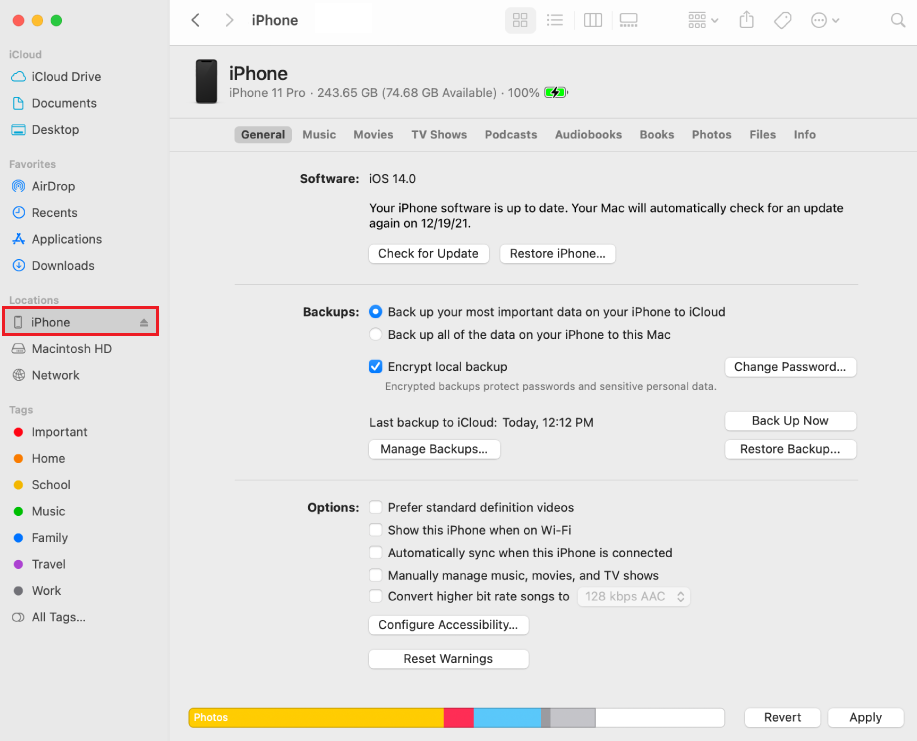
- On the left sidebar, click on Locations.
- Then, select iPhone under it.
- If this is your first time connecting your iPhone to the Mac, a message Trust iPhone will appear on the screen. Click on the Trust button to continue.
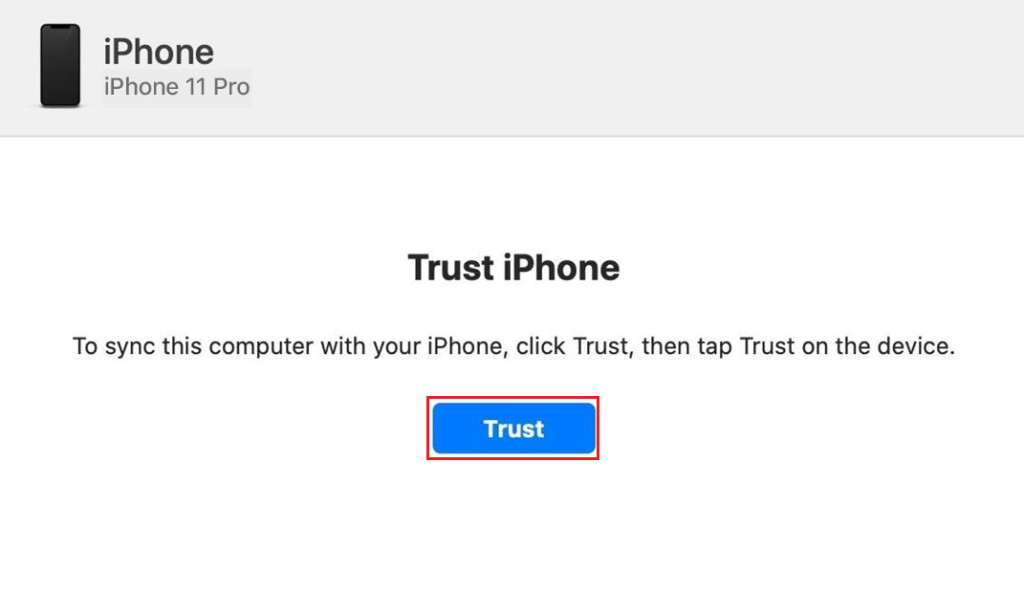
- On your phone, select the Trust option from the dialog box that appears.
- Next, enter the iPhone’s passcode.
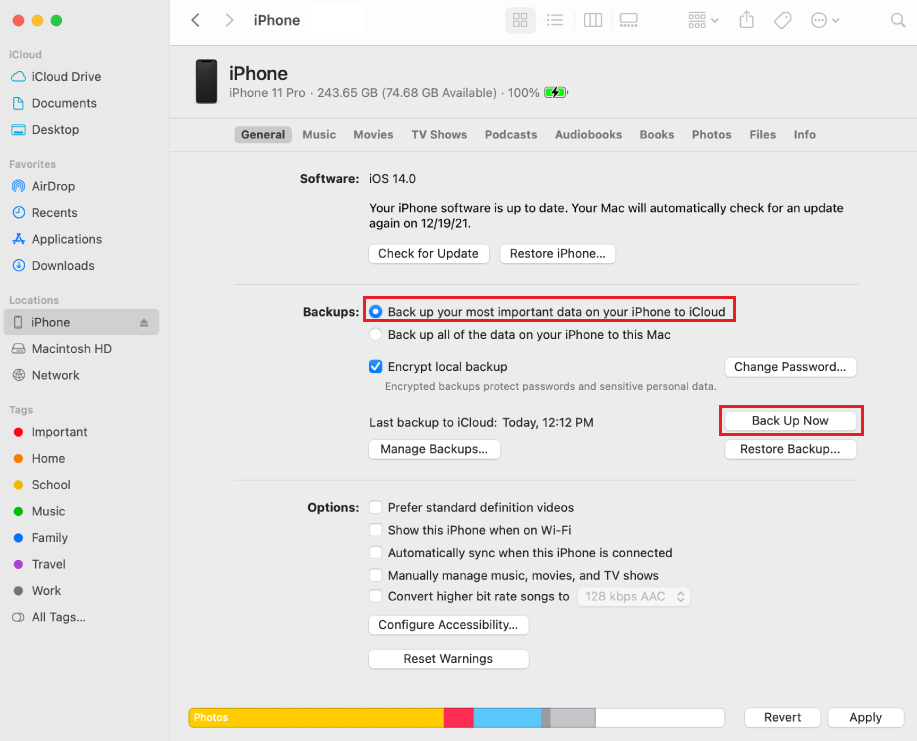
- After the authentication is complete, you will view your iPhone’s data. Under the General tab, select the Back up all the data on your iPhone to this Mac option.
- Lastly, click on Back up Now on your Mac screen. You will be shown the progress of your iPhone backing up on the screen.
2. Pair Your iPhone Wirelessly to Mac.
The next step to copy your iPhone backups to an external HDD is to connect your device to the Mac wirelessly. This will help you locate the backup, which we will explain later.
Although the devices could be connected with a wire, a more convenient approach would be to connect the two devices over a shared Wi-Fi network.
For that, follow the steps below:
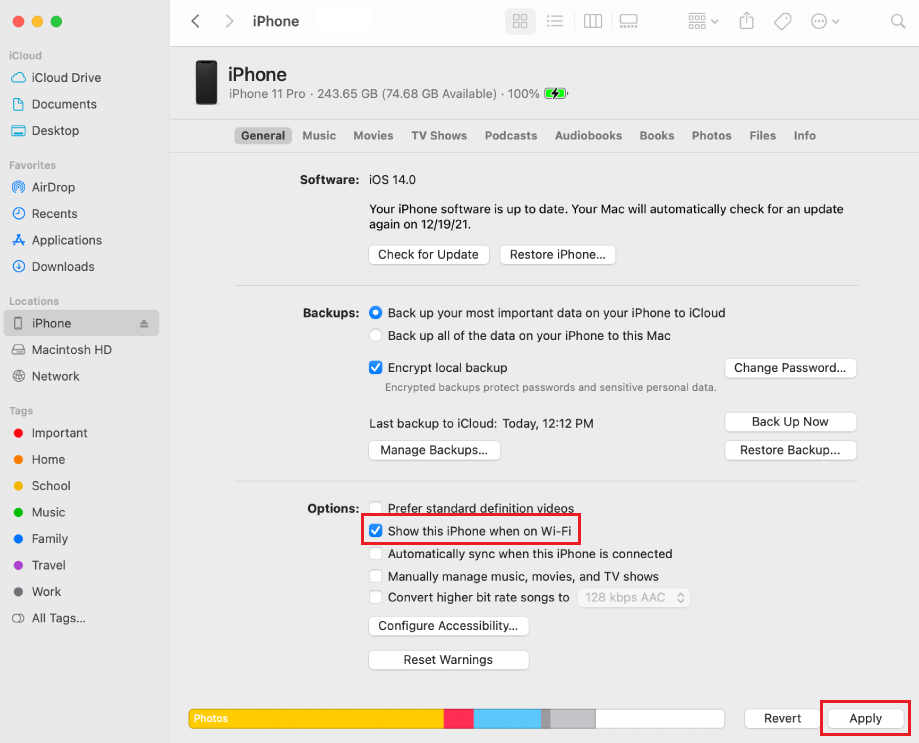
- Connect your iPhone and Mac using a USB cable.
- Open the Finder app on your Mac.
- Once the app opens, select iPhone from the left sidebar.
- Under the General tab, click on the Show this iPhone when on Wi-Fi option, then click on Apply.
3. Locate the Backup of Your iPhone.
Once the wireless connection between your iPhone and Mac is secured, you need to go ahead and locate your iPhone backups on the Mac you created earlier. To do so, you’ll need to follow the steps mentioned below:
- Launch the Finder app on your Mac.
- From the left pane, select the iPhone option under Locations.
- Then, select Manage Backups inside the General section.
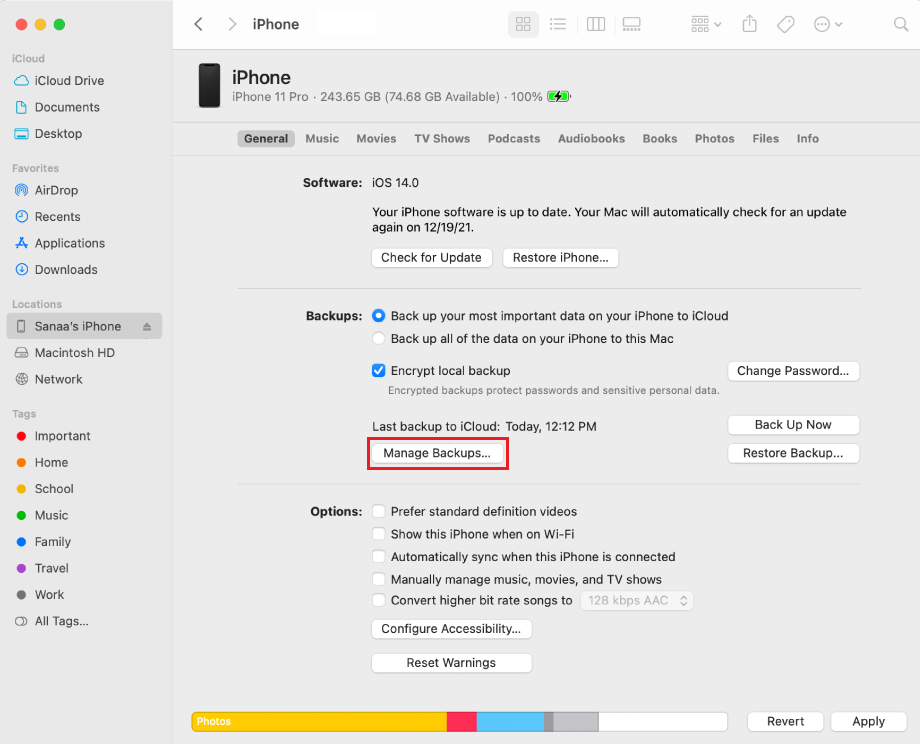
- A device backup box will appear on the screen containing all your iPhone backups.
- Right-click on any backup, then click on Show In Finder to find out about its location.
- Another window will open with the selected backup highlighted amongst the others.
4. Move the Backup to the External HDD.
Once the backup is located, moving the backup to the external HDD is no different than moving files from one location to another. While Mac functions pretty differently than regular PCs, this step remains an exception.
Here’s what you need to do:
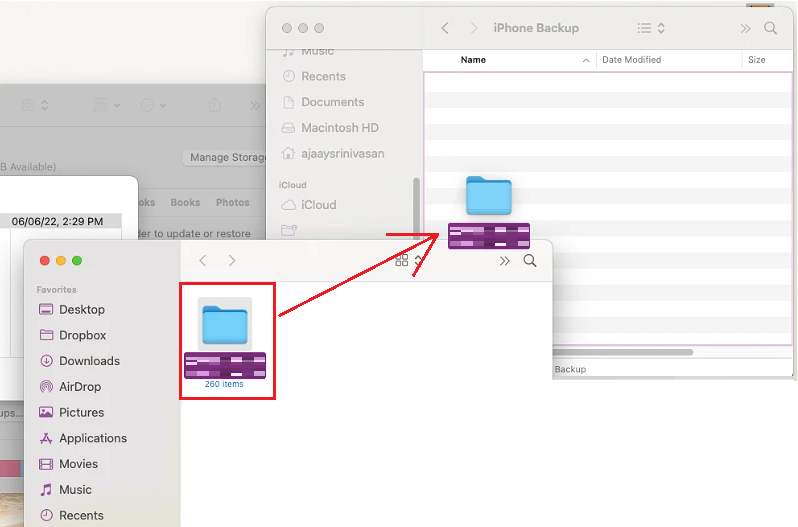
- First, establish a connection between the external HDD and your Mac using a cable.
- Once connected, open the storage device in Finder and go to the preferred location for your backup storage.
- In the Finder window, go to where your iPhone backup is stored.
- In the backup folder, you will find the available backups of your iPhone. Select the content you would like to move.
- After selecting the backup, drag this data from the folder to the preferred location in the external HDD in order to move it.
5. Clear the Backup from Your Mac.
Now that you’ve copied your iPhone’s backup to an external HDD, you’ll no longer need to keep it stored in your Mac. Hence, we advise that you delete it from the local storage. This will clean some space to store other files and also create more iPhone backups.
Below are the steps you need to do:
- Open the Finder app on your Mac.
- Click on iPhone under the Locations tab on the left pane.
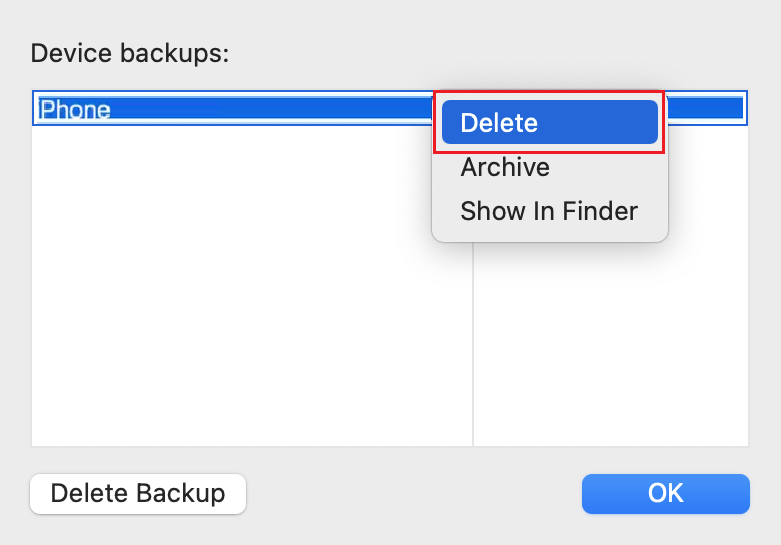
- Inside the Finder window, under the General tab, select Manage Backups.
- A Device backups dialog box will open, showing all the available backups of your device. Right-click on any backup you want to delete.
- Then click on Delete. Again on the confirmation box, select Delete.
The particular backup will be cleared from your Mac.
This brings us to the end of our guide on how to copy your iPhone backups to an external HDD. If you followed each step carefully, you should be successful in completing the task. But if you still have any confusion, do not hesitate to contact us through the comment section below. We’ll be more than happy to provide further assistance.
If this guide helped you, please share it. 😊
