

Trying to figure out ways to create backup and restore registry on Windows 11?
When making major changes in your system, like configuring system files or customizing Windows settings, your first step should be to create a backup for your registry in case of any misconfiguration.
Windows registry is a core location for storing settings and information related to hardware and software installed on your computer. Any time a new program gets installed, its related sub-key gets added to the registry. This contains data about its location, version, settings, how to start the program, and so on.
If the registry gets corrupted, it will render your computer inoperable. For this reason, it becomes vital to create a backup so that you can restore it anytime in case any mishap occurs. You can create a backup of the entire registry or individual keys.
So, let’s take a look at them!
1. Backup Registry With Registry Editor.
Whether you are editing or removing files or saving changes to apply later on your system, backing up the entire registry appears to be a good option. And what better way to do it than with the Registry Editor?
As the name suggests, the Windows Registry Editor is a default graphical tool that allows users to view and make changes to the registry. Through it, you can create, manipulate, delete, or even back up the registry keys and values.
To back up the complete registry, follow these steps:
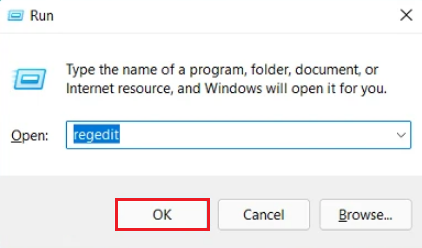
- To get started, press the Windows key + R on your keyboard to open the Run dialog box.
- Then type ‘regedit’ and click on OK.
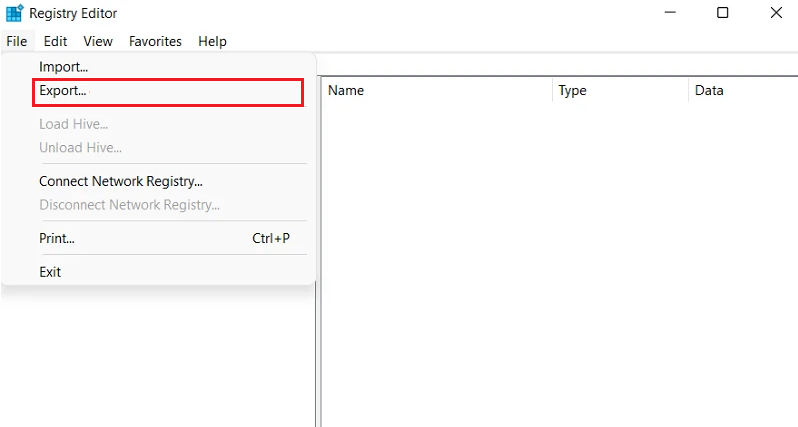
- From the tabs at the top, click on File and choose Export.
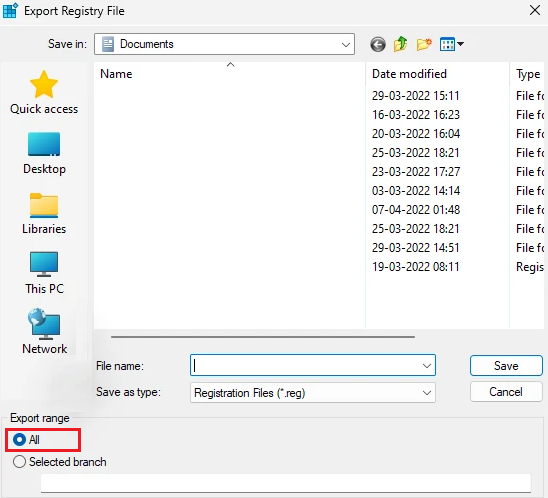
- When the dialog box opens, select All for Export range and navigate to the location where you wish to create a backup registry file.
- Now, choose a File name and click on Save.
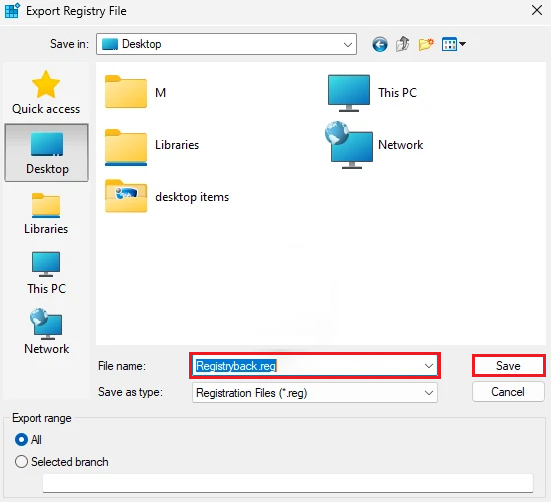
- For the Save as type, it’s best to select the Registration Files (*.reg) format, especially if you want to restore the registry in the future.
That was it! Your complete registry settings will now be backed up to the specified location. If you want to backup individual entries, here’s what you need to do instead:
- Press Windows and R keys simultaneously to launch the Run dialog box.
- Now type ‘regedit’ and press Enter.
- Select the individual key you want to create a backup of.
- From the top, click on File and choose Export.
- For the Export range, click on Selected branch at the bottom of the new dialog window.
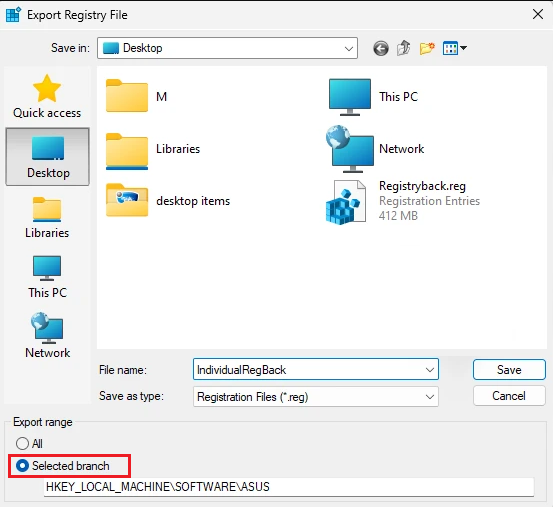
- Then, go to the location where you want to save the backup file.
- Finally, type a File name and click on Save.
The selected individual entry will now be saved in a .reg format.
2. Create Backup For Registry With Command Prompt.
Another way to create backup and restore registry on Windows 11 is via Command Prompt. The program is used to automate advanced administrative tasks using scripts or scripting tools. You can create a backup for the entire registry or its selected entries through this method.
Here’s how to back up the complete registry using Command Prompt:
- To follow this method, you need to open Command Prompt with administrator privileges. For that, click on the Magnifying glass icon from the taskbar.
- Then, type ‘cmd’ and click on Run as administrator on the right pane.

- Once the Command Prompt opens, start typing the following commands one by one and press the Enter key each time. Remember to replace “PATH” with the path of the location where you want to save the backup file and “Name” with what you want to name the backup file. Do not delete the .reg extension, as that will destroy the purpose of creating a registry backup.
reg export HKCR PATH\Name.reg /y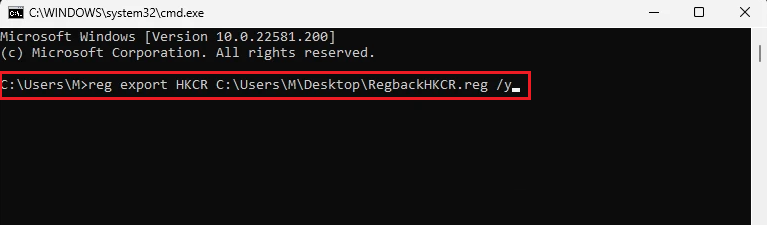
reg export HKCU PATH\Name.reg /y
reg export HKLM PATH\Name.reg /y
reg export HKU PATH\Name.reg /y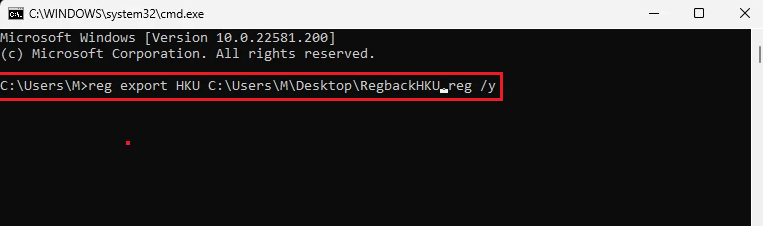
reg export HKCC PATH\Name.reg /y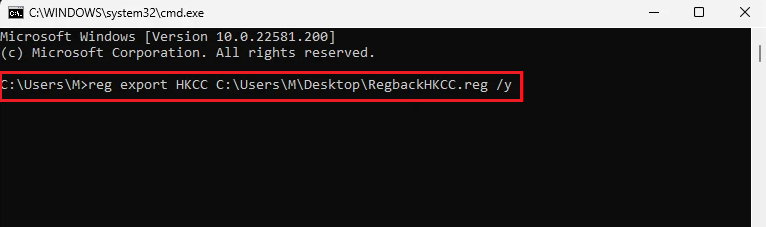
The commands mentioned above individually backed up each key in the Registry Editor. Hence, you can modify and use the same commands if you want to backup selected keys instead.
Follow the steps below to do so:
- Start by launching the Command Prompt with administrative permissions. For that, press the Windows key + R.
- Type ‘cmd’ in the field, then press Ctrl + Shift + Enter from your keyboard.
- When the Command Prompt launches, run the following command. Make sure to replace “RPATH” with the path of the key you want to create the backup of and “PATH” with the location path where you want to save the backup file.
reg export RPATH PATH /y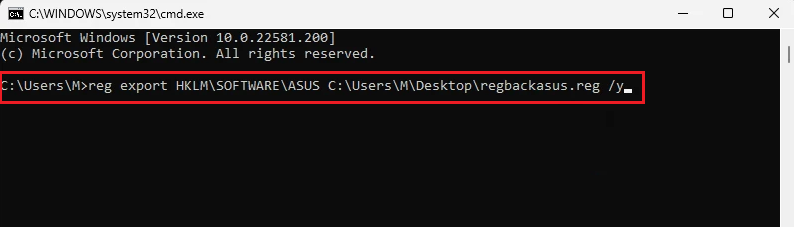
The backup file will now be successfully created in the selected location.
3. Restore Registry on Windows 11 Using File Explorer.
While making changes in Windows registry, it’s not impossible to break the program. In fact, many users have reported making a mistake that causes their system to become inoperable.
What saves a system in those times is a backup of the registry. If you created one earlier, restoring it would bring your computer back to functioning. You can perform the task from the File Explorer.
Here’s how:
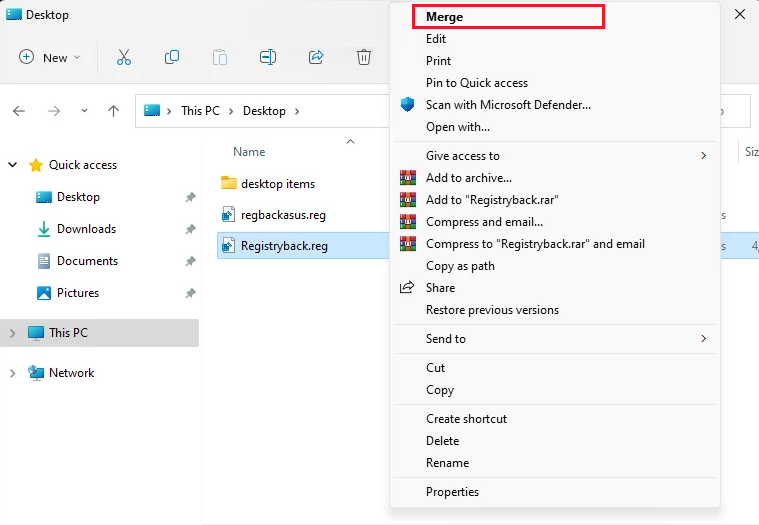
- To begin, navigate to the location where you saved the registry backup file.
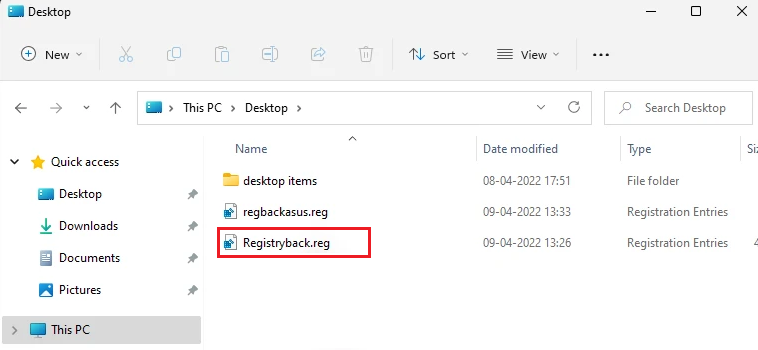
- Once found, right-click on the file and select Merge. If you don’t see the option, you might need to access the larger context menu. You can do so by pressing the Shift key + F10 or clicking on Show more options.
- When the confirmation box appears, click on Yes.
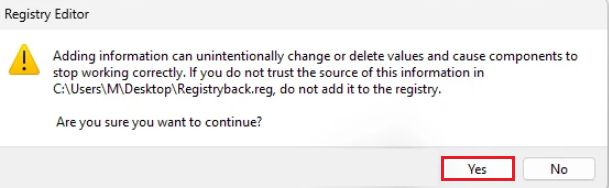
This will automatically restore your computer to the selected backup. To avoid bugs and background conflicts, we recommend restarting your PC before proceeding any further.
4. Restore Registry From Registry Editor.
Like how Windows Registry Editor can be used to create a registry backup, it can be used to restore the same. The method requires you to follow similar steps as to when you were exporting the backup file.
Simply follow the steps below to perform the task:
- Firstly, open the Run dialog box by pressing the Windows key + R.
- Then, type ‘regedit’ and click on OK. When the User Account Control pop-up appears, click on Yes to confirm making changes as administrator.
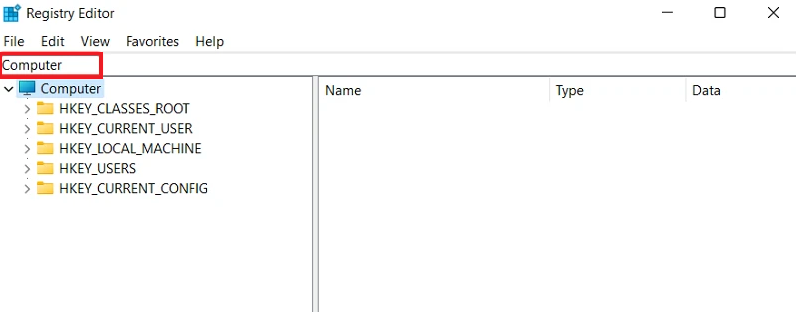
- When the window opens, click on Computer from the left pane.
- Then click on the File tab from the top bar and choose Import.
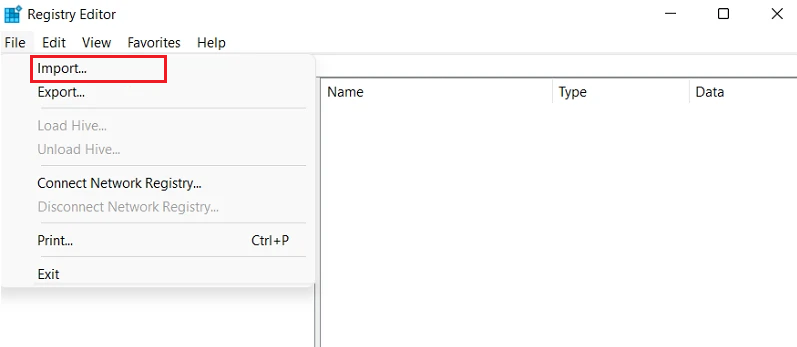
- Now, navigate to the location of the backup file.
- Once there, select the backup .reg extension file and click on Open.
Windows registry will now start importing the selected file. After that, your system will be restored to the selected point.
This concludes our guide on how to create a backup and restore registry on Windows 11. We’ve mentioned a few different ways to perform the task hoping that at least one does the job. For further queries, head to the comment section below. We’ll respond to you.
If this guide helped you, please share it. 🙂
