

Want to know how to customize the Action Center on Windows 11?
With the recent Windows 11 update, the Action Center interface is revamped, along with how users can access it. The feature has always been popular as it provides a way to do quick actions and see app notifications.
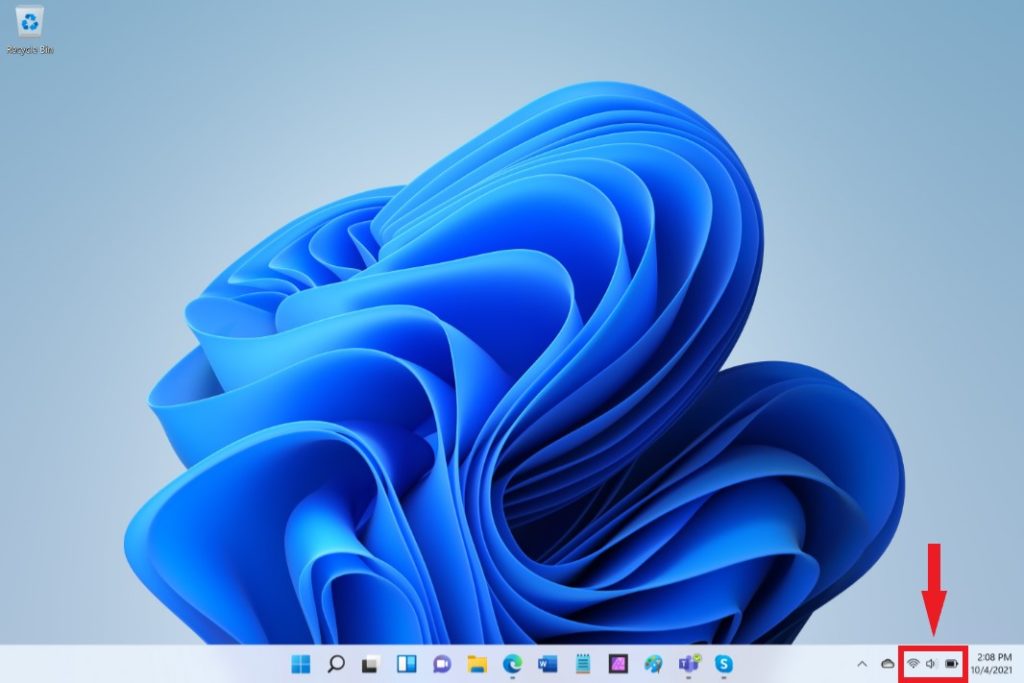
In previous Windows versions, you could open it easily from the bottom-right corner of the system tray. But now, you can either open it by clicking on the internet, volume, and battery status icon, which is now a single button, or through a keyboard shortcut.
Moreover, the redesigned look splits controls at the bottom and notifications at the top of the panel. And Microsoft still lets you customize the Action Center the way you like. You can add or remove shortcuts, alter their location, and even change the transparency effects.
So, let’s look at how you can do that.
1. Add New Shortcuts On Windows 11 Action Center.
In the older Windows OS, the battery, volume, and internet each had their separate icons located on the system tray. But now, Microsoft has included all of them under the Action Center, also called Quick Settings, to clear up some space on the Taskbar.
Additional settings can also be accessed through it, such as Bluetooth connectivity, brightness, battery saver mode, and so on. Depending on how often you use each feature, you can add or remove them for personal convenience.
If your favorite quick action option isn’t there on the limited menu, here’s how to add them:
- First, open the Action Center either by clicking on the grouped wifi, volume, and battery icon or by pressing Windows key + A on your keyboard.
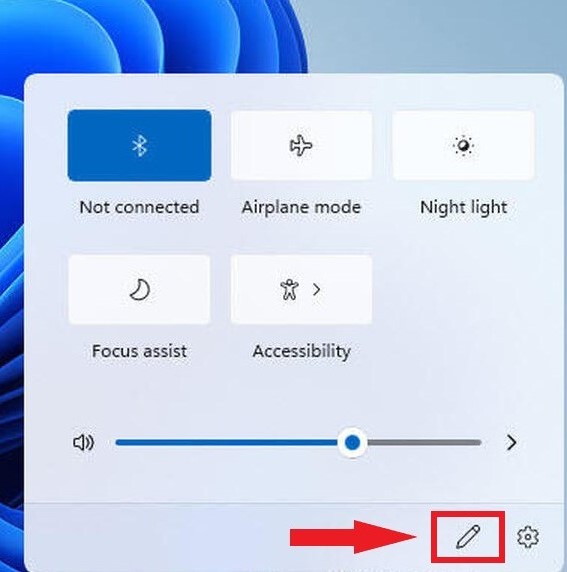
- Next, click on the Edit icon denoted by a pencil at the bottom-right to enter Edit Mode.
- From there, click on the Add button, then select any quick action you want to be accessible from the Action Center.
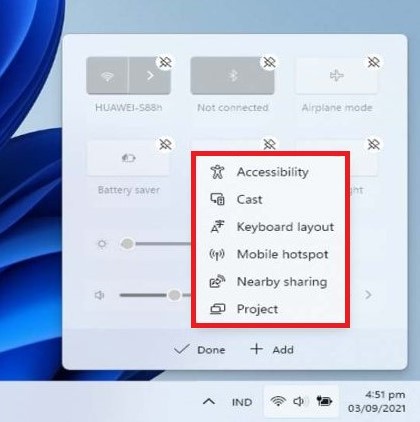
- Finally, click Done to save these changes.
2. Remove Shortcuts On Windows 11 Action Center.
Having too many shortcuts on the Action Center may seem a bit clustered to some users. In fact, keeping shortcuts you don’t use is pretty pointless, and you may want to remove them to clear up some space.
In order to do that, these are the steps you need to follow:
- Start by clicking on the internet, volume, and battery grouped icon to enter the Action Center. Alternatively, you can press the Windows key and A on your keyboard simultaneously.
- Then, go to the Edit icon at the lower right corner of the panel.
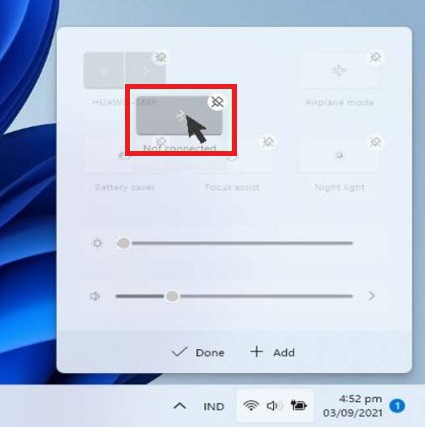
- Over each shortcut, you will see an unpin symbol. Click on it to remove that particular feature from the Quick Settings menu.
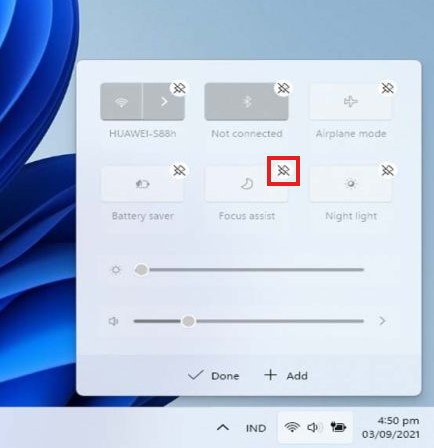
- Once done, click on the Done button to save these changes.
If you accidentally remove a shortcut, follow the instructions in the previous section to bring it back.
3. Rearrange Shortcuts On Action Center.
There are certain settings on the Action Center that you use more often than others. To make your workflow smoother, those need to be located where you can effortlessly click on them. You can make this happen by rearranging the layout, similar to how you rearrange applications on your phone’s home screen.
Below are the steps you need to follow:
- To begin, click on the wifi, sound, and battery icon at the lower right corner of the screen or press the Windows key and A on your keyboard simultaneously.
- After that, click on the Pencil icon at the bottom right corner of the panel to enter the Edit Mode.
- All the shortcuts will then turn gray. Now, simply drag and drop the shortcut you’d like to relocate where you want it to go.
- Once satisfied with the new layout, press Done.
4. Adjust Transparency Effects on Windows 11.
Similar to the previous Windows OS, Windows 11 includes a transparency effect that gives the Action Center, Taskbar, and the Start menu a translucent look. The feature can be enabled or disabled as per your preference. In general, there are two ways to do so.
The first method is through the Personalization tab in the Settings:
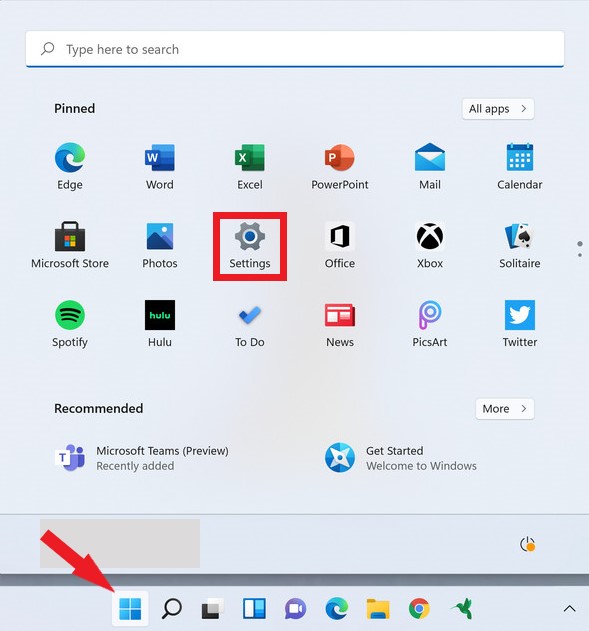
- First, click on the Start menu or press the Windows key + i from your keyboard.
- From there, go Settings.
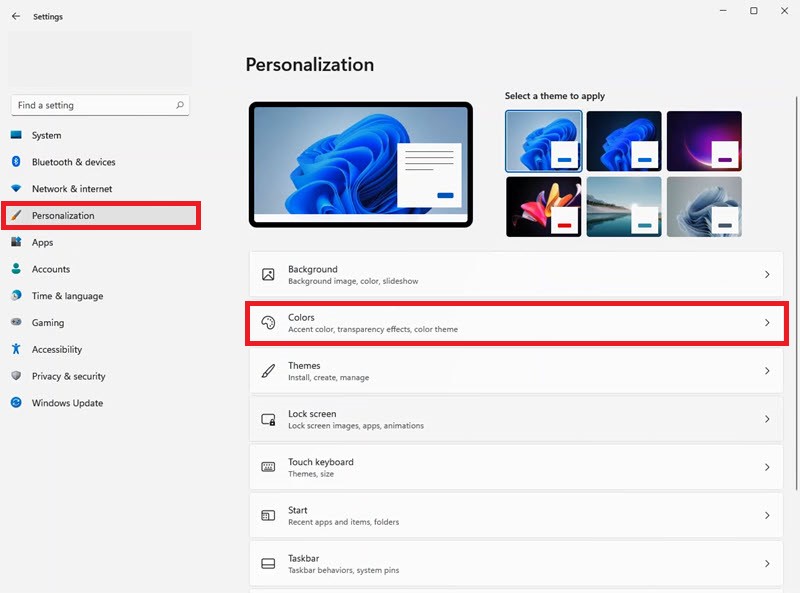
- On the left pane, select the Personalization tab.
- After that, click on the Colors option.
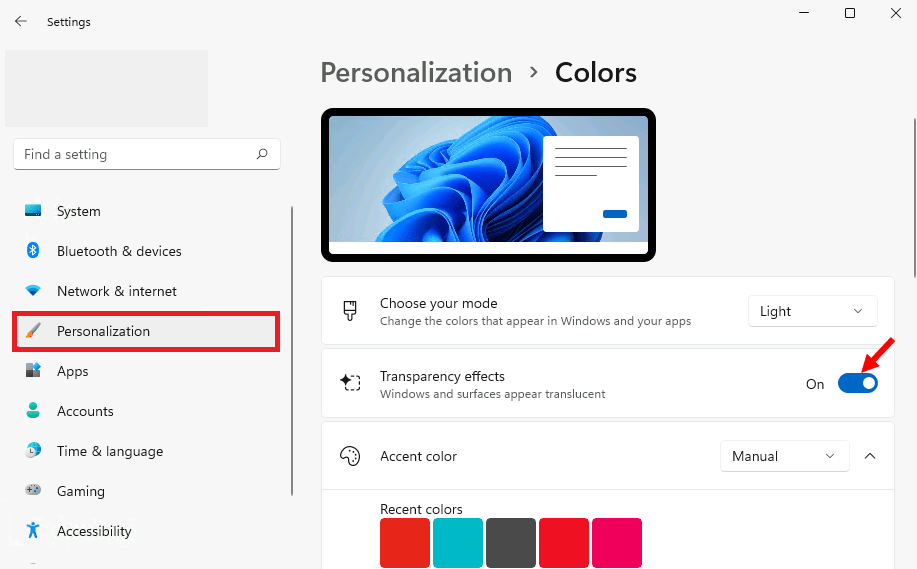
- Finally, turn the toggle on or off next to Transparency Effects.
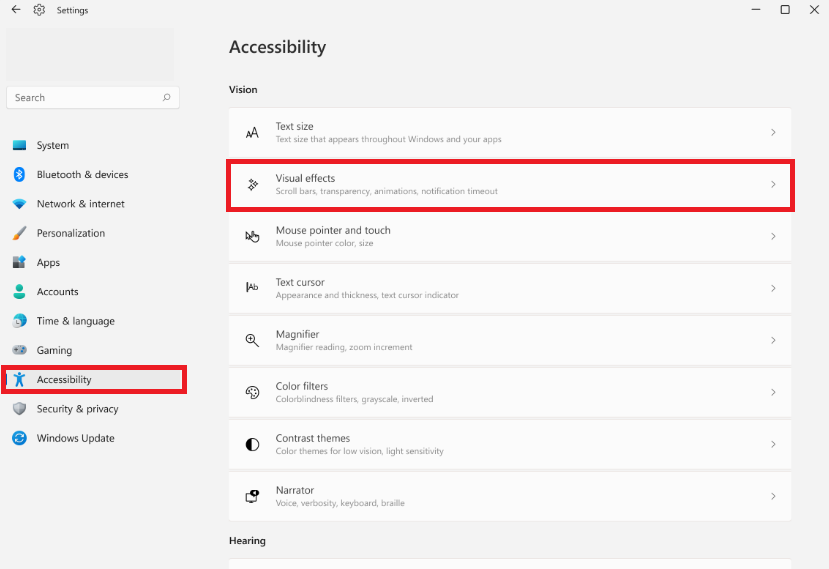
If the above method doesn’t work for you, you go through the Accessibility tab. Follow the steps below:
- Start by clicking on the Start menu. Alternatively, you can press the Windows key and i on your keyboard simultaneously.
- Next, click on Settings.
- Now, go to the Accessibility tab from the left pane of the window.
- From there, scroll down to find Visual effects under Vision, then click on it.
- You can then turn the toggle on or off for Transparency effects.
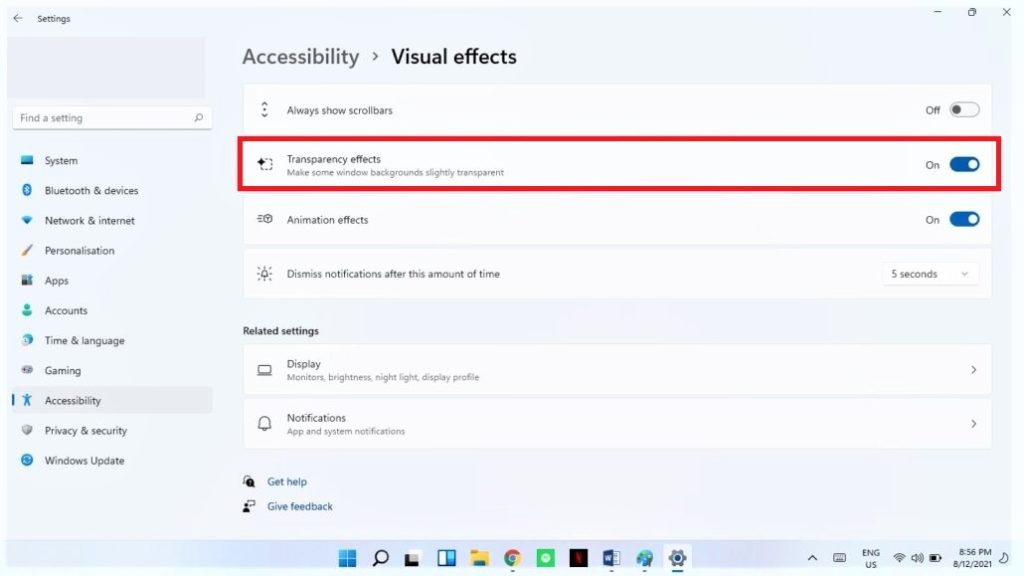
Although the transparency effect may seem like an exciting feature, turning it off increases the system’s performance.
This was all on how to customize the Action Center on Windows 11. We hope our guide proved helpful. If you still have any queries, let us know in the comment section below. We’ll try our best to guide you through it.
If this guide helped you, please share it. 🙂
