

Wondering how to disable background apps on Windows 11?
With Windows 11, pre-installed apps and apps that you download from the Microsoft Store will run in the background to make use of additional features. These may include the ability to download data and show notifications – even if you don’t use them!
Despite the fact that these features can be very useful in several circumstances, running apps in the background can drain battery power, waste bandwidth, and burden the system. If keeping apps up-to-date isn’t important for you, Windows 11 ships with a feature that lets you control which apps can run in the background.
In this guide, we will walk you through several methods of disabling background apps on Windows 11. All the methods are simple to execute, and should not take much of your time!
Let’s get right into it!
1. Modify Windows Settings.
The simplest method for executing the task under consideration is through Windows Settings.
This method, however, can be used by all standard users to disable background apps on Windows 11. If there are multiple users on your PC, prevent them from customizing such features using Windows Registry.
Here is what you need to do:
- Press Windows + I keys simultaneously on your keyboard to open Windows Settings.
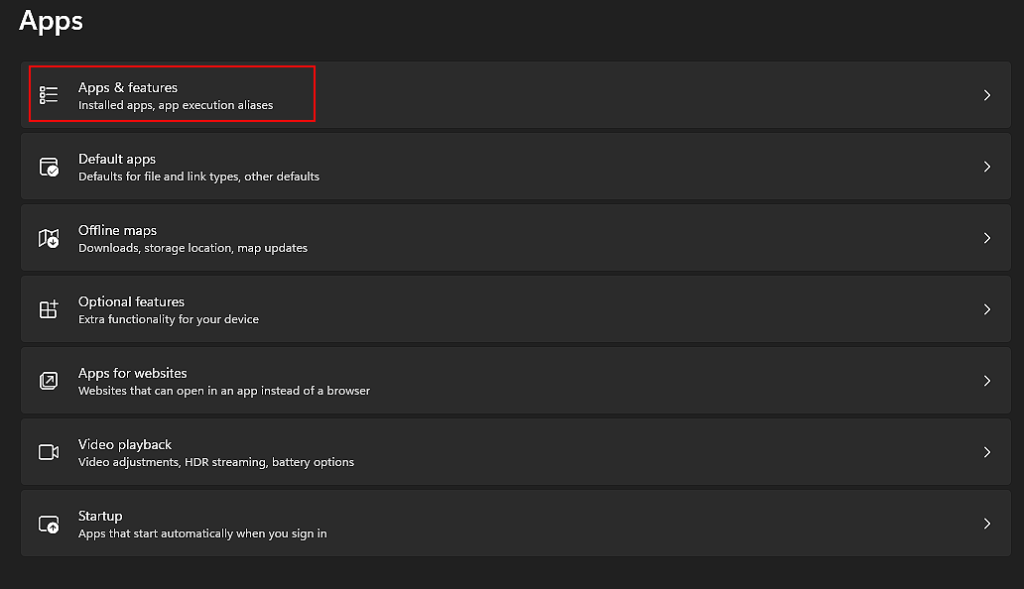
- In the Settings window, select Apps from the left pane and click on Apps & features in the right pane.
- Now type the name of the application that you want to disable in the search bar on the window.
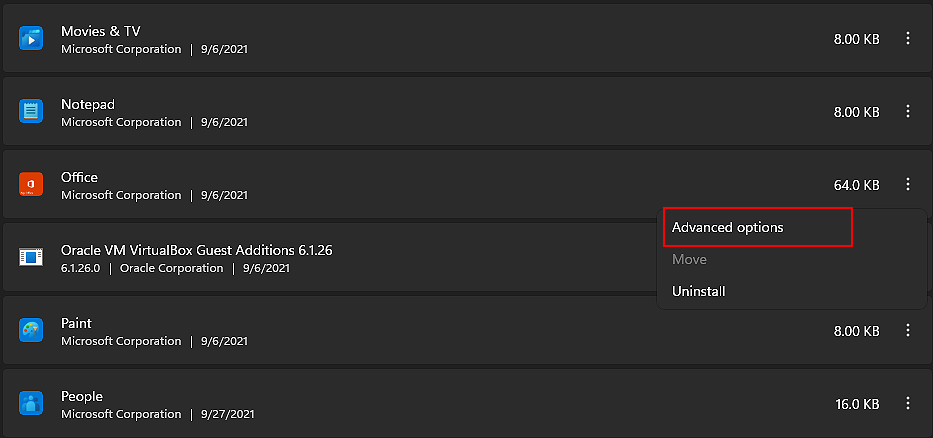
- When the result is displayed, click on the three dots next to the app and then choose Advanced options.
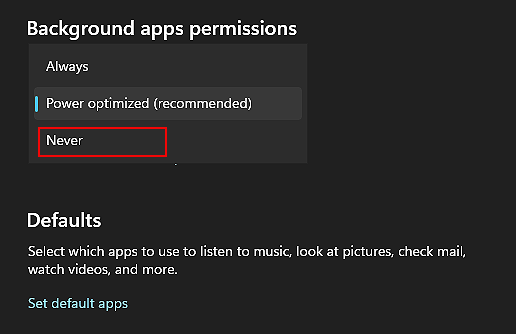
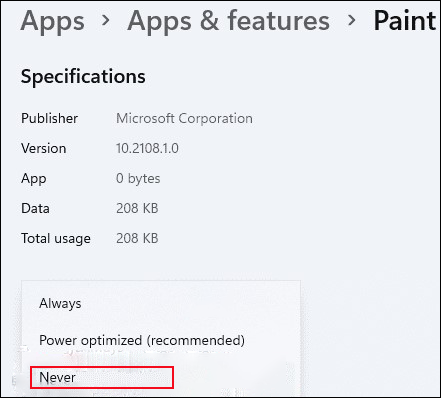
- In the Advanced options screen, locate Background apps permissions and expand the dropdown menu under it.
- Choose Never and close the Settings app.
This should disable the background applications in no time.
2. Use the Group Policy Editor.
Another easy way of disabling the background apps on Windows 11 is by using the Group Policy Editor.
Group Policy Editor (GPE) is also a utility provided to help users customize the behavior of their operating systems from an administrative level. The information in GPE is stored in policies, and by modifying the relevant policies, you can make the changes you desire.
Here is how you can use the Group Policy Editor to make the desired changes:
- Press Windows + R keys simultaneously on your keyboard to open a Run dialogue box.
- In the text field of the dialogue box, type gpedit.msc and hit Enter. This will launch the Group Policy Editor on your PC.

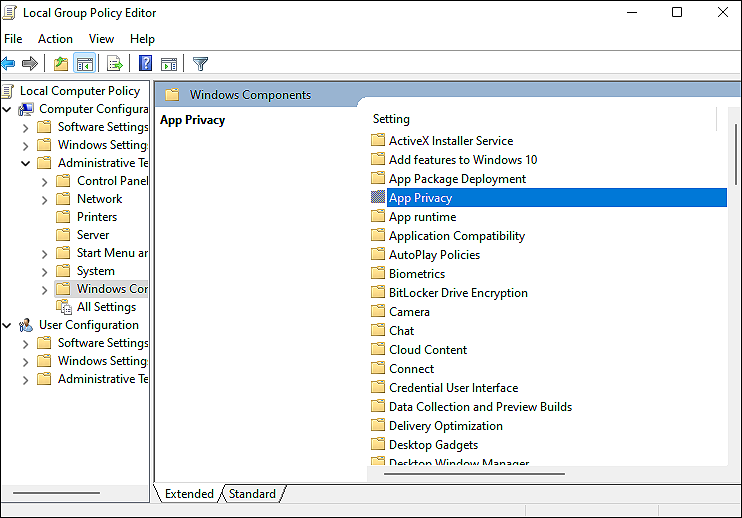
- Inside the Group Policy Editor, navigate to the location mentioned below.
Computer Configuration\Administrative Templates\Windows Components\App Privacy
- Now locate and double-click on Let Windows apps run in the background in the right pane.
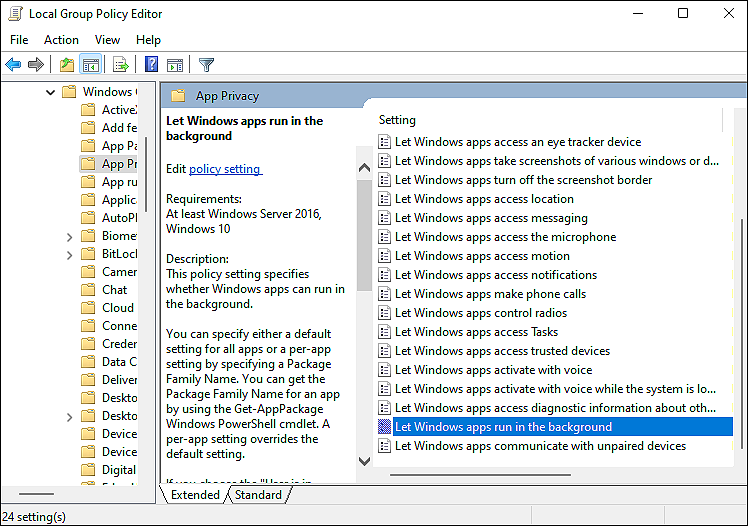
- In the next window, click on Disabled and hit Apply to save the changes.
- Finally, restart your PC.
Once you reboot your PC, applications will stop running in the background on Windows 11.
3. Modify Battery Settings.
Background apps utilize battery resources even when you are not actively using them.
If your reason for wanting to disable the background applications is their battery consumption, then the best way to do so is by modifying the battery settings. By using this method, you can see how much battery each app consumes and disable the ones that consume too much.
Here is what you need to do:
- Press Windows + I keys simultaneously on your keyboard to open Windows Settings.
- In the Settings window, select System from the left pane and then click on the Power & battery option on the right side of the window.
- Now scroll down in the next window and select Battery usage.
- In the battery usage by app section, you can see which apps are consuming the most battery. Click on the three dots next to the app that you want to disable and select the Manage background activity option.
- Choose the Never option in the Background apps permissions section.
Hopefully, this will prevent the targeted application from running in the background.
4. Try Using CleanMyPC.
If after following both steps in this guide, you are still unable to accomplish the desired action, it may be that your system has become corrupt.
To eliminate any bugs or corruption errors from your PC, you should perform a deep cleaning before following this guide. If this scenario is applicable, using a good PC cleaner can be beneficial, as manual cleaning can take up a lot of time and energy.
In case you’ve never used a PC cleaner before, we recommend CleanMyPC.

CleanMyPC helps you solve all PC problems fast and efficiently. It comes with a wide range of tools that include (but are not limited to) a multi-uninstaller, speed boost, and registry cleaner. These tools can optimize your system and fix most problems.
If this looks like something your PC desperately needs, install CleanMyPC now and get your PC up and running like new!
5. Use Windows Registry.
Registry refers to a database used by Windows to store low-level details about an operating system’s processes and applications. Windows relies on the Registry Editor for important information while performing relevant operations. This makes the Registry Editor an important component of our operating system.
Make sure, however, that you are logged into Windows as an administrator before proceeding with the method mentioned below.
Follow these steps to disable background apps using Windows Registry:
- Press Windows + R keys simultaneously on your keyboard to open a Run dialogue box.
- In the text field of the dialogue box, type regedit and hit Enter. This will launch the Windows Registry on your PC.

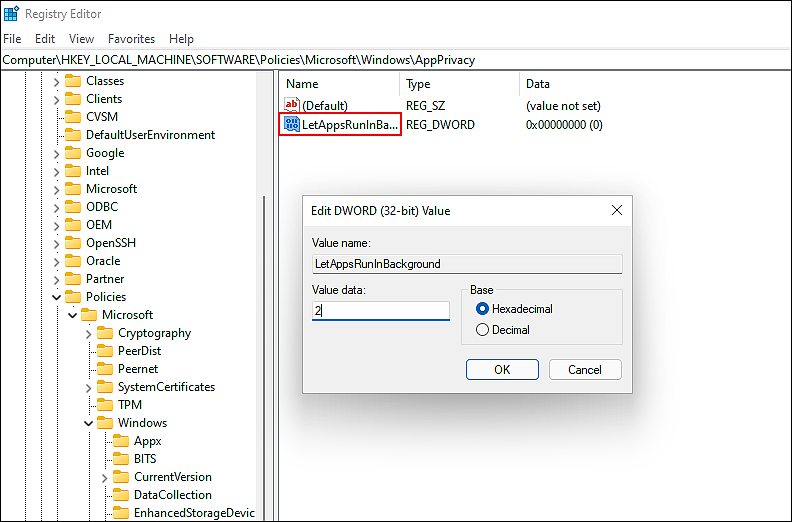
- Inside the Registry Editor, navigate to the location mentioned below.
HKEY_LOCAL_MACHINE\SOFTWARE\Policies\Microsoft\Windows\AppPrivacy
- If you cannot locate the AppPrivacy key, right-click on the Windows key and select the New > Key option.
- Rename this key as AppPrivacy.
- Now with the AppPrivacy key selected, right-click anywhere in the right pane and select the New > DWORD (32-bit) Value option.
- Name this value as LetAppsRunInBackground and double-click on it.
- Under Value data, type 2 and click OK.
- Finally, restart your PC to save the changes.
You can always revert the changes by deleting the LetAppsRunInBackground keys.
This brings us to the end of our guide on ways to disable background apps on Windows 11. We tried walking you through all the steps in detail and hope that one of the methods mentioned in this post did the trick for you. In case you still have any confusion about the troubleshooting steps, please let us know in the comment section below!
If this guide helped you, please share it. 🙂
