

Wondering how to disable Start menu background customizations in Windows 10?
The Start menu is an important part of Windows 10, since it’s where you can access and find apps, settings, and files for every day use.
A default Start menu has elements and settings that are usually suitable for most people. You can, however, customize the Windows 10 experience to make it more functional and personalized if you want to. For instance, you can change the menu’s color, its size, or you can simply use it in its full-screen version. You can also organize your apps using folders and groups.
However, if multiple users use your PC and you do not want them to be messing with the Start menu, it is best to disable Start menu background customizations in Windows 10. In this guide, we will show you how you can do that in a few easy steps.
Let’s get started!
1. Use Windows Registry.
Microsoft Windows Registry is a hierarchical database used for maintaining low-level settings as well as enabling applications to access it.
The Registry stores information such as what applications are installed on a computer and what types of documents can be created with them, what property sheet settings are assigned to folders and icon properties, and what hardware is installed on the computer. Windows refers to this information when performing relevant operations in your operating system.
The information is stored in the form of keys, and by modifying the relevant Registry keys, you can make the desired changes.
- Press Windows + R keys simultaneously on your keyboard to open a Run dialogue box.
- Inside the text field of the dialogue box, type ‘regedit’ and hit Enter. This will launch Windows Registry on your PC.

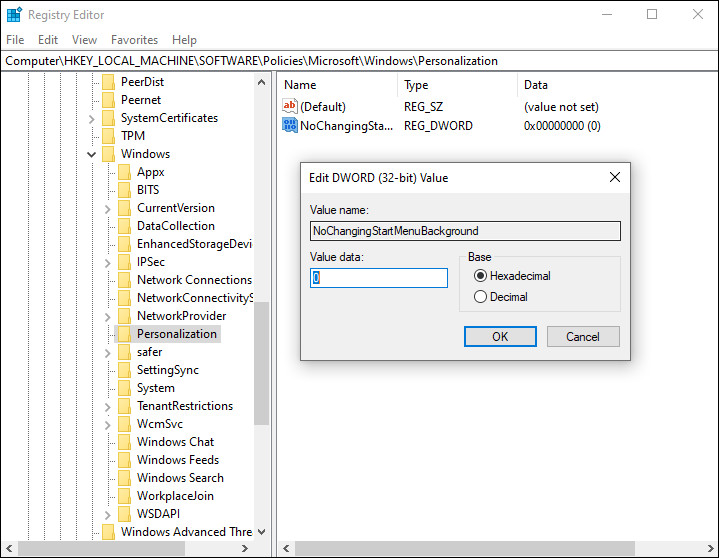
- Once you are inside the Registry Editor, navigate to the location mentioned below.
HKEY_LOCAL_MACHINE\SOFTWARE\Policies\Microsoft\Windows\Personalization
- If you cannot locate the Personalization key, then right-click on the Windows key and select the New > Key option.
- Rename this key as Personalization and double-click on it.
- Now right-click anywhere in the right pane and select the New > DWORD (32-bit) Value option.
- Rename this newly created value as NoChangingStartMenuBackground.
- Double-click on NoChangingStartMenuBackground and under Value data, type 1.
Once done, restart your PC to save the changes.
2. Try Using CleanMyPC.
If your operating system contains corruption errors, you may encounter issues when executing the methods in this guide.
In general, corruption issues result from junk files in your system, so if you haven’t cleaned them up in a while, now is the time. We recently tested some of the best cleaners in the market and found CleanMyPC to be the best.

It includes a comprehensive list of tools for system maintenance that can do a great deal more than just remove junk files. These tools include (but are not limited to) Multi-Uninstaller, Registry Cleaner, and a Speed Booster. All that you need to do is install CleanMyPC and run a scan using it. If any issues are identified, it will take care of them with little to no user input.
Install CleanMyPC now and get your PC up and running like new!
3. Use Group Policy Editor.
The Group Policy Editor is a Windows-based administration tool that lets users customize the settings of their operating systems. You can set password requirements, startup programs, and determine what applications or settings users can modify.
The information in the Group Policy Editor is stored in the form of policies and by modifying the relevant policies, you can make your desired changes like preventing standard users from customizing the Start menu.
- Press Windows + R keys simultaneously on your keyboard to open a Run dialogue box.
- Inside the text field of the dialogue box, type ‘gpedit.msc’ and hit Enter. This will launch Group Policy Editor on your PC.
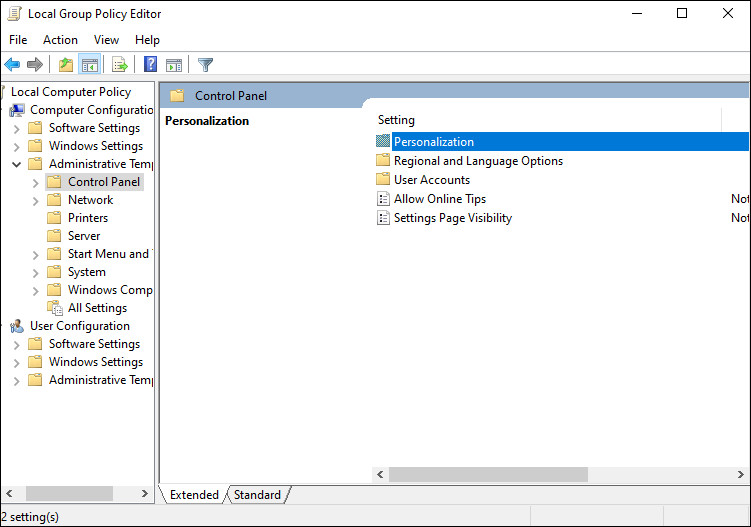
- Once you are inside the Group Policy Editor, navigate to the location mentioned below.
Computer Configuration\ Administrative Templates\ Control Panel\ Personalization
- Now locate and double-click on Prevent changing start menu background in the right pane.
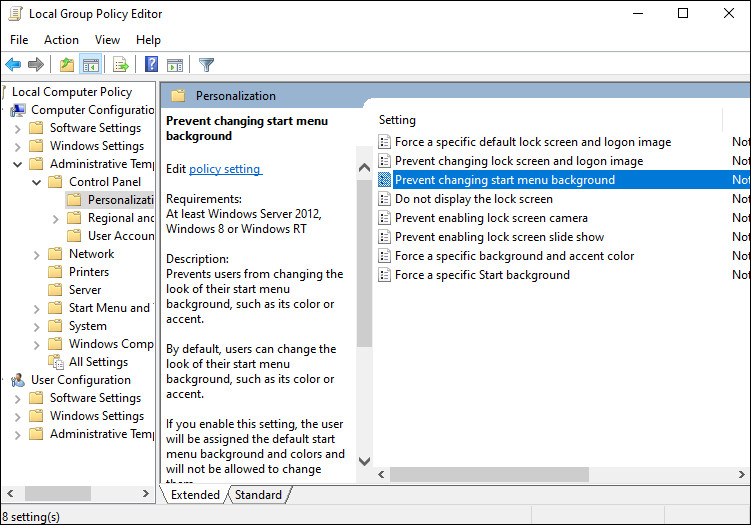
- Select Enabled and click on Apply to save the changes.
- Now check if the desired changes have been made. If not, then type cmd in the search bar and click on Run as administrator.
- Type the command mentioned below in the Command Prompt window and hit Enter to execute it.
gpupdate /force
As simple as that!
This brings us to the end of our guide on ways to disable Start menu background customizations in Windows 10. We tried walking you through all the steps in detail and hope that one of the methods mentioned in this post did the trick for you. In case you still have any confusion about the steps, please let us know in the comment section below!
If this guide helped you, please share it. 🙂
