

Wondering how to disable the Start menu on Windows 10?
The Windows Start menu is a big deal. It is probably the first thing that you think of when it comes to launching applications, searching for important files, or simply shutting down your PC. This iconic Start menu is so intertwined with the identity of Windows, that it is hard to imagine using Windows without it, but it might not be as convenient for some as it is for others.
Luckily, Windows allows its users to disable the Start menu and if you are one of those people who do not find it handy, you are in the right place.
In this guide, we will walk you through the steps of disabling the Start menu on Windows 10 in detail.
Let’s get started!
1. Use Windows Registry.
If you have always wanted to get better control over your operating system, then Windows Registry is something you should know about.
Windows Registry is a database of low-level information about Windows programs and processes. The information in the Registry Editor is stored in the form of Registry keys, and advanced users modify the relevant keys to customize their operating systems.
Here is how you can disable the Start menu on Windows 10 using Windows Registry:
- Press Windows + R keys on your keyboard simultaneously to open a Run dialogue box.
- Inside the text field of the dialogue box, type ‘regedit’ and hit Enter. This will open Registry Editor on Windows.

- Inside the Registry Editor window, navigate to the location mentioned below.
HKEY_CURRENT_USER\Software\Microsoft\Windows\CurrentVersion\Policies\Explorer
- In the right pane, right-click anywhere and select the New > DWORD (32-bit) Value option and name this value as NoSetTaskbar.
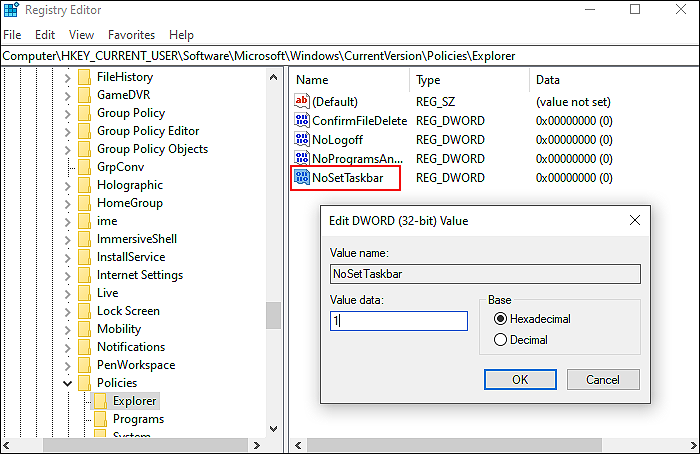
- Double-click on this value and under Value data, type 1.
This should disable the Start menu on Windows 10 without any issues.
2. Try Using CleanMyPC.
In the event that none of the suggested solutions work for you, there is a possibility that your system is infected with bugs or corrupt files that are hindering these operations. In this case, the best course of action would be to remove the junk files before attempting to troubleshoot.
Cleaning your computer from clutter is best done with a professional PC cleaner. If you want a recommendation, we like CleanMyPC.

Apart from removing junk files, CleanMyPC also offers an array of system maintenance tools that are designed to address other PC problems. When you install the tool and run an initial scan, it will automatically identify and fix problems without the need for extensive user input.
It is also quite easy to use, so even if you have never used a PC cleaner before, you will have no problem using CleanMyPC!
3. Use Group Policy Editor.
Another easy way of disabling the Start menu is via Group Policy Editor.
Group Policy Editor is also an administrative-level tool that allows you to customize the operations of Windows, as the Windows Registry. Information here is stored in the form of policies, and we will be modifying the relevant policies to make our desired changes.
Here is what you need to do:
- Press Windows + R keys on your keyboard simultaneously to open a Run dialogue box.
- Inside the text field of the dialogue box, type ‘gpedit.msc’ and hit Enter. This will launch Group Policy Editor.

- In the newly launched window, navigate to the location mentioned below.
User Configuration\Administrative Templates\Start Menu and Taskbar\
- In the right pane, locate Prevent changes to Taskbar and Start Menu Settings and double-click on it.
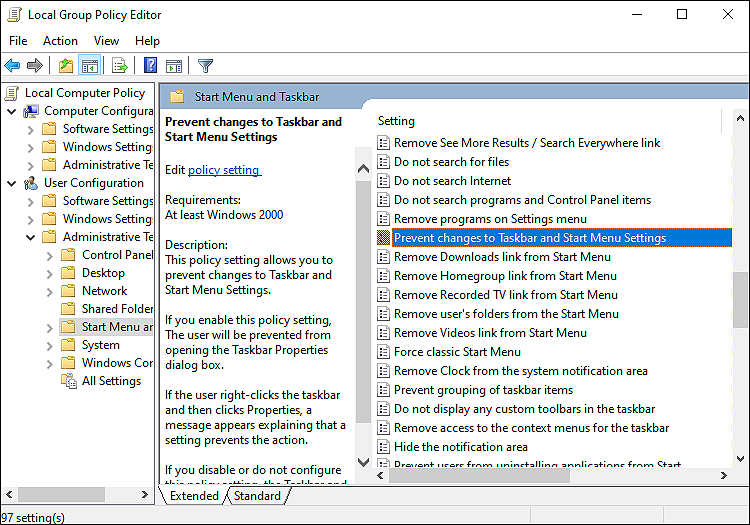
- Click on Enabled and hit Apply to save the changes.
That’s it.
Hopefully, doing so will make desired changes in no time.
This brings us to the end of our guide on disabling the Start menu on Windows 10. We tried walking you through all the steps in detail and hope that one of the methods mentioned above did the trick for you. In case you still have any confusion about the methods, please let us know in the comment section below!
If this guide helped you, please share it. 🙂
