

Wondering how to fix DISM error 2 in Windows 10?
DISM is a command-line tool that is used to solve performance and start-up issues on PC. It helps users fix Windows corruption errors, but DISM can sometimes fail to respond like all other Window tools.
There are several types of errors that users experience while running this tool.
If you are trying to figure out how to fix DISM error 2 in Windows 10, you’re in the right place. Error 2 occurs when the system is unable to find a specified file, and if not fixed, it can harm your system.
This guide will walk you through the process of fixing DISM error 2 in a few easy steps.
Let’s get started.
- 1. Check DISM Version.
- 2. Refresh DISM Tool.
- 3. Disable or Uninstall Antivirus.
- 4. Use Disk Cleaning Tool.
- 5. Perform a System Restore.
- 6. Reset Your PC.
1. Check DISM Version.
First of all, it is important to check if you are using the correct version of DISM installed with the Windows. If you have been experiencing DISM error 2, we suggest you to run the commands using WinPE.
Windows Preinstallation Environment (WinPE) is a small Operating System with limited features. WinPE is often used to initiate a setup or perform a recovery operation in Windows. However, you cannot use it as a primary OS.
Running commands in WinPE will help you execute them successfully without facing any errors.
2. Refresh DISM tool.
You can solve the DISM error 2 in Windows by refreshing the DISM tools on your PC. Doing so will enable /Restorehealth switch to automatically run scans and repair the corrupted files automatically from the operating network.
To refresh DISM tools, follow the steps mentioned below:
- Right-click on the Start menu and select Command Prompt (Admin) option.
- Now type the command mentioned below to revert any pending tasks.
exe/image:C /cleanup-image /revertpendingactions
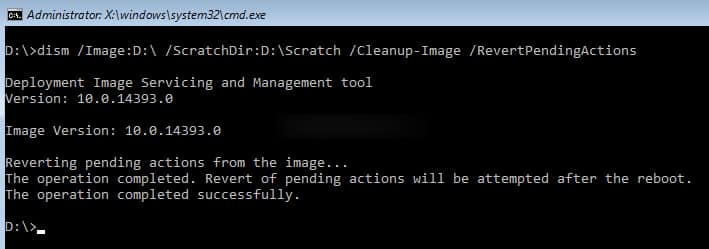
- After the processing is completed, restart your PC.
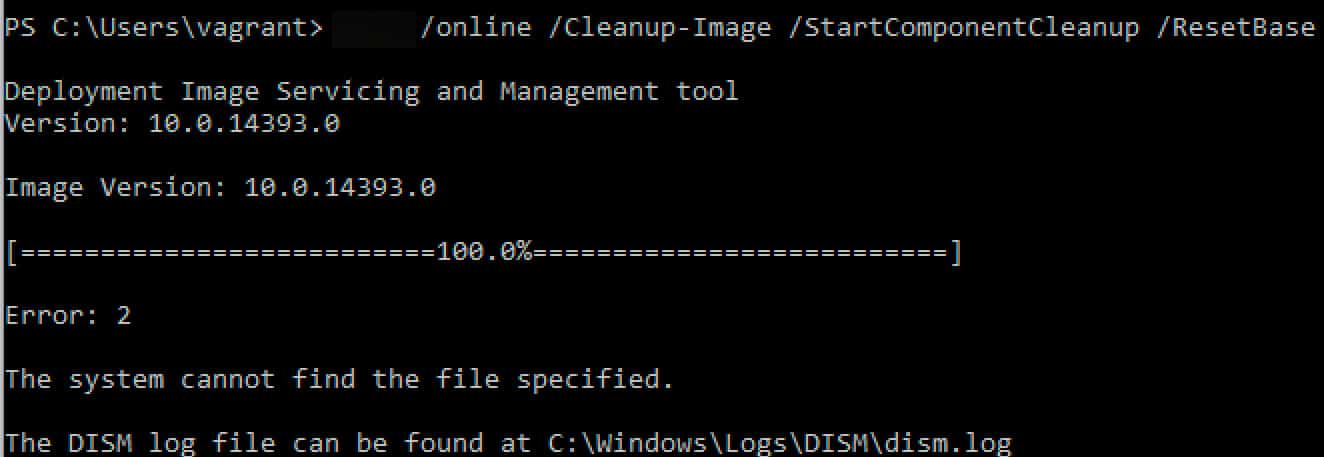
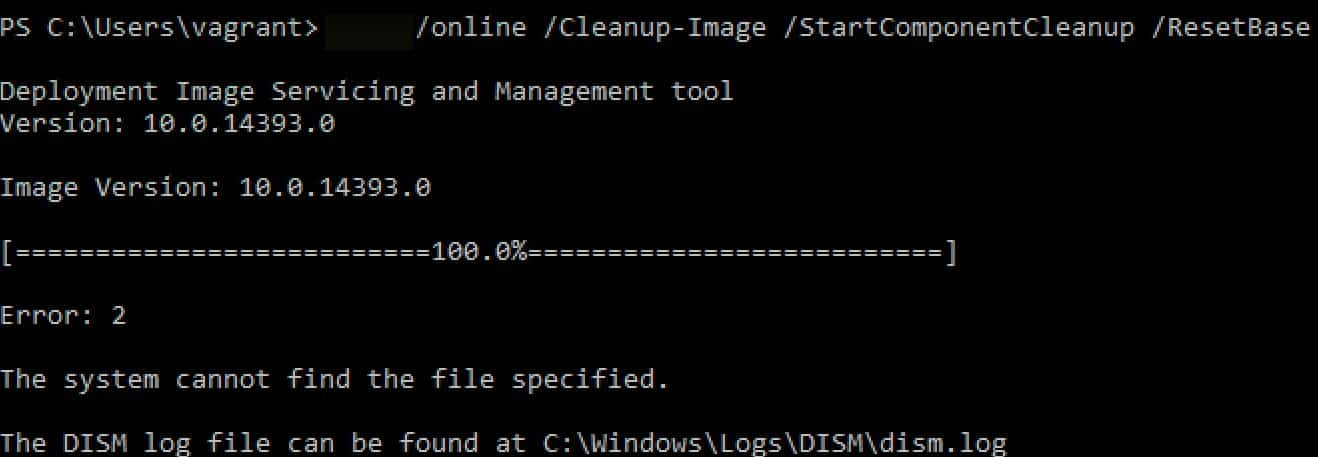
- Now run in the recovery command prompt and type the command line mentioned below.
exe /online/Cleanup-Image /StartComponentCleanup
- Once the processing is complete, restart your PC.
- Type cmd in the search bar and click on Run as administrator.
- Now, run the command mentioned below and hit Enter.
sfc/scannow
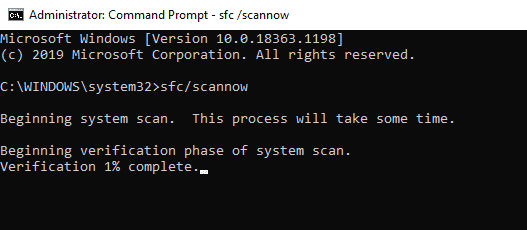
- Once the processing is completed, restart your PC.
- Open Command Prompt again and type the command mentioned below.
dism.exe /online /Cleanup-Image /RestoreHealth
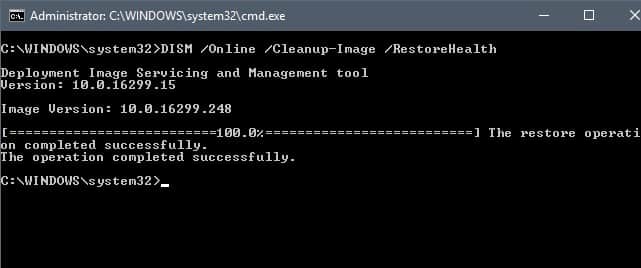
This will hopefully solve the DISM error 2 in your PC. If the problem persists, try the next solution.
3. Disable or Uninstall Antivirus.
It is common to experience DISM error 2 on your computer because of the security software installed in your PC. If you have been facing the issue, disable or uninstall antivirus from your PC and check if the error is solved.
You can also uninstall the current antivirus in your PC and install a better one to get rid of the issue permanently.
4. Use Disk Cleaning Tool.
In a PC, data is spread all across the hard drive. This disorganization of data sometimes makes it difficult for Windows to access specified files, which causes DISM error 2.
A Disk Cleaning Tool can help you resolve this issue. Defragmentation or Disk Cleaning is a process of combining data fragments at a single location on the hard drive of your PC. A Disk Cleaning Tool helps Windows access the files faster by reorganizing them.
Follow the steps mentioned below to solve DISM error 2 using a disk cleaning tool:
- You need to have “Administrative Privilege” to solve the error using a disk cleaning tool. For this, log into your PC as an Administrator.
- Type File Explorer in the search bar and hit Enter.
- You need to expand This PC.
- Click on Local Disk (C:) and select Properties.
- Go to the Tools tab.
- Under the Optimize and defragment drive section, select Optimize.
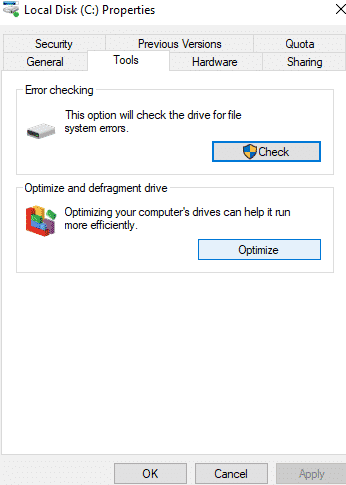
- Now click on Apply and press Enter.
Using the disk defragmenter will help solve the issue in no time. If the problem persists, follow the next step mentioned below.
5. Perform a System Restore.
System Restore is a software program that creates restore points in your PC at a specified location. Restore points are images of the system configuration in the registry. These points help restore the system to an earlier error-free version.
You can perform a system restore by creating restore points on your PC. To do so, follow the steps mentioned below:
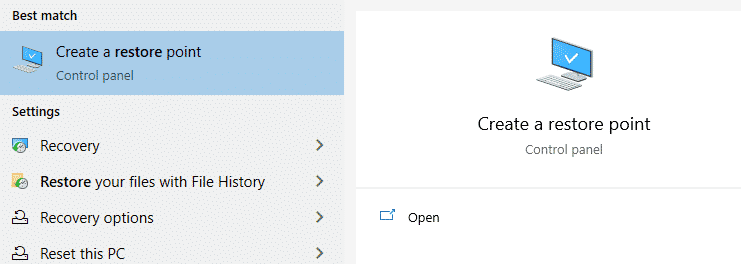
- If you have not created a restore point in your PC, the first step is to create one. To create a restore point, type Restore in your search box and click on Create a restore point.
- This will open a pop-up window. Click on System Restore and select Next.
- If you are unable to click on the System Restore button, that is because the available drives in your PC are not protected. In this case, click on Local Disk (C:) option and select Configure.
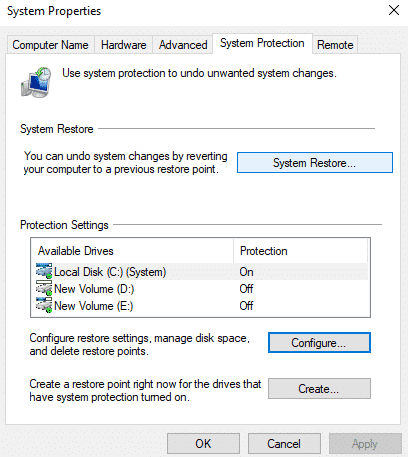
- Next, select the “Turn on System Protection” button to enable the System Restore option.
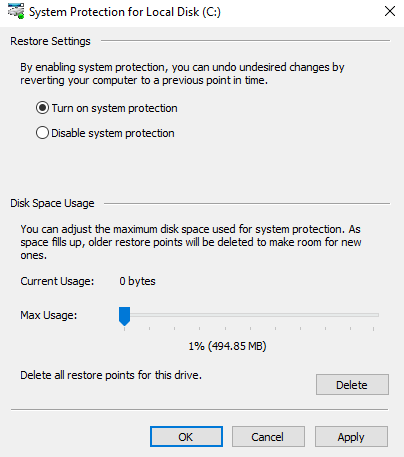
- Now click on System Restore and select Next.
- Create a restore point and click on Next.
- Once the operation is completed, run DISM commands again.
This method will restore your PC in the state it was in before the selected event. If this method does not solve the error, follow the next method.
6. Reset Your PC.
If none of those above methods was able to solve your problem, then try resetting your computer. This method will reset all the settings and delete all the files on your computer. If you want to keep your files, don’t forget to choose the “Keep my files” option while resetting your computer.
Follow the steps mentioned below to successfully reset your PC:
- Type Settings in the search bar and hit Enter.
- Choose Update and Security and click on the Recovery option on the left panel.
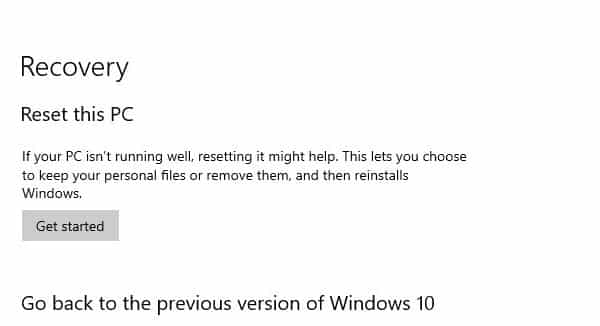
- Now select the Get Started option.
- This will open a new window where you can select if you want to keep your files. Select Keep my files if you do not want to lose your data.
- Follow the instructions on the screen to complete the process.
Doing so will reset the Operating System and solve all the errors in your PC.
This brings us to the end of our guide on fixing DISM error 2 in Windows 10. In our previous post, we have already introduced DISM error 1009 in Windows 10. Don’t forget to check that out if you have been facing the initialization error. If you have any questions, feel free to drop them in the comment section below.
If this guide helped you, please share it. 

Used command prompt as admin on windows 10 64bit.
exe = dism.
Look out for missing spaces. ex.
This didn’t work for me:
exe /online/Cleanup-Image /StartComponentCleanup
This worked:
dism /online /Cleanup-Image /StartComponentCleanup
Changed exe to dism, added a space.