Facing the DISM Error 87 on Windows 11 and don’t know how to fix it?
The system files of your PC may occasionally get corrupted due to various reasons. But you can resolve the issue by using DISM or Deployment Image and Servicing Management. However, while using this command-line tool, users have to be extra careful as any mistake will result in the DISM Error 87 on Windows 11.
DISM is an essential tool in Windows OS. Its main function is to organize virtual disks of your PC by servicing WIM, Full Flash Utility files, VHD, and so on. If anything goes wrong with this tool and you start receiving the DISM Error 87, it’s important to understand what causes it in order to accurately resolve the issue.
Some of the most common reasons include executing incorrect commands, incorrect Windows 11 installation, not using Command Prompt with administrative privileges, ignoring or blocking some essential updates, using the wrong DISM versions, etc. But don’t fret! All these factors can be easily solved by following through with this guide.
So without further delay, let’s get started!
1. Ensure You’re Running the Correct Command.
As mentioned earlier, the DISM Error 87 on Windows 11 often occurs because users mistakenly run the wrong command in Command Prompt or Terminal. So it is recommended to start off with the most basic solution.
You just need to make sure you’re not making any typos while typing the command. Look for any incorrect spacing and spellings and ensure you’re not adding any slashes where it’s not required. When that happens, the Command Prompt will fail to read and execute the command properly.
Furthermore, if you’re copying and pasting a command from a website, it’s best to use a reliable source. And before running it on the prompt, verify that it’s error-free.
2. Launch Terminal or Command Prompt With Admin Rights.
When repairing or replacing the damaged system files using DISM, it’s mandatory that you open the Command Prompt with administrative privileges. If you don’t, you won’t have complete access to the system’s settings.
Therefore, try Command Prompt with admin rights by following the steps below:
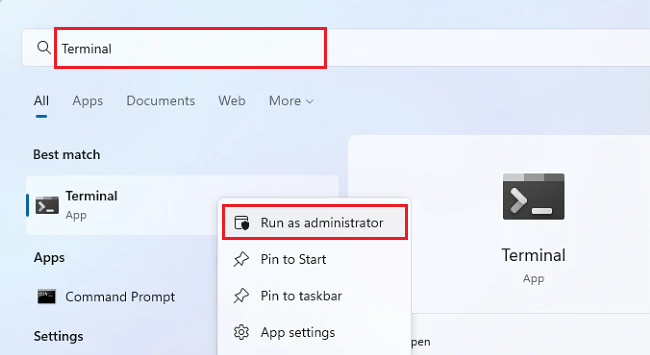
- Firstly, click on the Start Menu, and in the search bar, type in ‘Terminal’.
- Next, right-click on Terminal from the top search results and select Run as administrator.
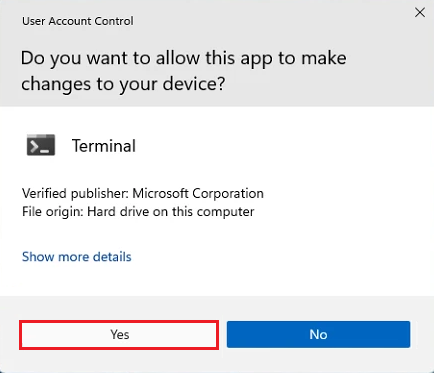
- From the User Account Control, click on Yes to proceed.
- Launch the Command Prompt in a separate window by clicking on the down arrow from the top bar and selecting Command Prompt from the given options.

Once done, execute a few commands to see if the problem is solved or not.
3. Run CHKDSK.
CHKDSK or Check Disk is a command tool that aims to check the file system integrity and displays the status report for a specific volume. Additionally, it will fix all errors diagnosed in that volume, or at least attempt to. Hopefully, this method will also eliminate the DISM Error 87 on Windows 11.
Follow the steps below to go about this method:
- Start by running Windows Terminal as an administrator. To do so, go to the Start Menu and search ‘Terminal’.
- Right-click on Terminal from the search results and choose Run as administrator.
- Next, click on Yes from the User Control Account.
- Open Command Prompt in a separate window by pressing Ctrl + Shift + 2 keys from your keyboard.
- Now, copy and paste the following command and then hit the Enter key:
chkdsk/f
- Then, press the Y key from your keyboard to continue.
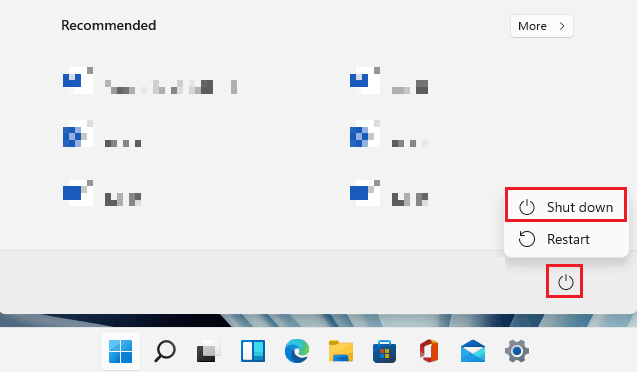
- Lastly, turn off your PC so that the chkdsk tool can start scanning. To do so, head to the Start Menu, select the Power icon and then click on Shut down.
4. Run DISM in Safe Mode.
If you believe the reason for the occurrence of DISM Error 87 on Windows 11 is the interference of other programs, try booting into Safe Mode first and then run the DISM. This will disable all Microsoft services and third-party programs so you can easily restore the system image without any hindrance.
Here’s how to enter the Safe Mode on Windows 11:
- Launch Settings by pressing Win + i keys.
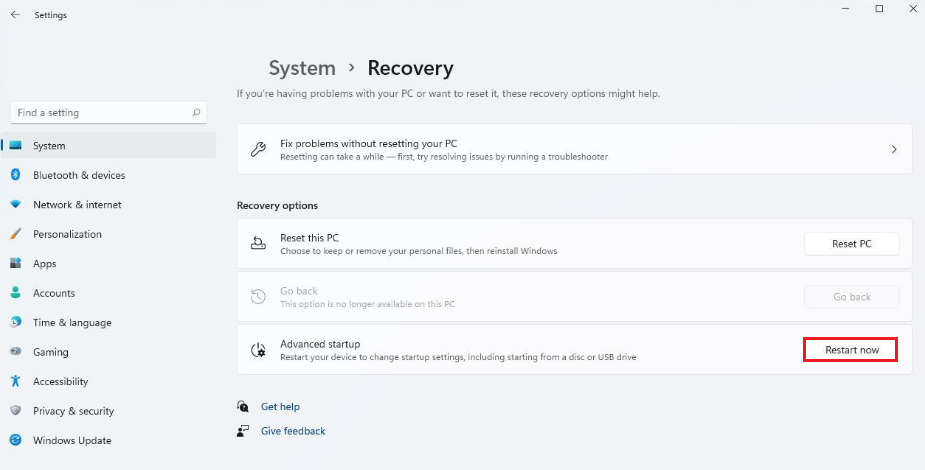
- After that, ensure that you’re currently in the System tab from the left pane, and then scroll down and click on Recovery from the right side.
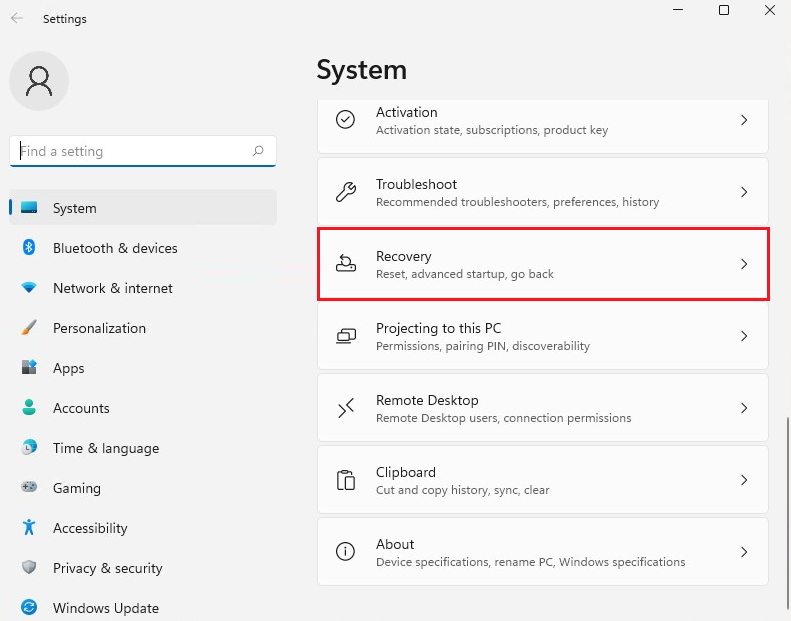
- Now, click on the Restart now button next to Advanced startup, which is present under the Recovery options section.
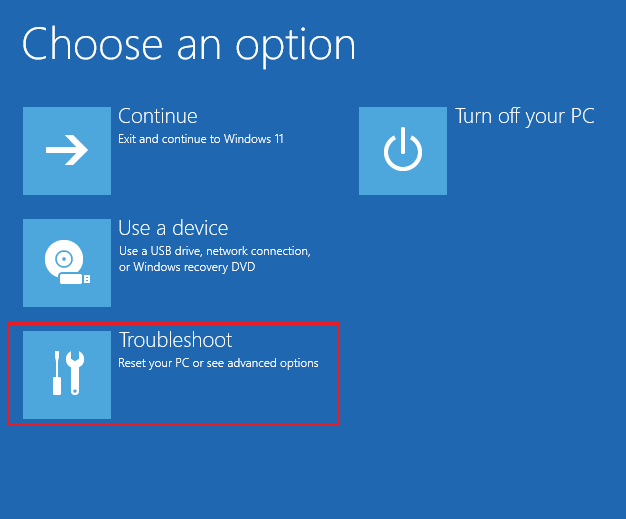
- As your computer restarts, a Choose an option screen will appear. Select the Troubleshoot tile.
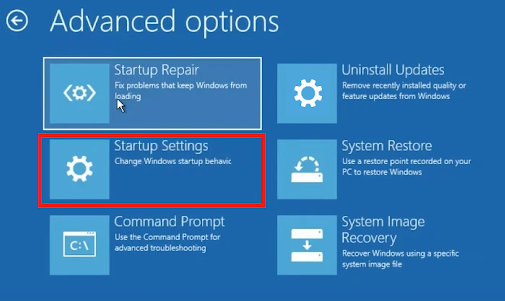
- Next, click on Advanced options to proceed.
- Choose Startup Settings from the next screen.
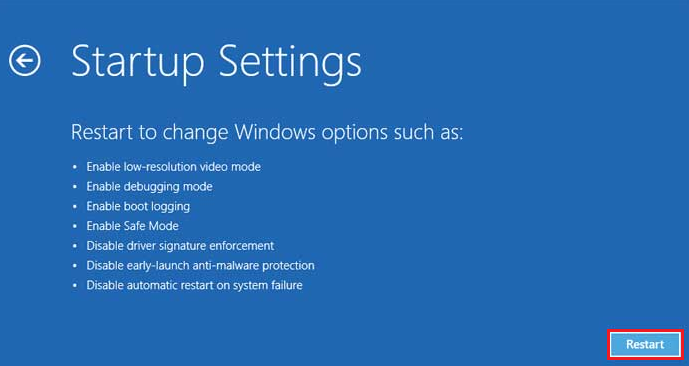
- Finally, click on the Restart button located at the lower right corner of your screen to boot your PC in Safe Mode.
5. Factory Reset Your Computer.
When all the other methods fail, you’re only left with the option to reset your PC to factory settings. Of course, by following this method, you will lose all data, files, and settings from your computer, but this is the only method left for you to fix the DISM Error 87 on Windows 11.
These are the steps you need to follow:
- Press the Win + i keys on your keyboard to open Settings.
- Next, go to the System tab from the left pane and click on Recovery from the right section.
- After that, click on Reset PC from the next screen.
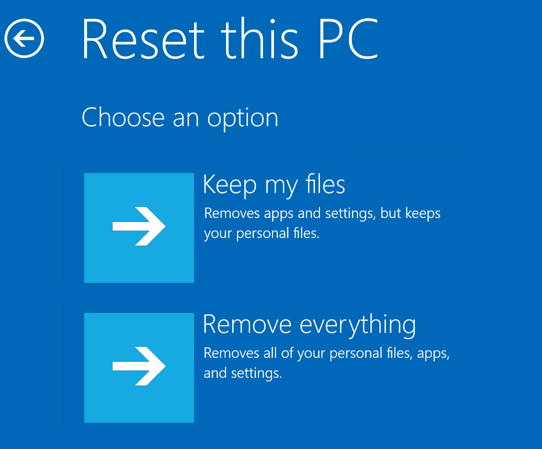
- A Reset this PC window will appear. Either choose Keep my files or Delete everything to continue.
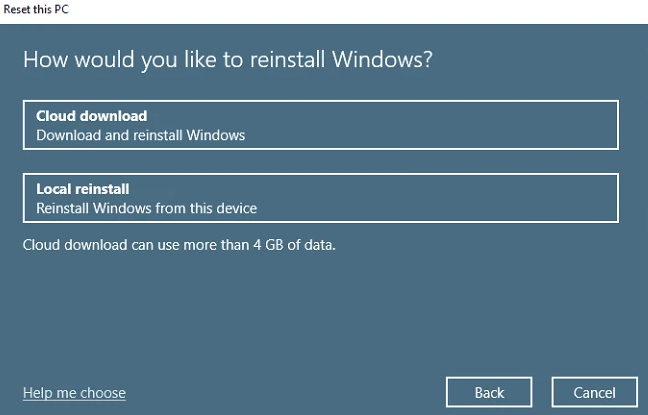
- Select the option of how you wish to reinstall Windows. You can either pick Cloud download or Local reinstall.
- Afterward, click on Next to proceed.
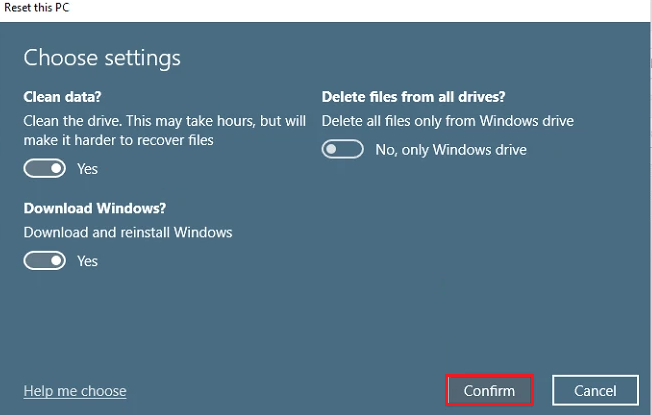
- From the Choose settings screen, decide whether you wish to Clean data, Download Windows, or Delete files from all drives and turn on the toggle below the selected option. Then, click on Confirm.
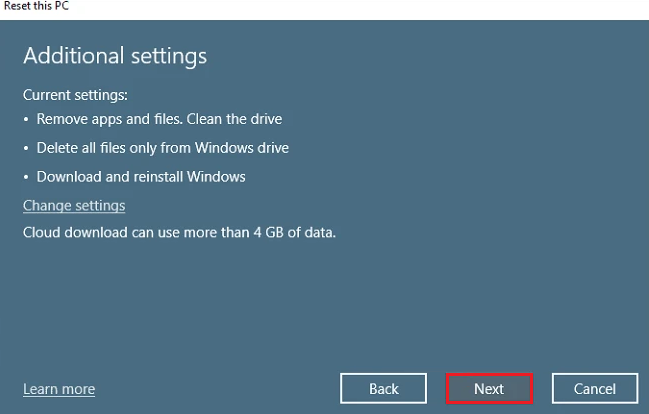
- Now, click on Next again.
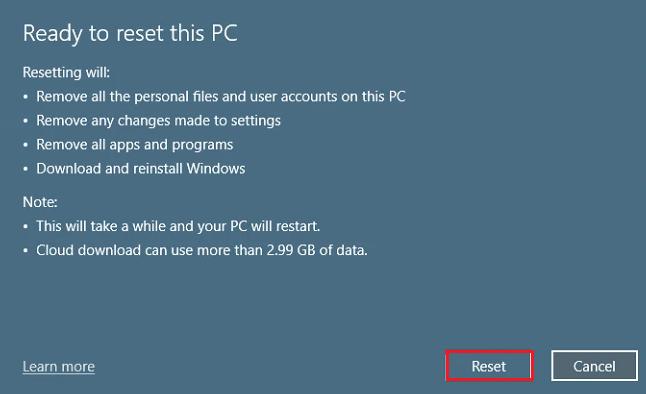
- Lastly, select the Reset button from the bottom to factory reset your PC. Wait till the process is complete, which may take several hours or so.
Here, we end our guide on how to fix DISM Error 87 on Windows 11. Let us know if you found these methods helpful. Also, for more questions, use the comment section below. We’ll be happy to provide further assistance.
If this guide helped you, please share it. 😊


