

Searching for ways to enable or disable autofill in Microsoft Edge?
If you have a difficult time remembering your passwords or dread looking for credit card details every time you have to make a payment online, you are likely to find the autofill feature of Microsoft Edge very convenient.
However, there can be times when you would want to disable this feature, like when you are visiting websites that are not safe.
Luckily, the autofill feature is customizable, and you can turn it off or on according to your own preferences.
If you want to enable or disable autofill in Microsoft Edge, you are in the right place because this guide will walk you through the methods of doing so in detail.
Let’s get started.
1. Modify Microsoft Edge Settings.
Microsoft Edge’s settings allow you to access and change the features of the browser according to your personal preferences. This is why if you want to enable or disable autofill in Microsoft Edge on your PC, then one of the easiest ways of doing so is via Microsoft Edge settings.
This method is easy to follow and will not take much of your time. However, if the option is greyed out in your Microsoft Edge, then jump to the next method below.
Here is all that you need to do:
- Launch Microsoft Edge on your PC and click on the More button (three dots) on the top-right corner of the window.
- Select Settings from the list of options available.
- Choose Profile from the left panel and in the right pane, click on Payment info.

- Turn off/on the toggle switch for the option you want to enable or disable as shown below.

- Once done, type Edge://flags in the address bar of your browser and hit Enter. This will allow you to modify the advanced-level setting of Microsoft Edge.
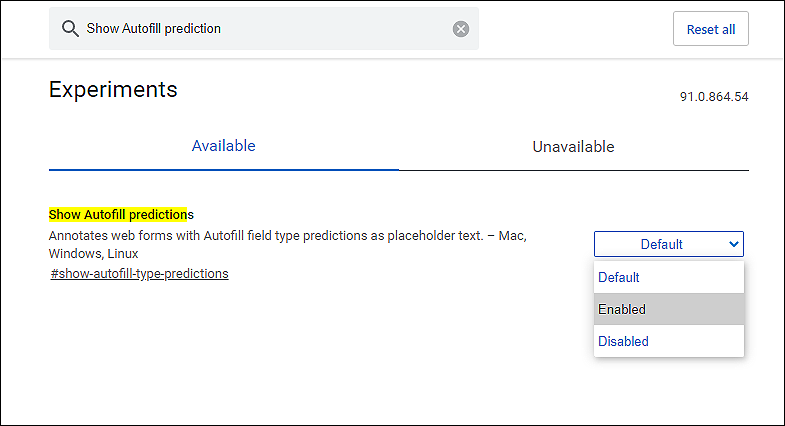
- In the search bar of the newly launched tab, type Show Autofill prediction and click Enter.
- Expand the dropdown menu under Show Autofill prediction and select Enabled/Disabled.
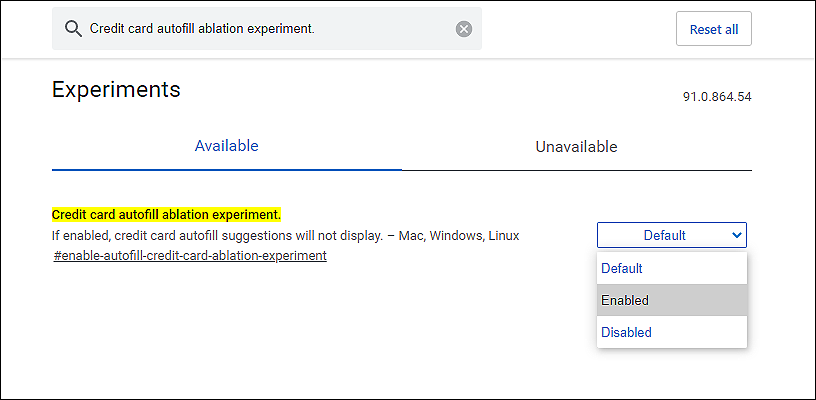
- Now follow the 5th step again and this time, search for the Credit card autofill ablation experiment flag.
- Expand the dropdown menu under Credit card autofill ablation experiment and select Enabled/Disabled.
- Once done, relaunch Microsoft Edge and check if the issue at hand is resolved.
Hopefully, doing so will enable or disable autofill in Microsoft Edge.
2. Use Windows Registry.
If the Autofill feature in Microsoft Edge settings was greyed out on your PC, then using the Windows Registry can help you perform the desired task.
Before jumping into the steps, it is essential to know that Windows Registry is an administrative-level tool that stores low-level information for important Windows processes and programs.
We recommend being extremely careful while performing the steps mentioned below as even a slight error can cause serious issues within your PC.
Here is what you need to do:
- Open a Run dialogue box by pressing Windows + R keys simultaneously.
- Inside the text field of the dialogue box, type ‘regedit’ and hit Enter. Doing so will launch Windows Registry on your PC.

- In the newly launched window, navigate to the location mentioned below.
HKEY_LOCAL_MACHINE\SOFTWARE\Policies\Microsoft\Edge
- If you cannot locate an Edge key, right-click on the Microsoft key and select the New > Key option.
- Name this newly created as Edge.
- Now double-click on the Edge key and right-click anywhere in the right pane.
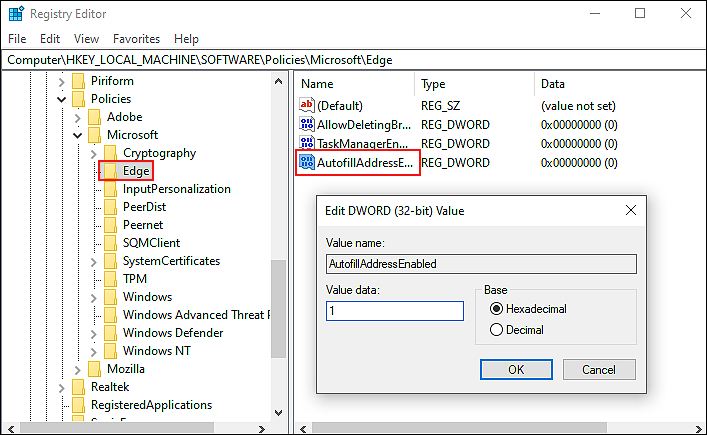
- Select the New > DWORD (32-bit) Value option and name this value as AutofillAddressEnabled.
- In case you want to enable the Address Autofill feature, double-click on AutofillAddressEnabled, and under Value data, type 1. If you want to want to disable it, type 0 under Value data.
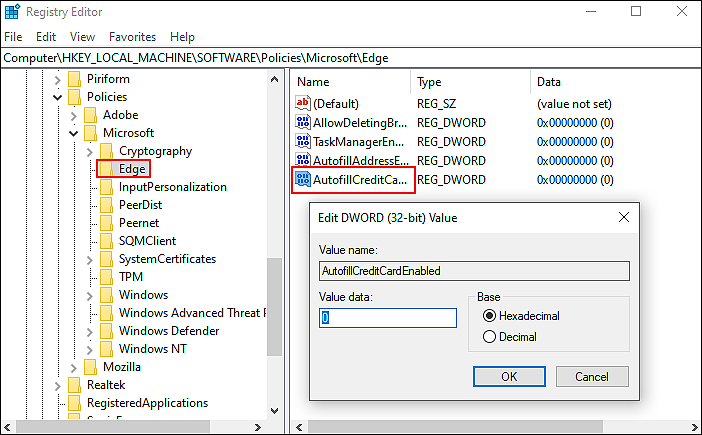
- Next, follow the 7th step again and this time, rename the key as AutofillCreditCardEnabled.
- In case you want to enable the Credit Card Autofill feature, double-click on AutofillCreditCardEnabled, and under Value data, type 1. If you want to want to disable it, type 0 under Value data.
- Finally, restart your PC.
This should enable/disable the Autofill feature in Microsoft Edge.
3. Try Using CleanMyPC.
You might experience difficulties performing any of the methods described in this guide on your PC if your operating system is infected by corruption errors.
The junk files within the operating system are typically the cause of these corruption errors and if you haven’t deep cleaned your PC in a long time, now might be the right time to do so.
The best way to remove these corrupt and unwanted files from your computer is by using an effective PC cleaner, and if you need a recommendation, we highly recommend CleanMyPC.

It features a wide range of system maintenance tools that are strong enough to handle much more than just cleaning problems. After using CleanMyPC, we noticed a dramatic increase in computer speed!
Install CleanMyPC now and get your PC up and running like new!
4. Use the Local Group Policy Editor.
Like Windows Registry, the Group Policy Editor is also an administrative-level tool that allows the users to customize the functions and processes of Windows according to their preferences.
Information about Windows programs is stored as policies in the Group Policy Editor and by modifying the relevant policies, you can make the desired changes.
Here is how you can enable/disable the Autofill feature of Microsoft Edge using the Group Policy Editor:
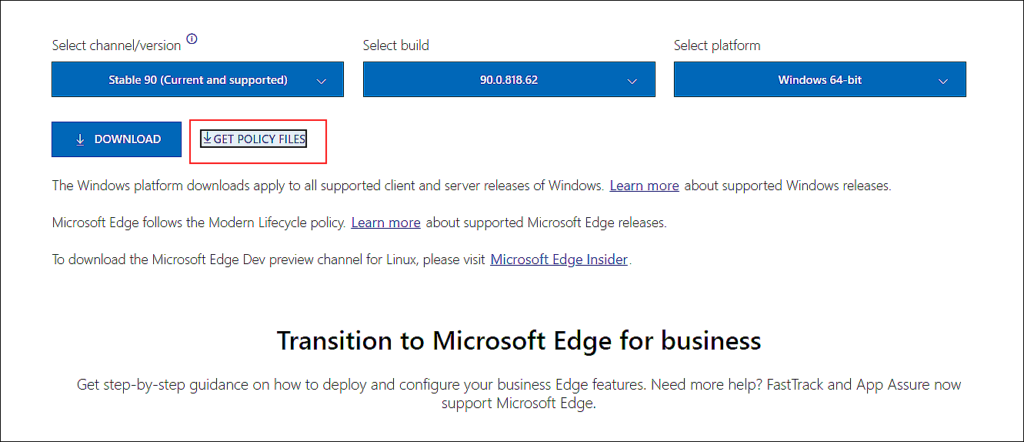
- Visit Microsoft’s official website.
- Scroll down the window and select the version details of your Microsoft Edge.
- Click the GET POLICY FILES button to download the policy files.
- Once the download is complete, extract the downloaded file and then open the folder.
- In the folder, navigate to the location mentioned below.
MicrosoftEdgePolicyTemplates\windows\admx
- Copy the msedge.admx and msedge.adml files and paste them in the C:\Windows\PolicyDefinitions folder.
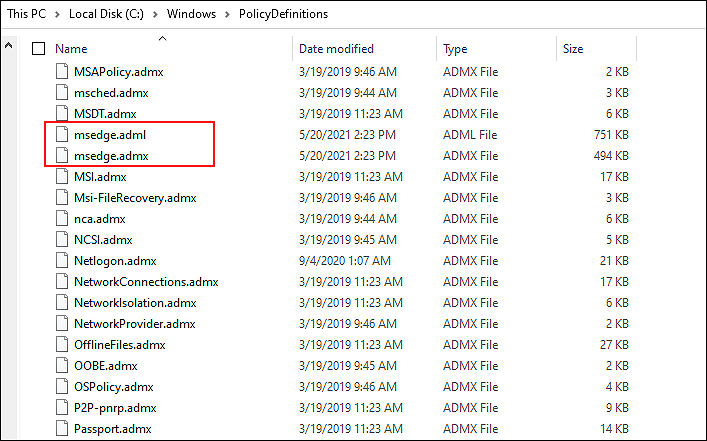
- Once you have pasted the files, restart your PC.
- Upon reboot, open a Run dialogue box by pressing Windows + R keys on your keyboard simultaneously.
- Inside the text field of the dialogue box, type ‘gpedit.msc‘ and hit Enter. Doing so will launch the Group Policy Editor on your PC.

- In the Group Policy Editor window, navigate to the location mentioned below.
Computer Configuration\ Administrative Templates\ Microsoft Edge
- In the right pane, locate Configure Autofill and double-click on it.
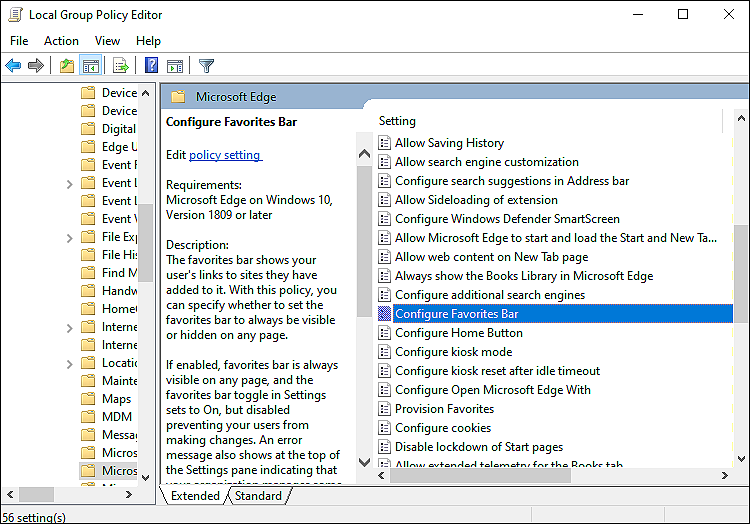
- Select Enabled to enable the feature and Disabled to disable it.
- Finally, click on Apply to save the changes.
That’s it.
This should help you enable or disable autofill in Microsoft Edge successfully.
This brings us to the end of our guide on enabling/disabling autofill in Microsoft Edge. We tried walking you through all the steps in detail and hope that one of the methods mentioned above did the trick for you. In case you still have any confusion about the methods, please let us know in the comment section below!
If this guide helped you, please share it. 🙂
