

Wondering how to enable or disable check boxes to select items in Windows 11?
Windows’ checkmark and checkboxes enable users to quickly select multiple files and folders. Known as “Item check boxes” in Windows 11, this feature lets you checkbox all icons on your desktop and folders in File Explorer when enabled.
All that you need to do is move the mouse cursor over an icon, and a checkbox will appear. Using the checkbox, you can select multiple icons at a time.
This feature is disabled by default in Windows but fortunately, it is customizable. This means that you can enable or disable checkboxes to select items in Windows 11 in a few easy steps. In this guide, we will walk you through the steps of doing so in detail.
Let’s get started!
1. Use Command Bar.
In Windows 11, Microsoft has scrapped the conventional ribbon that appeared on the top of File Explorer off and has replaced it with a command bar. The command bar is equipped with both basic and advanced tools, just like the old ribbon.
In this method, we will use the command bar to modify settings related to checkboxes.
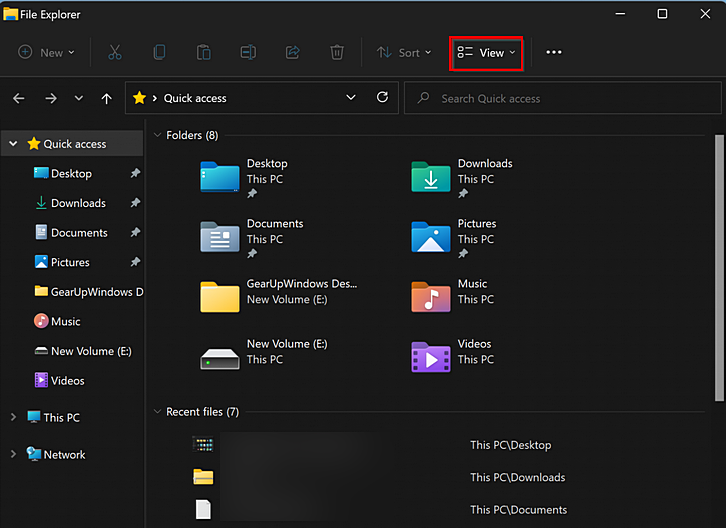
- Press Windows + E keys simultaneously on your keyboard to open File Explorer.
- Locate View on the ribbon menu and click on it.
- Now click on Show and then select Item checkboxes to enable the selection checkboxes on Windows 11.
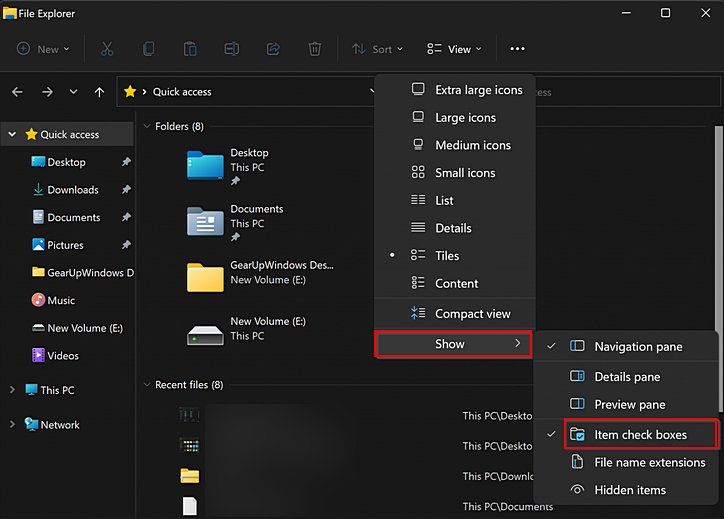
This should make the desired changes.
2. Use Folder Options Menu.
Another easy way to enable or disable checkboxes to select items in Windows 11 is by modifying the Folder Options menu.
File Options is a dialog that allows you to modify the settings and preferences of Windows 11’s file manager. You will find three tabs in this dialog: General, View, and Search. Your changes here will affect all folders.
- Press Windows + R keys simultaneously on your keyboard to open a Run dialogue box.
- Inside the text field of the dialogue box, type control.exe folders and hit Enter to launch File Explorer Options.
- Inside the File Explorer Options menu, navigate to the View tab, and under Advanced settings, uncheck/checkmark the box associated with Use check boxes to select items.

- Click on Apply to save the changes you just made.
As simple as that!
3. Try Using CleanMyPC.
It may be that your system has become corrupted if, after following both steps in this guide, you are still unable to perform the desired action.
Before you follow this guide, you should perform a deep cleaning in order to eliminate any bugs or errors. It may be beneficial to use a good PC cleaner in this scenario, as manual cleaning can be time-consuming and energy-intensive.
In case you’ve never used a PC cleaner before, we recommend CleanMyPC.

CleanMyPC helps you solve all PC problems fast and efficiently. It comes with a wide range of tools that include (but are not limited to) a multi-uninstaller, speed boost, and registry cleaner. These tools can optimize your system and fix most problems.
If this looks like something your PC desperately needs, install CleanMyPC now and get your PC up and running like new!
4. Create a .BAT file.
There is a plain text file called .BAT that contains repetitive commands or scripts that runs one after another. A .BAT file is used by all types of software for different purposes, such as copying or deleting files, running applications, or halting processes.
In this method, we will create a .BAT file to make the desired changes. This method is a little complex, so make sure you follow all the steps carefully.
Here is what you need to do:
- Press Windows + R keys simultaneously on your keyboard to open a Run dialogue box.
- Inside the text field of the dialogue box, type notepad and press Ctrl + Shift + Enter keys together to launch Notepad with administrative privileges.
- Inside the Notepad window, paste one of the following commands according to your preferences.
Turn ON The use of Checkboxes to Select Items:

REG ADD "HKCU\SOFTWARE\Microsoft\Windows\CurrentVersion\Explorer\Advanced" /V AutoCheckSelect /T REG_DWORD /D 1 /F
taskkill /f /im explorer.exe
start explorer.exe

Turn OFF the use of Checkboxes to Select Items:

REG ADD "HKCU\SOFTWARE\Microsoft\Windows\CurrentVersion\Explorer\Advanced" /V AutoCheckSelect /T REG_DWORD /D 0 /F
taskkill /f /im explorer.exe
start explorer.exe
- Click on File from the ribbon menu and select Save As.
- Save the file on your preffered location and expand the drop-down menu against Save as type.
- Select All Files and make sure that the name of the file ends with .bat.
- Hit Enter to save the changes and once the file is saved, navigate to the location where you saved it.
- Right-click on the file and select Run as adminsitrator and wait until the .bat file is successfully processed.
Once done, restart your PC.
This brings us to the end of our guide on ways to enable or disable check boxes to select items in Windows 11. We tried walking you through all the steps in detail and hope that one of the methods mentioned in this post did the trick for you. In case you still have any confusion about the steps, please let us know in the comment section below!
If this guide helped you, please share it. 🙂
