

Wondering how to enable or disable startup apps in Windows 11?
There are several programs that start automatically when the system is turned on. Despite the fact that that can be convenient in some cases (it is nice not to have to open cloud storage services each time), many of the programs launching at startup are unnecessary.
Further, your startup apps list can grow over time, which may slow down your boot time, decrease battery life, and impair overall performance. Luckily, Windows 11 allows you to enable and disable startup programs according to your preferences.
Nevertheless, you should be aware that disabling antivirus programs and other critical programs can actually harm your system. Therefore, you should identify the non-critical programs that should not run at startup before proceeding.
In this guide, we will walk you through several ways of enabling and disabling the startup programs in Windows 11. All the methods we have discussed below are easy to perform, and should not take much of your time.
Let’s get started!
1. Use Windows Task Manager.
Task manager is a built-in Windows utility that reports the status of the programs that are running on your operating system.
With it, you can see the overall performance of the computer and the tasks (processes) it is executing. It also allows you to view how much memory is being used by programs, stop frozen programs, and review available system resources.
In this method, we will modify the application settings using the Task Manager.
Here is what you need to do:
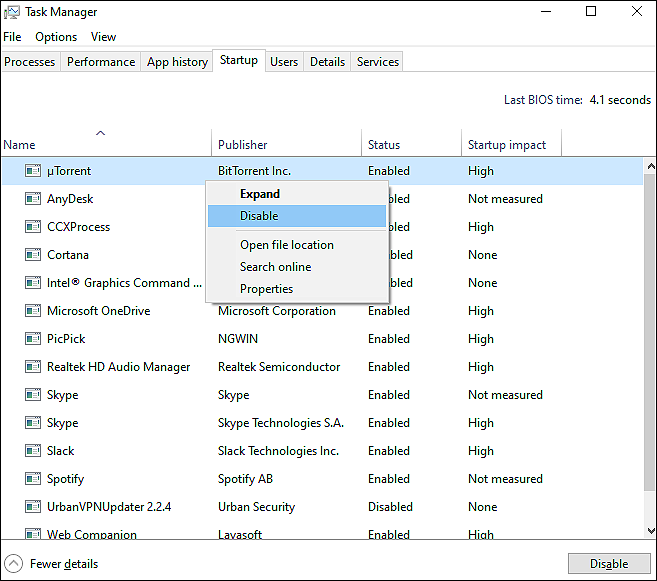
- Press Ctrl+Shift+Esc keys simultaneously on your keyboard to open Task Manager.
- Go to the Startup tab and select the service that you want to enable or disable.
- Click on the Enable/Disable button at the bottom of the window and close the Task Manager.
That’s it! This will allow/prevent apps from launching at startup on your PC.
2. Modify Windows Settings.
Another easy way of enabling and disabling the startup apps in Windows 11 is by modifying Windows Settings.
With the Settings app, you can customize every aspect of the way Windows 10 works. You can use it to install devices, change the keyboard language, customize your desktop wallpaper, upgrade Windows, and change startup sounds.
Here is how you can modify Windows Settings to make the desired changes:
- Press Windows + I keys simultaneously to open Windows Settings.
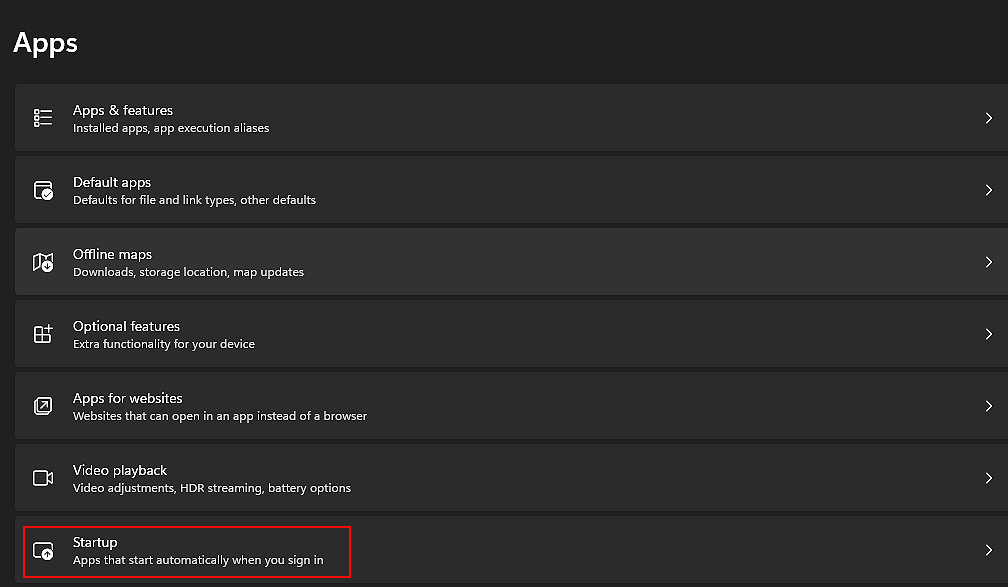
- In the Settings window, select Apps from the left panel.
- Now click on Startup in the right pane.
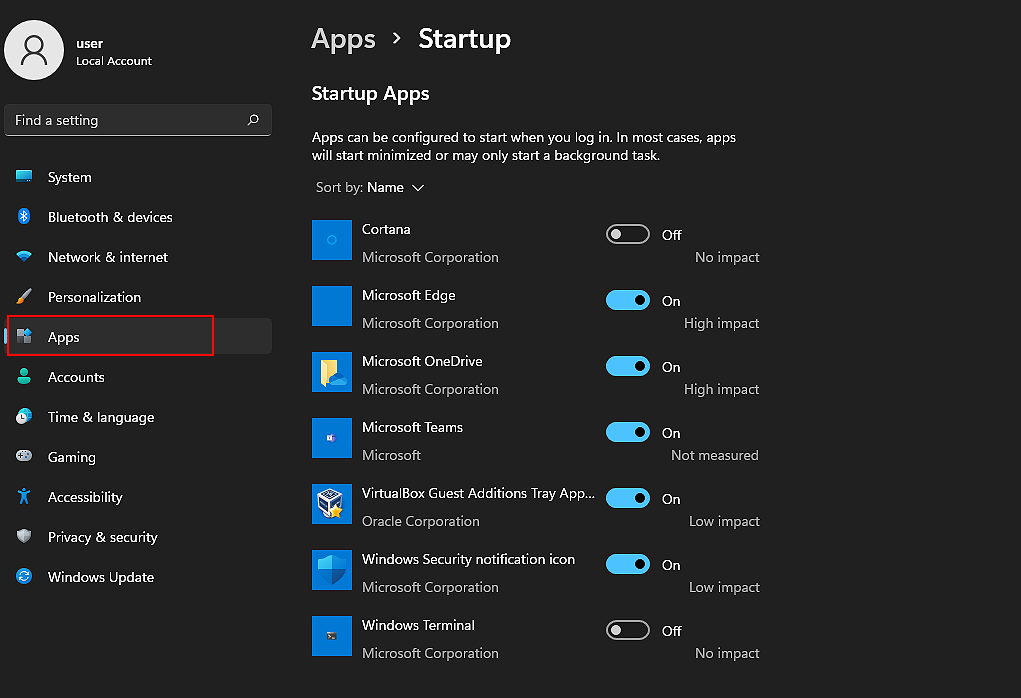
- Under Startup Apps choose the apps that you want to enable/disable and turn the toggle against them on or off.
Following the steps mentioned above should enable/disable startup apps without any issue.
3. Try Using CleanMyPC.
Your computer may have corruption errors that prevent certain features from working, making the steps outlined here ineffective. This scenario has a simple solution, so you do not have to be concerned.
All you need to have is a reliable PC cleaner that can scan your computer for issues, identify them, and fix them automatically. CleanMyPC does this all with little to no user input!

This program comes with a wide range of system maintenance tools. These tools can not only resolve the issue at hand but also other PC problems such as slow performance and long boot times.
The only thing you need to do is download CleanMyPC and run a scan. It will take care of the rest!
4. Change App’s Advanced Options.
You can also enable/prevent specific apps from launching at startup by modifying their advanced settings. This method is quite similar to Method 2 that we discussed earlier.
Here is all that you need to do:
- Press Windows + I keys simultaneously to open Windows Settings.
- Select Apps from the left panel and in the right pane, click on Apps & features.
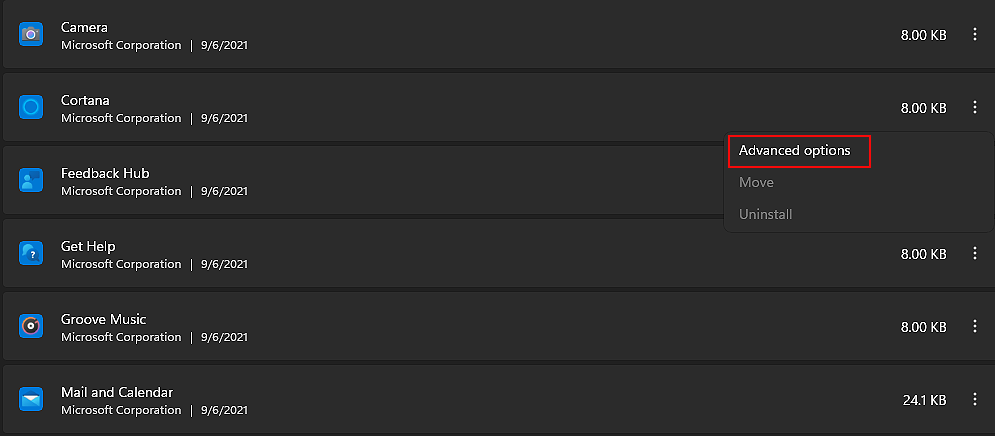
- Choose the app according to your requirements and click on the More button (3 dots) against it.
- Now select Advanced options.
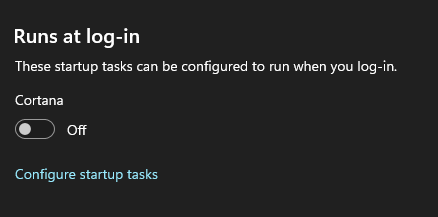
- Finally, in the next window, turn the toggle on or off under Runs at log-in.
Hopefully, following these steps will allow you to make the required changes in no time.
This brings us to the end of our guide on ways to enable or disable startup apps in Windows 11. We tried walking you through all the steps in detail and hope that one of the methods mentioned above did the trick for you. In case you still have any confusion about the methods, please let us know in the comment section below!
If this guide helped you, please share it. 🙂
