

Wondering how to enable or disable Windows sandbox in Windows 11?
If you have always been keen on trying and testing new software programs (including those with questionable sources), Windows Sandbox is something you should know about.
A Sandbox is a virtual machine that runs a separate kernel to isolate Windows Sandbox sessions from the host. This is accomplished using Microsoft’s hypervisor and hardware virtualization. Simply put, the purpose of this is to allow you to run applications and check risky websites that you might not normally want to use in your regular Windows environment.
In the event that any malware or other dangerous content appears, it remains in the Sandbox, keeping the rest of Windows safe. As soon as you are finished using the application, you can simply close the Sandbox, and all is gone and forgotten without any lasting effects.
In this guide, we will walk you through the steps of enabling and disabling Sandbox in Windows 11 in detail. The steps are quite simple, and should not take much of your time.
Let’s get right into it!
1. Enable or Disable Windows Sandbox in Windows Features.
The simplest method to enable/disable Windows Sandbox in Windows 11 is by modifying the Windows Features dialogue.
Windows comes with a number of optional features (such as Sandbox) that you can enable through the Windows Features dialogue. You can also disable the features that are enabled by default in Windows here.
Here is what you need to do:
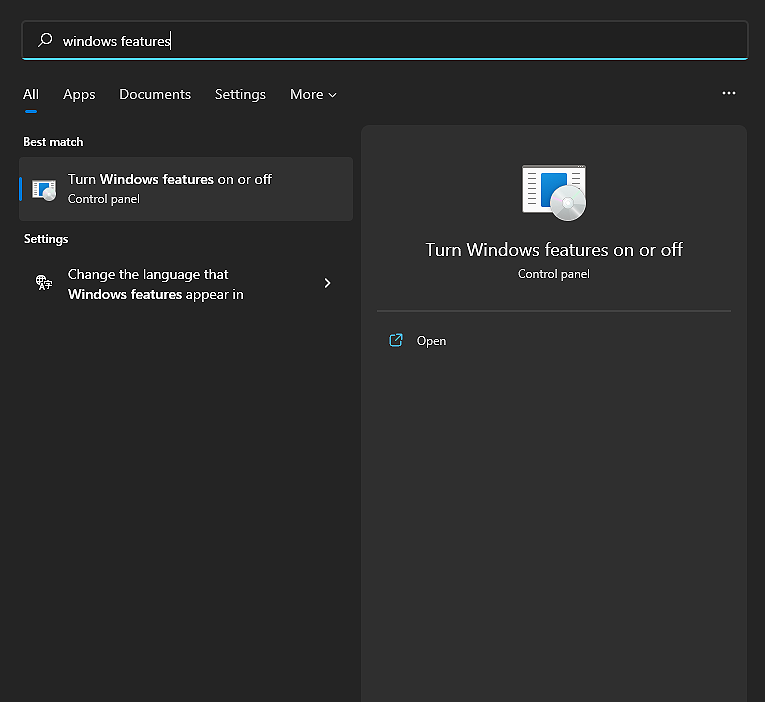
- Type Turn Windows features on or off in the search bar and hit Open.
- Inside the newly launched window, locate Windows Sandbox and uncheck the box associated with it.
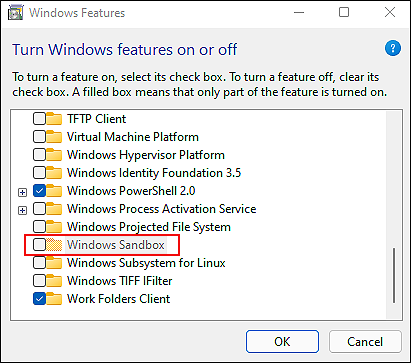
- Click on OK to save the changes and close the window.
This should make the desired changes in no time.
2. Enable or Disable Windows Sandbox in PowerShell.
The Windows PowerShell Framework provides a command-line shell and an associated scripting language for automating tasks. It automates a number of tedious or time-consuming administrative tasks, as well as helps with finding, filtering, and exporting information about the computers on a network.
Here is how you can use Windows Powershell to make the desired changes:
- Press Windows + R keys simultaneously on your keyboard to open a Run dialogue box.
- Inside the text field of the dialogue box, type ‘powershell‘ and press Ctrl + Shift + Enter keys together to launch elevated PowerShell.
- Once you are inside the Powershell window, copy and paste one of the commands mentioned below according to your preferences. Hit Enter to execute it.
Enable Windows Sandbox

Enable-WindowsOptionalFeature -Online -FeatureName "Containers-DisposableClientVM" -All

Disable Windows Sandbox - default

Disable-WindowsOptionalFeature -Online -FeatureName "Containers-DisposableClientVM" -Online
- Once the command is executed, restart your PC.
Once you restart your PC, the Windows Sandbox should be enabled/disabled.
3. Try Using CleanMyPC.
In the event that you have attempted the steps described in this guide and are still unable to achieve the desired result, your system may be corrupt.
In order to proceed with this guide, you should thoroughly clean your computer. Cleaning your computer will remove any viruses and corruption errors. A good PC cleaner can be very helpful in this case since manual cleaning can be quite time-consuming.
In case you’ve never used a PC cleaner before, we recommend CleanMyPC.

CleanMyPC allows you to fix all kinds of PC issues in a quick and efficient manner. The program includes many tools, such as a Multi-Uninstaller, a Speed Booster, and a Registry Cleaner, which allow you to fix the majority of problems with your system and enhance its performance.
Install CleanMyPC now to get your PC back up and running like new!
4. Enable or Disable Windows Sandbox in Command Prompt.
Quite similar to Windows Powershell, the Command Prompt is a command-line interpreter present in Windows operating systems. In this method, we will execute relevant commands in the Command Prompt to enable/disable Windows Sandbox.
Here is what you need to do:
- Press Windows + R keys simultaneously on your keyboard to open a Run dialogue box.
- Inside the text field of the dialogue box, type ‘cmd‘ and press Ctrl + Shift + Enter keys together to launch elevated Command Prompt.
- Once you are inside the Command Prompt window, copy and paste one of the commands mentioned below according to your preferences. Hit Enter to execute it.
Enable Windows Sandbox

Dism /online /Enable-Feature /FeatureName:"Containers-DisposableClientVM" -All

Disable Windows Sandbox - default

Dism /online /Disable-Feature /FeatureName:"Containers-DisposableClientVM"

Hopefully, the steps mentioned above will enable/disable Sandbox without any issues.
This wraps up our guide on enabling and disabling the Windows Sandbox in Windows 11. We hope that one of the methods mentioned in this guide did the trick for you. If you have any questions regarding the methods listed above, please let us know in the comment section below.
If this guide helped you, please share it. 🙂
