

Is your screen displaying the error code ‘DISM Error 1910’ upon your attempt to run DISM scans?
Windows contains a number of built-in troubleshooting utilities and scanners that help the users resolve the issues and optimize the performance of the operating system.
One such administrative-level command-line executable is the Deployment Image Servicing and Management (DISM). Users use it to repair Windows image and restore the overall health of the operating system.
However, unfortunately, even the troubleshooting utilities of Windows are not error-free.
Recently, several users reported that their screens display the error code ‘DISM error 1910’ whenever they attempt to try to repair Windows image on their PC. We had a look into this matter and found out that the error can be caused by a number of reasons, including software conflict, corrupt system files, and DISM inconsistency.
If you are facing a similar issue, you are in the right place because in this guide, we will walk you through all the relevant troubleshooting steps in detail.
Let’s get started.
1. Run an SFC Scan.
One of the most common reasons behind the DISM error 1910 is the corrupt system files residing in the operating system.
Files can become corrupt due to a number of reasons, and the easiest way to resolve them is by running an SFC scan on your computer.
System File Checker (SFC) is an advanced tool that is specifically designed to scan the system’s protected files and eliminate issues within them, so if a corrupt system file is causing the issue at hand on your PC, running an SFC scan should help you.
Here is what you need to do:
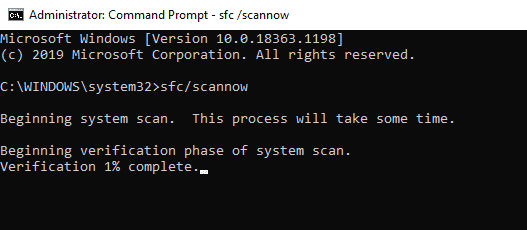
- Type cmd in the search bar and click on Run as administrator to launch elevated Command Prompt.
- Inside the Command Prompt window, type the command mentioned below and hit Enter to execute it.
sfc /scannow
- Once the scan is complete, restart your PC and then try to use DISM again.
Hopefully, running an SFC scan will resolve the DISM error code 1910.
2. Perform a System Restore.
If your computer started displaying the DISM error 1910 after you installed a new program or installed an update, then there is a high chance that the new program/update is the culprit behind the error under consideration.
Luckily, the System Restore feature allows you to revert the changes whenever needed.
System Restore typically creates snapshots of Windows before performing critical updates and installing important programs. Several users were able to resolve the issue at hand by using System Restore, which is why we encourage you to give it a shot.
However, this method will only work for the users whose operating systems have created restore points. If yours hasn’t, jump to the next troubleshooting method below.
3. Try Using CleanMyPC.
As we discussed earlier, corruption errors and bugs within the operating system can frequently cause errors like the one under consideration. If running an SFC scan did not resolve the issue, a reliable PC cleaner may be able to help you.
PC cleaners scan through your system and its programs, including Windows Registry, to identify damaged or corrupted files, and then attempt to repair them with little to no user input. But you must ensure that the PC cleaner you are using can perform such advanced functions.
For those who have trouble finding an effective cleaner, we recommend CleanMyPC.

CleanMyPC comes with a full suite of system-maintenance utilities designed to fix even complex problems with PCs such as privacy issues and slow performance.
If this is something your PC is in desperate need of, install CleanMyPC now and give your PC a much-needed performance boost.
4. Perform an In-place Repair Upgrade.
If none of the methods listed above worked for you, there is a chance that a corruption error has infected your operating system, and it cannot be resolved by conventional troubleshooting methods.
The best thing that you can do in this situation is to perform an upgrade in-place, as this will repair the issues within Windows without harming your data.
Here is what you need to do:
- Download Media Creation Tool.
- After successful installation, open the app and click on Upgrade this PC now.
- Follow the instructions on the screen.
- In the Ready to Install window, select the items you want to keep on your PC after installation.
- Click Next and follow the instructions visible on the screen to start Windows installation.
That’s it.
This should resolve the issue once and for all.
This brings us to the end of our guide on fixing the error code ‘DISM Error 1910′ in Windows 10. We tried walking you through all the steps in detail and hope that one of the methods mentioned above did the trick for you. In case you still have any confusion about the methods, please let us know in the comment section below!
If this guide helped you, please share it. 🙂
