Is your wired ethernet not working on Mac?
These days, many people are used to connecting to the internet via Wi-Fi. But hardwired ethernet cable connection is faster, more secure, and more reliable. That’s why it’s a shame if you suddenly lose that ethernet connection option on your Mac.
There are several possible culprits behind this issue. Your computer probably has a software problem, which may require some updates and workarounds. Do not rule out hardware issues, too. The cable or port probably needs repair or replacement.
No matter the cause, we’re here to help. We’ve listed several solutions in this article. Each solution comes with step-by-step instructions for your convenience. Here’s how to resolve the issue of ethernet not working on Mac.
Let’s get right to it!
1. Check Your Cable.
One of the first things to check is the ethernet cable itself. See if there are signs of damage, like scorch marks or twists. Replace the cable if it looks damaged.
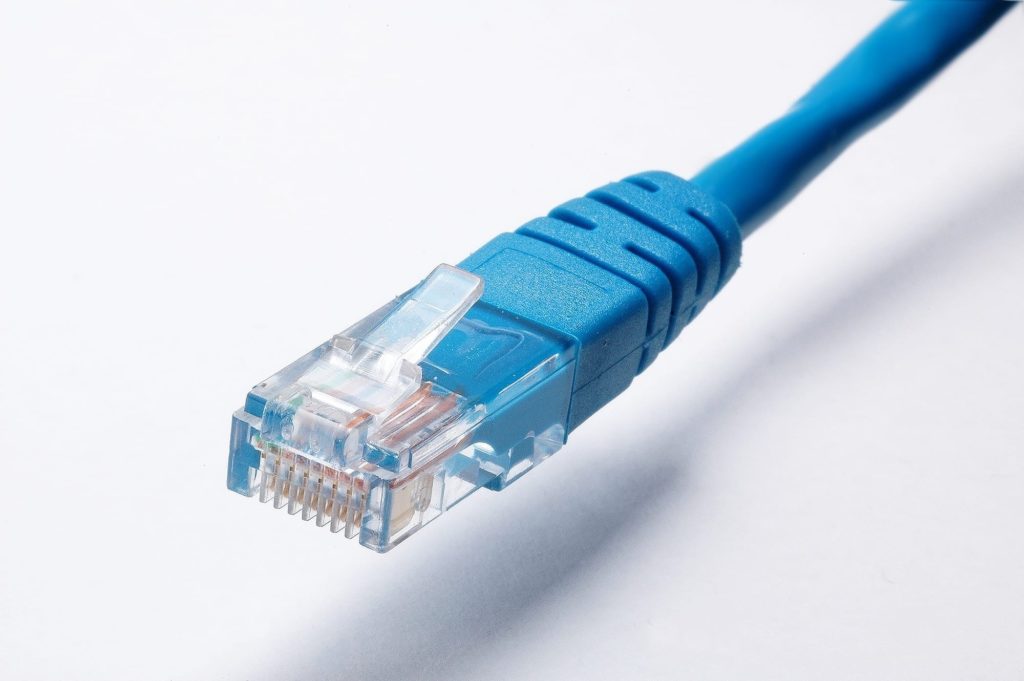
See if your ethernet works after using a different cable. Otherwise, try disconnecting and reconnecting the current cable a few times. That’s to ensure a firm and proper connection between your Mac and a router device. You can also try plugging the current cable into a different computer or port to check if it’s the root cause.
2. Ensure Settings Are Correct.
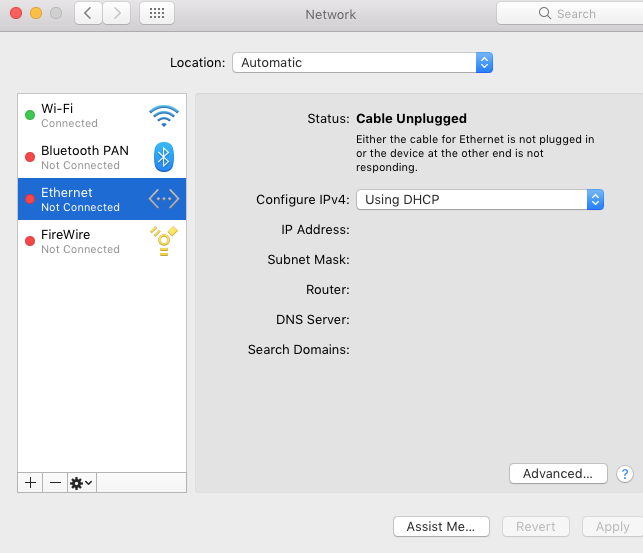
Does your ethernet cable look fine? The next thing to check is your network settings. Make sure you’ve selected Ethernet, not Wi-Fi. Incorrect settings could explain why you can’t go online via a wired connection no matter how many times you try.
Here’s how to check your network settings:
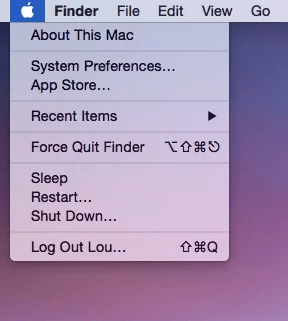
- Start by clicking the Apple menu on your Mac’s home screen.
- Next, choose System Preferences.
- Then, click Network.
- On the left side of the screen, you’ll see a list of network services.
- Select Ethernet. If you don’t see this option, click the Add icon. Enter the settings for your ethernet connection. Click Advanced to enter more detailed settings. Contact your service provider if you want to configure the settings.
Now, see if you can go online by connecting to ethernet. If not, try our next solution.
3. Use Terminal to Restart Ethernet That’s Not Working on Mac.
Got a working cable and correct network settings? It’s time to try restarting your Mac’s wired network interface. This trick helps eliminate any random bugs or garbage memory that might have been affecting your Mac’s capabilities to connect to the ethernet.
Here’s how to do it:
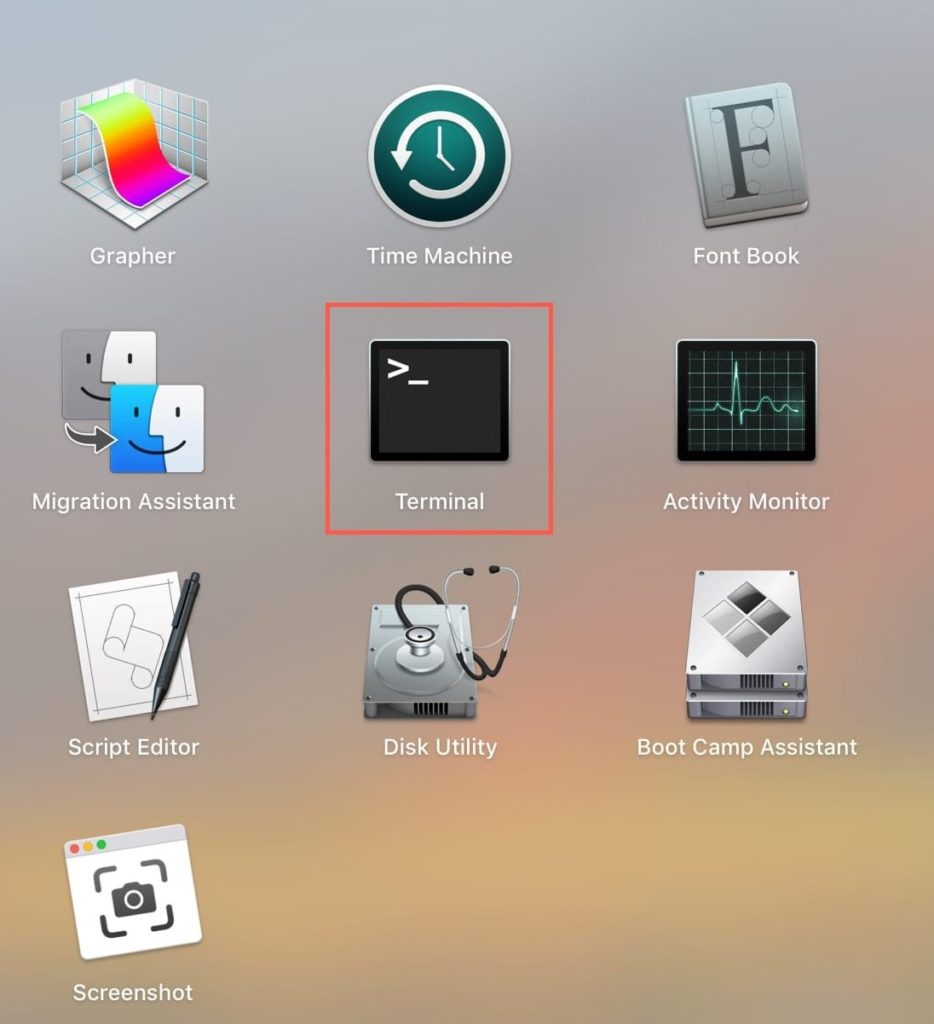
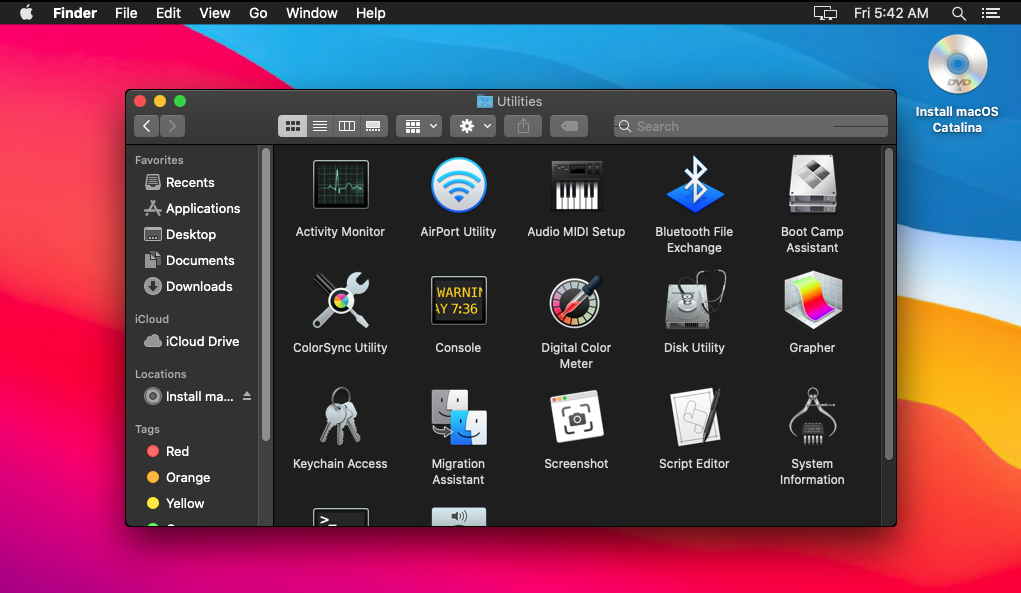
- First, launch the Finder app on your Mac.
- Select Applications. Then, click Utilities.
- Find and open the Terminal icon.
- Next, type this command: sudo ifconfig en0 down. Then, press Enter. (Note: en0 is the name of the wired network interface. Check yours by going to Apple Menu > About This Mac > System Preferences. Then, click Network on the left sidebar. You’ll see the name of the ethernet on the list on the right.)
- Type your password if prompted.
- Next, type this command: sudo ifconfig en0 up. Then, hit Enter.
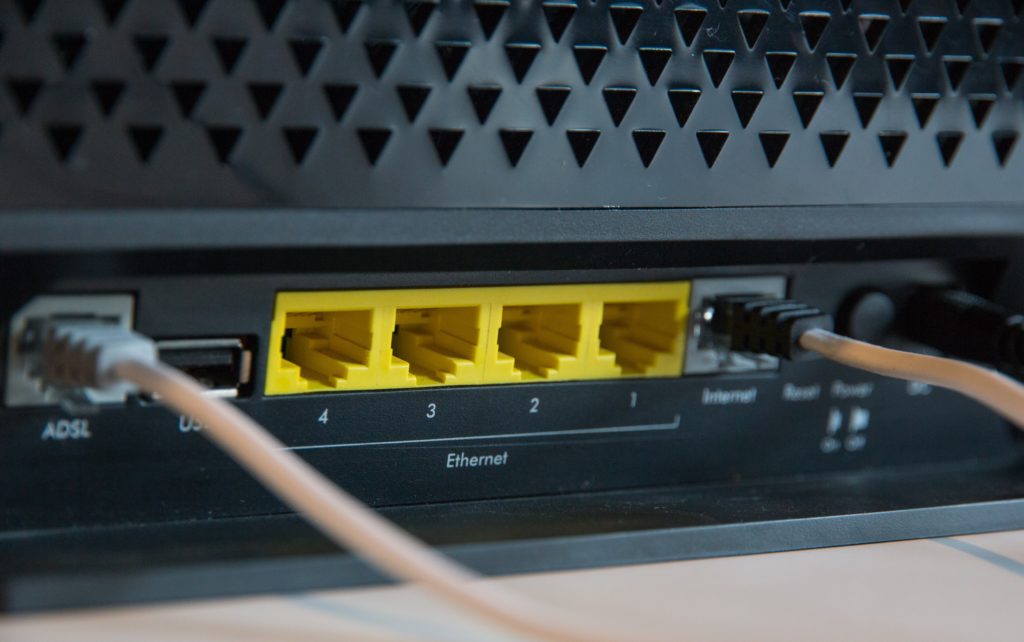
4. Reboot Modem and Mac to Fix Ethernet Issues.
Restarting ethernet didn’t work? Try rebooting your Mac and modem, too. The idea here is similar to restarting ethernet’s network interface. And that’s to refresh the capabilities of your devices to recognize and utilize a wired internet connection.
Restart your devices in this order:
- First, shut down your Mac.
- Then, switch your modem off.
- Wait for around 30 seconds.
- Switch your modem back on.
- Wait for the modem to turn on completely. See if all the lights are on.
- Lastly, turn on your MacBook.
Try to go online using the ethernet. Most users found this trick to work for them. But if that isn’t the case with you, we have a few more troubleshooting methods for you.
5. Re-Add Ethernet to Fix If It’s Not Working on Mac.
None of the above solutions worked? We’ve got another fix for you. Try to delete the ethernet service from your Mac and then re-add it. This trick will help get rid of random bugs or unnecessary setting changes that caused your ethernet problem.
Here’s how to remove and then re-add ethernet on your Mac:
- First, ensure the ethernet cable is plugged into your Mac. Check if the modem is working, too.
- Then, go to the Apple menu on your Mac.
- Select System Preferences.
- Next, click Network. On the right side, you’ll see a list of network services.
- Choose Ethernet. Then, click the Minus button at the bottom of the list.
- Click Apply to confirm the action.
- Now, go back to the list and select Bluetooth PAN. Click the Advanced button.
- Next, click the DHCP Lease button. Select OK and Apply.
- Reboot your Mac.
- Once your device is on again, navigate your way back to the Apple menu > System Preferences > Network.
- Click the Add button. On the pop-up box, click the dropdown menu. Choose Ethernet. Then, click Create and Apply.
- Wait for your Mac to connect to ethernet automatically.
6. Update the Kernel Extension.
If restarting and re-adding ethernet didn’t resolve the issue, it’s time to look at another software-related cause. Many Mac users reported that they suddenly couldn’t connect via ethernet. But the issue didn’t affect Wi-Fi and other types of wireless connectivity.
Do you experience the same thing? The kernel version on your Mac could be the culprit. Apple recommends checking what’s installed on your computer. Go to Apple Menu > About This Mac > System Preferences. The kernel version responsible for the ethernet issue is 3.28.1. If you see that on your Mac, you have to update to 3.28.2.
Since you can still connect to Wi-Fi, you can fix this issue with a single Terminal command. Here’s how to do it:
- Open Finder.
- Next, select Applications. Then, click Utilities.
- Click the Terminal icon.
- Then, type this command: sudo softwareupdate –background. Hit Enter.
- Close Terminal. Then, restart your computer.
If no Wi-Fi network is available, follow these steps to update your kernel version:
- Start by shutting down your Mac.
- Press the Power button. Then, hold the Command and R keys at the same time.
- The Apple logo will appear on the screen. A few seconds, your Mac will enter the Recovery Mode.
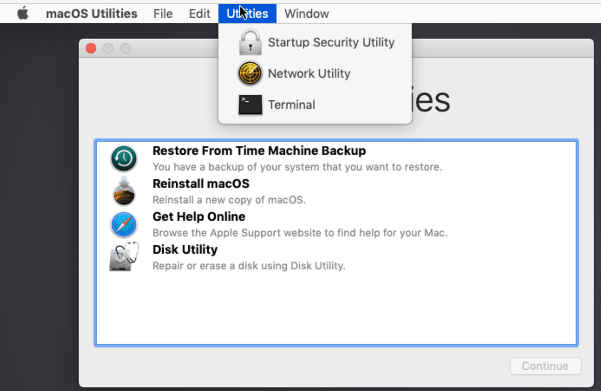
- Enter your password. That’ll prompt the macOS Utilities window to appear.
- Select Disk Utility. Then, select your drive. Macintosh HD is the default name of your drive. But you’ll see a different name if you moved or renamed it.
- Your drive is protected by FileVault if the drive name is gray. Select File. Then, choose Unlock from the Disk Utility. Lastly, enter your FileVault password.
- Next, choose File. Then, mount your drive by clicking Mount in Disk Utility.
- Quit Disk Utility.
- You’ll go back to the macOS Utilities window. This time, look at the menu bar at the top and select Utilities. Then, on the dropdown menu, choose Terminal.
- Type this command as one line: rm -rf “/Volumes/Macintosh HD/System/Library/Extensions/AppleKextExcludeList.kext”. Then, hit Enter. (Note: “Macintosh HD” is the drive name. Change that if you’ve altered your drive name.)
- Quit Terminal.
- Then, on the Apple menu, select Restart.
- At this point, your ethernet connection should work. Go online.
- Then, navigate your way to Finder > Applications > Utilities > Terminal.
- Type this command: sudo softwareupdate –background. Press Enter. This action assures you’ve updated your Mac’s kernel to the 3.28.2 version.
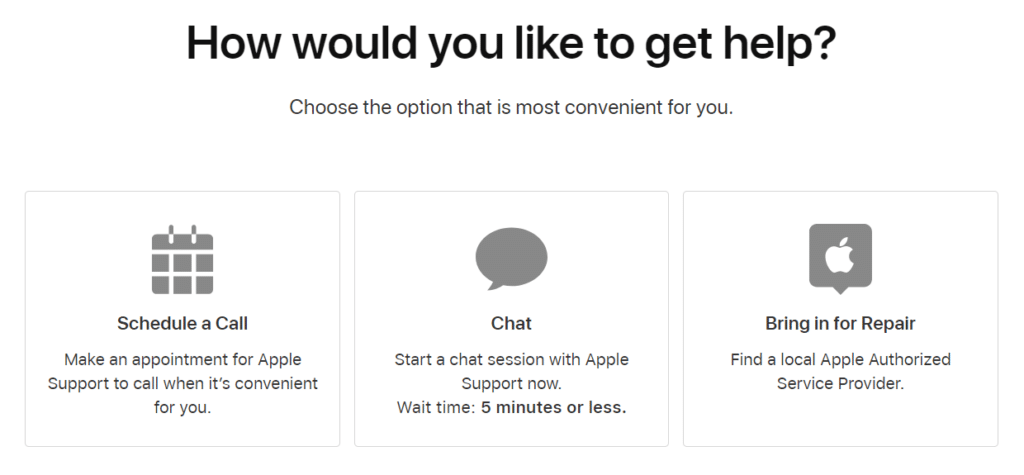
7. Contact Apple to Fix Ethernet That’s Not Working on Mac.
If all else fails, it’s time to reach out to Apple. Your Mac probably has a hardware issue that requires repair or replacement. Get in touch with Apple via phone, live chat, or email. But it’s best to bring your Mac to the nearest Apple Store. That way, they can inspect the machine closely and advise you on what to do next.
This wraps up the article. We hope we’ve helped fix your ethernet issue. For more MacBook-related problems, write a comment below. Our team is ready to help you. We’re here to offer more troubleshooting tips to make your Mac experience great again.