

Wondering why your external hard drive is not mounting after macOS Ventura update?
Apple’s community page was flooded with user complaints regarding their external hard drive not mounting after a macOS Ventura update.
Some of these errors mentioned include access denied, drive not showing up, and more.
If you’re among the affected users, we got you covered.
In this guide, we will show you various ways how to troubleshoot this issue on macOS Ventura.
Let’s dive right in!
1. Restart Your Mac.
Starting with the most basic troubleshooting, give your Mac a restart if something is not working.
Restarting your computer should allow it to clear corrupted data from its memory. This should resolve temporary errors that prevent your external drive from being detected.
Here’s how you can restart your Mac:
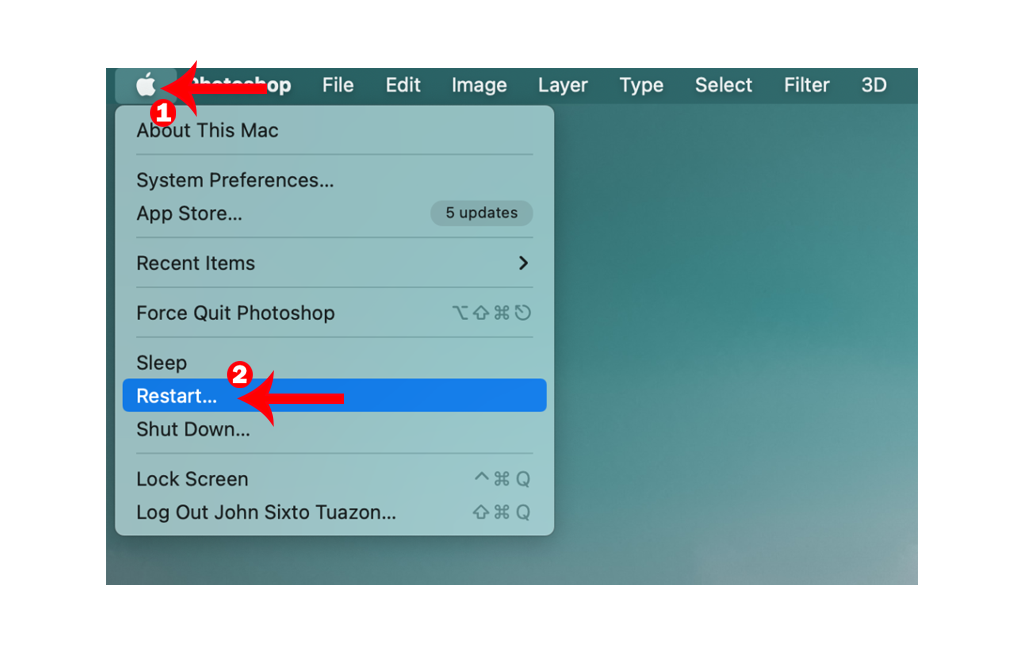
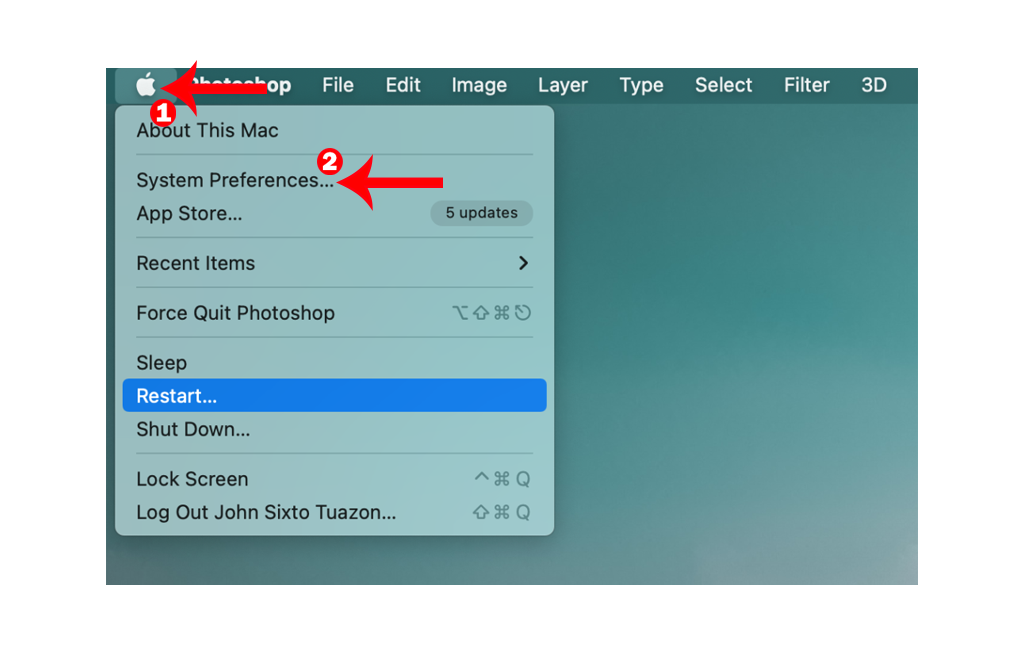
- Click on the Apple icon in the upper left corner of your screen.
- Now, choose the Restart option from the drop-down menu.
- Wait for the confirmation message and click Restart.
Once done, try accessing your external hard drive to check if the problem is solved.
2. Clean USB Ports and Connectors.
Ensuring that your computer ports and connectors are free from dust can help prevent connection issues.
If your external drive is not mounting, clean the connectors and USB ports.
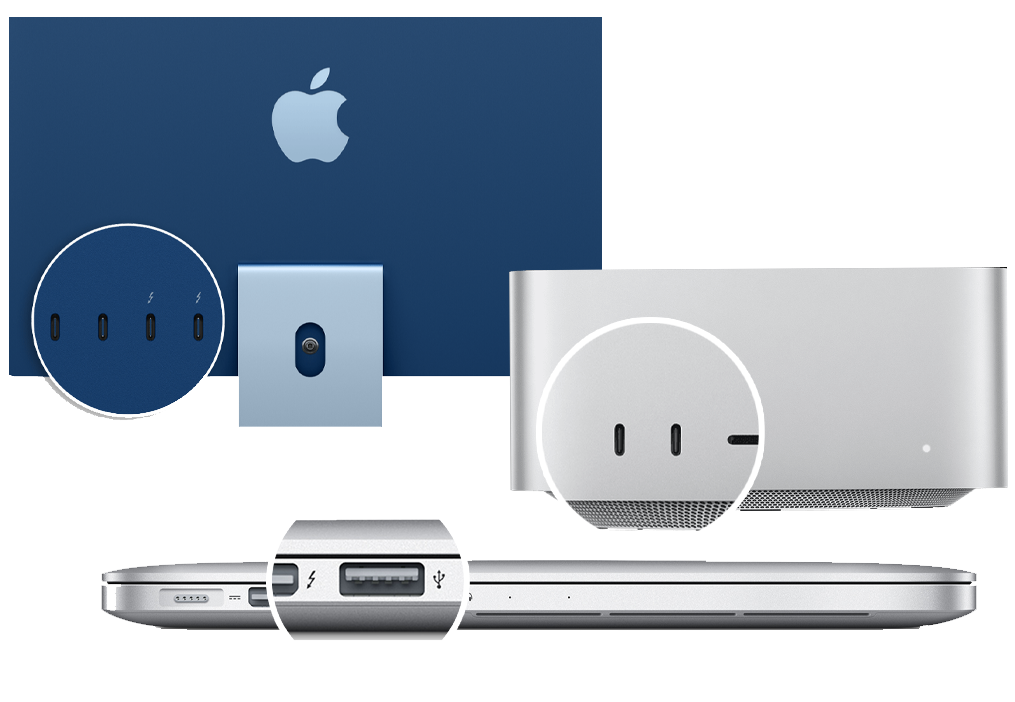
To clean your USB ports and connectors, you can use an air blower or a hair dryer within 4 to 5 inches away from the ports to blow away dust and debris.
Note
- Be careful not to use a hair dryer too close to your devices as it can damage the internal components.
- Avoid using cotton swabs to clean delicate ports on your Mac as they can cause damage.
If you are not comfortable cleaning your USB ports yourself, we suggest that you ask an authorized technician to do it for you.
3. Check Finder Options.
There’s an option to hide external drives in Finder. If this option is enabled, it might be the reason you can’t see your external hard drive.
Your external hard drive might be actually mounted and Finder is simply not showing it.
Here’s how you can confirm this:
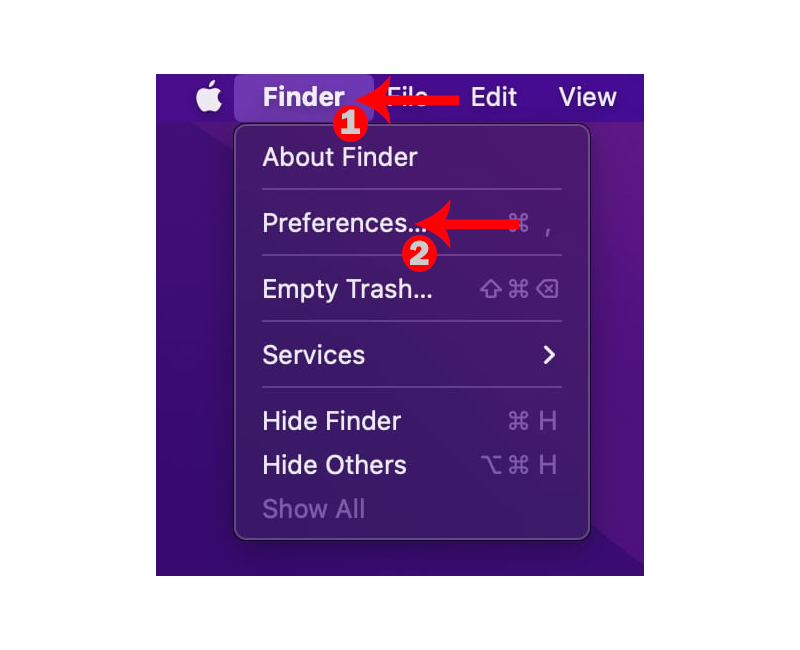
- Open Finder on your Mac.
- Next, click on Finder in the upper left corner.
- Choose Preference from the drop-down menu.
- Under General, look for the ‘Show this Items on the Desktop’ section.
- Ensure that the External Disks option is marked checked.

- Restart your Mac.
You should now see your external hard drive in the upper right corner of your desktop.
4. Format Your External Drive.
If you have just bought your external drive, it might be using a format that is not supported by macOS.
Follow the steps below to setup your external drive to a supported format:
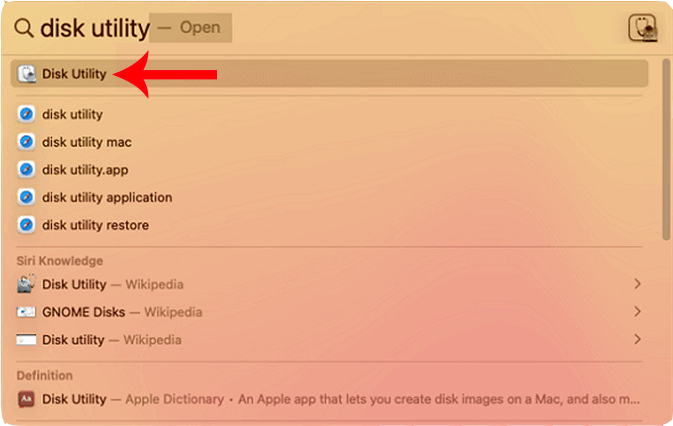
- Press Command + Space on your keyboard to open Spotlight.
- Now, search for Disk Utility and open it.
- On the top menu, click on View.
- Choose Show All Devices from the drop-down menu.
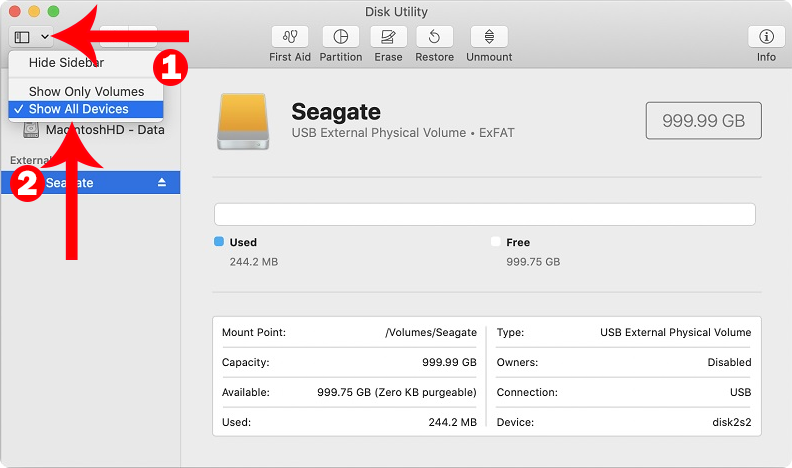
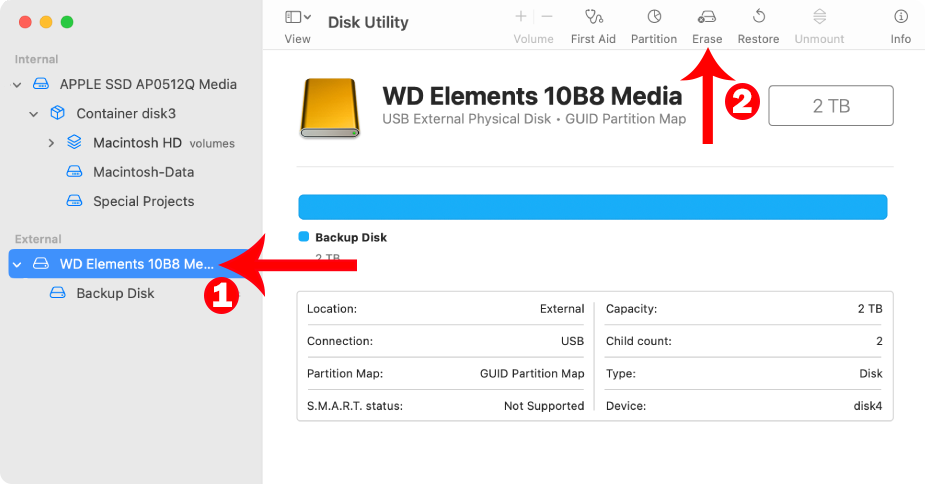
- Select your external drive in the side menu.
- Click the Erase option in the upper right corner of Disk Utility.
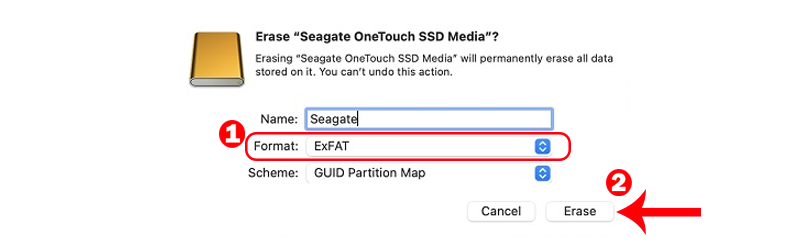
- In the pop-up menu, click on the Format tab and choose exFAT.
- Click on Erase to start the process.
Once done, your external hard drive should now be detected by your Mac.
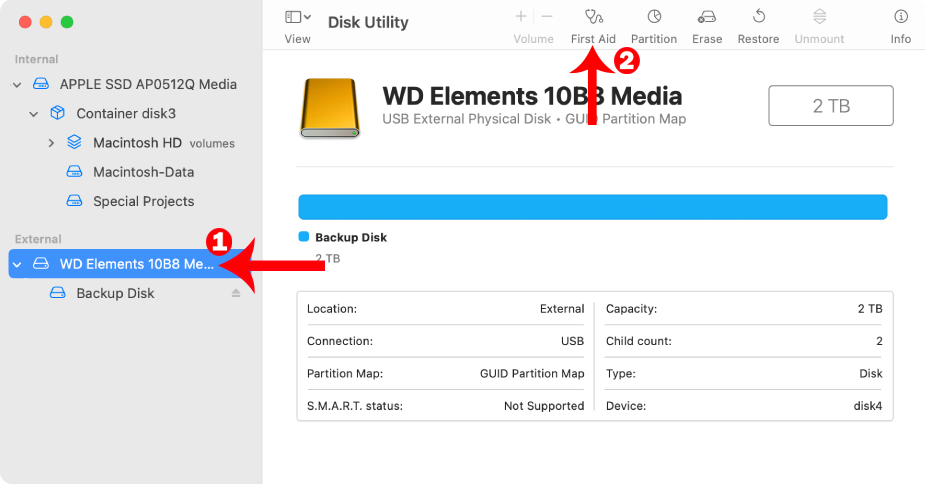
5. Repair Your External Drive.
First Aid is a tool in macOS that automatically scans your drive for errors and repairs them. If your drive is not mounting after an update, it’s possible that some resources got corrupted.
Follow the steps below to repair your external drive:
- On your keyboard, press the Command + Space keys to open Spotlight.
- Look up Disk Utility and open it.
- Under the External tab in the side menu, select your external hard drive.
- Now, click on First Aid in the upper right corner.
- Click Run in the confirmation box.
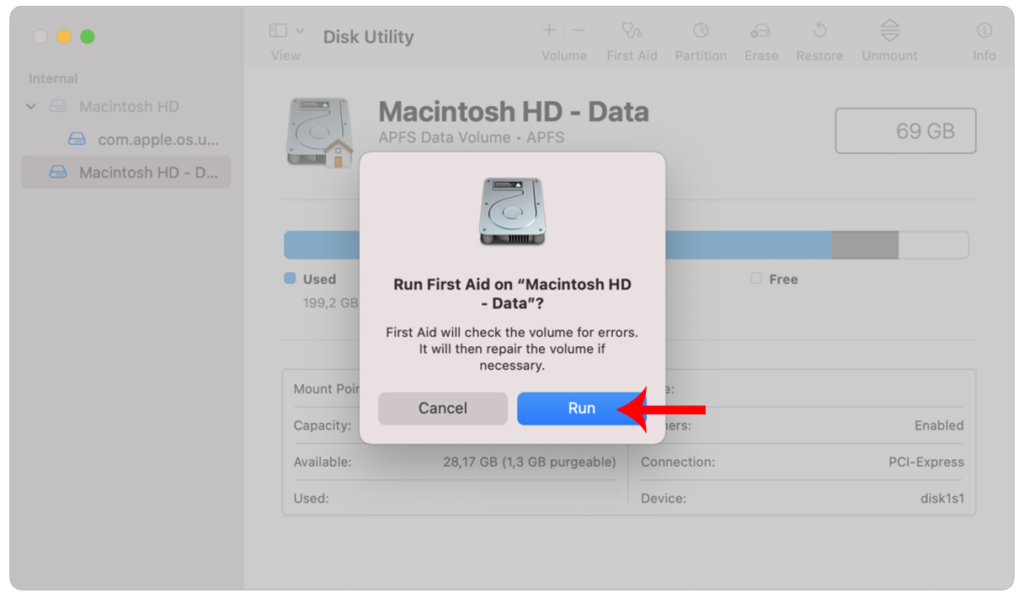
- Wait for the process to complete and click Done.
Try accessing your external drive using Finder to check if the problem is solved.
6. Use Third-Party Software.
NTFS is a file system widely used by Windows operating systems. However, you may encounter issues if you use an NTFS-formatted external hard drive on your Mac.
Unfortunately, macOS does not support the NTFS file system.
While you might be able to access files on an NTFS drive, you won’t be able to save changes to them. Creating new files on an NTFS drive is also not possible on macOS.
You can bypass this restriction through third-party software such as Paragon NTFS for Mac.
Through this software, you can easily manage NTFS hard drives without formatting them for macOS.
Note
- If you install a third-party NTFS software, you now rely on that vendor to keep the software updated for new releases of macOS.
- You may not be able to access your NTFS drives with newer versions of macOS until that vendor updates its software.
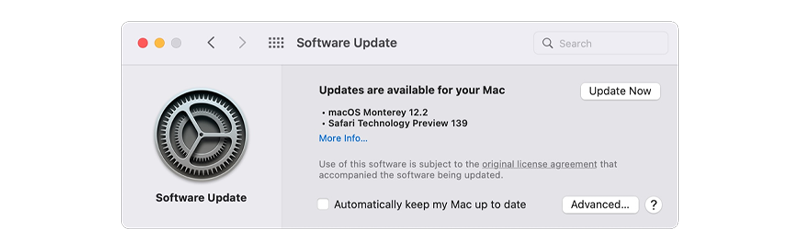
7. Update Your Mac.
The version of macOS you’ve installed might have an issue that is related to external storage management.
If this is the case, Apple might release another update to patch the problem.
See the steps below to update your Mac:
- Click on the Apple icon in the upper left corner of your screen.
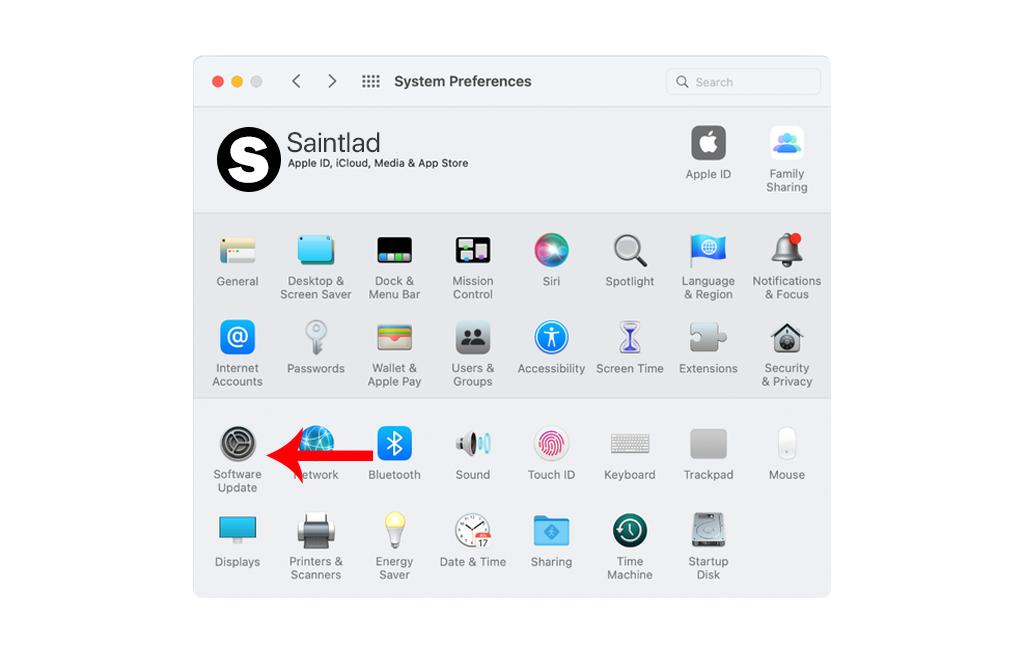
- After that, click on System Preferences.
- Open the Software Update tab.
- Click on Update Now or Upgrade Now if there’s an available update.
Note
- If you are using a MacBook, make sure that your battery is at least 50% charged. You can just leave it plugged into the wall outlet during the update.
- Your Mac can restart several times while installing the update.
- The update progress bar might also appear to be stuck. When this happens, don’t do anything. Software updates can take several minutes to complete.
Reconnect your external hard drive afterward to check if it mounts.
8. Reset System Management Controller.
The System Management Controller (SMC) is a chip on your Mac that handles power management, battery charging, and other hardware functions.
If your external hard drive is not mounting after a macOS Ventura update, an error may have occurred on your Mac’s SMC.
Resetting the SMC can help resolve external storage mounting issues on your Mac.
If you’re using a Mac with an M1 chip, here’s what you need to do:
- Make sure that your Mac is plugged into power.
- Now, click on the Apple icon in the upper left corner of your screen.
- Choose Shut Down and follow the prompts.
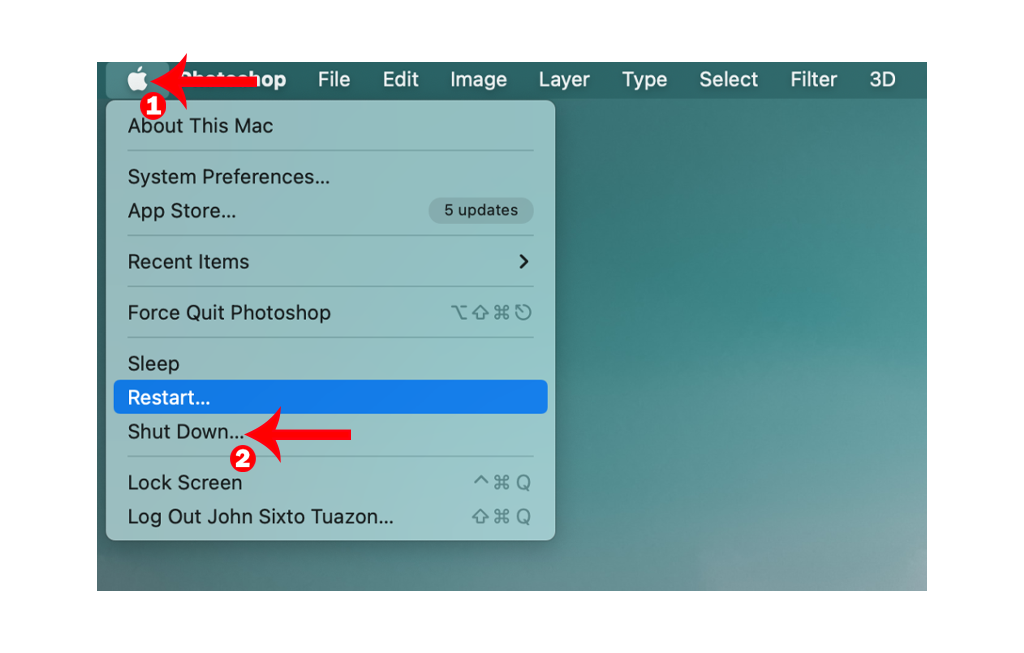
- After a few minutes, press the Power button to turn on your Mac.
For Macs with a T2 chip, follow the steps below to reset the SMC:
- Make sure that your Mac is turned off.
- On your built-in keyboard, press the Control (left) + Option (left) + Shift (right) keys for seven seconds.
- Now, press and hold the Power button while continuously holding the other keys.
- Keep holding all four keys for another seven seconds and release them.
- After a few more seconds, press the Power button to turn on your Mac.
Try accessing your external drive afterward to check if the problem is solved.
That’s everything you need to know on how to fix an external hard drive that is not mounting after a macOS Ventura update.
If you have other concerns, voice them out in the comment section, and we’ll do our best to respond.
