

Want to know how to find duplicate files on Windows 11?
Duplicate files can be pretty annoying, even if organizing things is not your cup of tea. Not only do they unnecessarily take up space in your computer, but they also overload the drive, reduce computer performance, and make searching through data quite strenuous. That said, it becomes vital to get rid of them.
These unwanted files can come into existence in a variety of ways. More often, they are a result of merging folders or drives, storing backups, or simply copying files from one location to another. Manually looking for them can be very time-consuming.
This is why it’s preferable to have an automated tool do the job for you. There are many of those tools available but be wary of ones that locate the duplicate files solely based on the file name. The best duplicate file finder tool will compare additional properties, including the file size and type.
So let’s look at how these tools can help you out!
1. Use Windows Explorer To Find Duplicate Files on Windows 11.
Microsoft doesn’t provide a separate software you can use to find duplicate files on your computer easily. Despite this fact, it does offer certain features to get yourself organized, which you can utilize to locate similar files based on their name.
This method is especially useful if you’re low on space and don’t want to download and install extra apps.
Here’s how you do it:
- First, click on Windows Explorer and go to the folder that has the target files.
- Now, you will see a Sort menu on the toolbar. Click on the drop-down symbol next to it.
- Then, you will come across a list of options you can organize these files. Click on Name, Size, or Type for more convenience.

From there, compare the files and delete the ones you find duplicated.
2. Use Command Prompt To Delete Duplicate Files on Windows 11.
By default, Windows will have a suffix -Copy at the end of files that are duplicates. They also contain a number representing how many times that file has been copied. This helps in finding them using the sort feature explained above.
However, if there are a number of copies, deleting these may seem like a never-ending task. Fortunately, you can make it easier for yourself by using the Command Prompt.
These are the steps you’ll need to follow:
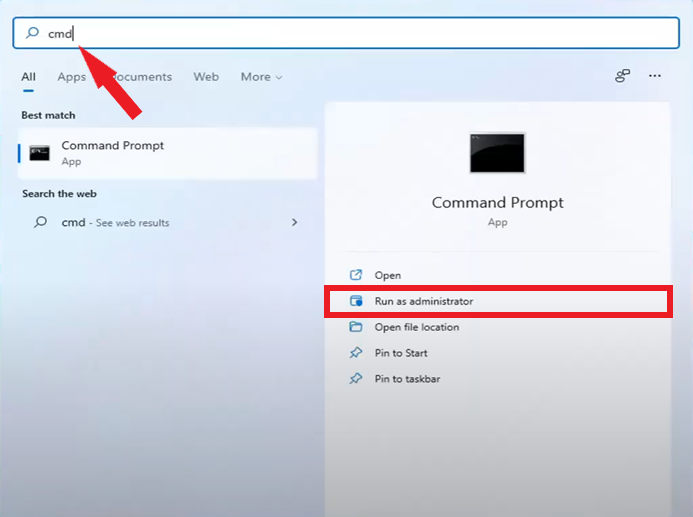
- Begin by clicking on the Start button at the bottom-left corner of the screen and type cmd in the search box.
- Then, click Run as administrator.
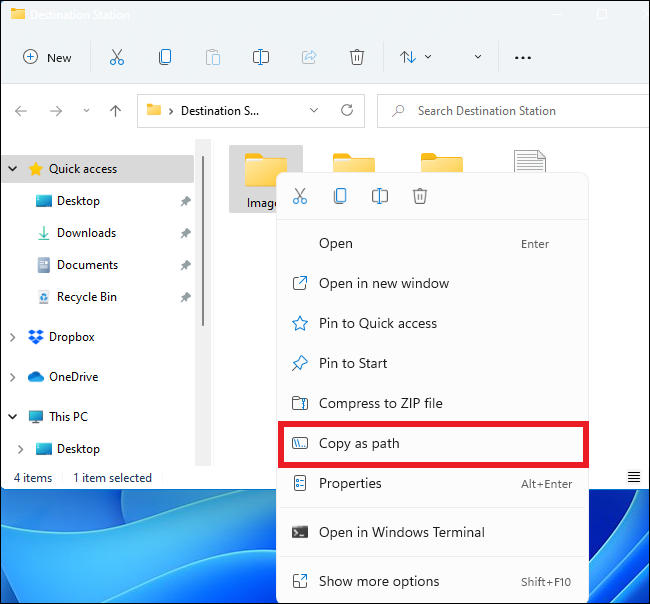
- Now, right-click on the folder containing the duplicate files you want to delete and select Copy as path.
- After that, replace the “folder-location” in the following with the file path you copied by simply pressing Ctrl + V in the Command Prompt and press Enter:
cd/d "folder-location"- Type the following and press Enter again:
del "* - Copy.jpeg"If the file name includes a number at the end or has a different file extension, change the command accordingly.
3. Use Duplicate Files Fixer.
This incredible software works by scanning files by name, size, and even dates they were created and/or modified. It also allows you to exclude specific folders and protect your data.
The Duplicates Files Fixer also works on Androids along with laptops or PCs. The software can be used to remove the copied files, even on Google Drive and Dropbox.
Here’s what you need to do:
- First, download and install the Duplicate Files Fixer on your computer by clicking here.
- Next, click Launch to open the app window.
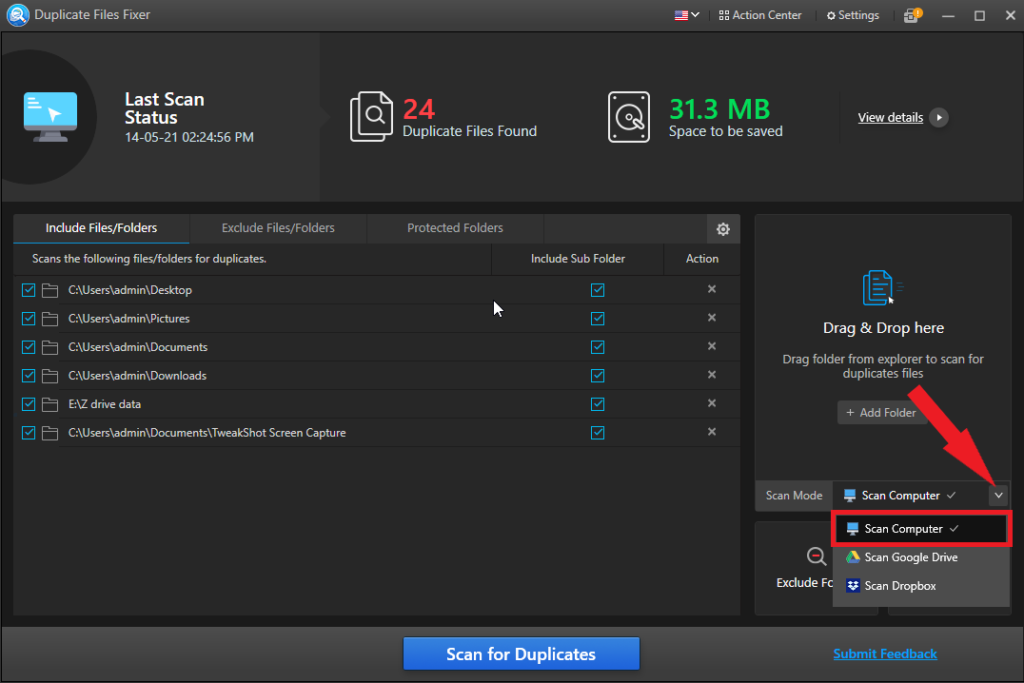
- Then, click the drop-down arrow next to Scan Mode and select Scan Computer.
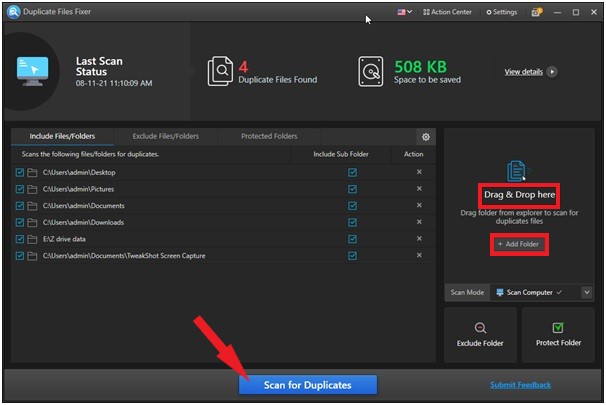
- Now, either click Add Folder or drag and drop the folder you’d like to scan.
- After that, click on the Scan for duplicates button and wait.
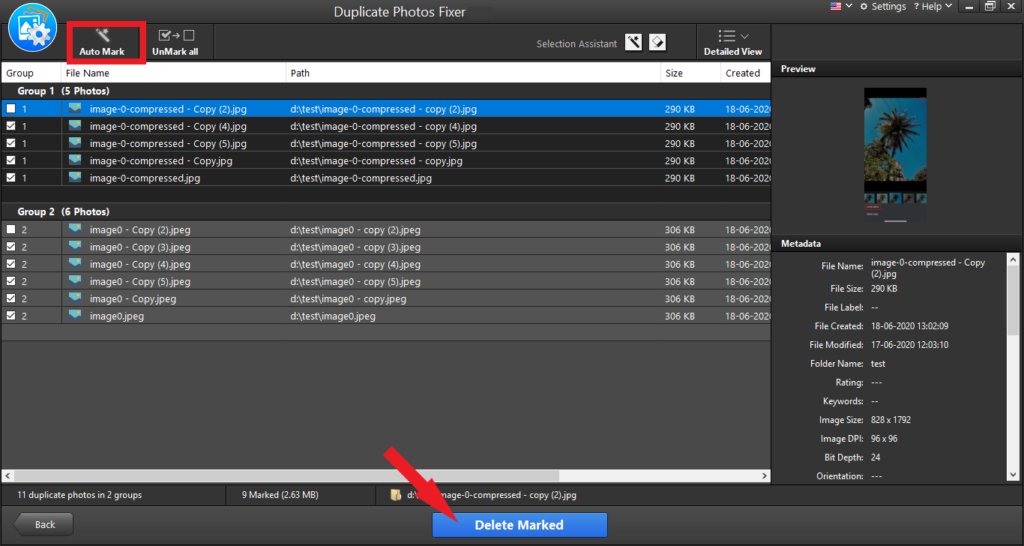
- When the scanning process ends, a list of all the detected duplicates will appear. You can now select specific files or click on All files to select all. You can double-click on any file you want to take a look at, and its preview will display in the right pane.
- To clean, you can either select the duplicate files manually or click on Automark at the top left for the software to do it automatically.
- Finally, click Delete Marked and then Yes to confirm the action.
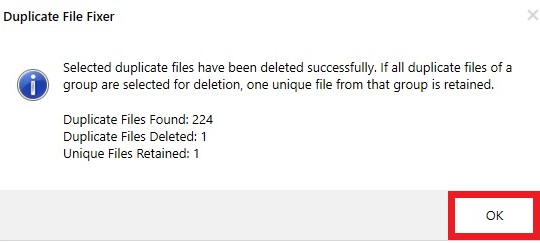
- You will then get a summary of all the actions performed. Click Ok.
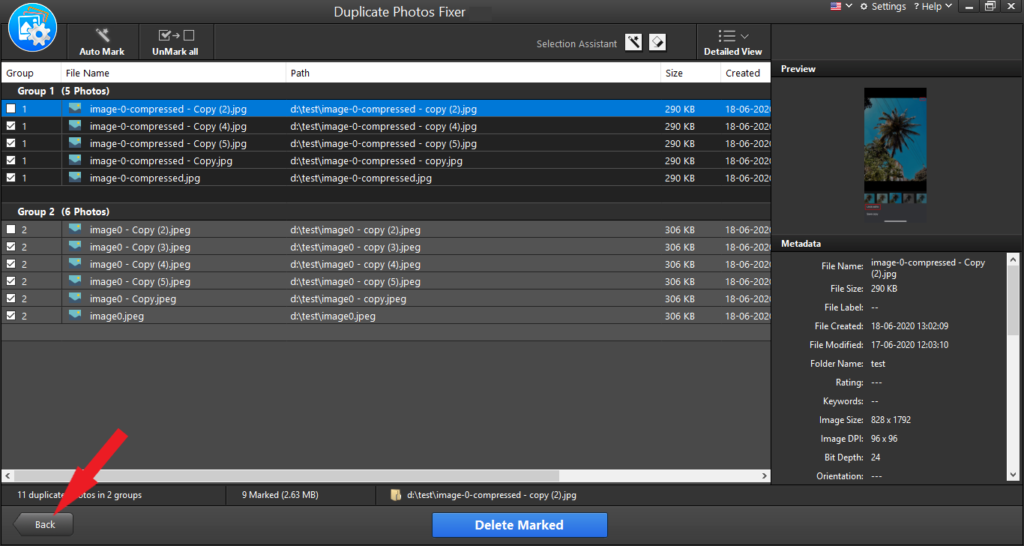
- To add more folders, click the Back button on the bottom left and repeat the above steps.
Following the steps above will successfully remove all your duplicate files on Windows 11.
4. Use Auslogics Duplicate File Finder.
Auslogics is a great app not only because it’s free but also due to its easy-to-use interface. With only a few clicks, this software will automatically scan target drives and folders and remove the duplicate files from your device.
First, you’ll have to download the Auslogics Duplicate File Finder app and install it on your computer. Other Auslogics apps may also get installed automatically, so you’ll have to pay special attention to each screen to avoid getting unwanted apps on your computer.
Once the installation process finishes, follow the steps below:
- Start by clicking on the Auslogics icon and select Run.
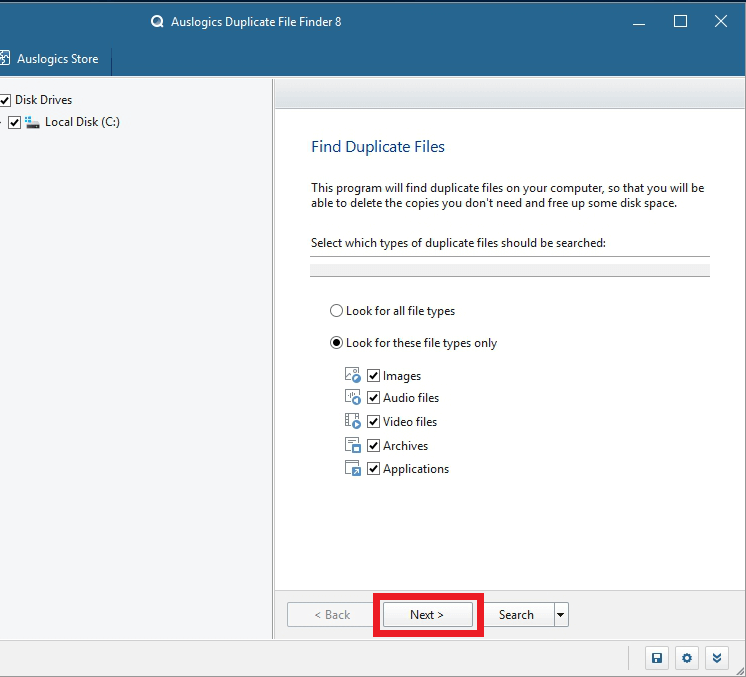
- When the software opens, you will have three sections in the first window. The first section includes links to other Auslogics apps you can download. In the middle section, you are to choose a hard drive where you wish to run the scan.
- On the right, select certain types of files if you know what you’re looking for. Otherwise, click on Look for all file types and choose Next.
- In the next window, you will be able to leave out specific sizes of files from the scan by selecting a value in a box next to Ignore files smaller than and Ignore files larger than options.
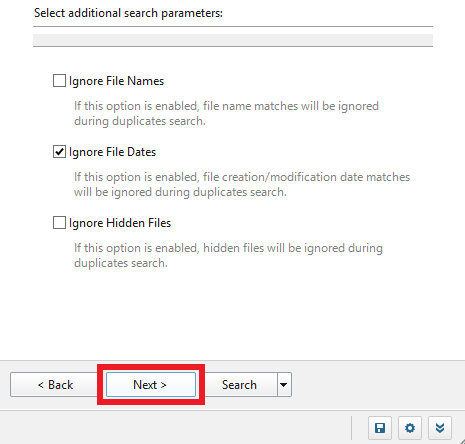
- Now, click Next and check the box for Ignore File Names, Ignore File Dates, and Ignore Hidden Files if you wish to ignore these contents in the scan.
- Click Next one last time.
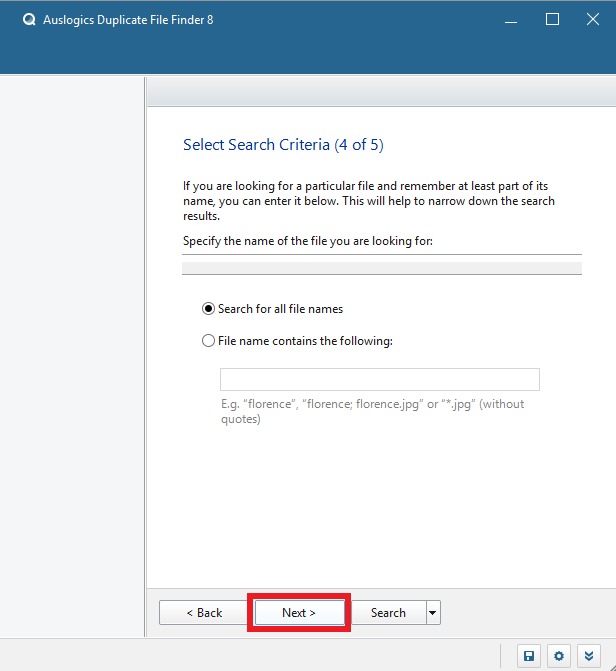
- Then, if you’re looking for specific files, you can enter a part of the name on the box below or just click on Search for all file names.
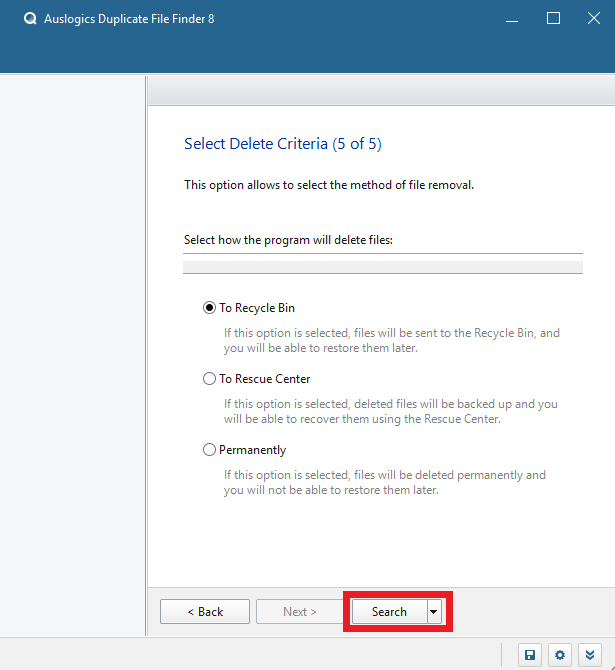
- After that, you can choose where you want the duplicate files to go after deletion: To Recycle Bin, To Rescue Center, or Permanently delete them. Remember that permanently deleted files can no longer be recovered.
- Now, click Search to start the scan.
- When the scan is done, a list of files will appear. You can manually choose specific files or use the drop-down menu next to Select for convenience.
- Lastly, click on Delete Selected Files.
You will then have all the duplicate files removed from your device. A tip is to always keep a backup of your data just in case.
This is it! You have made it to the end of our guide on how to find duplicate files on Windows 11. We hope you found it helpful. If you have further questions, be sure to leave a comment down below. We’ll get back to you as soon as we can.
If this guide helped you, please share it. 🙂
