

Wondering how to fix ‘Win32AppBackgroundContext’ message on Windows?
The Gmail client for Windows 10 is not built-in, so people use third-party Microsoft Store apps like EasyMail to access their Gmail accounts. However, there are times when the third-party apps become incompatible, causing the errors like the ‘Win32AppBackgroundContext’ message on Windows.
This error is typically caused by the following reasons:
- EasyMail installation is corrupt
- Chrome installation is corrupt
If you are facing a similar issue, you are in the right place because in this guide, we will walk you through the relevant troubleshooting steps in detail.
Let’s get started!
1. Uninstall EasyMail Through Apps & Features.
In Apps & Features, you can get a list of all applications installed on the system, move, modify, and uninstall them.
Here is how you can uninstall Easy Mail via Apps & Features:
- Type Apps & Features in the search bar and click Open.
- Look for EasyMail for Gmail in the right pane and click on it.
- Now on Uninstall and follow the on-screen instructions to proceed with the uninstallation process.
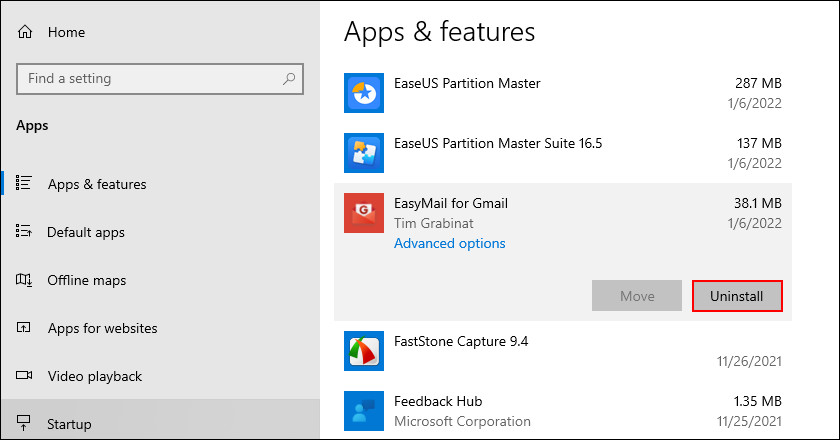
- Finally, reboot your PC. You can now re-install EasyMail.
If a corrupt EasyMail installation was causing the issue, uninstalling and then reinstalling it should fix the problem.
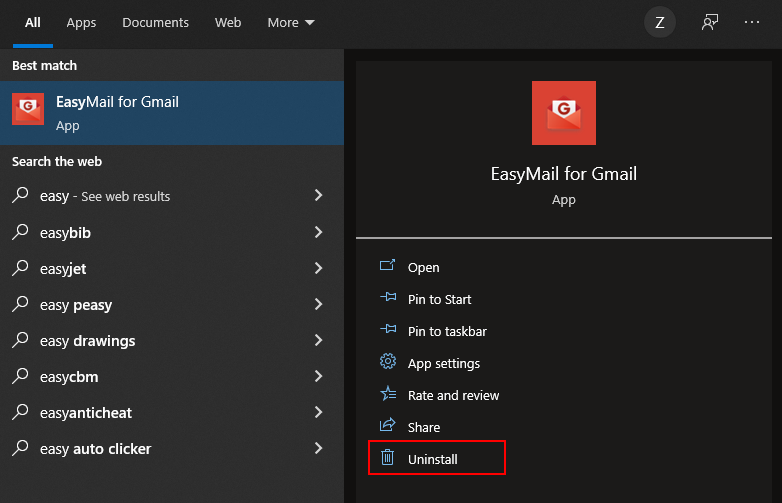
2. Uninstall EasyMail Through the Right-Context Menu.
Another easy way to uninstall EasyMail is through the right-click context menu.
Here is what you need to do:
- Type EasyMail for Gmail in the search area and click on Uninstall.
- Follow the on-screen instructions to proceed with the uninstallation process and then check if the issue is resolved.
As simple as that!
3. Try Using CleanMyPC.
You might also be facing the error at hand due to bugs or corruption errors in the operating system. This is why we recommend scanning your PC using a reliable and efficient cleaner.
With PC cleaner, your entire computer, including Windows Registry is scanned for damaged and corrupted files and repaired without user intervention. However, it is important that the PC cleaner you use is capable of performing these advanced functions.
We recommend CleanMyPC as a cleaner for those who are having trouble finding one that is effective.

CleanMyPC is a powerful system-maintenance program that can fix even complex problems with PCs, such as slow performance and privacy issues. If this is something your PC is in desperate need of, install CleanMyPC now and give your PC a much-needed performance boost.
4. Reinstall Google Chrome.
If none of the methods mentioned above works for you, then we encourage you to go ahead and uninstall the current version of Chrome on your PC. You can then install the latest version of Google Chrome from the official Google Update page.
Don’t worry, doing so will not make you lose your data. You will be able to retrieve all your settings and other user data by logging in with your Google account in the latest version of Chrome.
Here is all that you need to do:
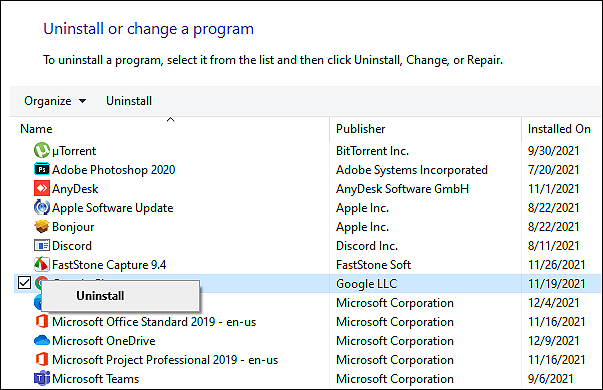
- Press Windows + R keys simultaneously on your keyboard to launch a Run dialogue box.
- Inside the text field of the dialogue box, type appwiz.cpl and hit Enter to open the Programs and Features window.
- In the newly launched window, locate Google Chrome and right-click on it.
- Click on Uninstall and follow the on-screen instructions to complete the process.
- Once Chrome has been uninstalled, restart your PC.
- Upon reboot, open a Run dialogue box again and type %localappdata% in the text field.
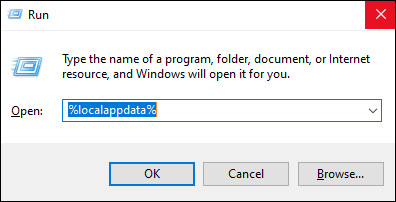
- Hit Enter and in the next window, locate a folder named Google.
- Delete this folder to remove the local data cache.
- Once done, visit the download page of Chrome and click on the Download button.

- Follow the on-screen instructions to complete the process.
Hopefully, doing so will fix the issue once and for all.
This brings us to the end of our guide on ways to fix the ‘Win32AppBackgroundContext’ message on Windows. We tried walking you through all the steps in detail and hope that one of the methods mentioned in this post did the trick for you. In case you still have any confusion about the steps, please let us know in the comment section below!
If this guide helped you, please share it. 🙂
