

Wondering how to hide the Firewall & network protection area in Windows 10?
Windows Security offers the following seven different subsections that secure your operating system by protecting it from viruses and other potential threats:
- Virus & threat protection – keep your device safe from threats
- Account protection – offers protection of your login and account information
- Firewall & network protection – controls who and what can access your network
- App & browser control – protects your apps and helps you stay safe online
- Device security – built-in security for your device
- Device performance & health – reports detailed information about your device
- Family options – saves time and simplifies your family’s digital life
Firewall & network protection maintains and manages Windows Defender antivirus protection settings and keeps track of all internet and network connections connected to the computer.
If you have multiple users on your PC, it may be a good idea to hide the Firewall & network protection area in Windows 10. In this guide, we will show you how you can do so in a few simple steps.
Let’s get started!
1. Use Group Policy Editor.
Group Policy Editor is a Windows-based administrator tool that allows users to set up and customize both individual computer settings and entire networks. You can set password requirements, startup programs, and determine what applications or settings users can modify.
The information in the Group Policy Editor is stored in the form of policies and by modifying the relevant policies, you can make your desired changes. In this method, we will modify a policy related to Windows Security to hide the Firewall & network protection area.
Here is what you need to do:
- Press Windows + R keys simultaneously on your keyboard to open a Run dialogue box.
- Inside the text field of the dialogue box, type ‘gpedit.msc’ and hit Enter. This will launch Group Policy Editor on your PC.

- Once you are inside the Group Policy Editor, navigate to the location mentioned below.
Computer Configuration\Administrative Templates\Windows Components\Windows Security\Firewall and network protection\
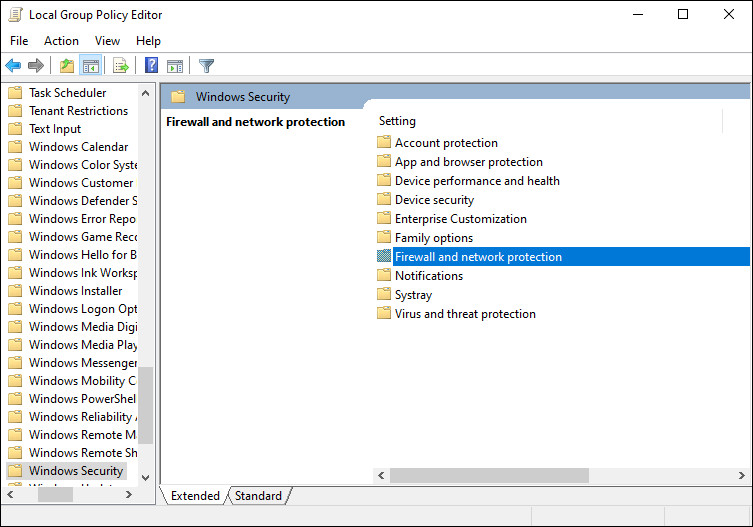
- Now locate and double-click on Hide the Firewall & network protection area in the right pane.
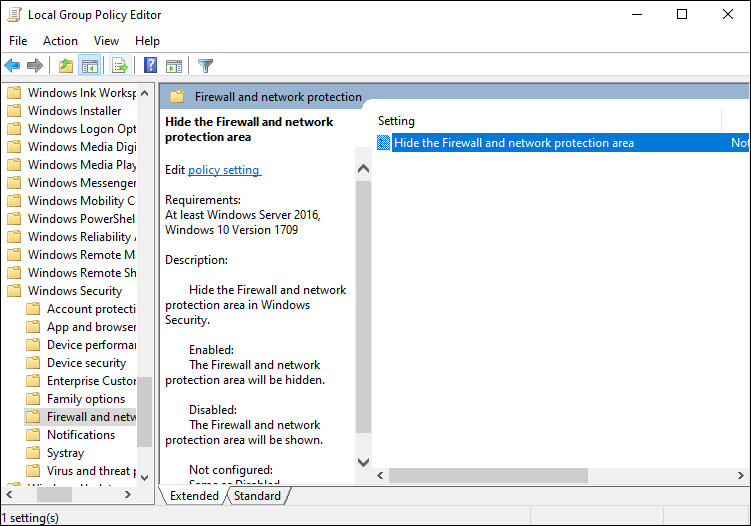
- Select Enabled and click on Apply to save the changes.
- Now check if the desired changes have been made. If not, then type cmd in the search bar and click on Run as administrator.
- Type the command mentioned below in the Command Prompt window and hit Enter to execute it.
gpupdate /force
This should make the desired changes.
2. Try Using CleanMyPC.
If you have trouble following the instructions provided in this guide, there is a chance that your system is infected. Prior to troubleshooting, it would be best if you clear the junk files.
Using a professional PC cleaner can help you remove computer clutter and if you are looking for a suggestion, we recommend CleanMyPC.

In addition to removing junk files, CleanMyPC has a range of tools that can address other PC problems. After you install the tool and run an initial scan, the tool will automatically find and fix problems without your input.
CleanMyPC is also quite easy to use. Even if you’ve never used a PC cleaner before, you’ll have no problem using it.
3. Use Windows Registry.
Windows Registry hierarchical database for maintaining low-level settings for Microsoft Windows as well as for operating system applications that use the Registry.
Windows refers to the Registry to learn information such as user profiles, what applications are installed on the computer and what types of documents they are capable of creating, what property sheet settings are for folders and application icons, what hardware is present, etc.
In this method, we will use the Windows Registry Editor to hide the Firewall & network protection area in Windows 10.
- Press Windows + R keys simultaneously on your keyboard to open a Run dialogue box.
- Inside the text field of the dialogue box, type ‘regedit’ and hit Enter. This will launch Windows Registry on your PC.
- Once you are inside the Registry Editor, navigate to the location mentioned below.
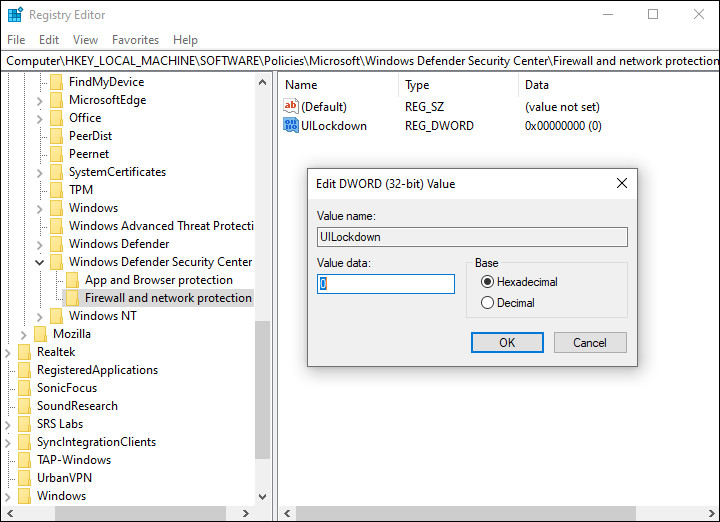
HKEY_LOCAL_MACHINE\SOFTWARE\Policies\Microsoft\Windows Defender Security Center\Firewall and network protection
- If you cannot locate the Firewall and network protection key, then right-click on the Windows Defender Security Center key and select the New > Key option.
- Rename this key as Firewall and network protection and double-click on it.
- Now right-click anywhere in the right pane and select the New > DWORD (32-bit) Value option.
- Rename this newly created value as UILockdown.
- Double-click on UILockdown and under Value data, type 1.
Once done, restart your PC to save the changes.
As simple as that!
This brings us to the end of our guide on ways to hide the Firewall & network protection area in Windows 10. We tried walking you through all the steps in detail and hope that one of the methods mentioned in this post did the trick for you. In case you still have any confusion about the steps, please let us know in the comment section below!
If this guide helped you, please share it. 🙂
