

Wondering how to enable or disable System Restore in Windows 7, Windows 8, and Windows 10?
The System Restore feature in Windows allows you to restore your PC to an earlier point in time. Its working is similar to the ‘Undo’ feature in most applications. This feature allows Windows to restore important files and settings, including drivers, registry keys, system files, and installed software, to their previous versions and settings.
It works by creating a snapshot of your PC’s working system so that if anything goes wrong in the future, you can restore it back to its previous state. In other words, if strange things happen to your computer after installing certain software, you might find that performing System Restore will resolve the issue since it will restore the system back to its original state.
Additionally, this feature is highly customizable, which means you can enable or disable it on your Windows according to your preferences.
In this guide, we will show you how you can do that in a few simple steps.
Let’s get started!
1. Use Windows Registry.
Windows Registry is an administrative-level tool designed for advanced users to help them control their operating system better. The Registry stores low-level information about Windows programs and processes. Windows refers to this information while performing relevant operations.
The information in Windows Registry is stored in the form of Registry keys. By modifying the relevant Registry keys, we can make desired changes.
In this method, we will modify the keys related to System Restore. We recommend executing the steps mentioned below carefully, as even a slight mistake can cause serious issues within the Registry.
Here is what you need to do:
- Press Windows + R keys simultaneously to open a Run dialogue box.
- In the text field of the dialogue box, type ‘regedit‘ and hit Enter. This will open Windows Registry on your PC.

- Once you are inside the Registry Editor, navigate to the location mentioned below.
HKEY_LOCAL_MACHINE\SOFTWARE\Policies\Microsoft\Windows NT\SystemRestore
- Right-click in the right pane and select the New > DWORD (32-bit) Value option.
- Rename this newly created value as DisableSR and double-click on it.
- To disable System Restore, type 1 under Value data, and to enable it, type 0.

- Finally, hit Enter and restart your PC.
This should enable/disable System Restore without any issues.
2. Try Using CleanMyPC.
There are times when junk files in our operating system prevent us from performing certain operations. In the case that the methods in this guide do not work for you, your junk files can be the culprit.
If this is the case, we recommend removing junk files from your PC before implementing the methods we have listed.
However, identifying all the junk files and deleting each one individually is a difficult process. This can take up lots of time and energy, which is why a reliable PC cleaner is recommended. CleanMyPC is one of the top recommendations if you are on the lookout for one.

CleanMyPC is one of the most popular PC cleaning utilities on the market. You can use it to keep your computer in great shape. This tool comes with a large variety of system maintenance tools including a Speed Booster, a Registry Cleaner, a Multi-Uninstaller, and more.
To get started, download and install CleanMyPC on your computer. The tool will take care of everything else!
3. Use Group Policy Editor.
If Windows Registry did not do the trick for you, then you can try using the Group Policy Editor.
Group Policy Editor (GPE) is also an administrative-level utility that allows users to customize the operations of their operating systems. Information in GPE is stored in the form of policies, and by modifying the relevant policies, you can make the desired changes.
Here is what you need to do:
- Press Windows + R keys on your keyboard simultaneously to open a Run dialogue box.
- Inside the text field of the dialogue box, type ‘gpedit.msc‘ and hit Enter. This will launch the Group Policy Editor on your PC.

- In the newly launched window, navigate to the location mentioned below.
Computer Configuration\Administrative Templates\System\System Restore
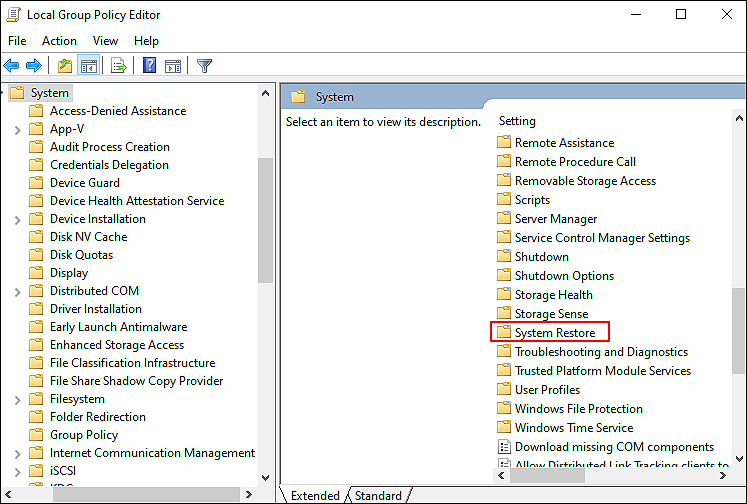
- In the right pane, locate and double-click on Turn off System Restore.
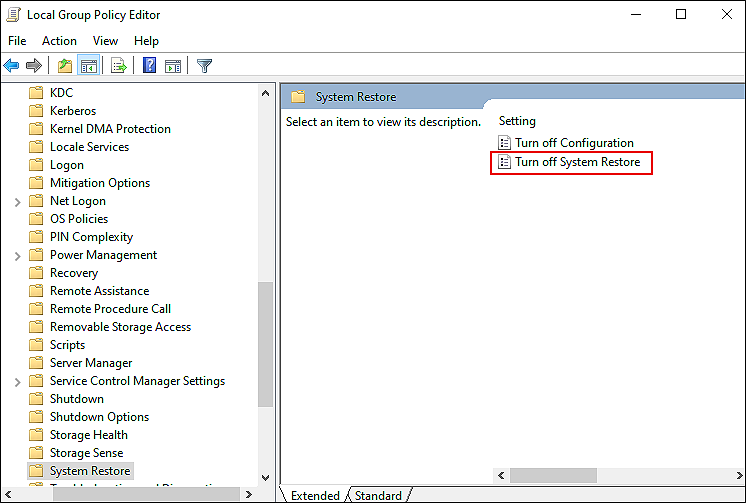
- Select Enabled or Disabled according to your preference and hit Apply to save the changes.
- Once done, restart your PC.
Hopefully, using the Group Policy Editor will allow you to enable/disable System Restore without any issues.
This brings us to the end of our guide on ways to enable or disable System Restore in Windows 7, Windows 8, and Windows 10. We hope that one of the methods mentioned in this guide helped you make the required changes. If you still have any questions regarding the methods, please let us know in the comment section below.
If this guide helped you, please share it. 🙂
