Looking for quick and easy ways to fix AirTag not working issue?
It can be frustrating to see your AirTag not working. It’s supposed to be the device that can help you find items easily. But it’s not connecting with your iPhone, or the item isn’t showing up in the Find My app. Don’t fret, though. Whatever the cause, it’s fixable.
AirTag is a recently released Bluetooth-powered device you can attach to your keys, wallet, or other important items that can get easily lost. It’s a genius device. But like any other innovations, it has had a fair share of issues. Connectivity-related or not.
Today, we’ll make things easier for you. In this article, we list several ways to help you use your AirTag again. Here’s how to fix AirTag not working issue with iPhone or iPad.
Let’s jump right in!
1. Turn Bluetooth, Wi-Fi, and Cellular Off and On.
Assuming you set up your AirTag successfully, the first thing you should check when it’s not working is the connection. AirTags and the Find My app require Bluetooth, Wi-Fi, or cellular network to work effectively. So, if you notice any sluggishness in your connection, it could be the culprit.
Whether you use iPhone or iPad, it’s easy to turn device connections on and off. So this should be your first step when fixing AirTag issues.
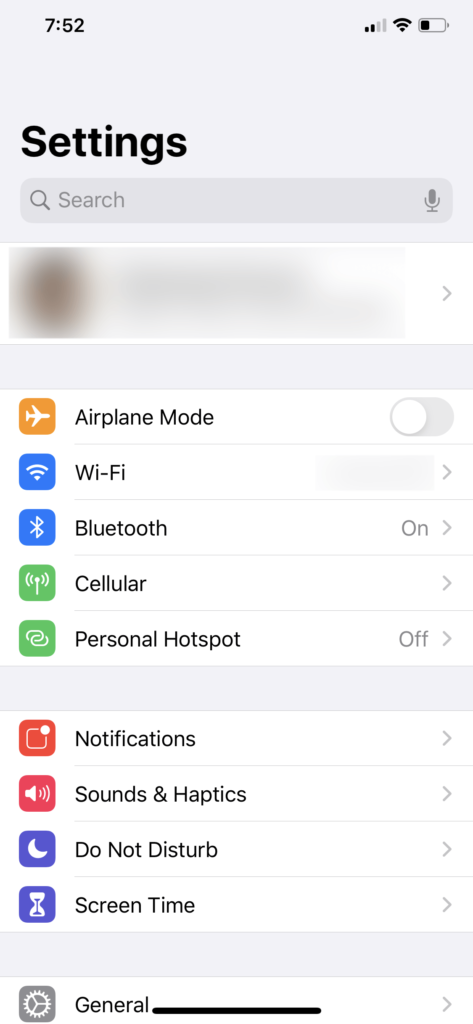
Here’s how to do it:
- On your device, go to Settings.
- Look for Wi-Fi, Bluetooth, and Cellular. They are listed one after the other.
- Next, turn off the toggles for Wi-Fi, Bluetooth, and Cellular.
- Restart your iPhone or iPad.
- Once your device is back on, go to Settings again.
- Turn on the Wi-Fi, Bluetooth, and Cellular toggle buttons.
- Test if your AirTag is working.
This fix has helped many users. But if that isn’t the case with you, try the next solution.
2. Ensure Find My App Is Enabled.
If you misplaced your AirTag item and it’s within Bluetooth range, you should easily locate it through the Find My app. Lost an item and it’s out of your device’s Bluetooth range? The Find My network can still help locate it.
The Find My app is the central piece that makes the connection between your device and your lost item. So if your AirTag is not working, it pays to check if this app is on.
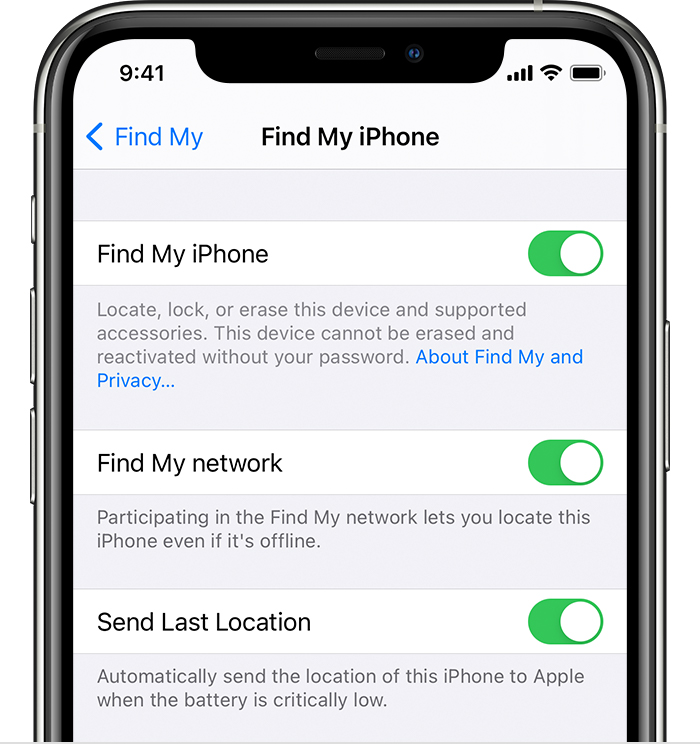
Here’s how to ensure the Find My app is enabled on your device:
- On your iPhone or iPad, head to Settings.
- Tap your name.
- Then, choose Find My.
- Now, make sure the toggle buttons beside Find My iPhone (or iPad), Find My Network, and Send Last Location are on or green.
Is your AirTag not working even if Find My app is enabled? Give our other fixes a try.
3. Re-Enable Location Services.
Location Services need to be on so AirTags can work with precision. So, if you’re trying to fix AirTag not working issue, try turning Location Services off and on. This simple action could help eliminate any random bug that may have affected your AirTag.
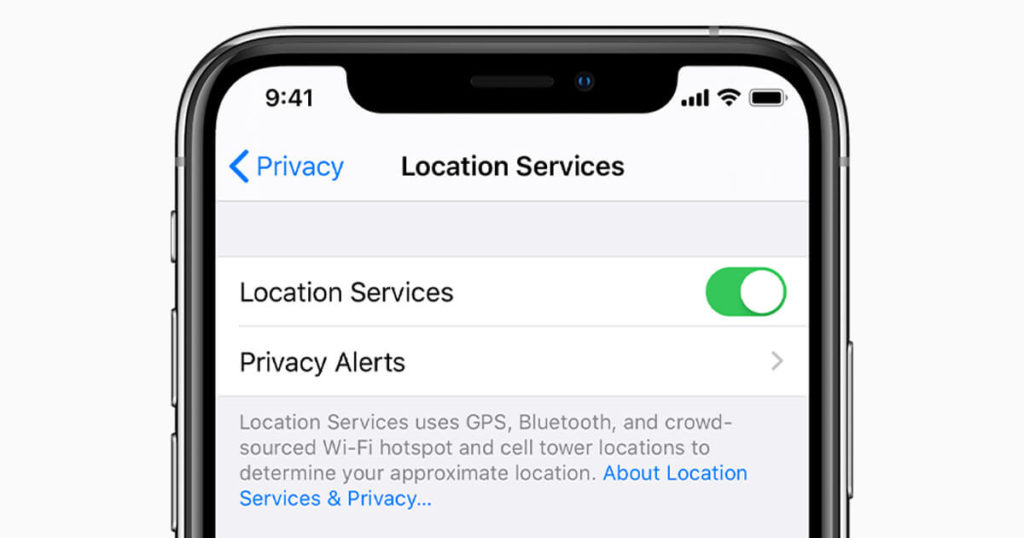
Here’s how to turn Location Services off and on again:
- On your device, navigate to Settings.
- Tap Privacy.
- Then toggle off the button beside Location Services.
- Tap Turn Off to confirm the action.
- Restart your device.
- Then, head to Settings > Privacy again to toggle Location Services back on.
After these steps, try to pair your AirTag. See if it works. If not, read on for more troubleshooting tips to fix AirTag not working problems on iPhones and iPads.
4. Reset Network Settings.
Network-related issues are often the reason behind AirTag problems. So, it makes sense to reset your device’s network settings to fix AirTag not working issues. But this erases the existing Bluetooth, Cellular, Wi-Fi, and VPN settings on your iPhone or iPad.
So, after the reset is complete, make sure to pair your Bluetooth devices again. You’ll also have to re-enter credentials for your Wi-Fi, VPN, and Cellular settings.
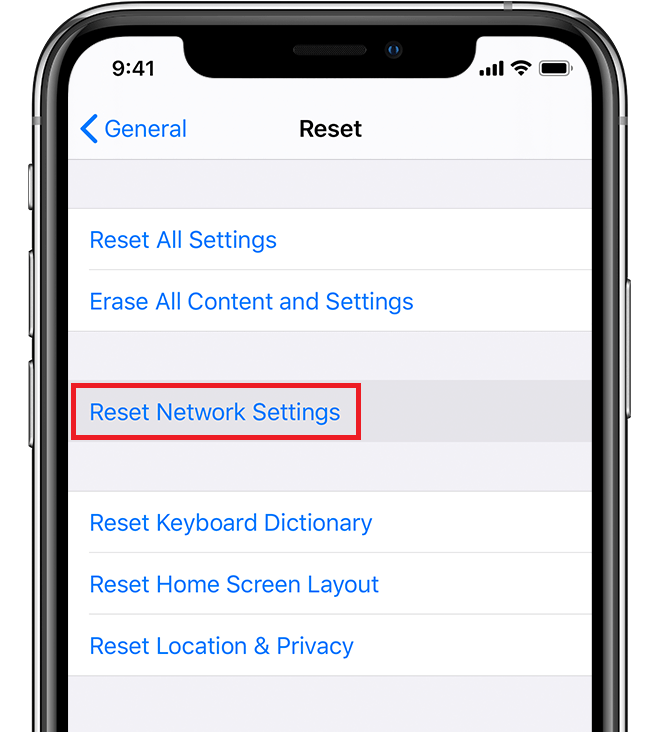
Here’s how to reset network settings on your device:
- On your iPhone or iPad, open Settings.
- Tap General. Then, select Reset.
- Next, tap Reset Network Settings.
- Enter your passcode.
- Lastly, tap Reset Network Settings to confirm.
Your device will turn off to complete the reset. In a few seconds, it will turn on again. Check if your AirTag is working. If not, we still have more workarounds for you.
5. Update Device Software.
The current iOS or iPadOS version on your device may no longer be compatible with AirTags. In such cases, it’s best to check for software updates. Sometimes, this simple trick is enough to get the job done.
Checking software updates is the same across iPhones and iPads. The steps below should easily guide you in updating your iOS or iPadOS.
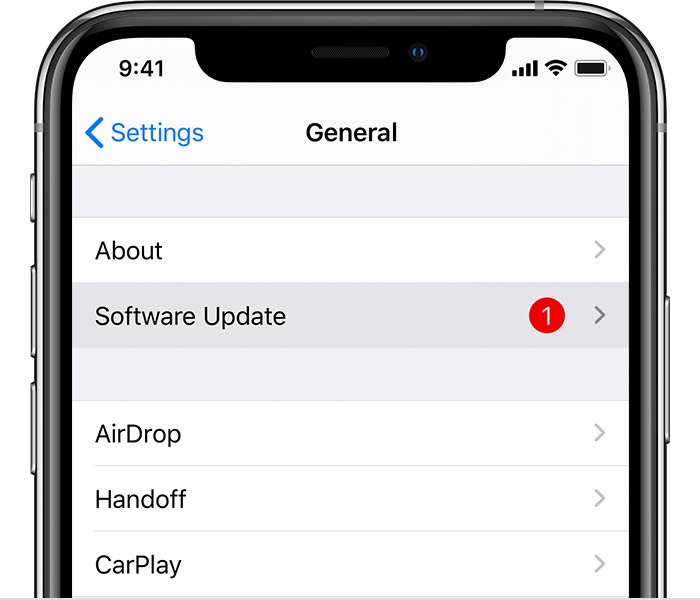
Here’s how to check for software updates:
- Start by opening Settings.
- Tap General.
- Then, choose Software Update.
- If there’s an available update, tap Download and Install or Install Now.
- Follow the on-screen instructions to complete the software update.
Is your AirTag still not working after the software update? Read on for more solutions.
6. Remove and Re-Add AirTag.
When a Bluetooth device doesn’t respond, it makes sense to unpair and re-pair it. The same goes for AirTag. Disconnecting AirTag will remove the customized settings you’ve made on your device. This will help AirTag reconnect to your device properly.
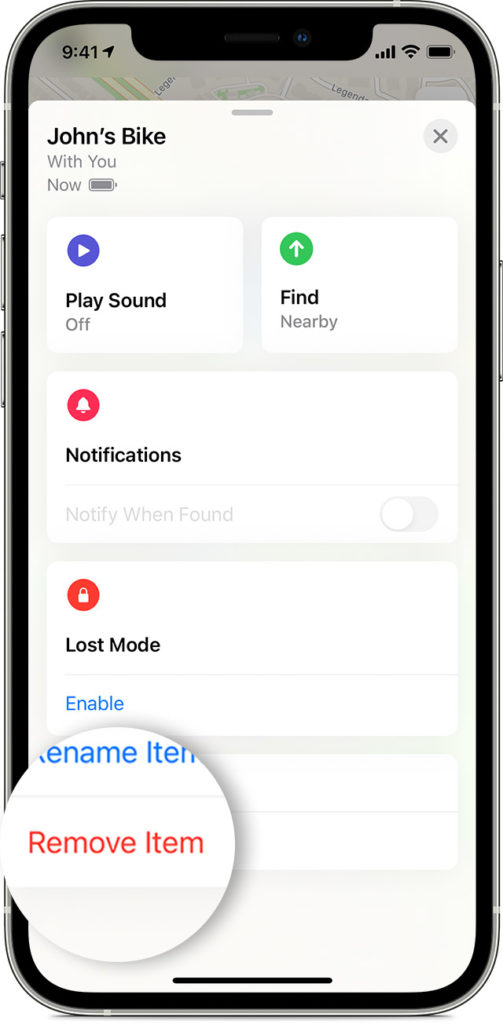
Here’s how to remove and re-connect your AirTag to your device:
- Launch Find My on your iPhone or iPad.
- Select Items at the bottom row.
- Tap your AirTag. It may be “Keys,” “Bag,” or any name you had set.
- Hit Remove Item. Then tap Remove to confirm.
- Restart your iPhone or iPad.
- Once the device is back on, pair your AirTag again.
For some, this fix has worked. But we still have more solutions if you need them.
7. Reset AirTag.
You don’t have network problems, your software is updated, and yet, your AirTag still doesn’t work. The problem could be because your AirTag has been used by someone else before.
An AirTag can only be associated with one Apple ID. If you want to use an AirTag your loved one used to own, ask them to remove it from their Apple ID. Have they already done that? Maybe, they removed it while they’re out of AirTag’s Bluetooth range.
If that’s the case, you have to reset the AirTag before using it with your iPhone or iPad.

Here’s how to reset your AirTag:
- First, press down on the AirTag’s stainless steel battery cover. Rotate the cover counterclockwise until it stops moving.
- Gently remove the cover and battery. You can clean the battery with a dry cloth.
- Then, put the battery back.
- Press down on the battery until you hear a sound.
- When the sound ends, repeat removing and re-inserting the battery four more times. Each time you re-insert the battery, make sure to press down until you hear a sound. You should hear a total of five sounds. But the fifth sound should be different from the previous four. That indicates the AirTag is ready to pair again.
- Put the cover back by aligning the cover’s three tabs with the three slots on your AirTag.
- Next, press down on the cover.
- Lastly, rotate the cover clockwise until you can no longer rotate it.
Be sure to track the count on Step 5. If not, you will have to redo the entire procedure. If the reset is done successfully, you should be able to use your AirTag without any issues.
8. Clean the AirTag.
Over time, your AirTag could be jammed up by dust and dirt. This could affect the connectivity between your AirTag and your device. If this is the problem, it’s easy to fix: clean your AirTag.
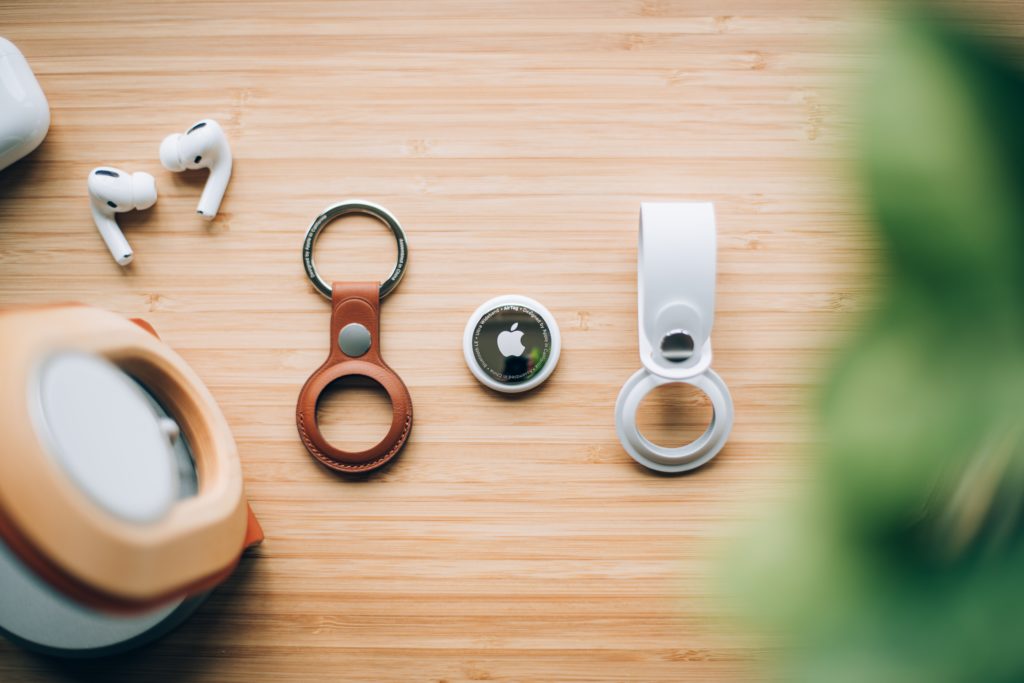
Uncover the AirTag and remove any straps. Take it out if it’s attached to any item. Then, use a soft piece of cloth to clean the AirTag. Even if the AirTag is IP67 water- and dust-resistant, be sure to clean it gently. After that, see if it now works properly.
9. Contact Apple Support.
Is your AirTag still not working after doing all the solutions above? Maybe, it’s a hardware issue. It’s time to contact Apple support.
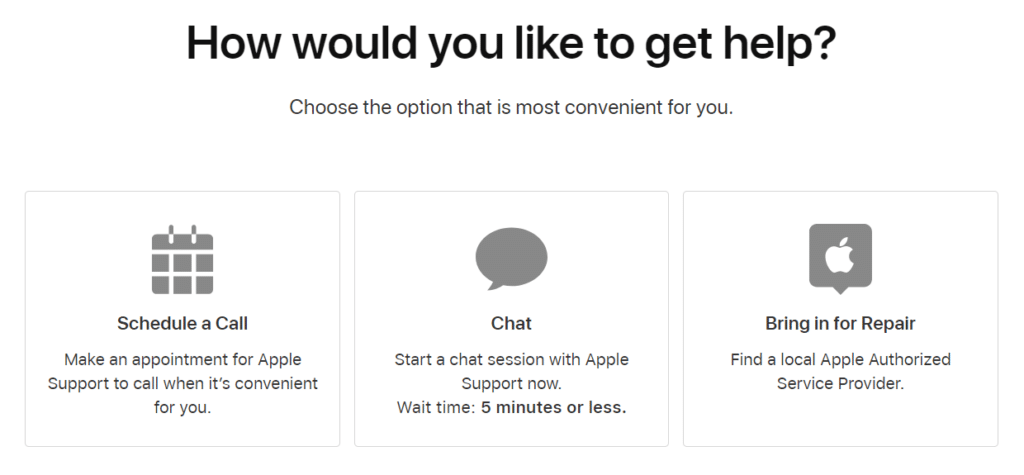
You can reach out to Apple via phone, live chat, or mail. If you plan to visit an Apple Store, it’s best to set an appointment to have your AirTag checked.
That wraps up the article. We hope one or two of our solutions have worked for you. But if you still have any AirTag-related questions or concerns, don’t hesitate to comment below. Our team will be happy to offer you more troubleshooting tips.


