

Wondering how to install CyberPanel on Ubuntu 20.04 LTS Server? We’ve got you covered!
Ever wondered how companies keep tabs on their data centers? What if you could monitor your server and get notified when something goes wrong? Wouldn’t that be great? Well, there is a way to do that.
CyberPanel is an open-source software that helps you do that. In this article, we will show you how to install CyberPanel on Ubuntu Server 20.04 LTS.
Let us proceed!
What is CyberPanel?
Using CyberPanel, you can monitor the health of your server in real-time. It can also send you alerts when a resource goes down or isn’t responding. Besides monitoring servers and networks, it can monitor applications as well.
The best part is installing it on your Ubuntu server or VPS instance. It supports all Ubuntu versions and you can also install it on Debian servers. As part of the Datadots family of products, CyberPanel is free and open source.
You can try out the free plan (limited to 1 server and 5 resources). You must purchase a license if you wish to use it for commercial purposes.
Why Should You Install CyberPanel on Ubuntu Server?
CyberPanel is an excellent choice for monitoring your server because it can be easily integrated with almost any server or network monitoring software. Here are some other benefits that might cater to your interests.
- If your organization uses Nagios, Munin, Zabbix, or another monitoring tool, you can easily connect it to CyberPanel and receive real-time notifications. This is not possible with commercial monitoring tools.
- CyberPanel is open source and free to use.
- Your server can also be secured with a cyber panel. If you manage everything in-house and you’re trying to set up your server, you might not have the right expertise to lock down your network as effectively as possible. Using a cyber panel for your server, you can secure your network as you see fit.

- You can customize your network to meet the needs of your business, your industry, and how you conduct business.
- Cyber panel servers guarantee you dedicated support to manage your server and provide you with the support you need. This lets you know that you’ll always receive the support and assistance required.
- Having a cyber panel on your server allows you to manage risk and threats effectively. Managing your server correctly is vital to the success of your business. Server management solutions can help you control risks and threats more effectively.
- A cyber panel on your server allows you to fully manage risk and threats and do so in a way that makes sense for your business. Your server can also benefit from a cyber panel by reducing costs.

- It can help prevent over-utilization of internal resources, which will increase costs. A cyber panel on your server allows you to manage your security more effectively and efficiently, which reduces your costs.
- Another benefit is that it ensures compliance and security are top-notch. You may be putting yourself in a highly dangerous position if you don’t comply with all the relevant standards and regulations in your industry. Fortunately, most cyber panels come pre-built with compliance in mind.
Now that you’ve learned about CyberPanel and its benefits, you can move on to learn how to install it.
Step 1: Installing Dependencies.
Before installing CyberPanel on your Ubuntu server, you’ll need to install some necessary dependencies on your system.
These dependencies can be installed via the Command Terminal.
Follow these steps to install necessary dependencies on your system:
- Start by opening the Command Terminal by pressing Ctrl + Alt + T on your keyboard.
- Once that’s done, type the following:
$ sudo apt update && sudo apt upgrade
This will update all packages and repositories to their latest available versions.
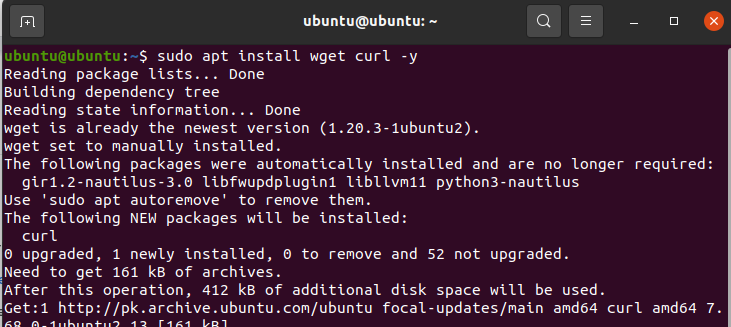
- Next, type the following in the Command Terminal.
$ sudo apt install wget curl -y
- Lastly, install Python by typing the following in the Terminal:
$ sudo apt install python3.8

If you followed the steps correctly, then congratulations, you have installed the necessary dependencies for CyberPanel.
Step 2: Download and Run the Installation Script for CyberPanel.
Now that you’ve installed all the dependencies for CyberPanel, you’ll need to download the installation script.
You can also download it to your local computer and transfer it to your Ubuntu server.
Follow these steps to install CyberPanel on your system:
- First, open the Command Terminal by pressing Ctrl + Alt + T on your keyboard.
- Next, type the following command:
$ sudo apt update && sudo apt upgrade

- Next, change the access level to root by typing the following:
$ sudo su -

- Once that’s done, download and execute the following script:
$ sh <(curl https://cyberpanel.net/install.sh || wget -O - https://cyberpanel.net/install.sh)

Wait for the installation to finish. If you meet the requirements for installation, CyberPanel should be installed.
If you followed these steps correctly, then congratulations, you have now learned how to install CyberPanel on Ubuntu 20.04 LTS.
Additional Information.
With CyberPanel installed on your system, you can keep an eye on your server 24/7. You can see the CPU, RAM, disk usage, and network bandwidth the server consumes at any time.
This is useful if you have multiple servers in your network and want to keep track of their activity. The best part is that you don’t have to log in manually to each server and check the stats.
Another service that you should check out is the Amazon Web Services (AWS) CLI. It’s the perfect utility for managing your AWS directly from the Command Terminal.
We hope this guide helped you learn how to install CyberPanel on Ubuntu 20.04 LTS. We went over the basics of the program, why you should use it, and the steps for installation. If you have any questions or suggestions, let us know in the comment section down below.
If this guide helped you, please share it😊
