

Wondering how to install AWS CLI on Ubuntu? Don’t worry, we got you covered!
Those of you who’ve had some experience working in the field of cloud computing have probably heard of Amazon Web Service.
For those who don’t know, the Amazon Web Service(AWS) refers to a platform supported by Amazon that is responsible for providing cloud computing APIs and services to different companies and corporations.
While the GUI can access these services, you can save time by directly managing AWS from the CLI.
This guide will help you learn to install AWS CLI on Ubuntu. We will cover the installation methods, along with some basics on getting started with the AWS CLI.
That being said, let’s dive in!
Prerequisites for Installation.
Before you learn how to install AWS CLI on Ubuntu, you must ensure that all the requirements are fulfilled to avoid unnecessary errors.
Here are some things to look out for before you proceed with the installation.
- Start by ensuring that your system uses Ubuntu as the main Linux distribution. While any version will suffice, we advise using Ubuntu 18.04 or higher.
- You’ll also require an account with sudo or root privileges to ensure that the commands work without any errors.
- Lastly, make sure that you have created an Amazon Web Service account to get access to AWS.
Once you’ve made sure that you’ve met the system requirements, you can move over to the installation methods.
Method 1: Installing AWS CLI Using the $apt Command.
The first method uses the $apt command, specifically $apt install.
This is the go-to method for installing any package on Ubuntu.
For this guide, we’ll be using Ubuntu 20.04 LTS as our main Linux distribution. However, the process shouldn’t be different for other Ubuntu versions.
Follow these steps to install AWS CLI using the $apt command:
- Start by opening the Command Terminal. The shortcut is Ctrl + Alt + T.
- Once the Terminal is open, type the following commands:
$ sudo apt update

$ sudo apt upgrade
This should update all packages and repositories to the latest available versions.
- Once the update is finished, proceed to type the following command:
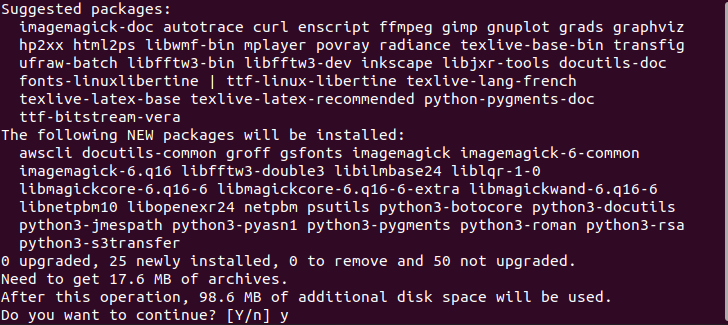
$ sudo apt install awscli
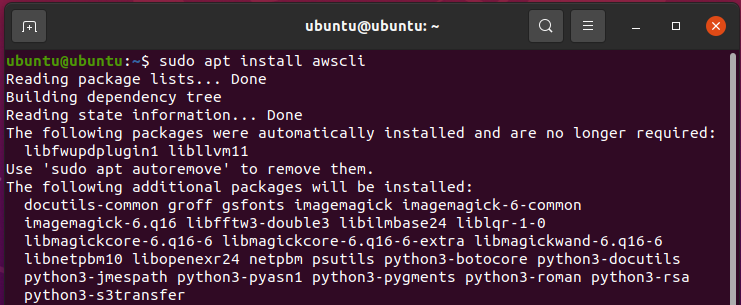
You should see a prompt asking you to confirm the installation. Press “y” and then Enter to confirm the installation.
If you followed the steps correctly, congratulations, you have successfully installed the AWS CLI on your system. If this method didn’t work out for you, then no worries, as there’s another method to install the AWS CLI.
Method 2: Install AWS CLI Using Python’s $pip Command.
The AWS CLI can also be installed via Python. By importing the AWS CLI as a module, you can use AWS CLI on your system,
The key advantage of this method is that you’ll always get the latest version of the AWS CLI. Furthermore, this method doesn’t require you to have any root privileges, as you can use AWS by creating a virtual environment in Python.
With that being said, you’ll need the Python-pip package to install AWS CLI.
Follow these steps to install AWS CLI using Python’S $pip command:
- First, open the Command Terminal by pressing Ctrl + Alt + T on your keyboard.
- Next, type the following commands:
$ sudo apt update
$ sudo apt upgrade
This should update all packages and repositories to the latest available versions.
- Once the update is finished, proceed to type the following command to install Python-pip on your system.
To install Python 2, use the following command:
$ sudo apt install python-pip
To install Python 3, use the following command:
$ sudo apt install python3-pip

- Once the installation is complete, proceed to install the AWS client by using one of the following commands.
For Python 2:
$ pip install awscli --upgrade --user
For Python 3:
$ pip3 install awscli --upgrade --user

If you followed the steps correctly, you should have the AWS CLI available on your system. You can use one of the following commands to confirm the installation.
For Python 2:
$ python -m awscli --version
For Python 3:
$ python3 -m awscli --version

Uninstalling the AWS CLI.
If the AWS CLI doesn’t work properly, or you wish to switch to a different cloud computing service, you can remove the AWS CLI from your system.
The AWS CLI package can be uninstalled by using the $apt remove command.
Follow these steps to uninstall the AWS CLI from your system:
- Start by opening the Command Terminal by pressing Ctrl + Alt + T on your keyboard.
- Once that’s done, type the following:
$ sudo apt remove awscli

This will proceed to remove the AWS CLI from your system.
If you installed AWS CLI using the Python method, the steps to remove it are different.
Since the AWS CLI was installed as a Python package, the command for removing differs from the usual $apt remove.
Follow these steps to remove the AWS CLI Python package:
- First, open the Command Terminal. The shortcut is Ctrl + Alt + T.
- Next, proceed to type one of the following commands based on the python version that you’re using.
For Python 2:
$ pip uninstall awscli
For Python 3:
$ pip3 uninstall awscli
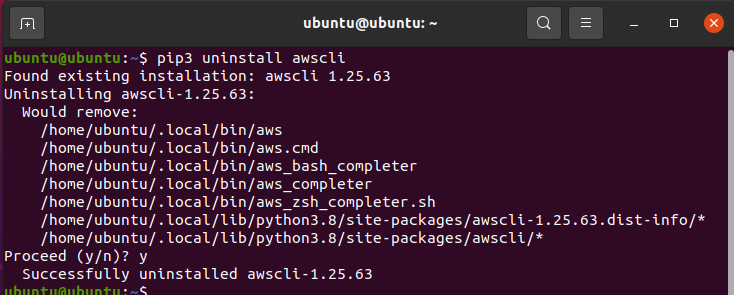
If you followed these steps correctly, you should have successfully uninstalled the AWS CLI from your system. You can confirm this by typing the following in the Command Terminal:
For Python 2:
$ python -m awscli --version
For Python 3:
$ python3 -m awscli --version

Aside from cloud computing, you might also want to learn about networking if you’re planning to do some remote hosting on your own. With all the confusing jargon and different applications, configuring your network can prove to be a hassle. Fortunately, Netplan is the all-in-one network configuration tool that can help you with all your configuration problems.
We hope this guide helped you figure out how to install AWS CLI on Ubuntu. If you have any questions, comments, or suggestions, let us know in the comment section down below.
If this guide helped you, please share it. 🙂
