

Wondering how to fix the Install Error 0x80070103 Update on Windows 11?
The most annoying part of updating Windows patches is getting unexpected errors. The most common one is the Install Error 0x80070103 Update on Windows 11. Usually, it occurs due to incompatible drivers related to any hardware piece, including graphics, audio, etc.
Sometimes you can’t ignore the update as it could help improve your system. For this reason, we’ve brought you the most effective remedies for resolving the stated error and upgrading it to the latest version.
So let’s dive right in!
1. Run the Windows Update Troubleshooter.
Windows provides several built-in troubleshooters to run a diagnostic check and repair the issue you face. They are the best way to start dealing with any software-related problem, including update errors.
Here’s how to run this utility:
- Press the Windows + i shortcut keys to launch Settings.
- From the left pane, click on System.
- Then, select Troubleshoot.
- After that, click on the Other troubleshooters option on the right pane.
- Next, look for Windows Update and click on the Run button.
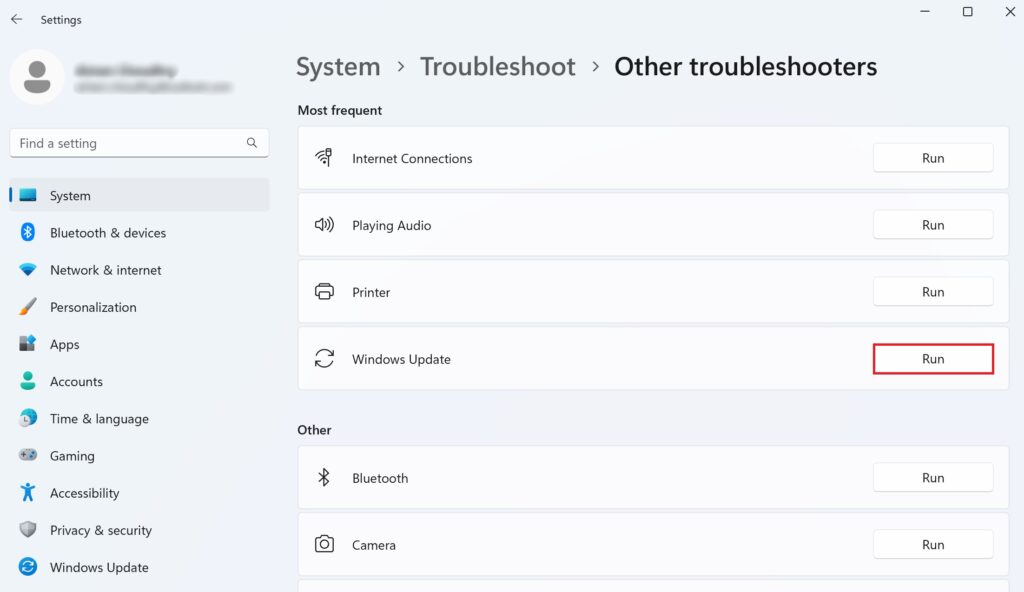
- Follow the on-screen instructions and restart your computer.
Once done, try installing the update and see if the error is fixed.
2. Skip Over the Updates.
Windows 11 regularly receives patches and builds to improve to eliminate widespread issues. While these updates improve user experience, you can skip them in case you’re getting errors in the process.
Microsoft features an option to show or hide updates. Through it, you can ignore unnecessary or problematic updates and prevent them from reoccurring.
Here’s how to do it:
- Download the tool and launch it.
- From there, select Advanced.
- Then, click on Apply repairs automatically.
- After that, click on the Next option.
- Wait for a while, a new window will open. Select Hide updates.

- From the list of updates, pick the ones you cannot install.
- Then click on Next.
Now, check to see if the install error 0x80070103 update is showing or not.
3. Replace Damaged System Files.
If your system lacks the necessary system files or is possibly damaged, it could cause the Install Error 0x80070103 Update on Windows 11. Run the default command-line tools like SFC, or DISM check to repair or recover corrupted or absent components.
Here’s how to perform the SFC scan on Windows 11:
- Click on the Start menu.
- Type cmd.exe in the search bar.
- Then, press the Ctrl + Shift + Enter keys from your keyboard.
- If a User Account Control (UAC) pop-up appears, click on Yes.
- Next, paste the following command and hit the Enter key:
SFC /scannow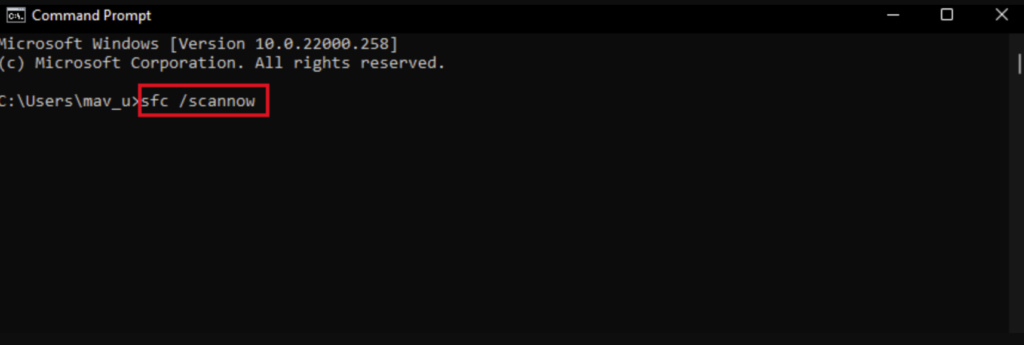
To perform the DISM scan, follow the steps below:
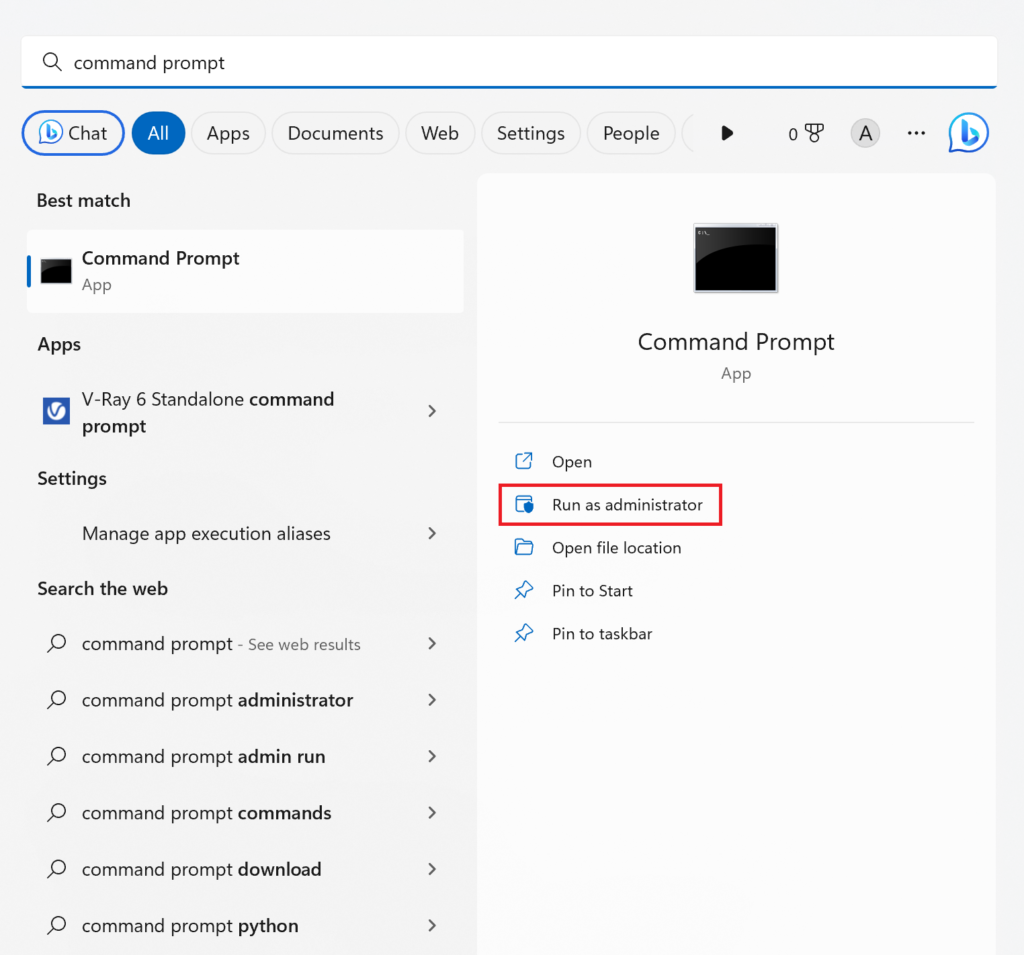
- Go to the Start menu.
- Type cmd in the search bar.
- Right-click on the Command Prompt app and select Run as administrator.
- Then, copy and paste the following command and press Enter:
DISM.exe /Online /Cleanup-image /Restorehealth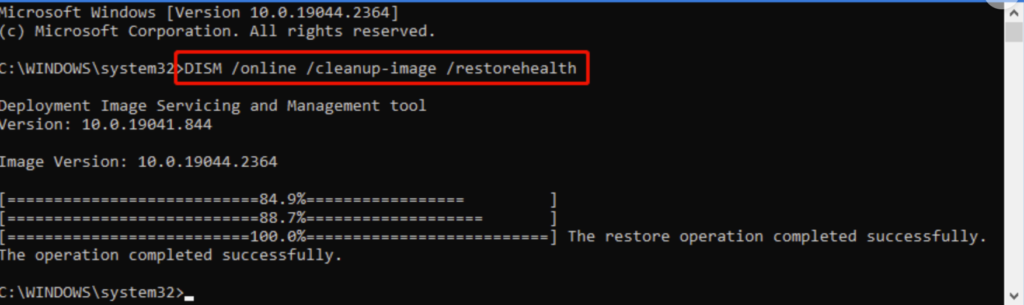
Once the scans are complete, restart your computer and try installing the update to see if the error persists or not.
4. Run the Windows Update Service.
Windows Update service is an essential component of the Windows environment as it is responsible for downloading and installing the latest versions, builds, fixes, etc. If the service encounters any issues or may malfunction, you will get the Install Error 0x80070103 Update on Windows 11.
In such a situation, we recommend you quickly restart the Windows Update service to remove any errors or bugs. Use the instructions below to do it:
- Press the Windows + R keys. This will launch the Run dialog box.
- Type services.msc in the text area.
- Then, click on the OK button.
- Another window will open. Look for Windows Update and right-click on it.
- Select the Restart option.
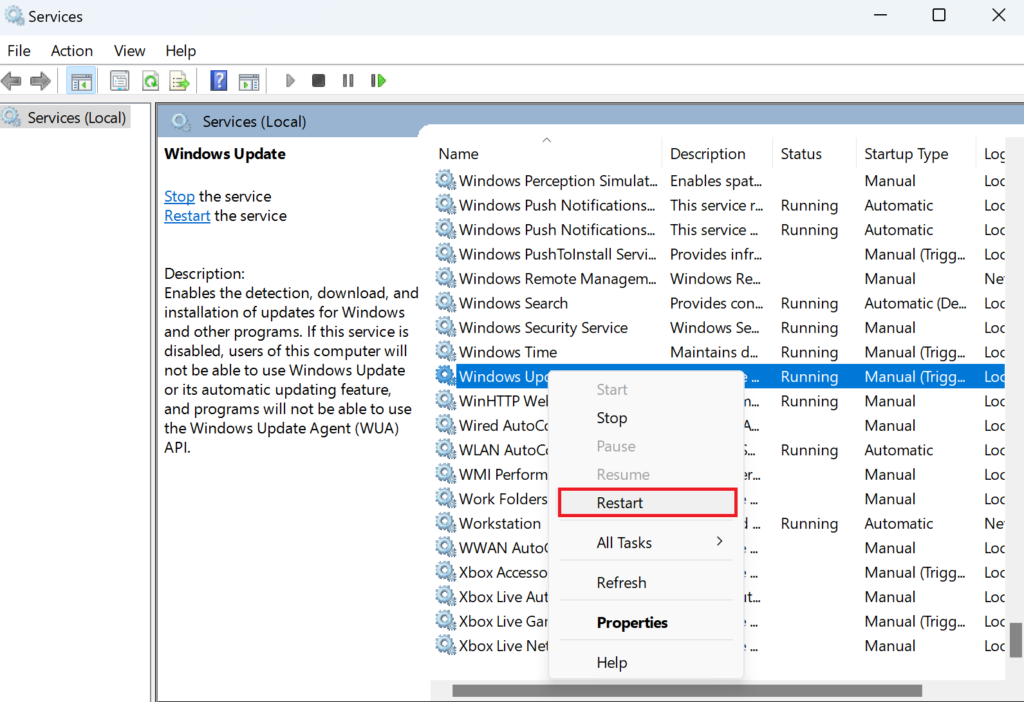
- Then, restart your PC.
If this fails to fix the error, try the next solution.
5. Reset Windows Update Components.
For each Windows update, your system stores some update-related files in its cache folder. At times, these old files may get corrupted or interfere with the new update files, resulting in the Install Error 0x80070103 Update on Windows 11.
You must purge the associated folders every once in a while to avoid encountering the error. Afterward, reset the Windows Update settings by following the steps below:
- Go to the Search icon from the taskbar.
- Type cmd in the search bar.
- From the results, right-click on Command Prompt and select Run as administrator.
- Copy and paste the following commands one after another and press the Enter key after each command to disable the services in charge of the Windows Updates:
net stop wuauservnet stop cryptSvcnet stop bitsnet stop msiserver- Once done, paste the following commands to rename the folders. Ensure to press Enter after every command:
ren C:\Windows\SoftwareDistribution SoftwareDistribution.oldren C:\Windows\System32\catroot2 Catroot2.old- To enable the services responsible for Windows Updates, execute the following commands:
net start wuauservnet start cryptSvcnet start bitsnet start msiserverAfter completing the above steps, try to see if the installation error occurs again.
6. Install Update In Clean Boot.
Sometimes, the installed programs on your PC may interact with the system apps or functions, leading to errors. To combat this situation, it’s suggested to enter a clean boot and then install the update.
A clean boot is a system state that starts with a minimum number of programs and drivers to help diagnose responsible background activity for an issue.
- Sign in to the Administrator account, then follow the steps below.
- Go to the Search icon from the taskbar.
- Type msconfig in the search bar.
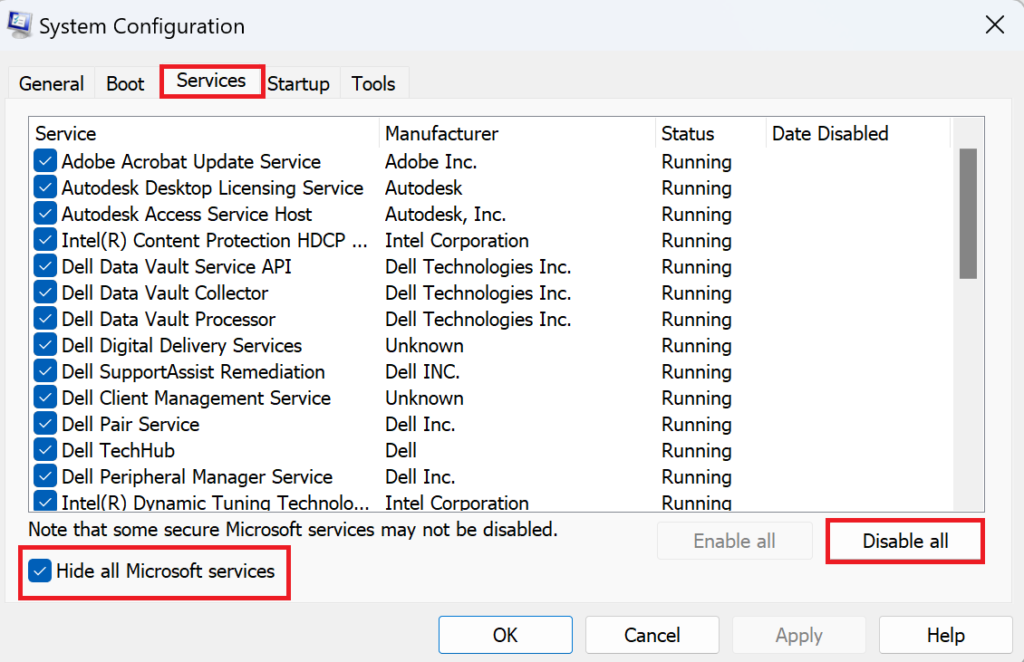
- Click on Open from the right pane to launch System Configuration.
- Then, go to the Services tab.
- At the bottom left corner, check the Hide all Microsoft services box.
- Then, click on the Disable All button.
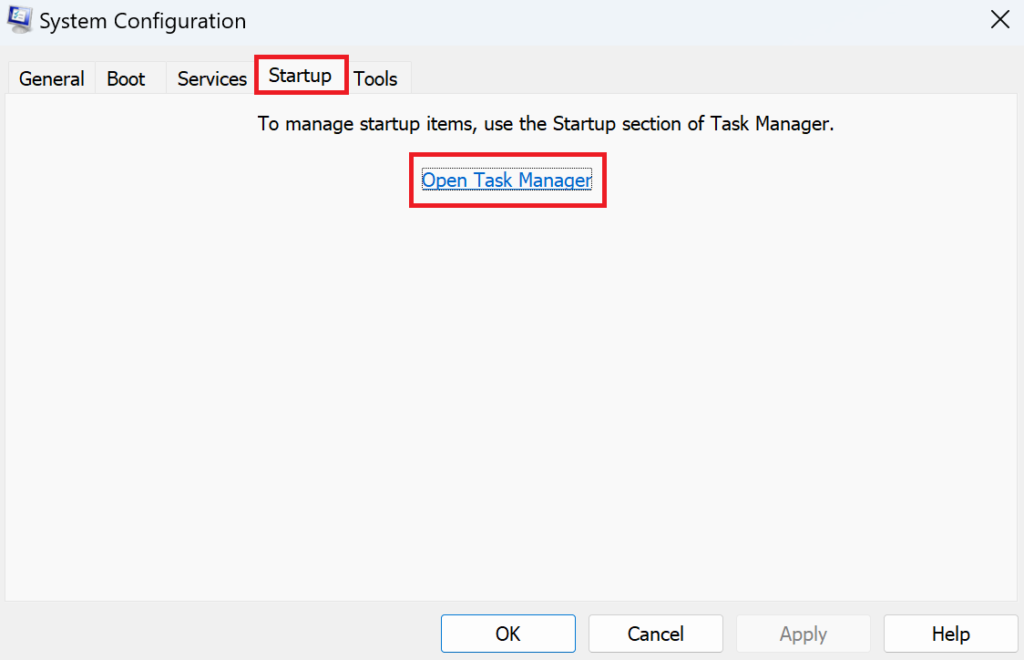
- After that, go to the Startup tab.
- Click on the Open Task Manager link.
- Select the suspicious programs one by one and click on the Disable option.
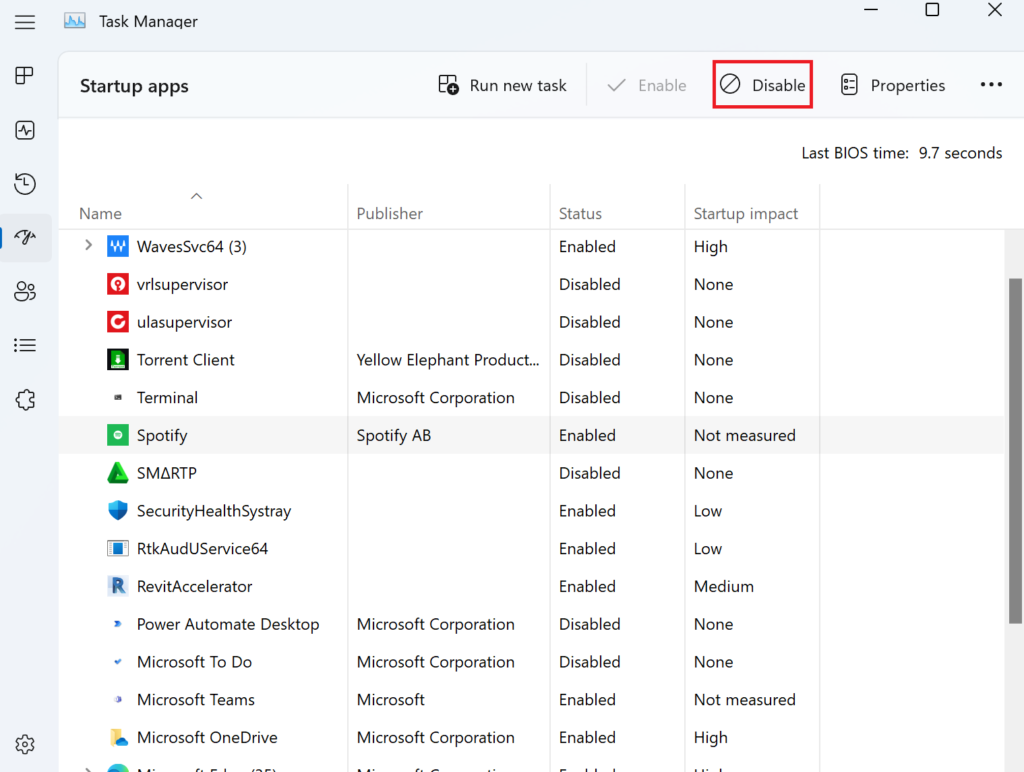
- Then, close the Task Manager window.
- Now, click on the OK button of the System Configuration window to save the recent changes.
- Restart your PC.
Now try installing the update and see if it works.
7. Remove Third-Party Antivirus Program.
While users add a third-party antivirus program for additional security, it may sometimes backfire and cause conflicts of its own. The default Windows Security may also interfere and block its suspicious files, resulting in the Install Error 0x80070103 Update on Windows 11.
Simply remove the antivirus to solve the issue. Use the instructions below to do so:
- Press the Windows key + i to launch Settings.
- Go to the Apps tab from the left.
- From the right pane, go to Installed Apps.
- Now click on the three horizontal dots icon next to your antivirus application and choose Uninstall.
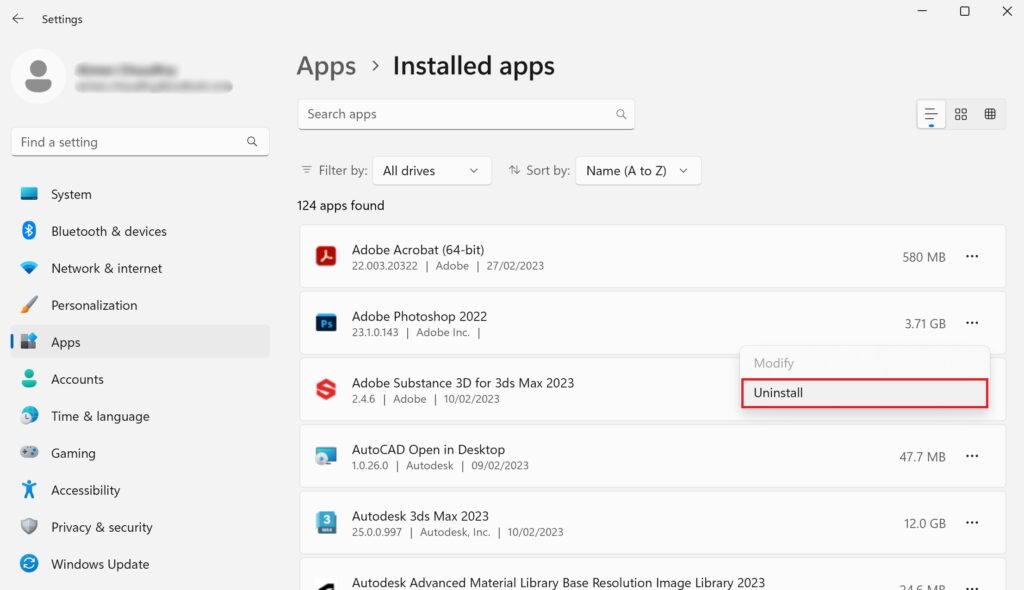
- Again, click on Uninstall to confirm your action.
Restart your PC afterward, then check if the issue has been resolved.
8. Edit Windows Registry.
The Install Error 0x80070103 Update on Windows 11 could result from the download path of the Windows Update. In that case, you need to modify the Windows Registry. However, we recommend only following this method after backing up the Registry as any mistake can damage your entire system.
- Go to the Search icon from the taskbar.
- Type regedit in the search bar.
- Then, press the Enter key.
- If a User Account Control (UAC) pop-up box appears, click on Yes.
- Once the Registry Editor opens, navigate to the following path:
HKEY LOCAL MACHINE\SOFTWARE\Policies\Microsoft\Windows\WindowsUpdate- Then, delete the DWORD value that reads WUServer.
- Also, delete the WIStatusServer key.

- Finally, restart the PC and see if you can install the update.
This brings us to the end of our guide on how to fix Install Error 0x80070103 Update on Windows 11. For more questions, communicate with us through the comment section below. We’ll be happy to provide further assistance.
If this guide helped you, please share it.
