

Wondering How to Install and Use MystiQ on Linux?
MystiQ or MystiQ Video Converter is an open-source converter that enables you to convert media files into different video and audio formats. It’s written using C++ and uses FFmpeg for its backend. MystiQ is available on Linux, Windows, and Mac Operating Systems.
Sometimes, you may be required to save your file in a certain format to transfer it over the internet. This means that you might need to convert the media file to a format that allows compression. Also, you have to convert the media in a format that won’t be corrupt when the file is accessed.
MystiQ enables you to convert media files to the desired format with a few quick steps. It has an intuitive, easy-to-use, and graphical user interface. In this guide, we will learn How to Install and Use MystiQ on Linux.
So, let’s dive right in!
Install MystiQ Using Terminal.
One of the ways to install MystiQ on Linux is by using the Command Terminal. You can run the commands one at a time to install from the apt repository.
That said, there are installation packages available for the various Linux distros.
Here is how you can install MystiQ using Terminal on Linux:
- First, open Command Terminal by pressing Ctrl + Alt + T.
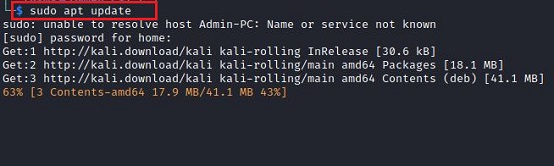
- A window should open. Go ahead and type the command below to update and fix the system packages.
$ sudo apt update
- Next, get and install the official MystiQ repository on your Linux computer by typing the following command.
$ sudo sh -c "echo 'deb https://download.opensuse.org/repositories/home:/llamaret/xUbuntu_20.04/ /' > /etc/apt/sources.list.d/home:llamaret.list"
- After that, run the command below to install the repository key.
$ wget -nv https://download.opensuse.org/repositories/home:/llamaret/xUbuntu_20.04/Release.key -O Release.key
- From there, add the release key to your Linux system by using the command below.
$ sudo apt-key add - < Release.key
- Next, once the packages are added, run this command to accept the added MystiQ repo.
$ sudo apt update
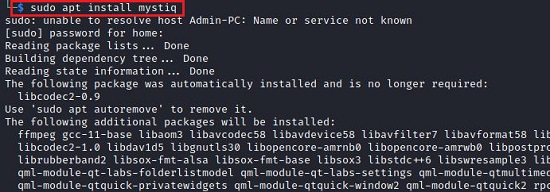
- Lastly, run this command to install the MystiQ converter.
$ sudo apt install mystiq
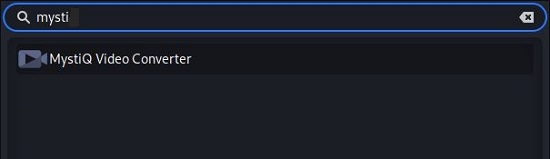
After all that, you will have successfully installed MystiQ into your system. When you search for the converter from the search bar of your Linux computer, it appears on the results dropdown.
Install MystiQ using AppImage.
An AppImage in Linux is a format used to distribute software without using root privileges during installation. It was first released in 2004.
AppImages are light, simple, portable, and leave the operating system unaltered.
Here is how you can install MystiQ using AppImage:
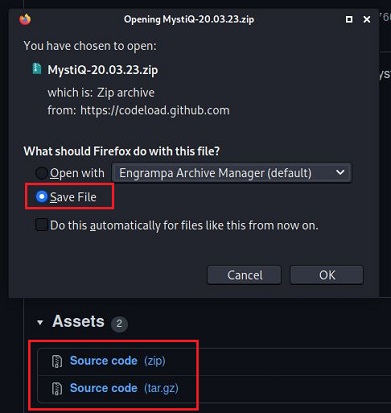
- Go ahead and download MystiQ AppImage file format from the GitHub repository.
- Select the location to save the MystiQ AppImage compressed file.
- Now, open Command Terminal by pressing Ctrl + Alt + T.
- Next, navigate to your download location using the command below.
$ cd Downloads
- After that, change the file permissions of your downloaded file using this command.
$ sudo chmod +x ~ MystiQ-20.03.23.zip

- Alternatively, right-click on the file, then scroll down and click Properties. After that, navigate to the Permissions tab and check Allow this file to run as a program.
- Lastly, launch the converter by running the command below.
$ sudo ./MystiQ-20.03.23.zip
When you are done with all that, you will have installed MystiQ using AppImage.
How to use MystiQ.
After the successful installation of MystiQ, the next step is to use it to convert media files to the desired video and audio format.
There are many reasons to use MystiQ. For instance, you may want to convert your media files to a format that’s compatible with your applications.
Here is how you can get started with MystiQ:
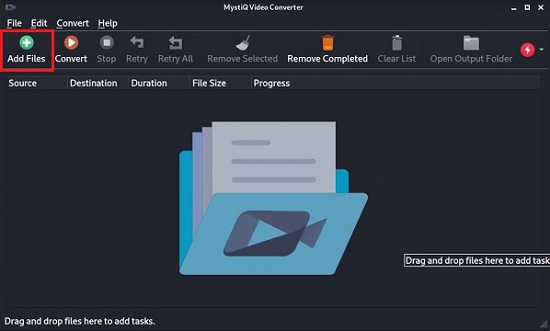
- Begin by typing MystiQ in the search bar and then double-click MystiQ Video Converter to open it.
- A window where you can add files for conversion opens. Now, click on Add Files.
- A new file explorer window will open. Select the media file you would like to convert.
- Another window opens where you can add more files for conversion. Once you are done with that, click Next.
- Now, specify the Output Settings and the Output Path for the new media file.
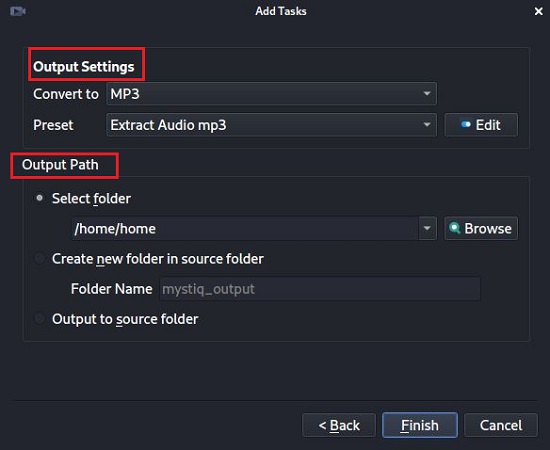
- From there, click Finish. A list of all your files to be converted will be displayed. You can check the progress of the conversion from the Progress bar and how long your media file is under Duration. Moreover, you can also see the size of your file.
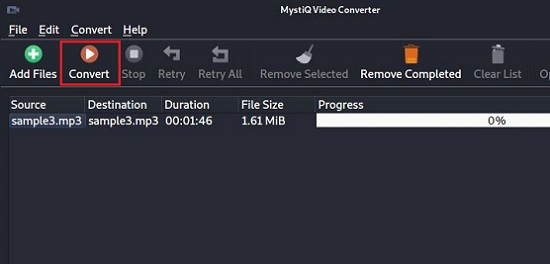
- Lastly, click Convert to start the conversion process. If you have many files or your files are large, then the process might take a little longer to complete.
Once you are done with all that, your files will be converted to your desired format and they will be located in the destination you specified.
How To Uninstall and Reinstall MystiQ.
Sometimes, you may encounter an error during the installation of MystiQ. As a result, you may have a broken package in your system. To fix this, you will be required to uninstall the incomplete application then reinstall it again.
Here is how you can uninstall MystiQ via Command Terminal:
- Start by pressing Ctrl + Alt + T to open Command Terminal.
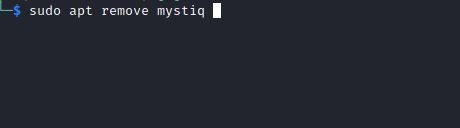
- The Terminal window should open. Now, run the command below to uninstall the media converter.
$ sudo apt remove mystiq
You have successfully uninstalled MystiQ using the Terminal. You can also remove it using the GUI.
Here is how you can uninstall MystiQ using the Graphical User Interface:
- Go ahead and type Software & Updates in the search bar.
- A window should open. Navigate to the Other Software tab.
- Now select the program you wish to uninstall then click Remove.
This will remove the converter from the system. You can then install MystiQ by following the steps discussed at the top.
We have now reached the end of our guide. In conclusion, we have learned about How to Install and Use MystiQ on Linux. If you have some questions or suggestions, let us know in the comment section below.
If this guide helped you, please share it. 🙂
