

Getting annoyed with lens flare on your iPhone?
There’s no denying that iPhones capture stunning images and videos. However, you may have experienced the frustrating lens flare on your iPhone’s camera.
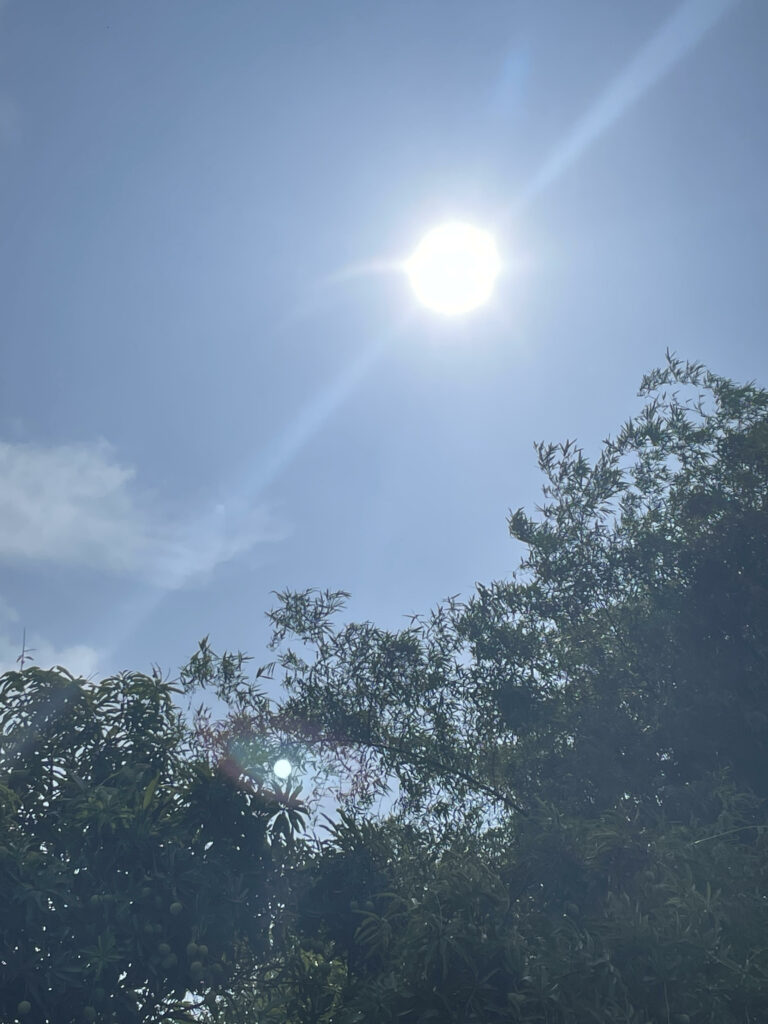
Lens flare occurs when light enters the camera lens at an unintended angle. This causes a bright and hazy spot in your photos and videos.
While it can be used for artistic effects, it is usually unwanted if you are just taking a snap of your loved ones.
Luckily, there are various techniques you can use to avoid lens flare on your iPhone’s cameras.
Today, we’ll show you how to fix lens flare on your iPhone.
Let’s jump right in!
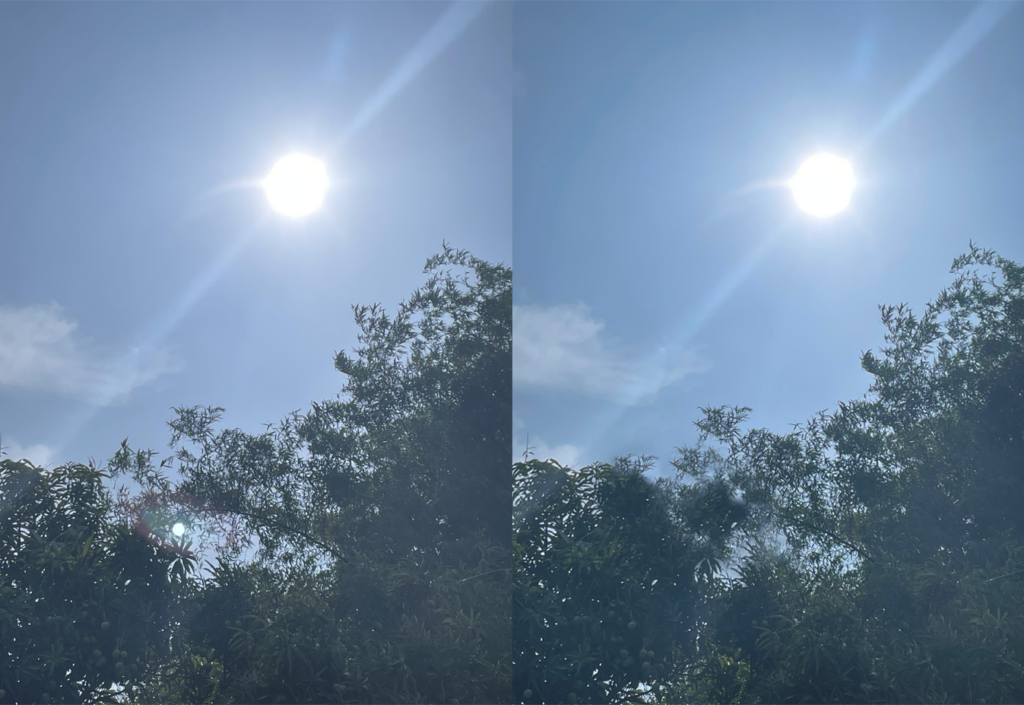
1. Update to iOS 15 or Later.
Many users noticed the improved image processing of iOS 15. iPhones can now automatically remove lens flare from images.
We suggest that you update your device to iOS 15 or later if you want to get rid of lens flares.
Here’s how you can update your iPhone:
- Go to the main menu and open Settings.
- Now, tap on General > Software Update.
- If there’s an available update, tap on Download and Install.
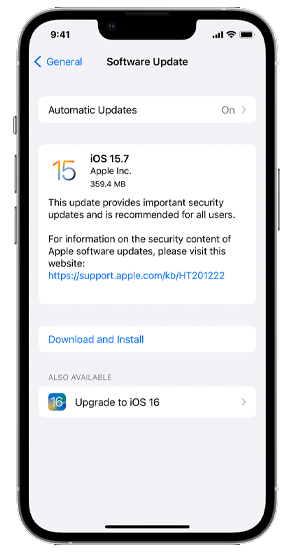
After downloading the file, follow the prompts to install the software update.
Go outside with your iPhone and take some shots directly facing the sunlight to test your camera.
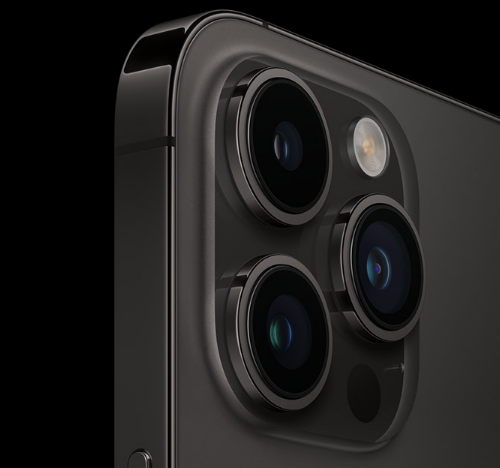
2. Clean Your Lens.
Dust and fingerprints on your camera lens can also make lens flares worse. Before taking photos or videos, make sure that your iPhone’s lens is clean and free from smudges and marks.
Note
While cleaning your iPhone’s camera, don’t apply too much force on the lens to avoid scratching it.
See the guide below to clean your iPhone’s lens:
- Grab a clean microfiber cloth. A microfiber cloth is the best tool to clean your camera. It’s soft and effectively removes dust and smudges.
- Now, remove any protective case on your iPhone. This should give you better access to the lens.
- Using a dry microfiber cloth, gently wipe the lens in a circular motion. Repeat this process until your iPhone’s camera is free from smudges and marks.
Do not use any cleaning agent on your iPhone’s camera as this can damage the lens.
Now that you’ve cleaned your lens, avoid touching it with your fingers. This can transfer oils and dirt to the lens.
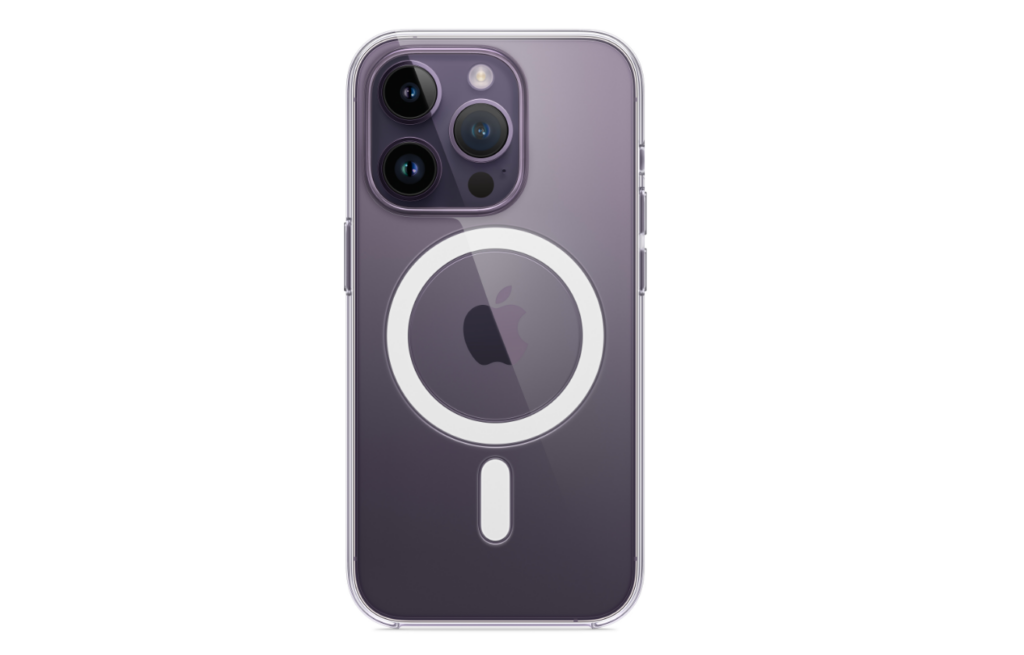
3. Remove Protective Cases.
You also want to make sure that there’s no plastic or glass blocking your camera.
Some protective cases come with plastic covers for the camera. These plastic covers are not made from anti-reflective material and could cause lens flares to occur.
What you can do is remove your iPhone’s case when you are taking photos and videos.
This should allow your device to capture clearer and more accurate photos since there’s no extra layer of material between the lens and your subject.
4. Adjust the Angle of Your Shot.
Lens flare occurs when light enters your camera at an unintended angle. By adjusting the angle of your iPhone when taking photos, you can prevent light from entering the lens, reducing the amount of lens flare in your images.
You can try moving your device slightly so that the light source is not directly hitting the camera.
Example
If you are taking a photo on a sunny day, find an angle where the sun is not in the frame. You can also change your position or move the subject to a different location.

It is important to note that it may not always be practical or possible to adjust your shot. In these cases, you might want to try the solution mentioned below.
5. Use A Lens Hood.
A lens shade is an accessory that attaches to your iPhone. This helps to block out unwanted light, which can reduce lens flares.
Here’s how you can use a lens hood:
- First, purchase a lens hood or shade for your iPhone. There are various options available, including clip-on hoods, screw-on hoods, and collapsible shades.
- Next, attach the hood to your iPhone. This can vary depending on the design of the lens hood you purchased. Refer to the user manual for installation instructions.
- Fire up your camera and adjust the position of the hood to block sunlight or other light sources.
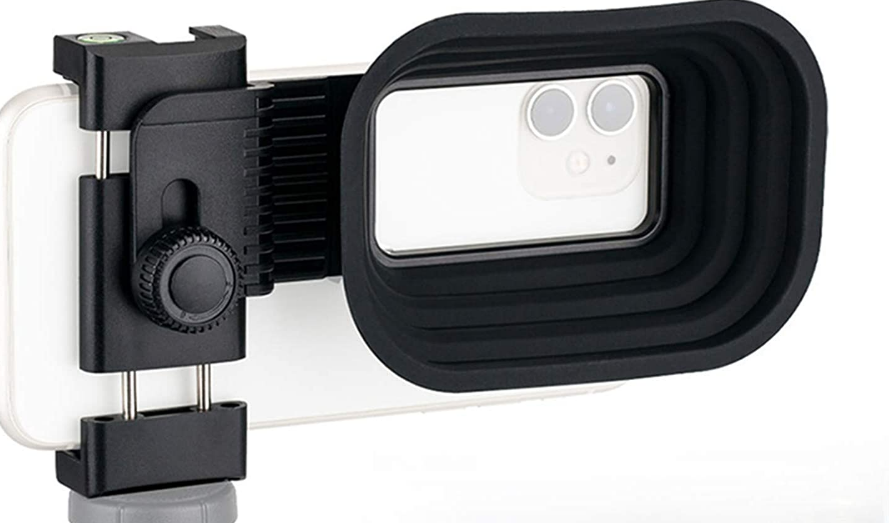
Make sure you’re still mindful of the angle and position of your device to prevent lens flare.
6. Adjust Exposure.
You can also adjust the exposure of your camera to minimize lens flare. Adjusting the exposure can reduce lens flare by controlling the amount of light entering the camera lens.
See the steps below to adjust your exposure:
- Open the Camera app and choose the photo or video mode.
- Aim at your subject and tap on the area of the screen where you want to focus.
- To adjust exposure, swipe up or down on the screen. Swiping upwards increases the exposure and swiping downwards reduces exposure.
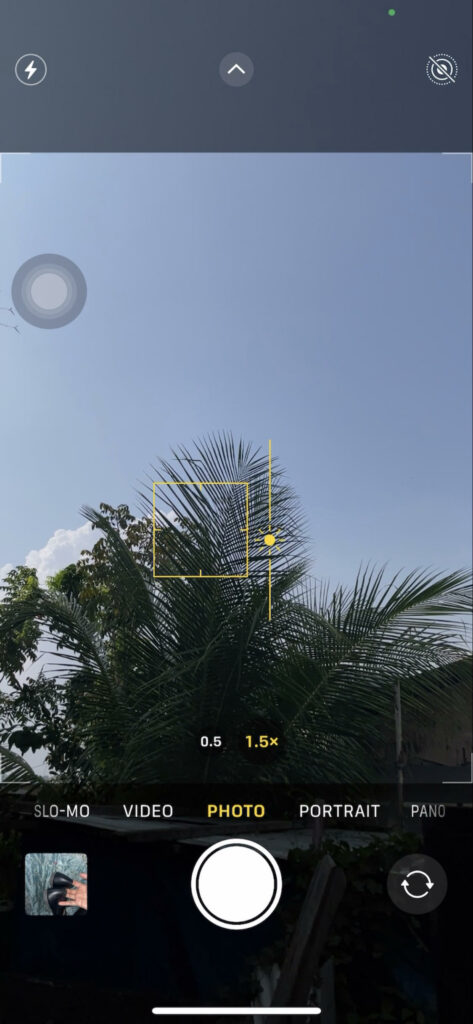
Take a couple of shots with various exposure settings and see which works best for you.
7. Use Editing Software.
If the steps above did not fix the lens flare on your iPhone, it means that the shooting conditions are simply too much for the camera.
In this case, you’ll need to use editing software to manually remove lens flare from your photos. For instance, you can use Snapseed to remove lens flares.
Here’s what you need to do:
- Download Snapseed on your iPhone.
- Open Snapseed and find the image you want to edit.
- Select the Healing tool.
- With the tool selected, swipe your finger over the lens flare to remove it. Depending on how obvious the lens flare is, you might need to repeat this process several times.
Save your edited image afterward and you’ll have a nice photo without any lens flare.
8. Contact Apple.
If none of the solutions above worked, you might have defective camera hardware. In this case, you’d want to report the issue to Apple immediately.
Bring your iPhone to the nearest Apple Store. Have your device inspected by an Apple-certified technician. To help their team assess the situation, show the photos you’ve captured with excessive lens flare.

The excessive lens flare on your iPhone is likely caused by a manufacturing defect.
If you are planning to get a replacement, check the warranty options for your device. If you just bought your iPhone, you have up to 14 days to return the device and ask for a refund.
That sums up our guide on how to fix lens flare on iPhone. If you have questions, please leave a comment below, and we’ll do our best to answer them.