Is Kodi taking up too much storage space on your device?
When we talk about Kodi alone, the media player is relatively stable and doesn’t consume much of your system resources. However, Kodi allows users to install add-ons and repositories to add various features to the media player.
This can include streaming HD movies and shows, music streaming, or managing Kodi’s system files and settings.
Unfortunately, not all add-ons and repositories on Kodi are the same.
Some add-ons can consume a lot of your resources, others may not be optimized for specific operating systems, or they simply consume a lot of storage space.
Whichever the case is, this can affect the performance of your entire system.
In this case, we’ve decided to make a guide on how to free up memory on Kodi if it’s taking too much storage space on your device.
Let’s get right into it!
Clear Kodi’s Cache Manually.
If Kodi is taking too much storage on your device, the first thing that you can do is to clear its caches. Like other apps, Kodi utilizes temporary data on your system and stores it locally to enhance its overall performance.
However, application caches can accumulate over time and eat up all your resources.
For Windows users, check out the steps below to clear Kodi’s cache:
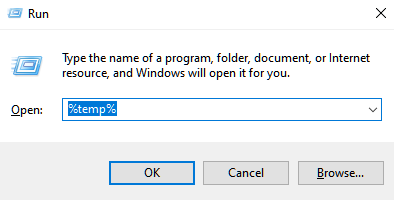
- First, press the Windows + R keys on your computer to open the Run Command.
- After that, type %temp% and hit Enter to access the folder.
- Lastly, remove all the files inside the folder and restart your system.
If you are using an Android phone or TV, follow the guide below:
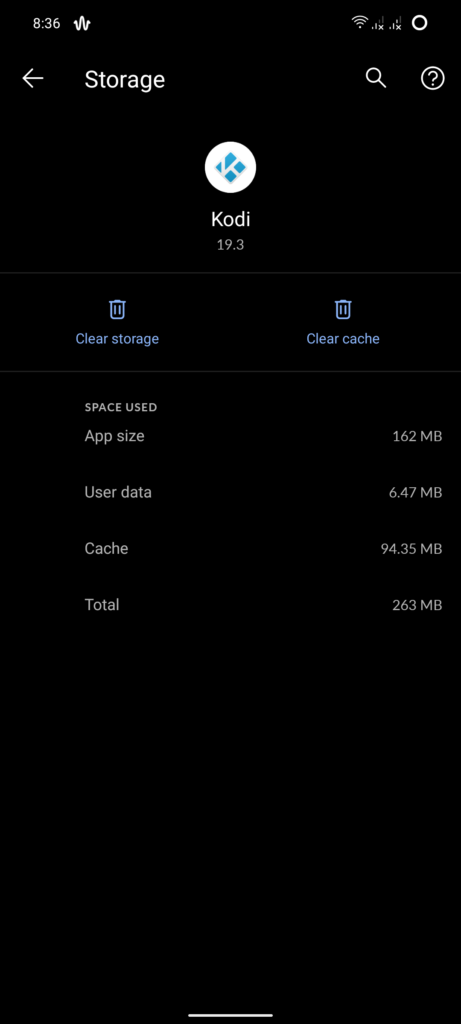
- On your device, find the Kodi app and press its icon until the options screen shows up.
- Next, tap on App Info and access the Storage & Cache tab.
- Finally, tap the Clear Cache button to complete the process.
On Amazon Firestick / FireTV, you can clear Kodi’s cache by going to Settings > App > Kodi and hit the Clear Cache button.
Check Kodi’s installation size on your system afterward to see if it’s still taking too much storage space on your device.
Remove Unused Add-Ons.
When you installed Kodi the first time, you’ve probably tried out various add-ons before finding the right one that fits your needs. If this is the case, you may have left out some add-ons you no longer used that are still installed on your system.
These add-ons still consume storage space on your device. To reduce the installation size of Kodi, remove unused add-ons on the app.
Follow the steps below to delete Kodi add-ons:
- On Kodi, click on the Gear icon on the side menu to open the Settings.
- After that, access the Add-Ons tab and choose an add-on you no longer use.
- Finally, click on Uninstall and follow the prompts to continue with the process.
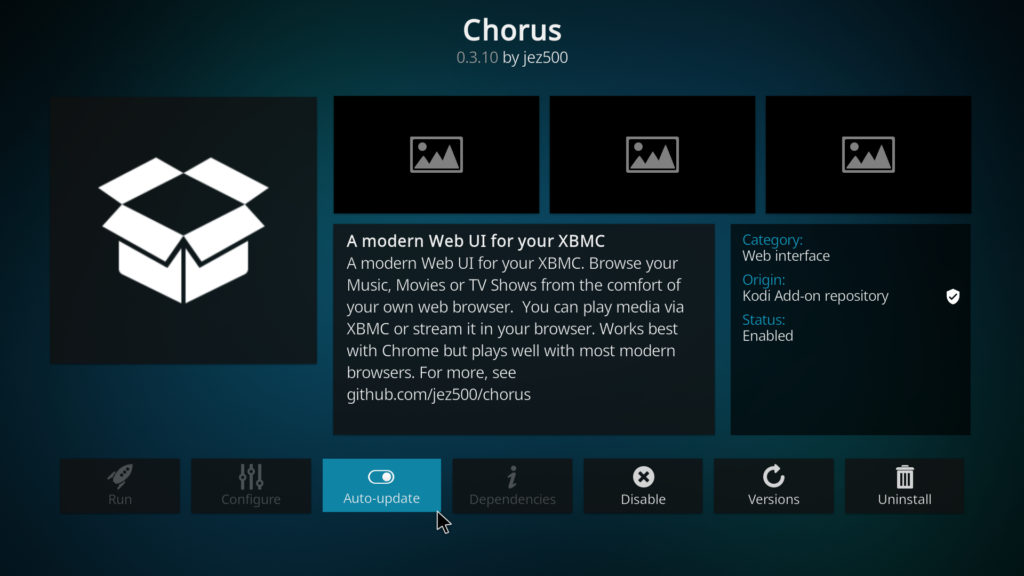
Repeat the steps above until you’ve removed all unused add-ons from your device.
Reset Kodi Using Fresh Start.
There are various add-ons on Kodi for handling your configurations and data. This allows you to manage Kodi faster with the help of a simple user interface where you can clear cache, reset settings, and more.
If Kodi is taking too much storage space on your device, use Fresh Start to reset the app to factory default. Keep in mind that there are other add-ons that you can use for this process, but we’re going to stick with Fresh Start.
Here’s what you need to do:
- First, go to Kodi’s Settings and open the File Manager.
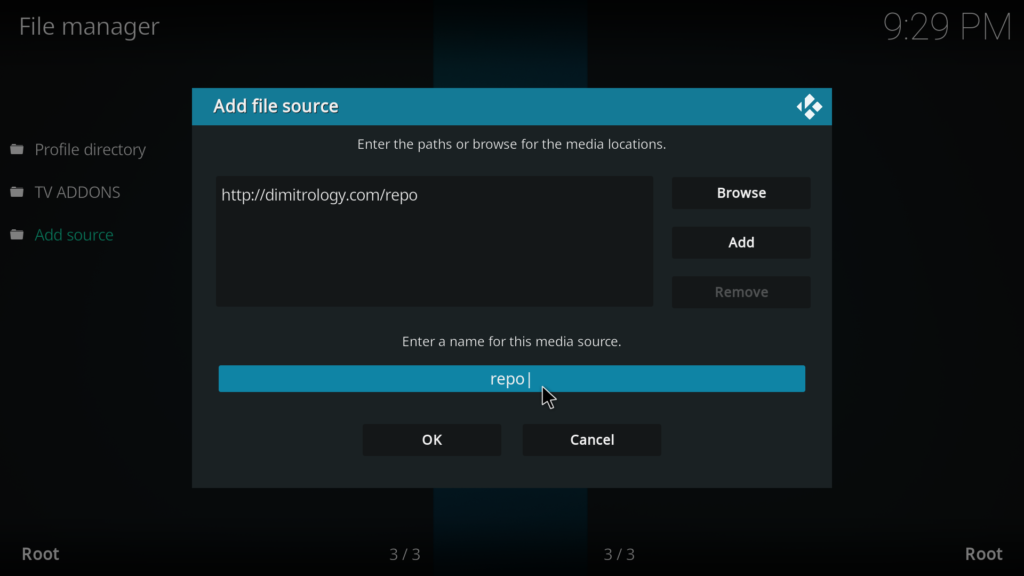
- Now, click on Add Source and add the ‘http://dimitrology.com/repo’ repository.
- After that, return to the main screen and access the Add-Ons tab.
- Next, click the Install button on the top left corner of your display and choose Install from Zip File.
- Select Dimitrology from the list and click on Plugin.Video.FreshStart-1.0.5.zip.
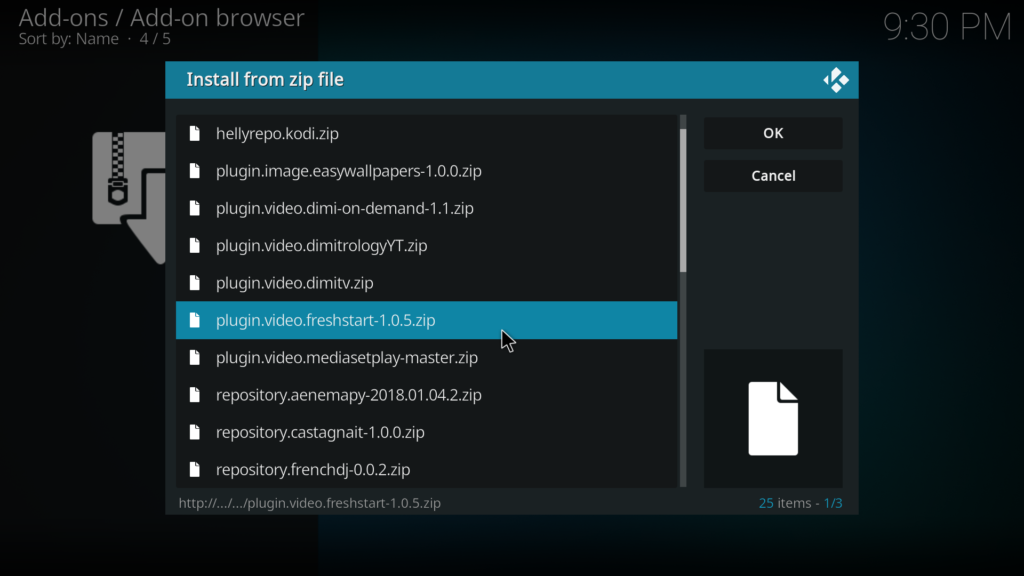
- Once done, go back to the main menu, click on Add-Ons, and open Fresh Start.
- Finally, click YES from the confirmation box and wait for the process to complete.
Check Kodi’s installation size afterward to see if it’s still taking too much storage space on your device.
That ends our guide on how to fix Kodi’s large memory usage on your system. If you have questions or other concerns, do let us know in the comment section, and we’ll get back to you as soon as we can.
If this guide helped you, please share it. 🙂


