

Want to learn how to manually configure a VPN on Windows 11?
Privacy leakage is a critical issue in today’s world, whether it occurs on applications, websites, etc. For this reason, it becomes a necessity rather than a choice to protect your identity when surfing the internet. And your best option for that is to use a VPN.
Currently, there are countless VPN services available, with most of them being free. Connecting your computer to a VPN adds an extra layer of security that was long needed. Fortunately, Windows 11 simplifies the process of configuring the VPN with their PC.
When establishing a connection to a VPN server, you can avoid installing additional applications through a manual setup. If you don’t know how it’s done, you’ve landed on the right page. Below, we’ll be covering the steps to manually configure a VPN on Windows 11.
So stick around till the end!
1. Obtain the Login Credentials.
When getting a VPN for Windows 11, you’ll be asked to provide the necessary login details. This includes username, password, server address, etc. Finding this information depends on the type of VPN connection you’re about to set up.
If the VPN connection is provided by your workplace or used by a corporate network, you’ll get the required information from the company’s intranet site or the administrative section. However, if your VPN is for personal/private use, your login information is the same as the one you used when creating the account.

In case you never made the account, then you need to get a subscription from a VPN service provider. The most reliable ones on the market are NordVPN, SurfShark, and ExpressVPN.
2. Access Windows 11 Account With Administrator Rights.
Next up, you’ll need to access your PC with administrator privileges. If you’re using your computer, you’ll likely receive the necessary permissions. However, if you’re using a guest account on someone else’s device, Windows 11 will not allow you to set up or modify the VPN settings.

3. Setup VPN From Windows Settings.
Some users prefer to manually configure a VPN on Windows 11. There can be various reasons behind such preference, and Microsoft understands. That’s why it has always offered the desirable settings. Fortunately, Windows 11 is no exception.
If you don’t want to use the program offered by your VPN service provider to set up the connection, you can perform the task manually from Windows 11 Settings. Below are the steps you’ll need to follow:
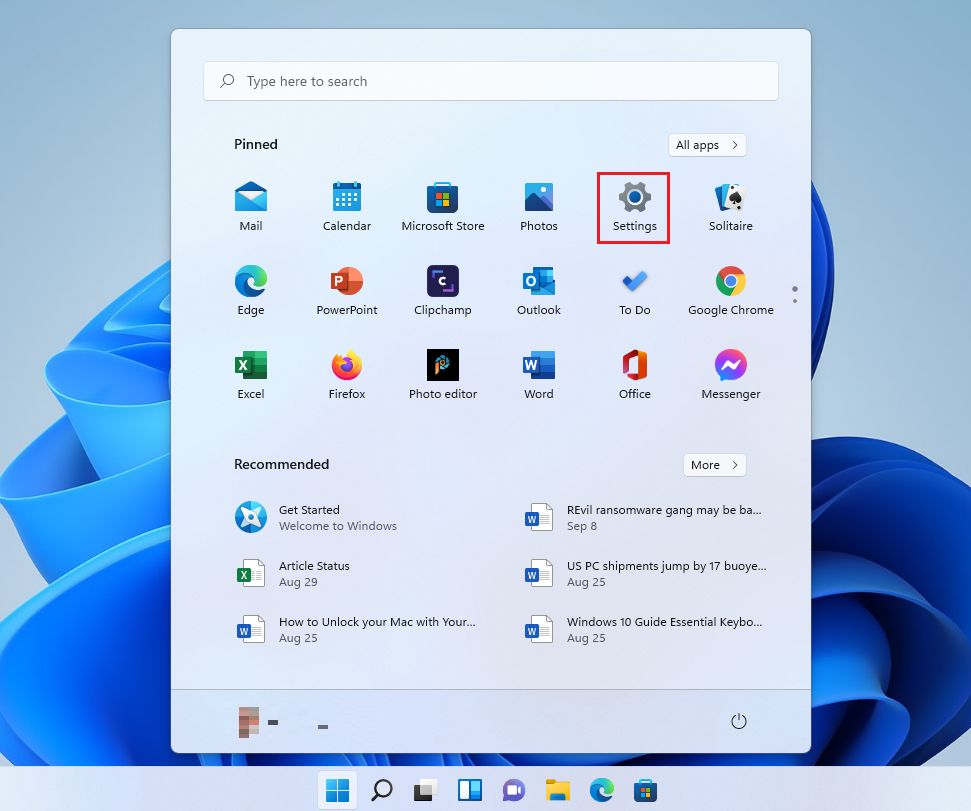
- Start by pressing the Win + i from your keyboard to open Settings. Alternatively, you may right-click on the Start menu and choose Settings from there.
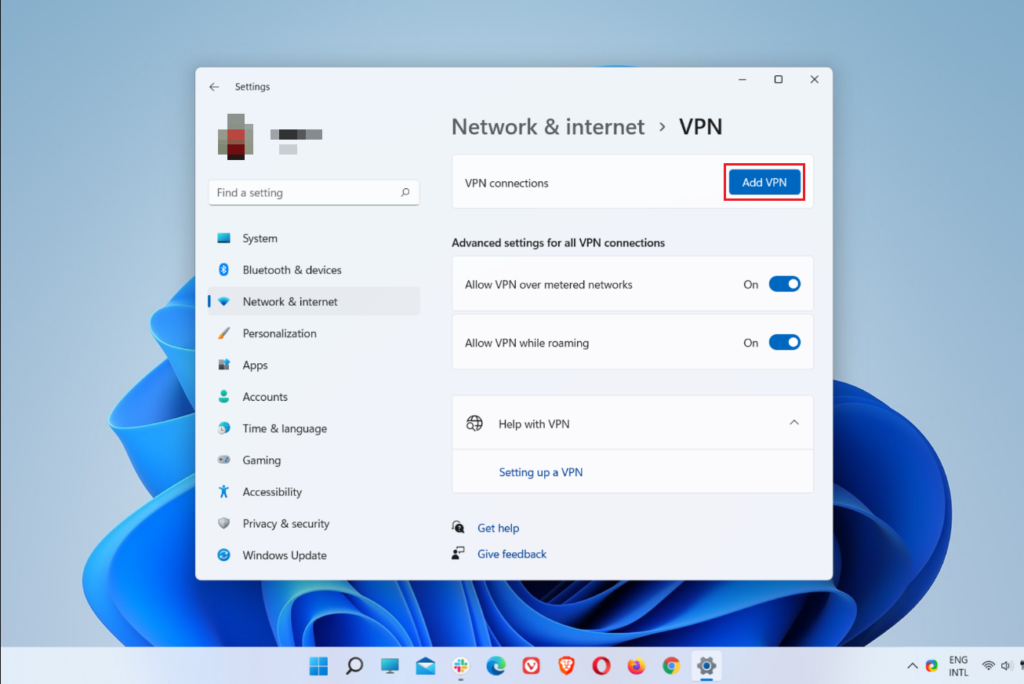
- From the left pane, select Network & internet.
- Afterward, click on VPN from Network & internet settings.
- Now, click on the Add VPN button located next to VPN Connections.
- A pop-up window of Add a VPN Connection will appear. Select Windows (in-built) from the drop-down menu of VPN Provider.
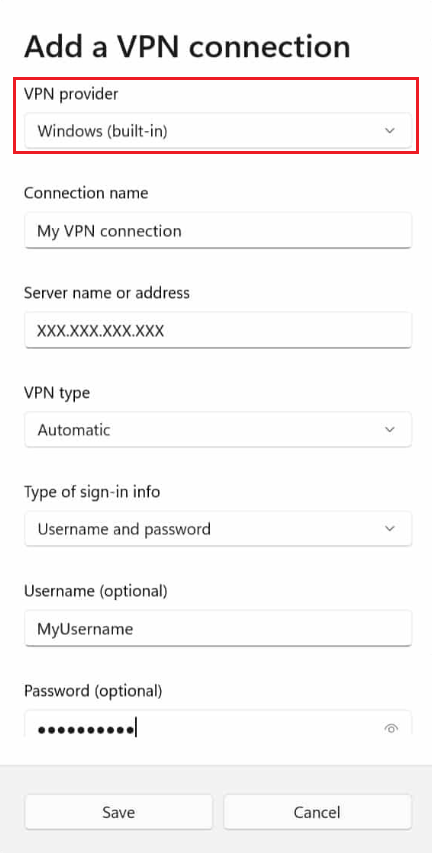
- Next, fill in the required details based on the VPN service to which you have subscribed.
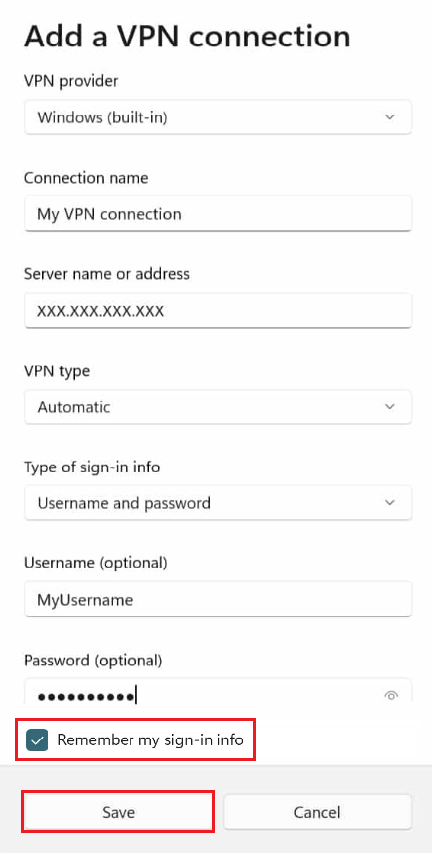
- Also, click on the checkbox next to Remember my sign-in info so that Windows can save your login credentials. Then, click on Save.
4. Setup VPN From Network And Sharing Center.
If you don’t prefer the first method or, for some reason, it didn’t work for you, don’t fret. Another way to manually configure a VPN on Windows 11 is through the Network and Sharing Center available in the Control Panel.
Here’s how to do it:
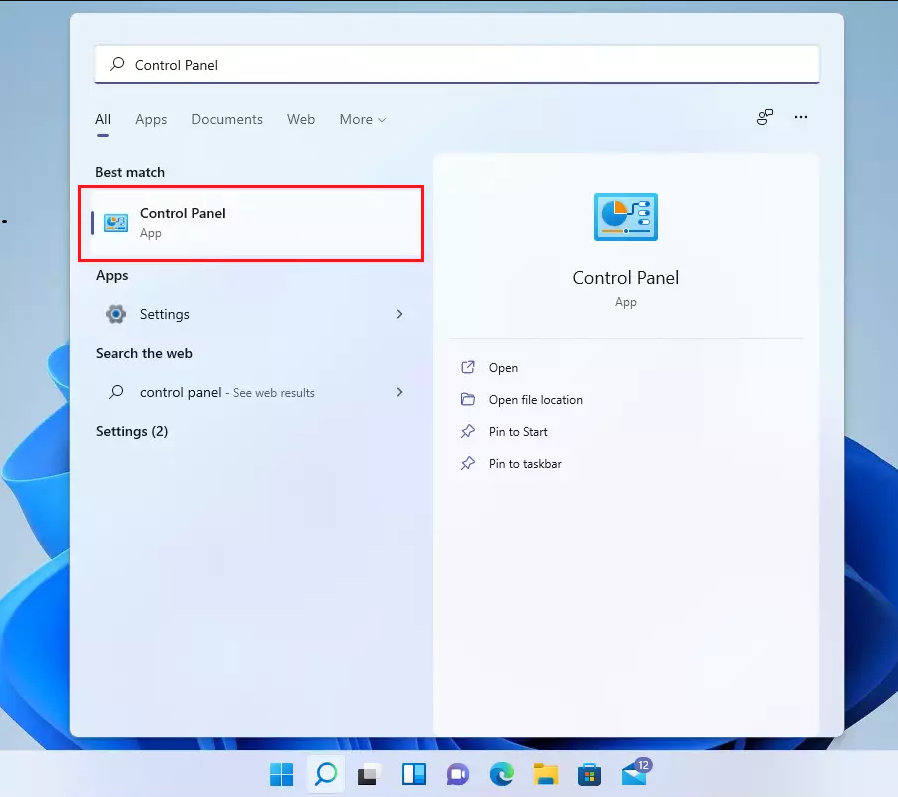
- To begin, click on the Start menu from the desktop and type in ‘control center’ in the search bar. Then select the same from the search results.
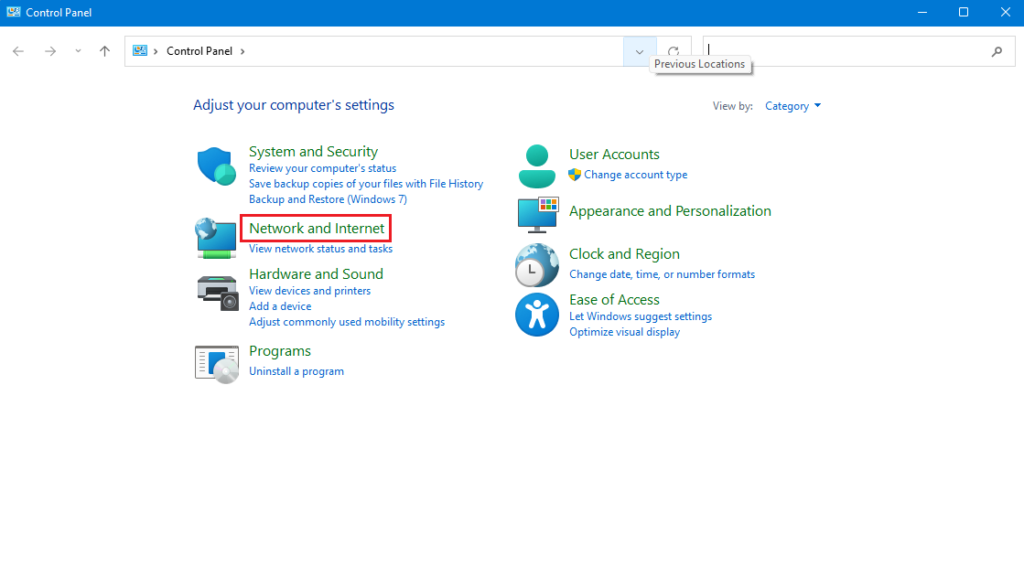
- Next, click on Network and Internet.
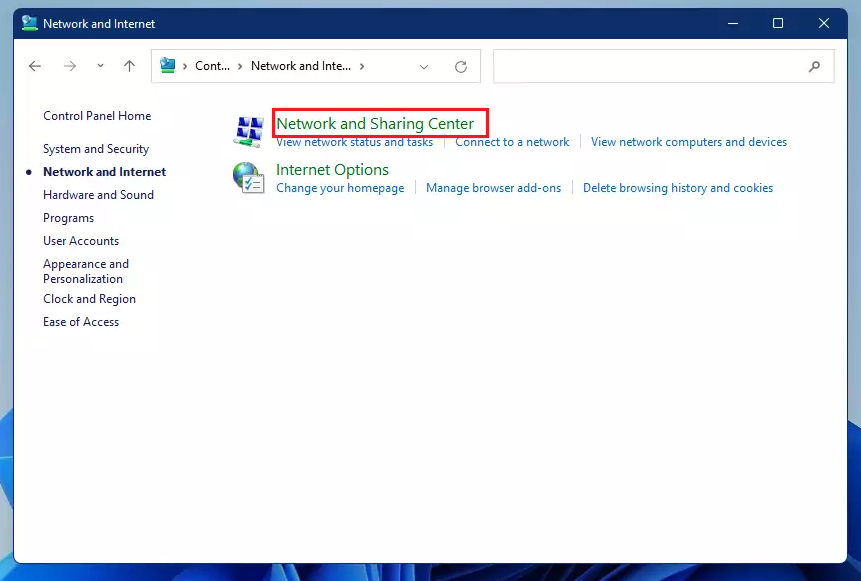
- From the right pane, select Network and Sharing Center.
- Now, pick Set up a new connection or network under the Change your network settings section.
- From the Set up a connection or network window, click on Connect to a workplace and then select Next.

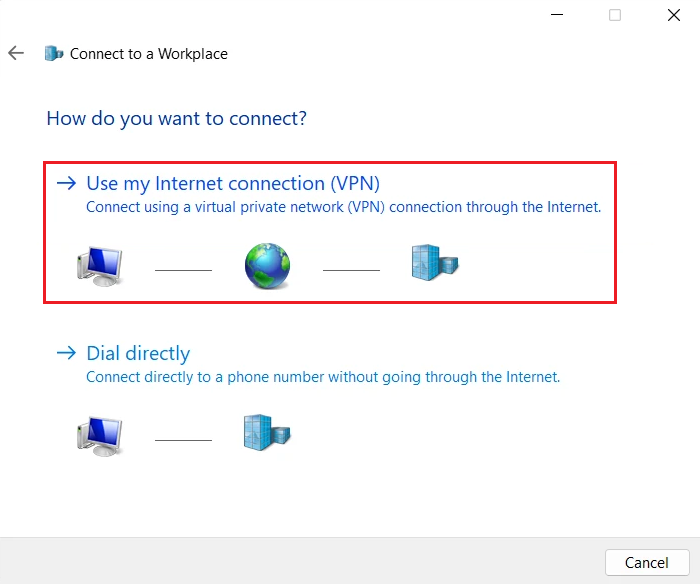
- From the next page, choose Use my Internet connection (VPN).
- Then, type in your VPN credentials. After that, click on Create.
- You will be brought back to the Network and Sharing Center window. From the left pane, select Change adapter settings.
- On the left pane, you will see the added VPN connection. Simply right-click on it and select Properties.

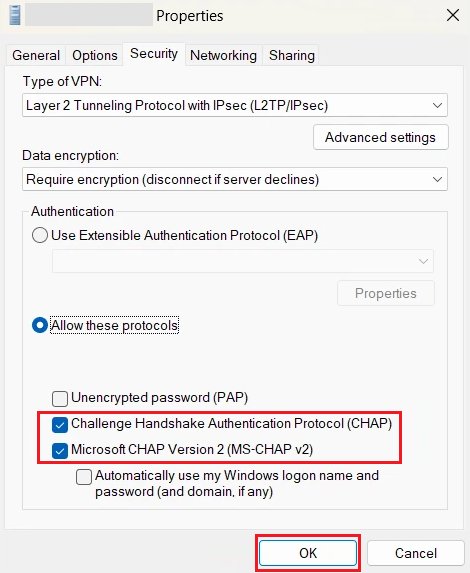
- Go to the Security tab and select a VPN protocol option from the drop-down menu of Type of VPN.
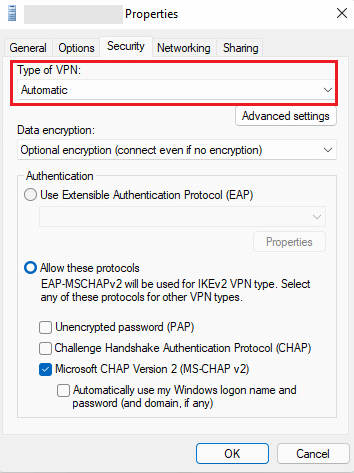
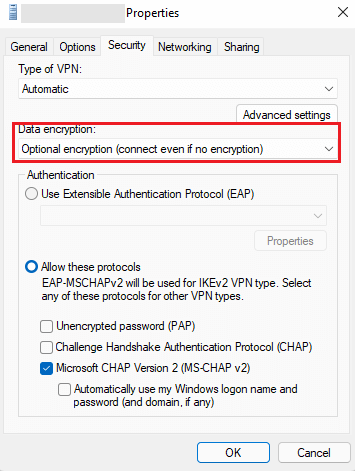
- Now, click on the drop-down menu of Data encryption and select an option. If you don’t wish to have any data encryption, select the No encryption allowed option.
- From the Authentication section, select your method of authentication. After that, ensure that the boxes next to Challenge Handshake Authentication Protocol (CHAP) and Microsoft CHAP Version 2 are checked. Then, click on OK.
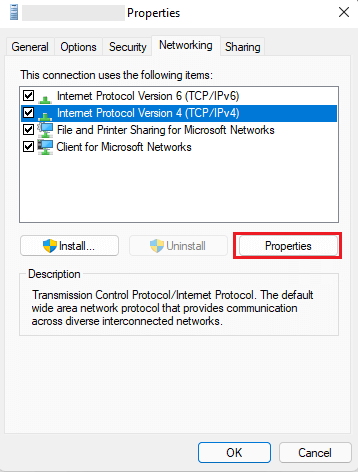
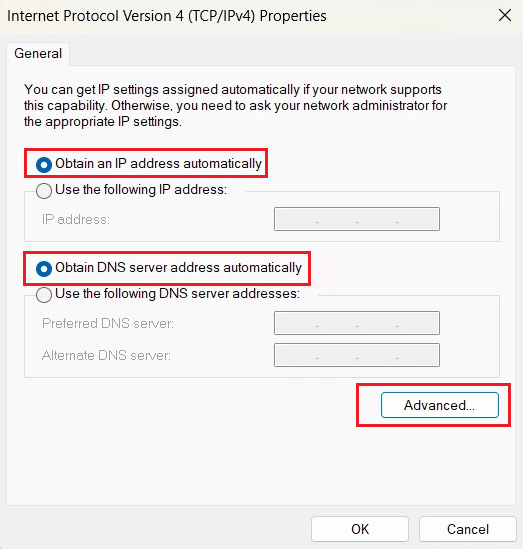
- Next, go to the Networking tab, click on Internet Protocol Version 4 (TCP/IPv4), and select the Properties button.
- From the next window, click on Obtain an IP address automatically and Obtain DNS server address automatically. Then, choose the Advanced button.
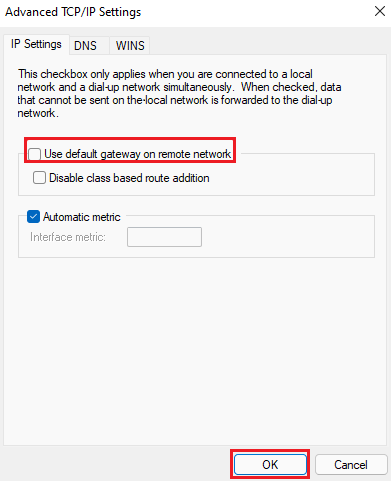
- Afterward, ensure there’s a checkmark next to Use default gateway on remote network and select OK.
Although the method has some extra steps, it will get the job done successfully.
5. Install Digital Certificates For IKEv2 or L2TP/L2sec VPN.
If you’re about to set up a VPN connection of IKEv2 or L2TP/IPsec type, there are a few additional steps you’ll need to follow. This is because they require you to download and install digital security certificates beforehand.
Configuring these two VPN types has a slightly different set of instructions for you to follow. They are as follows:
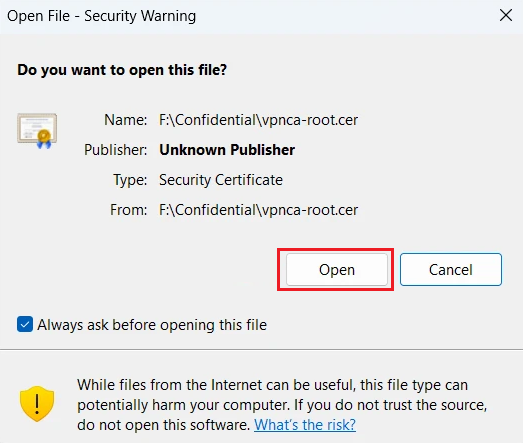
- Firstly, download the digital certificate of your VPN service provider. Once done, click on it and select Open.
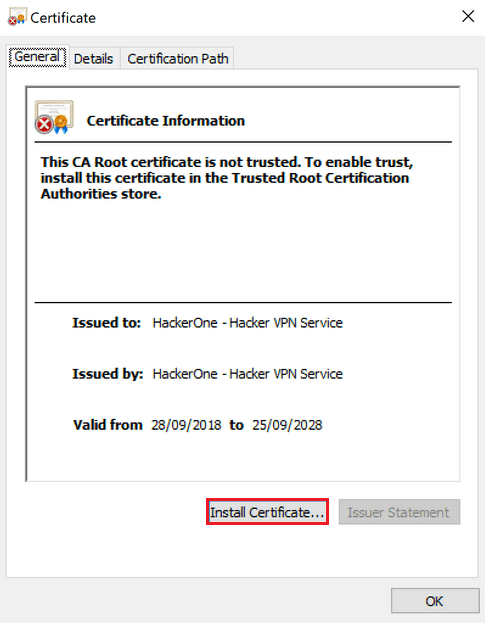
- From the Certificate window, click on the Install Certificate button and select OK.
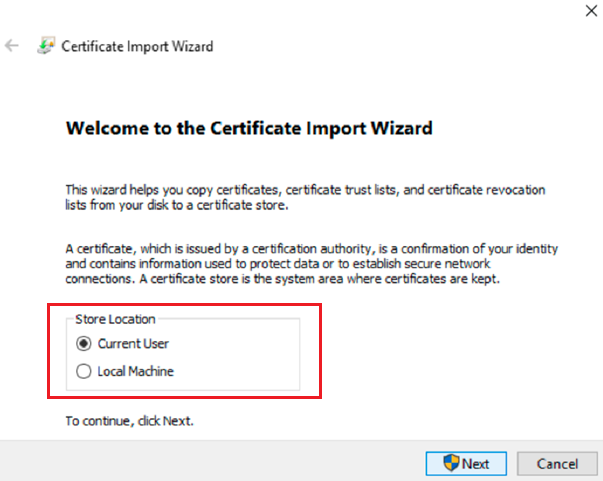
- Now, a Certificate Import Wizard window will show up. Select your Store Location and then click on Next.
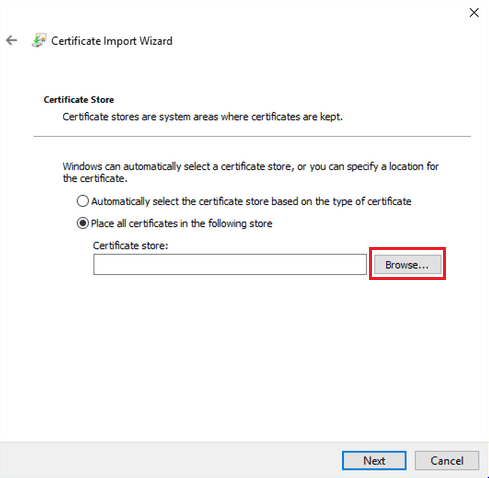
- Although Windows automatically determines the storage location, you may also do it by selecting the Place all certificates in the following store. Then, click on the Browse button.
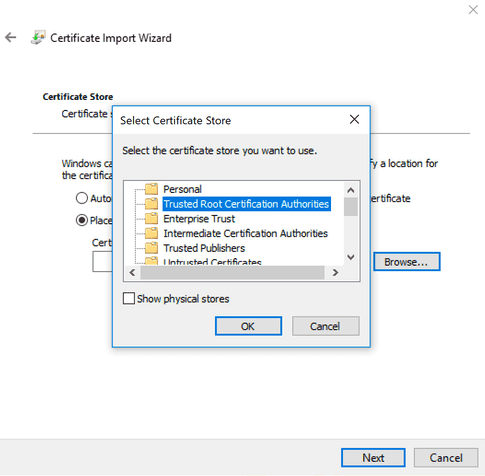
- After that, select Trusted Root Certification Authorities, click on OK, and then Next.
- Now, select Finish to import the VPN certificates.
- Next, open the Run command box by pressing Win + R from your keyboard. Type in ‘certmgr.msc’. Then, click on OK.
- From the left pane, choose Trusted Root Certification Authorities and then Certificates under it.
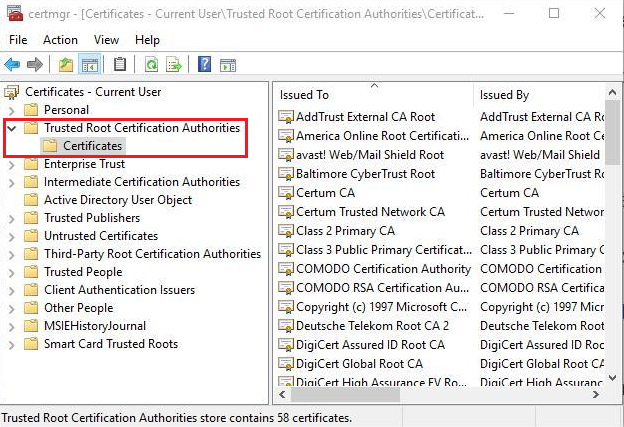
- From the right pane, locate and right-click on the certificate you imported, and choose Properties.
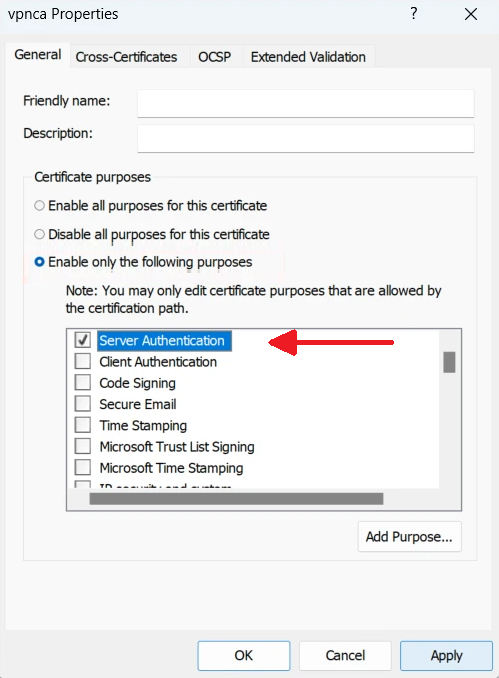
- Now, under the Certificate purposes section from the General tab, select Enable only the following purposes.
- Only click on the box next to Server Authentication. Lastly, click on Apply and then OK.
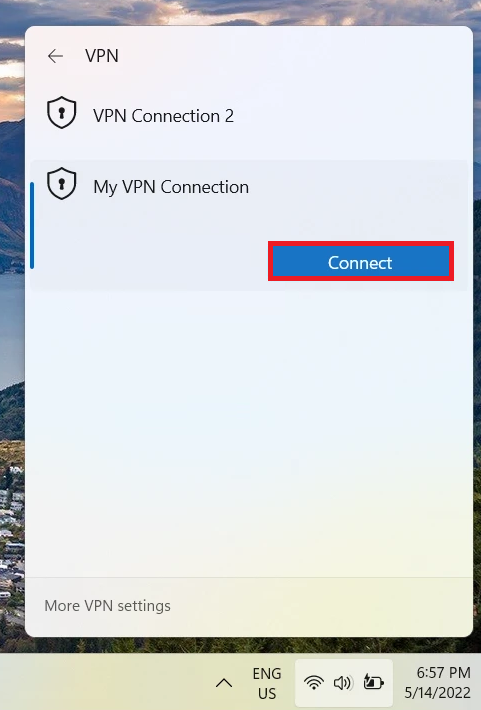
6. Connect to the VPN Server From Settings.
Once you’ve finally configured a VPN connection on your Windows 11 PC, the network will be available for you to connect to. This VPN server will now provide you with security services such as data encryption, privacy protection, IP address masking, and so on.
To connect to the VPN server using Windows Settings, follow these steps:
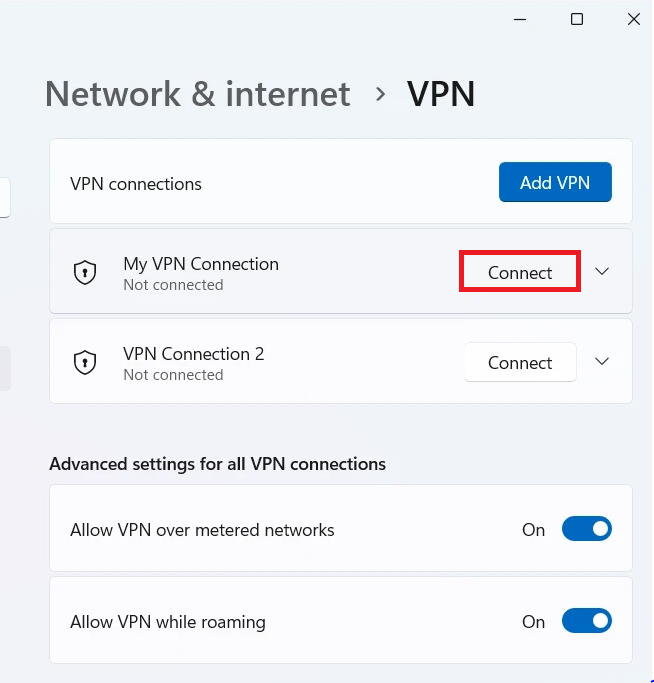
- Click on the Start menu and then select Settings to open it.
- From the left pane, click on Network & internet, and from the right, choose VPN.
- Now, click on the Connect button next to the VPN service that you would like to use.
Once done, your computer will connect to the VPN service.
7. Connect to VPN From Quick Settings.
The old Action Center on Windows 10 and older versions have been replaced by a Quick Access panel on Windows 11. As the name suggests, these Quick Settings enable you to quickly turn on and off services such as Wi-Fi, Bluetooth, and even the VPN server without having to dig through extensive Windows Settings.
Here’s how:
- Begin by pressing Win + A from your keyboard to open Quick Settings.
- Next, click on the VPN button to view all the VPN connections that you’ve added.
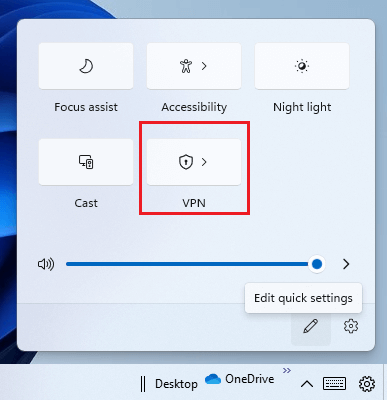
- Finally, select the one you wish to use and click on the Connect button.
This concludes our guide on how to manually configure a VPN on Windows 11. Alternatively, you may go back to using the app provided by your VPN service provider to set up the VPN connection. For further queries, use the comment section below.
If this guide helped you, please share it. 😊
