Are there no sound output devices found on Windows 11?
As great as Windows 11 is, you may occasionally encounter a few errors every now and then. Now, we don’t expect you to be a computer expert, but you should know how to combat the common issues yourself, especially in current times when technology is at its peak.
One such issue is the no sound output devices found on Windows 11. While there may be some physical issues with the audio devices or the sound card, the problem mostly lies in the software of your computer. Usually, the causing factors include incorrect configuration of the audio output device, missing or damaged audio drivers, etc.
The good news is that we’re here to guide you through the various methods you can easily fix the no sound output devices found on Windows 11. Simply follow the instructions provided below to troubleshoot the error.
Now, let’s get started!
1. Reboot Your PC.
Oftentimes, the no sound output devices found on Windows 11 error occurs due to a compatibility issue or a minor system glitch. In any of these cases, your best bet is to restart your PC. This will remove any temporary bugs within your system that may be interfering with the connected sound devices.
Keep in mind to disconnect any devices attached to your computer as you reboot your device. Here’s how to do it:
- Start by pressing and holding the Power button for a few seconds. Your screen will go black, indicating that your PC has been shut down.

- After a bit, press and hold the Power button again to restart your computer.
2. Check Sound Settings.
In Windows 11, the system audio is set as a default output audio. That’s why if you connect an audio device, you must ensure that it is the selected one in the Windows Sound settings for it to work as the output audio.
Here’s how to go about this:
- Launch Windows Settings by pressing Win + i keys from your keyboard.
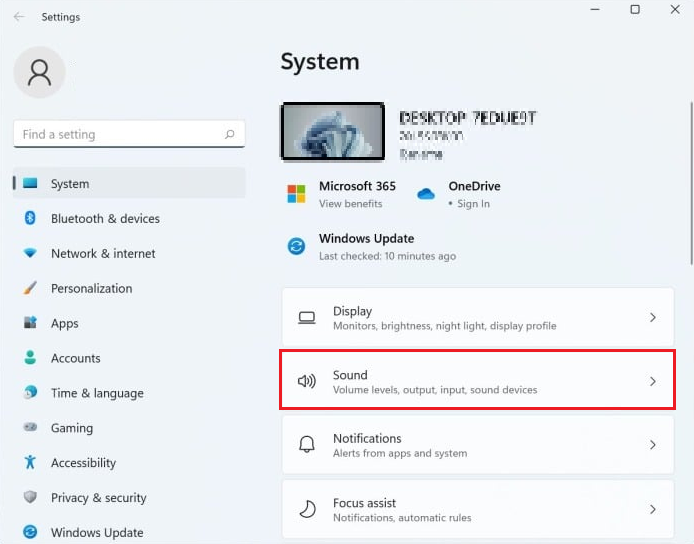
- From the System tab, select Sound from the right side of the screen.
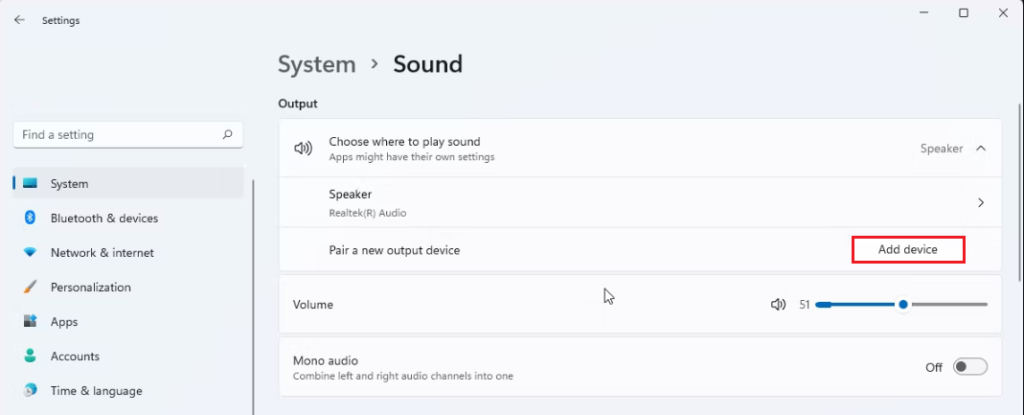
- Look under the Output section for your external audio device. If you don’t see any, click on the Add device button next to Pair a new output device.
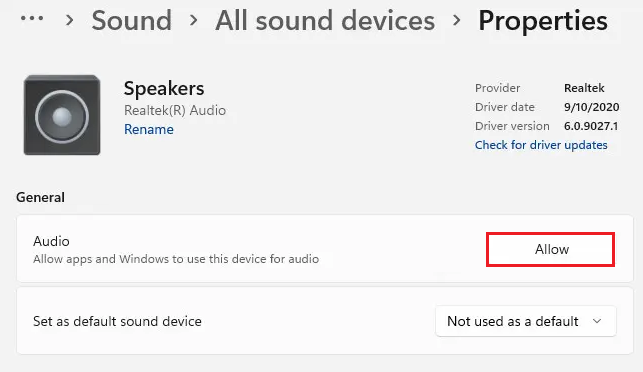
- Once done, double-click on your added audio device to access its settings.
- Under the General section, ensure that the Audio is set to Allow.
3. Ensure the Sound Devices Are Enabled in Device Manager.
Another reason you may find the no sound output devices found in Windows 11 error is if they’re disabled. You can utilize the Device Manager from your PC to enable them and fix your problem.
Follow these steps below to do it:
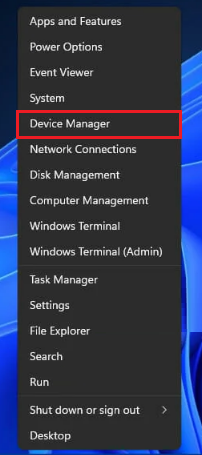
- Begin by right-clicking on the Start menu icon and clicking on Device Manager.
- From the Device Manager’s window, choose Sound, video, and game controllers to expand the category.
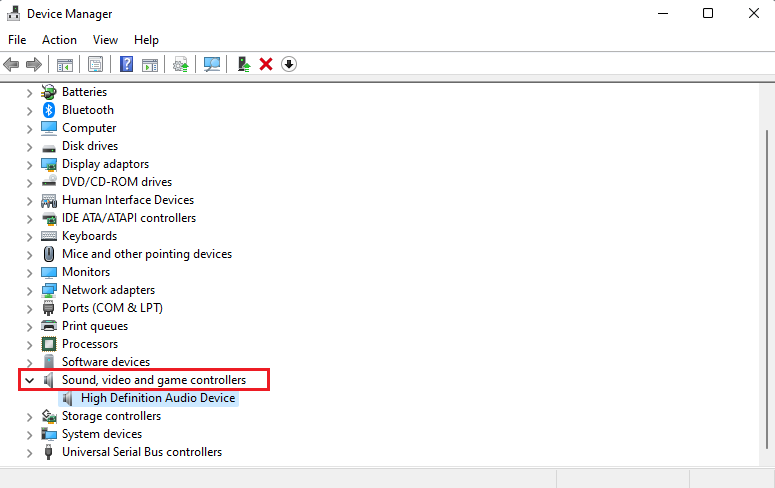
- Now, right-click on each audio device present under the category and Enable them if they’re not already.
- Next, double-click on the Audio inputs and outputs category.
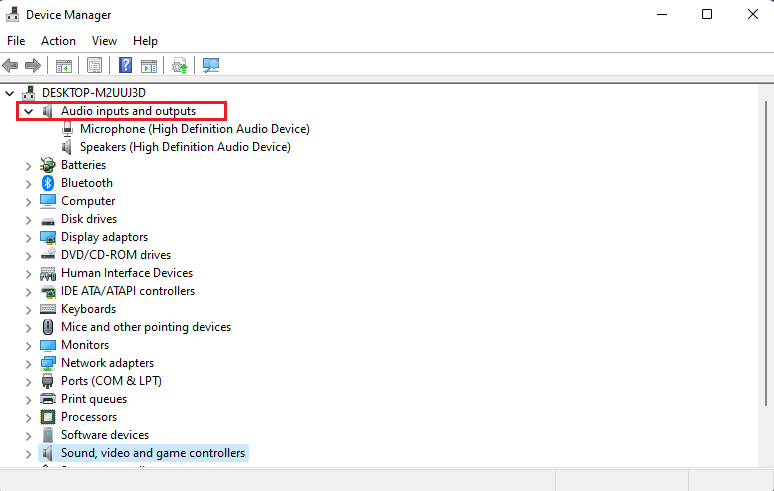
- Finally, right-click on each device listed below the Audio inputs and outputs category and choose Enable.
This should fix the problem you were facing. Check out the next method if your issue persists.
4. Update Audio Drivers.
Most of the time, an outdated or corrupted audio driver is the main cause behind no sound output devices found error on Windows 11. In these instances, updating the drivers to the latest version will resolve your issue.
The driver updates contain improved features, bug fixes, and more. Hence, it’s necessary to check for these updates every once in a while. Although Windows automatically installs these updates, you may also do it manually by following the steps given below:
- Head to the Start menu and type the words ‘device manager’ in the search bar. Then, click on the Device Manager app from the search results. Or, right-click on the Start menu icon and select Device Manager.
- Expand the Sound, video, and game controllers category by double-clicking on it.
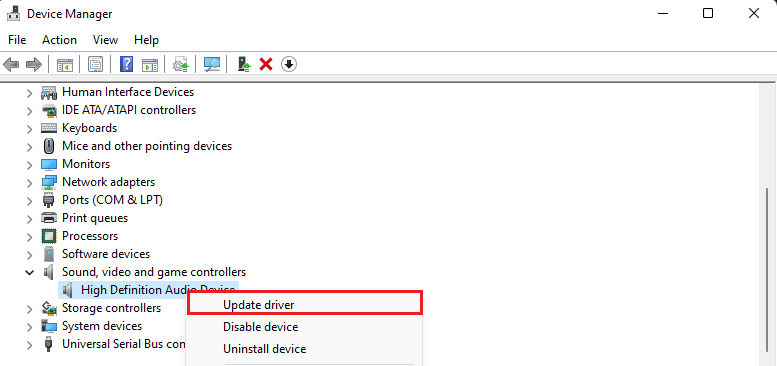
- After that, right-click on the audio driver and choose Update driver.
- From the new window that appears, click on Search automatically for drivers.
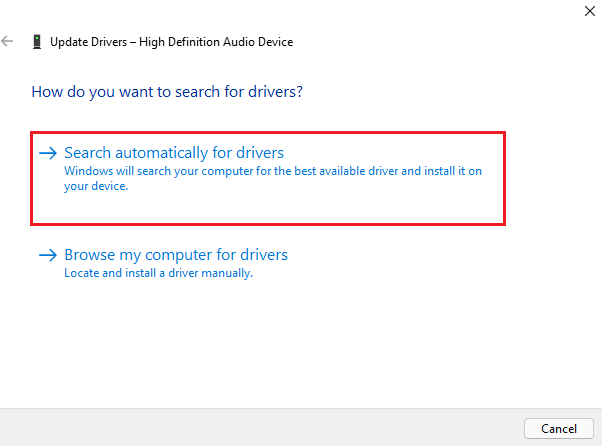
- Follow the on-screen instructions to update the sound drivers on your PC.
5. Uninstall and Reinstall Sound Drivers.
If updating the audio drivers didn’t seem to fix your issue, the actual problem may lie within the updated sound drivers. If that’s the case, the corrupted audio driver may interfere with the system and cause sound-related issues.
Uninstalling these faulty drivers will be able to fix the no sound output devices found on Windows 11 issue. Here’s what you need to do:
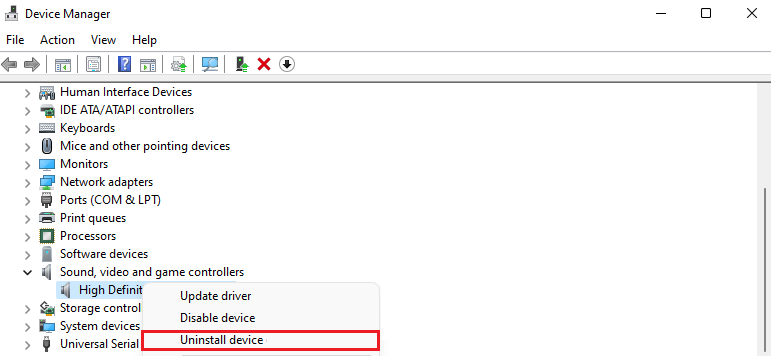
- From the Device Manager screen, click on the downward arrow next to Sound, video, and game controllers.
- Now, right-click on the sound driver you wish to remove and click on Uninstall device.
- A confirmation screen will appear. Check the box for Delete the driver software from this device and click on Uninstall to confirm.
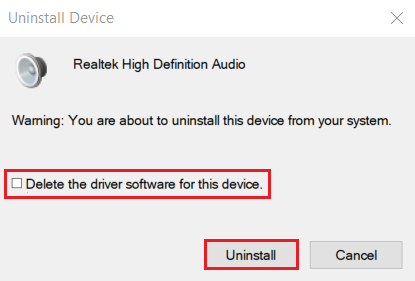
- To reinstall the driver, restart your PC, and the system will automatically reinstall the sound driver.
6. Run Windows Playing Audio Troubleshooter.
Windows provides a built-in troubleshooter that can fix many of the common issues occurring within your computer. Running the audio troubleshooter is one of the easiest and most effective ways to fix no sound output devices found on Windows 11.
Below are the steps you need to follow:
- Go to the Settings app by pressing Win + i keys on your keyboard.
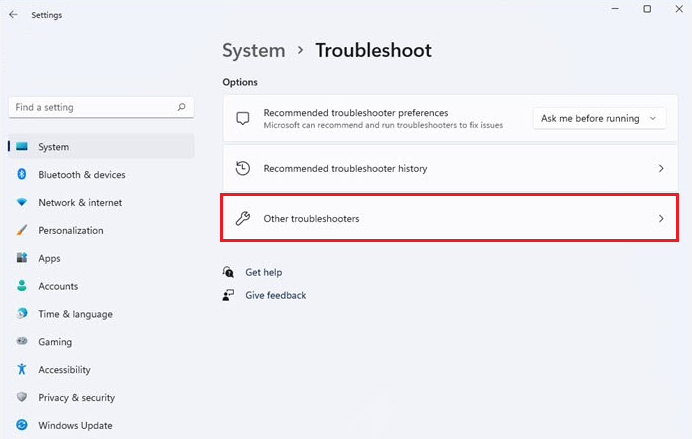
- Choose Troubleshoot from the System tab.
- After that, click on Other troubleshooters.
- Under the Most frequent section, click on Run next to Playing Audio.
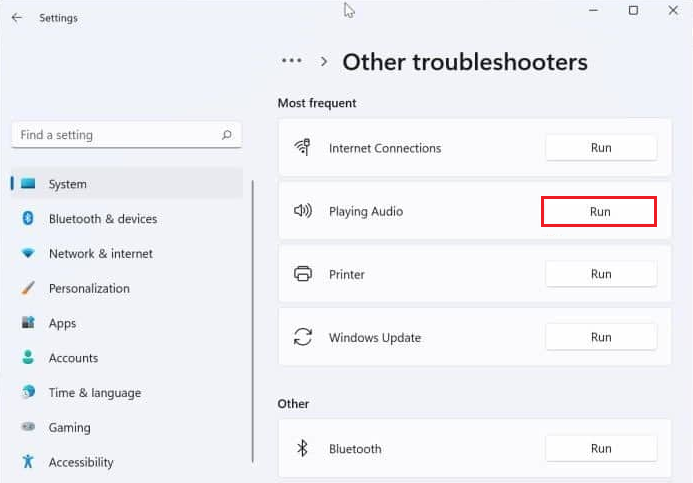
- Windows will take some time to detect the audio-related issues. Once done, it will suggest some fixes to your problem.
7. Perform SFC Scan.
If the necessary files in your system are missing, damaged, or corrupted, running the SFC scan on your system may help resolve the issue. You only need to run a single command, and the utility will continue on its own afterward.
Simply follow these steps to run the scan:
- Click on the Start menu from the bar at the bottom and type ‘cmd’ in the search bar.
- Now, choose Run as administrator from the Command Prompt app in search results.
- Lastly, type in the following command and hit the Enter key:
sfc/scannow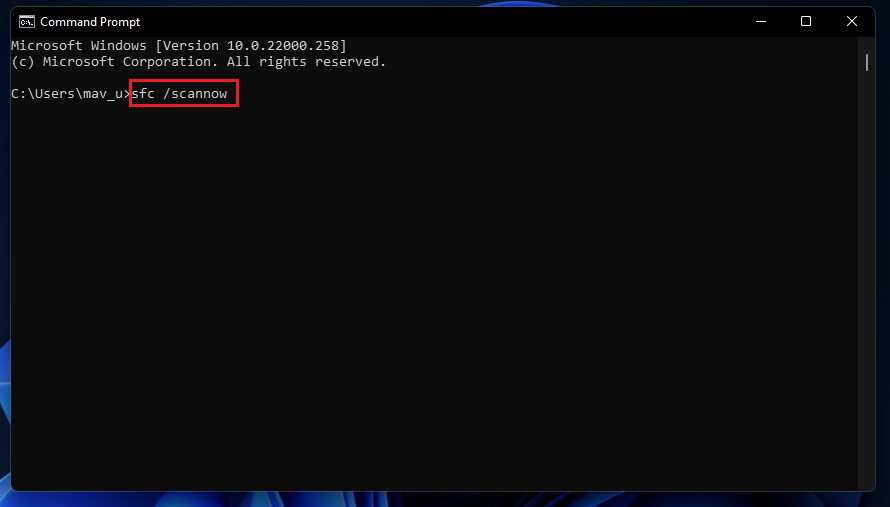
- Wait for the process to complete and restart your PC once done.
This ends our guide on how to fix no sound output devices found on Windows 11. In case of further questions and confusion, use the comments section below. We’ll try to provide further assistance.
If this guide helped you, please share it. 😊


