Encountering the Page Fault in Nonpaged Area error on Windows 11 and don’t know what to do?
Blue Screen of Death includes several types of errors that result in system failure. It can occur at any time without any prior warning. One such error is the Page Fault in Nonpaged Area on Windows 11.
The effective remedy, in this case, is to identify the problem and find a solution. The BSODs usually display a stop code without explaining the true cause. You’re expected to search for the stop code and resolve the issue on your own. And we’re here to make that easier for you.
Usually, the error occurs when a driver or a service attempts to access a non-existent page file that should’ve been there in the system. A damaged RAM may also cause this issue, resulting in a system crash or failure. But don’t worry. We have discussed below several fixes that you can try to resolve the matter.
So keep on reading to find out!
1. Roll Back or Update Your Drivers.
The most common reason many users face the Page Fault in Nonpaged Area Error on Windows 11 is faulty, outdated, or incompatible drivers. If you recently upgraded any driver, it is best to uninstall it and reinstall the older version.
Follow the steps below to do so:
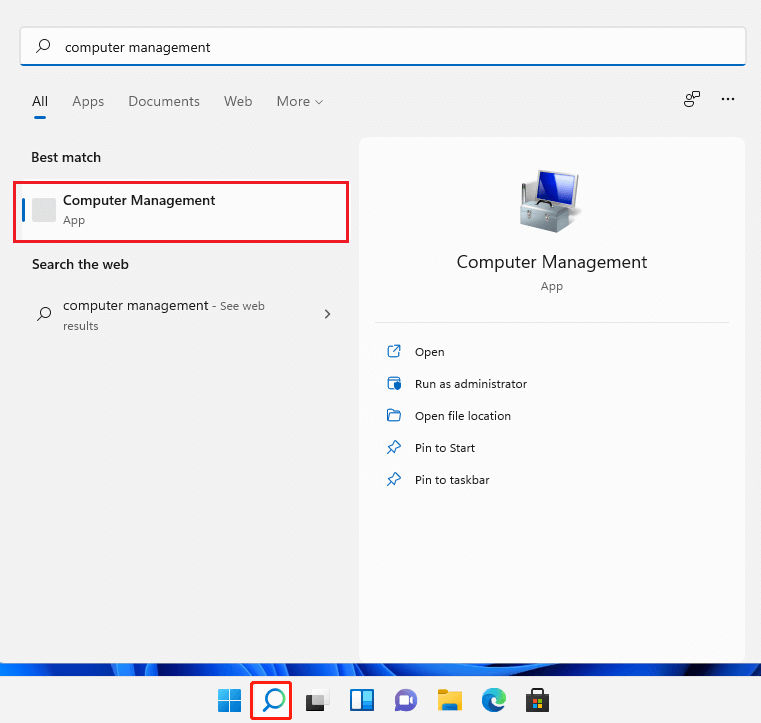
- Click on the Start menu and type ‘computer management’ in the search bar. Then, choose the same from the search results.
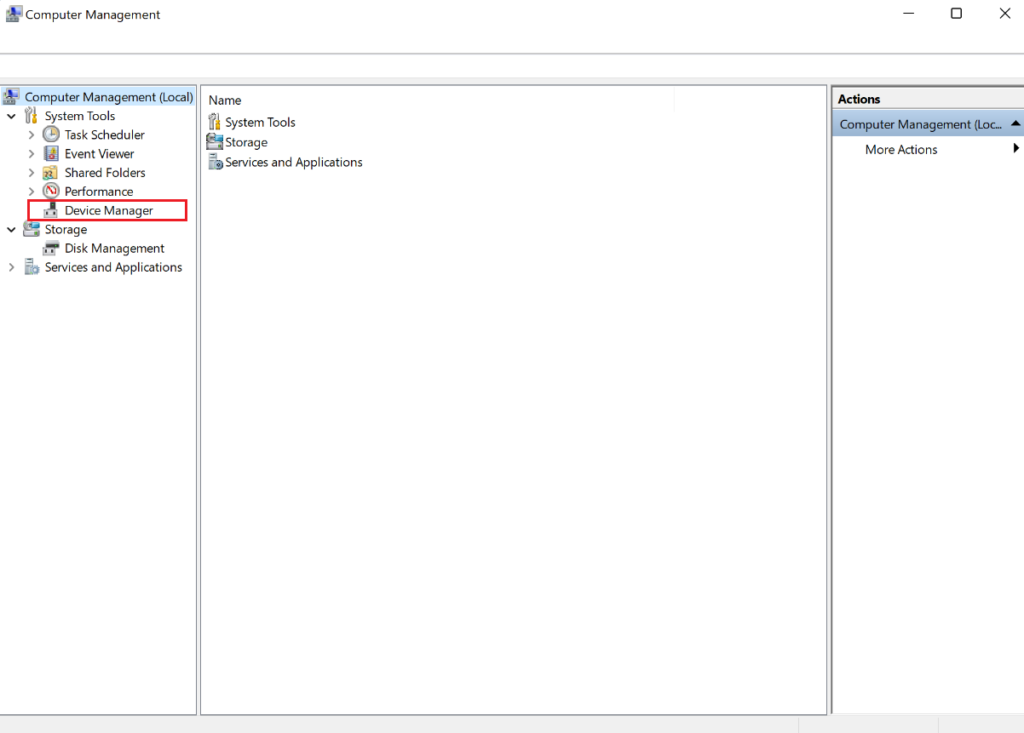
- From the left pane, expand System Tools and select Device Manager.
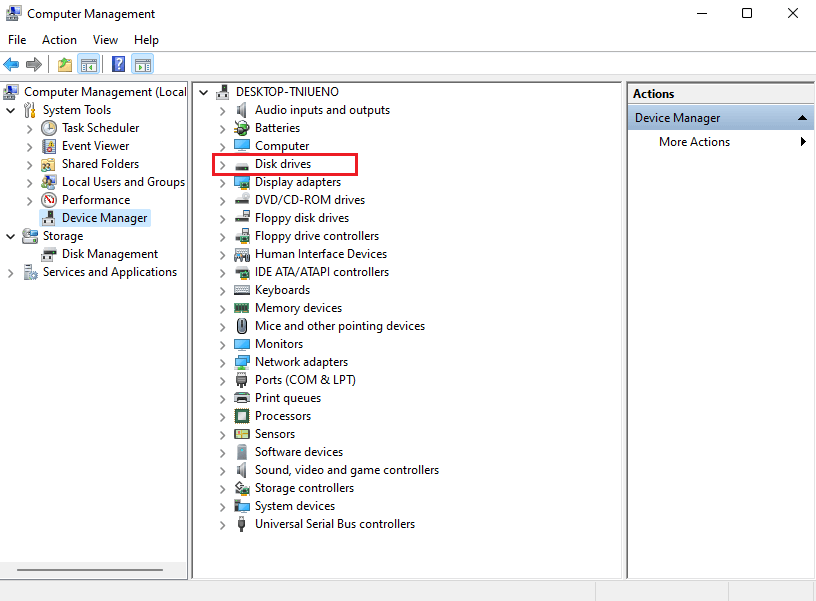
- Locate Disk drives and expand it.
- Now, right-click on the desired disk drive and choose Uninstall device.
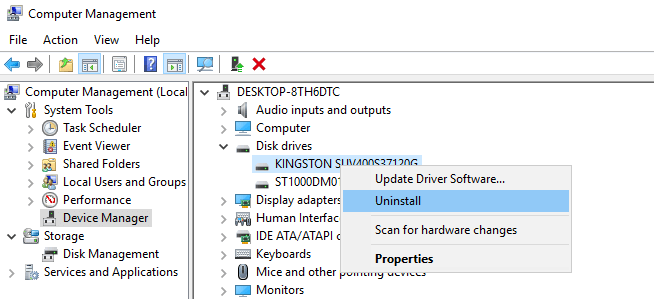
- Lastly, head to the manufacturer’s web page to reinstall the older version of the driver.
On the other hand, if you didn’t upgrade any driver earlier, it might be outdated or damaged. In this situation, install the latest version by following these steps:
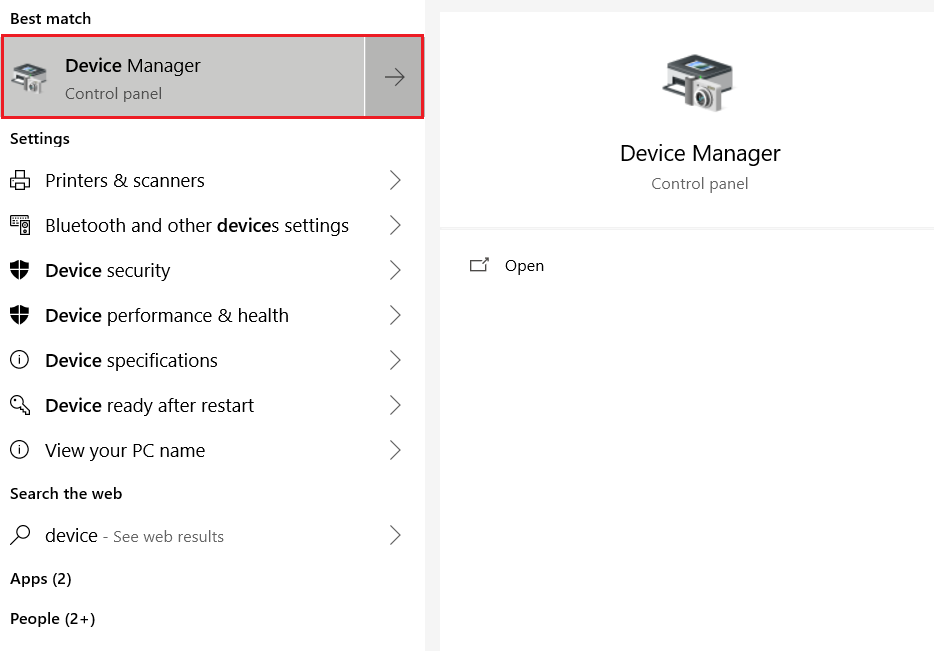
- Launch the Start menu and click on the Search bar.
- Now, type in ‘devmgmt.msc’ and click on the Device Manager from the search results.
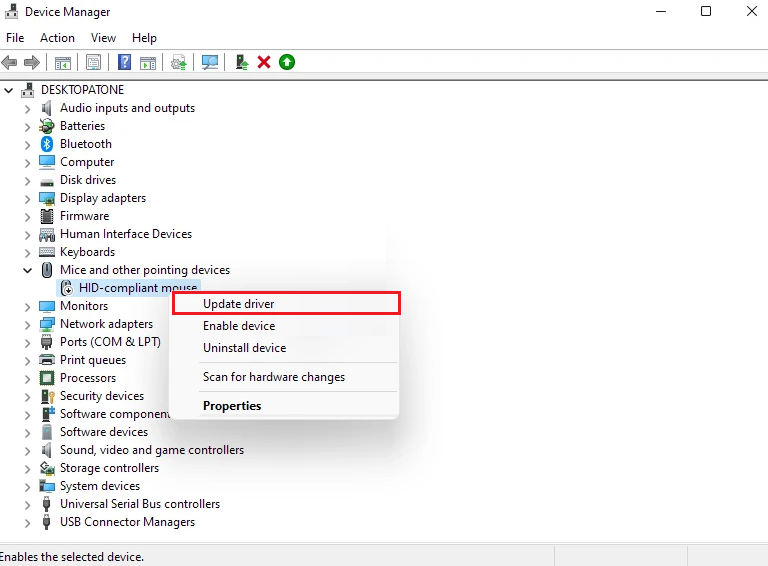
- From the right side of the window, look for the driver you wish to update and right-click on it.
- Then, choose Update driver.
2. Check Your Disk And Repair If Needed.
The primary location of the page file is your system boot drive. But, sometimes, corrupted sectors on the boot drive can result in missing page file data causing the BSOD error. In this scenario, it is recommended to check your disk for any possible errors and repair if needed by running a few scans on the system.
Here’s how:
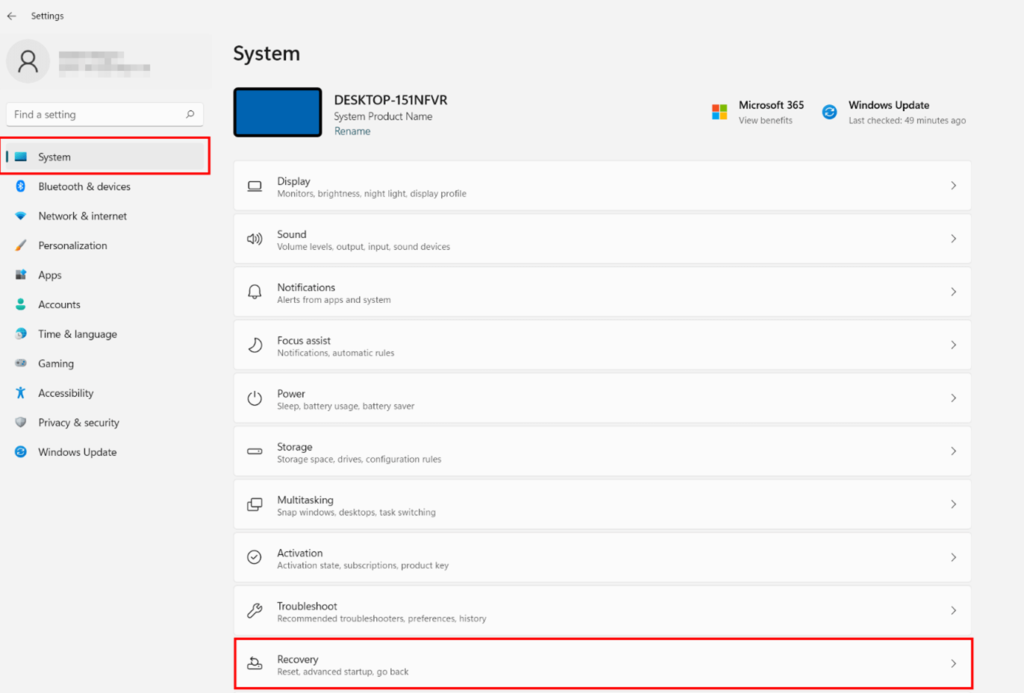
- Launch Settings by pressing Win + i keys.
- Next, click on Recovery from the right side of the System tab.
- Under the Recovery options section, click on the Restart now button next to Advanced startup.
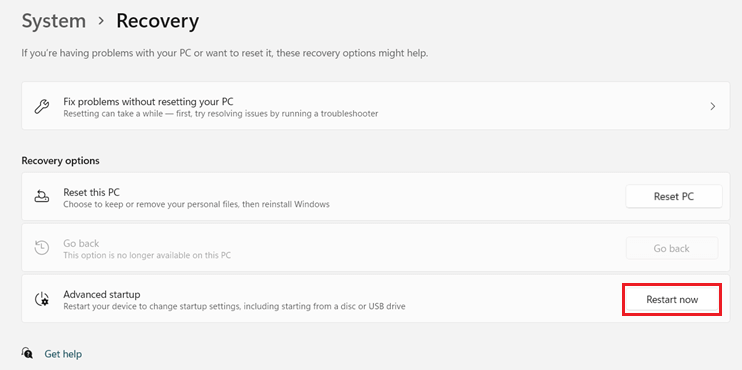
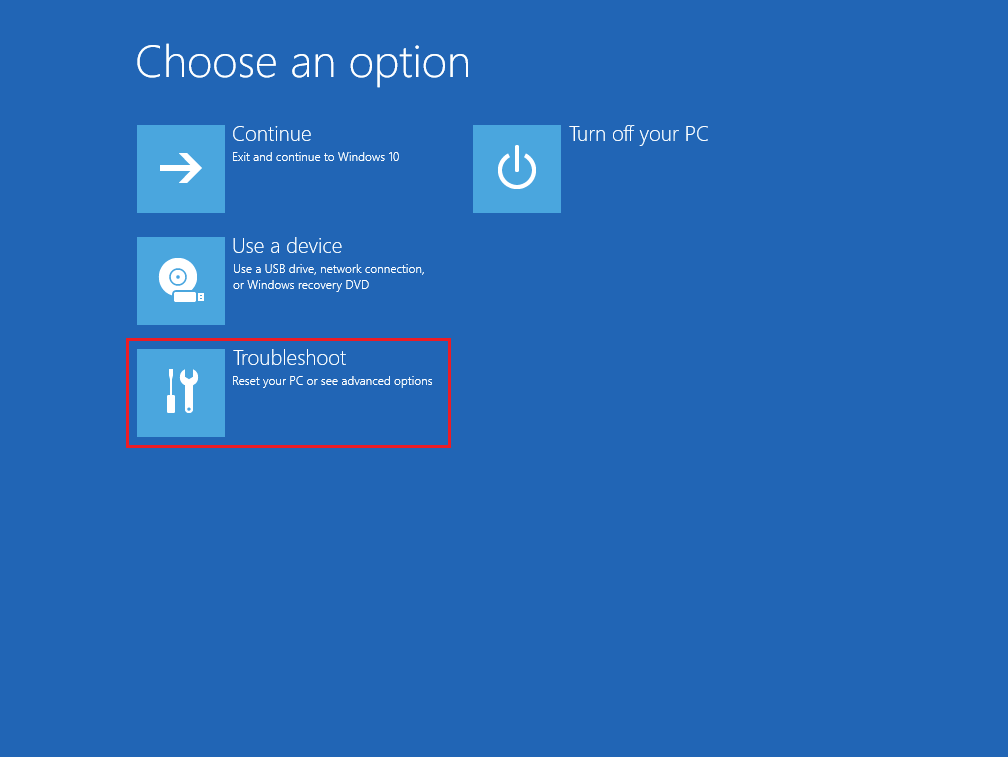
- Once your computer reboots into Recovery mode, click on Troubleshoot.
- Choose Command Prompt.
- Now, copy and paste this command and press the Enter key to execute it:
chkdsk c: /x /r- Next, perform an SFC scan by using this command:
sfc /scannow- Once done, close Command Prompt using this command:
exit- Finally, reboot your PC and check if the issue is resolved.
3. Select a Custom Size For Page File.
The page file on your hard drive is managed by Windows by default. It depends on factors like the available storage and the memory needed by the system. However, at times, it can cause issues like a BSOD error. To combat this, you can try assigning a custom size for the page file to see if that works.
Here are the steps you should follow:
- Press the Win + i keys to launch Settings.
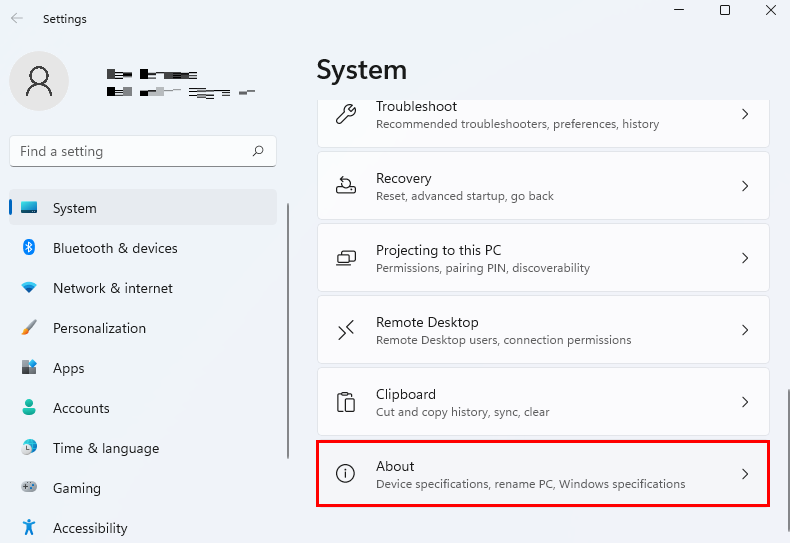
- Now, click on About from the System tab.
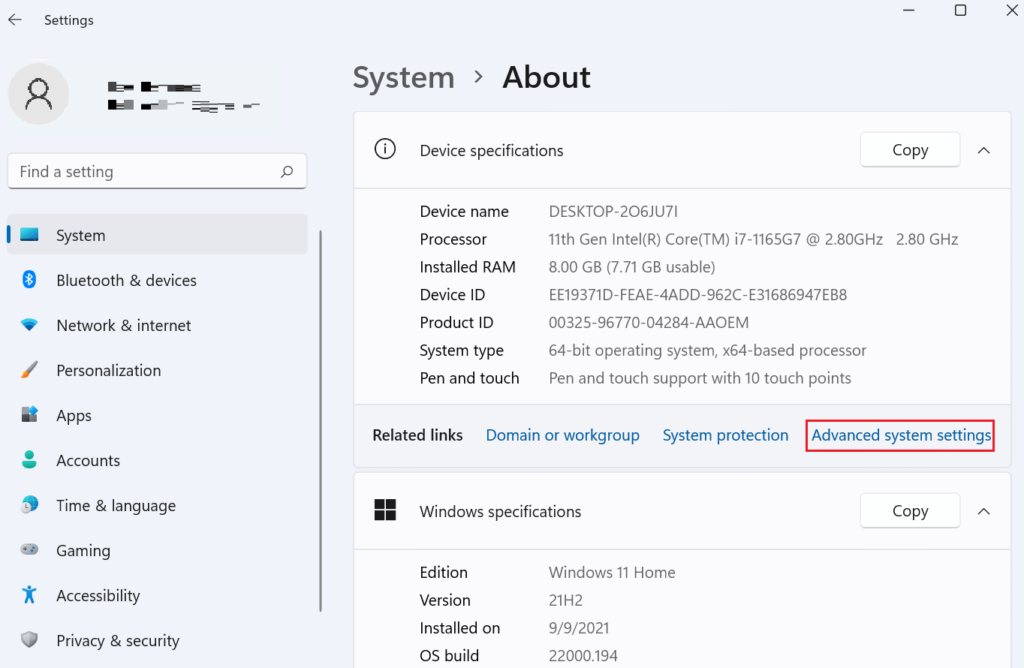
- Under Related links, click on Advanced system settings.
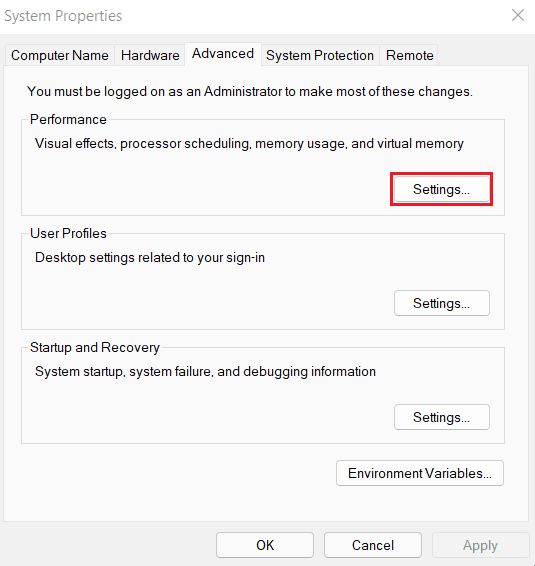
- From the System Properties window, select the Settings button under the Performance section.
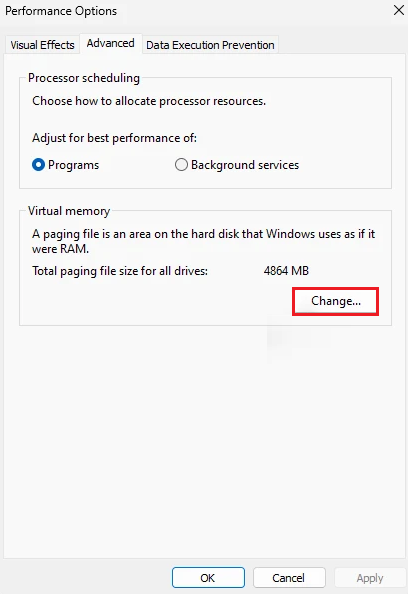
- Go to the Advanced tab from the top and choose Change from the Virtual memory section.
- Click on your drive from the top, and select Custom size.
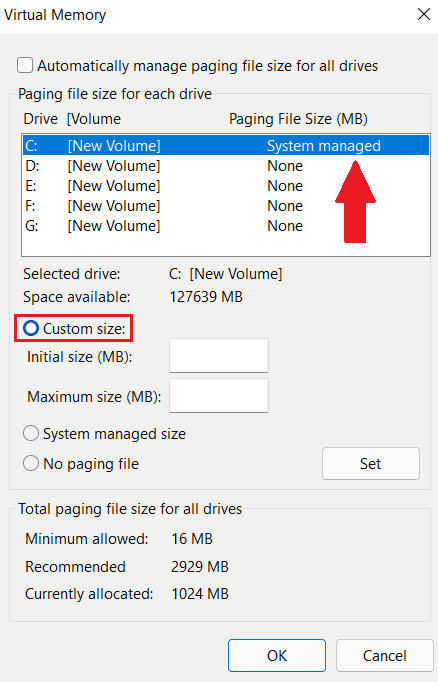
- Notice the size next to Recommendation from the bottom section.
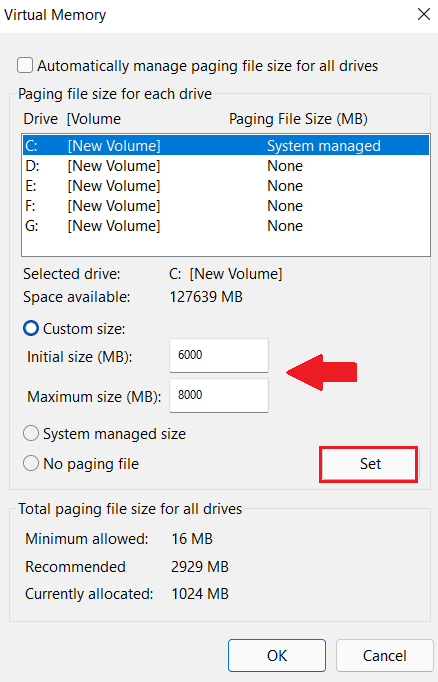
- In the Initial size (MB) box, enter a size larger than the Recommended one.
- Type in the maximum size in the Maximum size (MB) box and select Set.
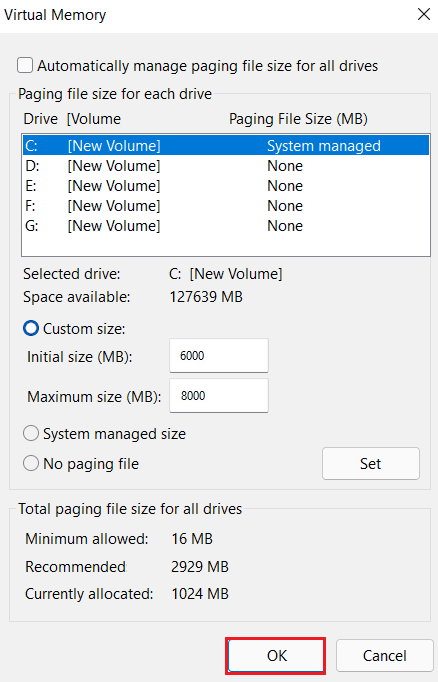
- After you’re done, click on OK.
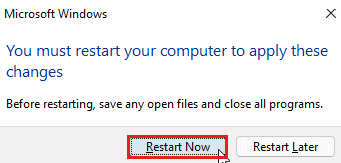
- From the Microsoft prompt that appears, choose Restart now.
4. Reseat the RAM.
As mentioned earlier, problems related to RAM can also result in BSOD errors. This includes overclocking, changed timings, newly installed RAM sticks, etc. Fortunately, there’s a way to fix this, but it requires opening up your PC.
So if you’re willing to do that, then here’s what you need to do:
- Start by opening up your computer and disconnecting the battery.
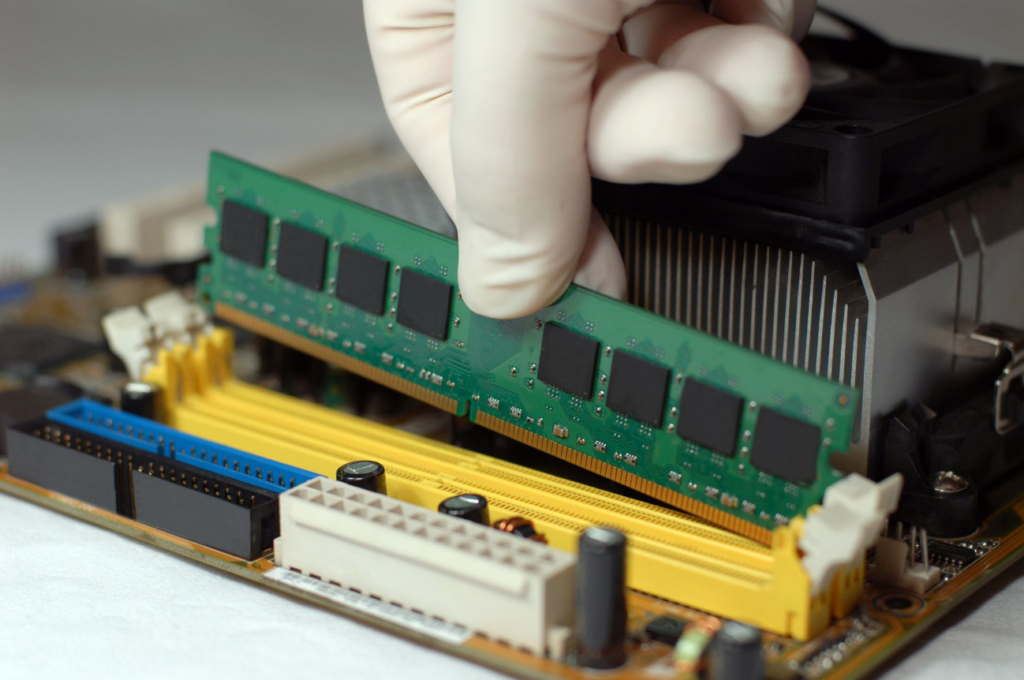
- After that, take out the RAM sticks.
- Remove the battery for only a few seconds to clear CMOS.
- Then, reseat the RAM sticks and connect the battery again.
- Finally, boot your PC and check if the problem is still occurring. If yes, move to the next method from this guide.
5. Run the Windows Memory Diagnostic Tool.
If the above method didn’t prove useful, use the in-built Windows Memory Diagnostic tool to test the RAM. The program runs a test on your system memory to help identify the actual cause behind the BSOD error.
Below are the steps you need to follow:
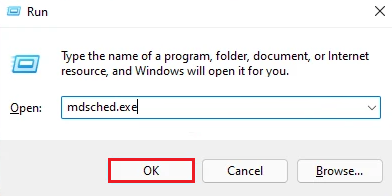
- Press the Win + R keys from your keyboard to open the Run dialog box.
- Type in ‘mdsched.exe’ in the search bar and click on OK.
- Next, select Restart now and check for problems (Recommended).
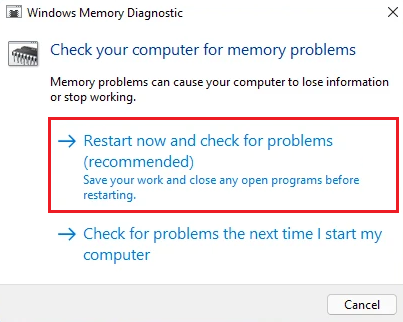
- The entire process will take a few minutes to complete. Once done, your computer will automatically restart, and you will be able to see the test results.
6. Remove All Virtual Drives.
The third-party applications you install on your system also install virtual drive drivers alongside. Sometimes, these can be misrecognized by your Windows, affecting your system memory.
Now there are quite a few ways you can adopt to remove these virtual drivers from your PC. You can uninstall the associated program or only remove the virtual drives from Device Manager or the Disk Management utility.
Here’s how to uninstall drives from the Device Manager:
- Right-click on the Start menu and choose Device Manager.
- Locate and expand Disk drives.
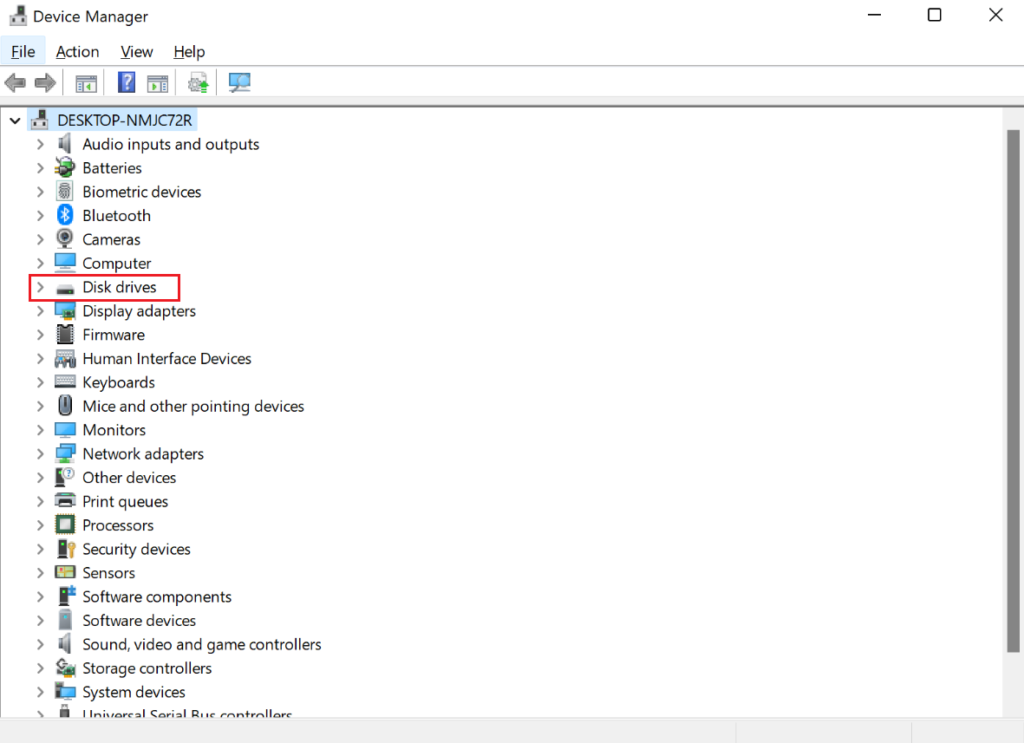
- Right-click on the virtual disk and choose Uninstall.
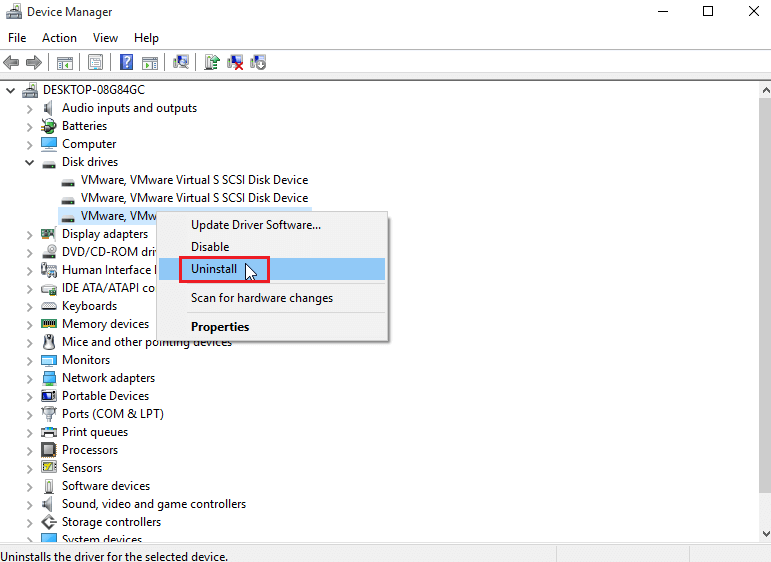
- From the confirmatory prompt, click on Uninstall.
- Follow these steps again to uninstall all the virtual drives from your PC.
- Then, reboot your computer.
7. Reset Your PC.
Resetting your PC should be your last resort to get your PC to function again properly. It enables you to re-establish a connection between the BIOS and the hardware. By doing so, it fixes issues related to large applications or with the operating system overall.
Here’s how to do it:
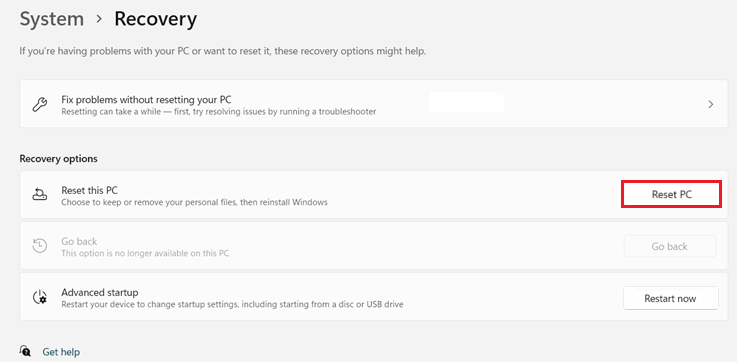
- From the Settings app, click on Recovery from the right side of the screen.
- Under the Recovery options, choose Reset PC.
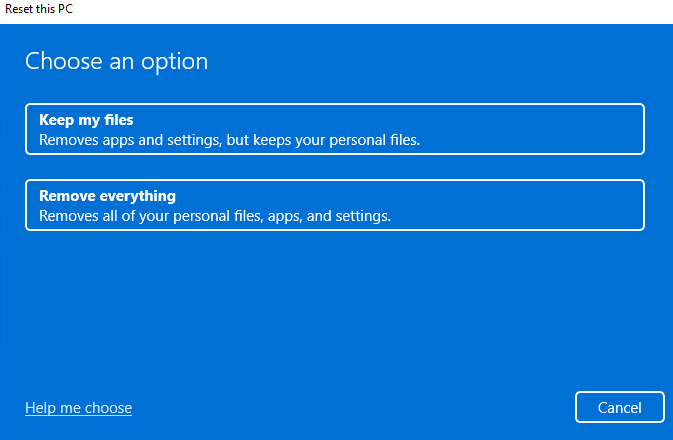
- A Reset this PC window will appear. Either select Keep my files or Remove everything.
- Then, follow the on-screen instructions to continue resetting your computer.
This brings us to the end of our guide on how to fix page fault in nonpaged area error on Windows 11. In case of other questions or concerns, use the comments sections below. We’ll be glad to provide further assistance.
If this guide helped you, please share it. 😊


