Wondering how to fix the Photoshop error stating ‘Not enough RAM’ on Windows 10?
What’s the first photo-editing software that comes to your mind for 3D modeling, photo editing, drawing, and typography? The answer is obvious, isn’t it? Adobe Photoshop, without a second thought!
Adobe Photoshop has been allowing users to get creative with the edits and graphic designs for over 30 years now. The automation features reduce the need to repeat procedures, making the overall process a lot more convenient.
The easy-to-use interface of Adobe Photoshop is one of the main reasons why the program is used by thousands of professional as well as amateur photographers.
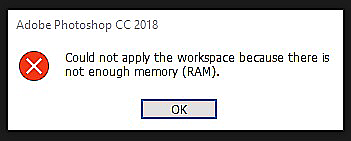
Several users recently reported that their screen displays the ‘Could not complete your request because there is not enough memory (RAM)’ error code as they attempt to open Photoshop or use specific tools for editing on Windows.
If you are facing a similar issue, you’re in the right place.
Listed below are some of the most effective methods that will help you get back on track in no time.
Let’s dive right in!
1. Increase Photoshop’s Physical Memory.
By default, Photoshop tries to use as little RAM as possible on your PC, which typically is around 1.5 GB. If you are a beginner or do not execute complicated, heavy Photoshop tasks, this would not cause any issues. However, people working on advanced projects that require more resources will need more RAM than this.
If you face the memory shortage issue on your PC, one of the first things you should try is increasing the physical memory of Photoshop.
This process is a bit complicated and involves changes in the Windows Registry, which is why we advise you to perform each step carefully.
Here is what you need to do:
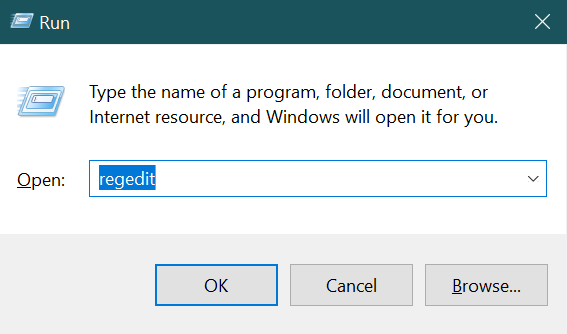
- Open a Run dialogue box by pressing Windows + R keys simultaneously.
- Type ‘regedit’ in the text box, and hit Enter.
- Inside the Registry Editor, navigate to the key mentioned below. Please note that the ‘140.0’ folder is only available to the users of Photoshop CC 2020. If you are using another version, this folder would have a different name.
HKEY_CURRENT_USER > Software > Adobe > Photoshop > 140.0
- Right-click on the folder appearing on your screen. For instance, the folder on our screen is 140.0.
- Click on New and select DWORD (32-bit) Value.
- Now name the new key as OverridePhysicalMemoryMB and hit Enter.
- Once done, right-click on the new key and click on Modify.
- Under Value data, type the physical memory of your system in numeric Megabytes. For instance, if your memory is 4GB, enter 4000 and vice versa.
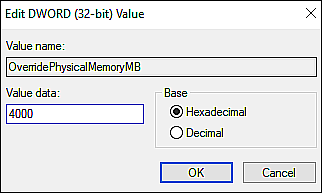
- Click on OK to save the changes and close the Registry Editor.
- Now open the Photoshop application on your PC, and inside the Photoshop window, click on Edit.
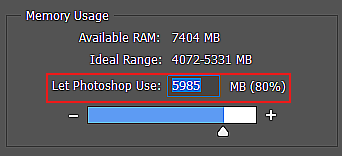
- Select Preferences from the list of options available and click on Performance.
- Under Memory Usage, move the slider to 80% to allow Photoshop to use more RAM.
- Finally, restart your PC and check if increasing the physical memory resolved the error on your PC.
Hopefully, your screen will not display Photoshop’s ‘Not enough RAM’ error again.
2. Update or Downgrade from Windows 10 Version 1803.
If you are trying to use Photoshop on version 1803 of Windows 10, that might be the reason behind Photoshop’s ‘Not enough RAM’ error.
Version 1803 of Windows 10 has several compatibility issues with Photoshop CC 2017, 2018, 2019, and 2020 versions. You can resolve this issue by updating your Windows version from version 1803 or downgrading to a previous version.
Here is how you can update Windows to the latest build:
- Go to Settings and click on Updates & Security.
- Select Windows Update from the left panel and click on Check for updates.
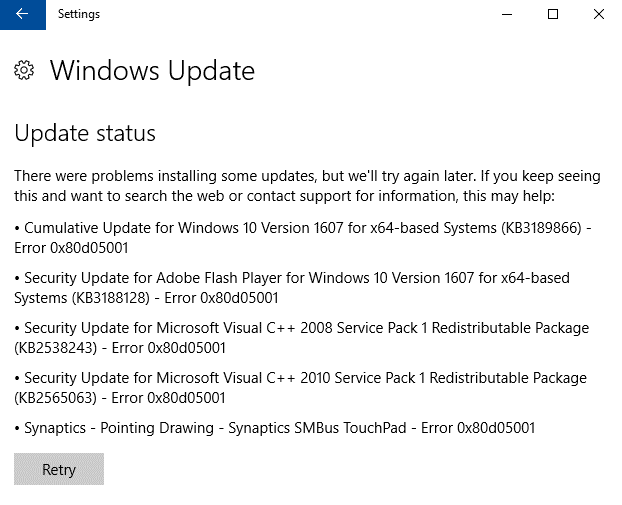
- If the system shows any pending updates that you need to install, follow the on-screen instructions to install them.
- However, if there are no pending updates, we suggest you downgrade to an older version. For that, repeat the first step.
- Select Recovery from the left panel, and under Go back to the previous version of Windows 10, click on Get started.
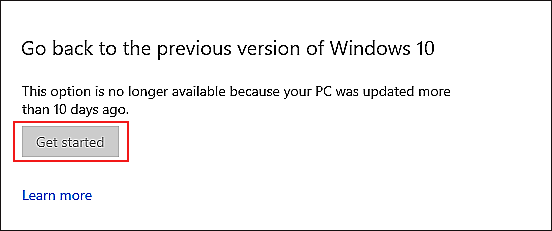
- Select a reason why you are downgrading to an older version and select Next.
- Follow the on-screen instructions to complete the process.
- Once done, check if Photoshop works fine now.
If the storage error was being caused by version 1803 of Windows 10, upgrading or downgrading would resolve the Photoshop ‘Not enough RAM’ error code on Windows 10.
3. Disable Background Applications.
Another common reason behind the Photoshop storage error is the apps running in the background on your PC. Background apps can receive information, install updates, use battery life, and eat up your bandwidth, even if you are not using them.
If you face a storage error on your PC, try disabling background applications to discontinue their resource usage. Hopefully, doing so will allow Photoshop to utilize more RAM.
Follow the steps mentioned below to disable background applications on your PC:
- Open a Run dialogue box by pressing Windows + R keys simultaneously.
- Type ‘msconfig’ in the text field and hit Enter.
- Doing so will launch System Configuration. Inside the System Configuration window, select Services.
- Locate the ‘Hide all Microsoft services’ box at the bottom of the window and checkmark it.
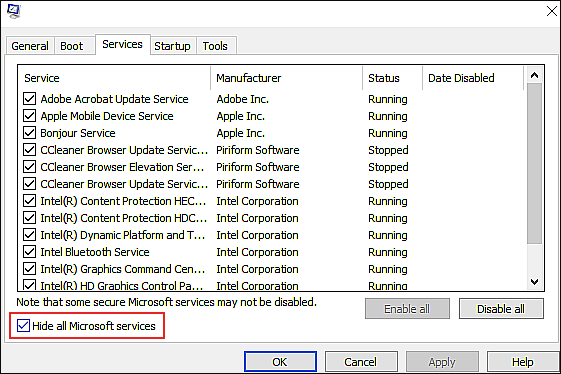
- Now click on Disable all and click on OK.
That’s it. Doing so should fix the Photoshop error code.
4. Try Using CleanMyPC.
If increasing Photoshop’s physical memory and disabling background applications did not work for you, then try freeing up some space on your PC. You’ll be surprised to know that a significant portion of your system’s space is occupied by the junk, unwanted files that get piled up over time.
These junk files do not just occupy space but can also cause errors within the system. The best way to free up your system’s space is to eliminate these junk files, but since it can be a tiresome and time-consuming task, we recommend using CleanMyPC.

CleanMyPC runs scans through the system, identifies the junk files, and eliminates them with little to no user input. Not just this, but it comes with several other handy maintenance tools that can boost the performance and speed of your PC.
CleanMyPC makes sure that your PC runs like new for years, avoiding errors such as the ‘Not enough RAM’ error in the process.
Install CleanMyPC now to deep clean your system in no time!
5. Reinstall Photoshop.
If none of the methods mentioned above works for you, it implies that the issue is within the Photoshop app, not your system. Some errors cannot be solved using conventional methods, and in this case, we encourage you to go ahead and reinstall Photoshop app.
Here is what you need to do:
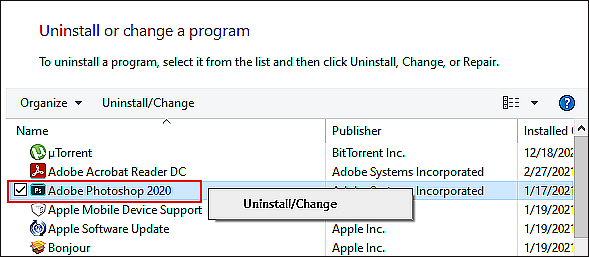
- Go to the Control Panel and click on Uninstall a program.
- Locate Photoshop from the list of programs available and right-click on it.
- Click Uninstall and follow the on-screen instructions to uninstall the program.
- Now go to the Local Disk (C:) and find the Photoshop folder.
- Delete the Photoshop folder and reboot your PC.
You can now reinstall Photoshop, and hopefully, doing so will resolve the error once and for all.
This wraps up our guide on fixing the Photoshop’s not enough RAM error on Windows 10. We have listed several effective solutions above, and we hope that they helped you fix the issue. If you have any questions regarding the troubleshooting methods, please let us know in the comment section below.
If this guide helped you, please share it. 🙂


