

Are you encountering the Preparing Automatic Repair Loop on Windows 11 and don’t know how to fix it?
The Automatic Repair tool on almost all versions of Windows OS aims to diagnose and resolve issues that might be preventing your computer from booting up normally. While you can use the tool to try to fix strange behaviors of your PC, it will automatically launch when your computer encounters three consecutive failures while booting up.
But it may not stop there. Your PC can get stuck in the Preparing Automatic Repair loop if you’re out of luck. In such circumstances, you will continuously be staring at the blank screen while the actual problem will remain undiagnosed.
Now, you must know that the Preparing Automatic Repair loop on Windows 11 won’t break on its own. But since it is a software-related issue, there are several methods you can follow to resolve the error on your own. Lucky for you, we’ve listed some of the most effective solutions down below.
So keep on reading!
1. Use Startup Repair.
Usually, your PC may get stuck in the Automatic Repair tool due to external interference from a third-party app or corrupted files of various installed programs. When you enter Safe Mode, your computer will only boot up with essential services from Microsoft, and hence hindrance can be easily diagnosed.
Here’s what you need to do:
- Begin by entering the Windows Recovery Environment. For that, first, turn on your computer. Instantly press and hold the Power button for about 20 seconds.
- Repeat the same process thrice, and on the fourth attempt, allow your PC to boot up normally.
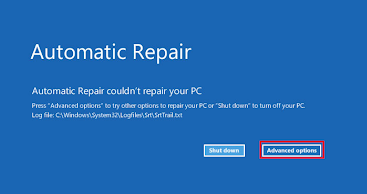
- When the Automatic Repair screen comes up, choose Advanced Options.
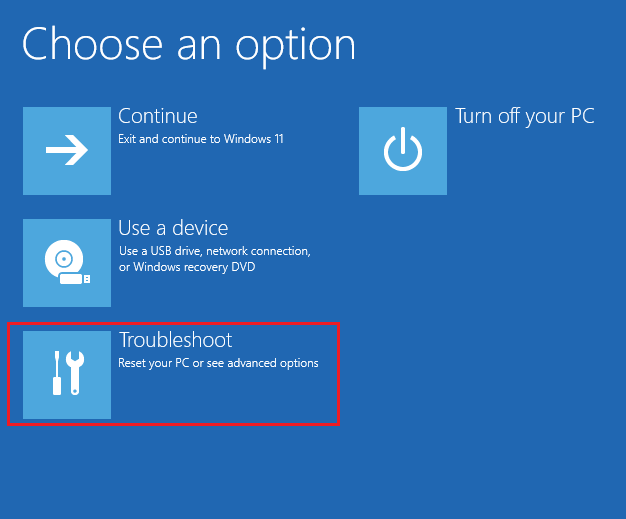
- Once you come across Windows Recovery Environment, click on Troubleshoot.
- From the Troubleshoot screen, choose Advanced options.
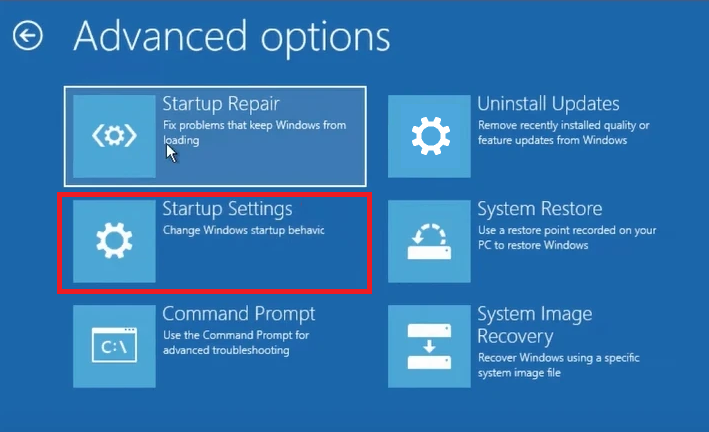
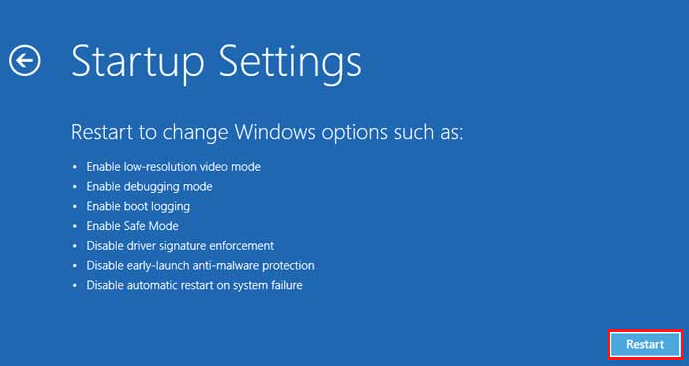
- Afterward, click on Startup Settings.
- Finally, click on the Restart button from the bottom-right to boot into Safe Mode on your computer.
2. Perform A System File Check.
If any boot files are corrupted instead of program files, the Startup Repair method will be of no use. The best way to tackle the situation is to run an SFC which stands for System File Checker. It is a Microsoft utility that will help repair, replace, and restore corrupted and damaged Windows system files.
Here’s how to do it:
- Firstly, boot into the Windows Recovery Environment by following the same steps mentioned above.
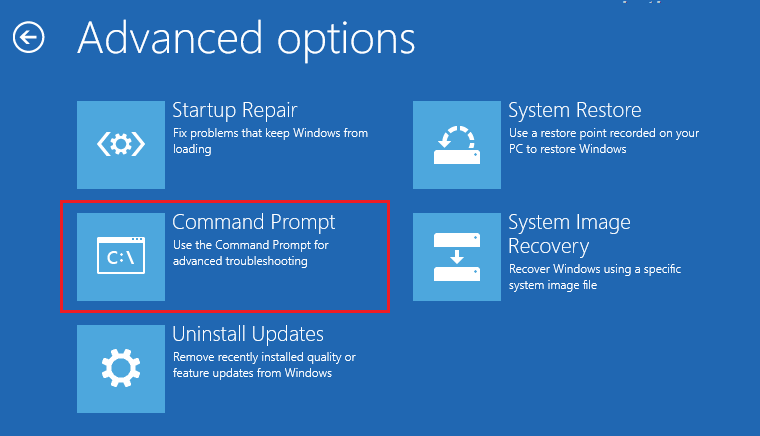
- Afterward, click on Advanced options and select Command Prompt to proceed.
- Now, copy and paste the following command:
sfc/scannow
- Next, type in the following commands one by one and press the Enter key:
bootrec.exe/rebuildbcdbootrec.exe/fixmbrbootrec.exe/fixboot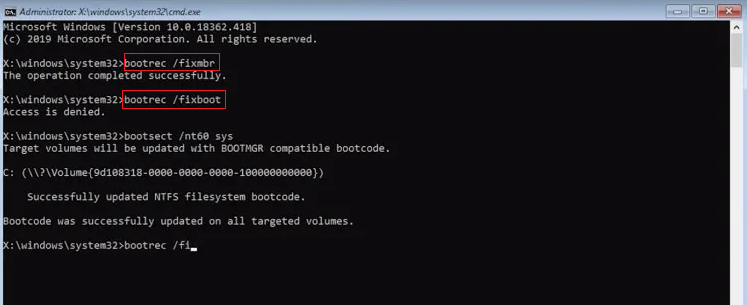
- Once done, restart your device and check whether the Preparing Automatic Repair Loop on Windows 11 is fixed or not.
3. Run A CHKDSK Scan.
The CHKDSK or Check Disk is another system tool that will help you fix the Preparing Automatic Repair loop on Windows 11. If the corrupted files make it to the hard drive or other disks, it will lead the entire system to the Automatic Repair loop.
In such a case, it is recommended to run a CHKDSK scan which will replace the missing or damaged files that were causing the issue. The method has been reported to be effective for most users, so it’s definitely worth a try.
To do so, follow these steps:
- From the Advanced startup options in Windows Recovery Environment, click on Command Prompt.
- Now, type in the following command and hit the Enter key on your keyboard:
chkdsk/r
- Lastly, enter the name of your disk and press the Y key. Then, press the Enter key.
The disk drive scan will take some time to complete. Once it does, check to make sure if your issue is resolved or not.
4. Scan System Files.
As explained above, the Preparing Automatic Repair loop on Windows 11 is most often the result of damaged system files. Another way to deal with the issue is to scan all the system files and replace the ones that are the main culprit. To do so, you can use the DISM tool.
Just follow the steps given below:
- Once you enter the Advanced Options in Windows Recovery Environment, click on Troubleshoot.
- Then, choose Command Prompt.
- Copy and paste the following command and press the Enter key:
DISM.exe/Online/Cleanup-image/Res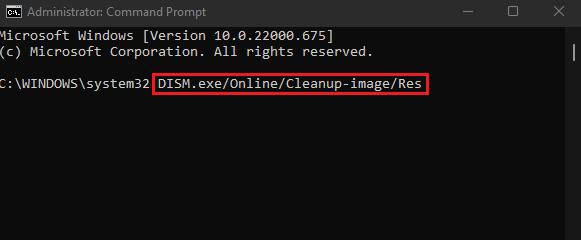
- The process will take some time to complete. Once done, type the following command and hit Enter:
sfc/scannow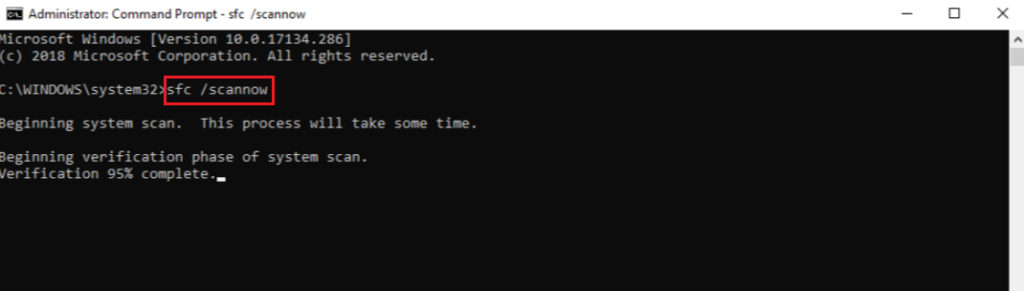
- If there’s a corrupted file present within your system, you will see Windows Resource Protection detected corrupted files and successfully restored them on your screen.
- Lastly, type ‘exit’ and press Enter.
5. Deactivate Early Launch Anti-Malware Protection.
Some users have explained that the same issue for them was caused by anti-virus programs installed on their computer. And they were able to break the loop successfully by disabling the program.
If you want to do the same, follow these steps:
- From the Advanced options in Windows Recovery, click on Startup Settings.
- This will restart your computer. Once it restarts, select Disable early launch anti-malware protection.
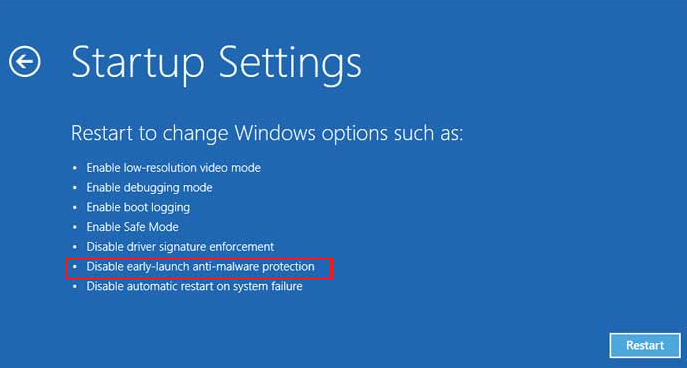
- Finally, click on Restart.
6. Restore Using System Image Recovery.
If you started facing the issue after a recent upgrade or installing a third-party application, there’s an easy way to break the Preparing Automatic Repair loop on Windows 11. But the only condition is to have a system restore point already created.
Follow these steps below:
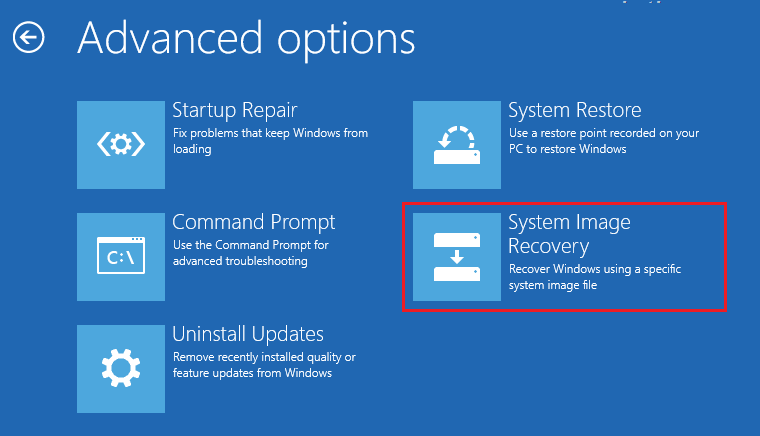
- Start by clicking on Troubleshoot from the Windows Recovery screen.
- Next, select Advanced options and then click on System Image Recovery.
- Click on your account to continue.
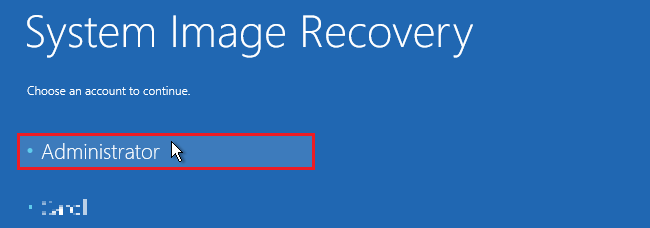
- Now, type in your password and click on the Continue button.
- From the Select a system image backup window that appears, select Use the latest available system image and then click on the Next button.
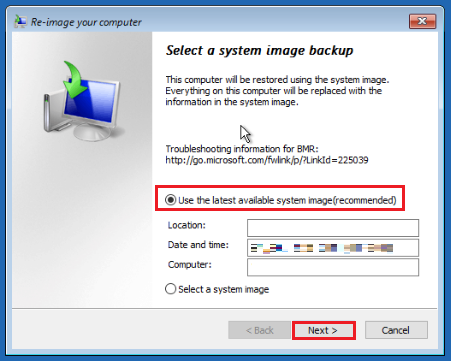
- At last, click on Finish to begin the backup restoration process.
7. Factory Reset Your Computer.
When nothing else works, your last resort is to reset your PC. But you’ll also be losing all your settings and data along with it. After that, you’ll also need to reinstall Windows, as resetting would take your computer back to the factory state.
Here’s how to factory reset your computer:
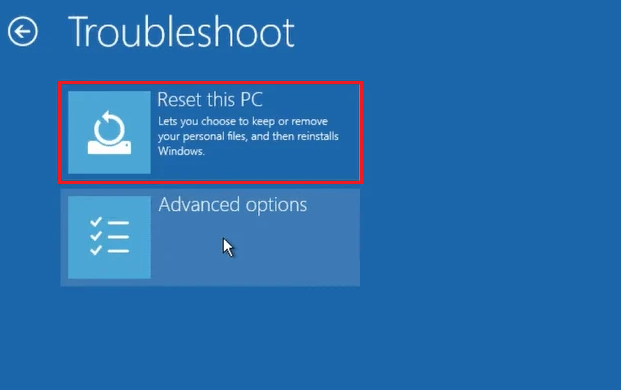
- On the Recovery Window, select the Troubleshoot option.
- After that, click on Reset this PC.
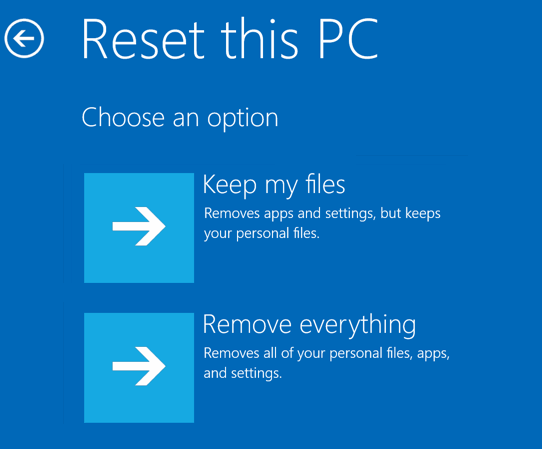
- From the next screen, select either Keep my files or Remove everything, depending on whether you wish to keep some files or remove all files and settings from your PC.
- Next, click on Local reinstall.
- Afterward, follow the on-screen instructions to factory reset your PC.
This brings us to the end of our guide on how to fix the Preparing Automatic Repair Loop on Windows 11. If you have any further queries, utilize the comments box below. We’ll try our best to help you out.
If this guide helped you, please share it. 😊
