Struggling to fix the recovery drive error on Windows 10?
As there are several incidents where Windows 10 reportedly fails, fixing the issue with the recovery drive may bring your system back in use. Windows allows the users to create a recovery drive with the option to back up the system files.
When you don’t avail of this option, the recovery drive completes uninterruptedly. On the contrary, choosing to back up your system files requires enough space on your USB flash drive and frequently leads to the recovery drive error on Windows 10.
Other causes of this particular issue may be clashing background services, a corrupted USB flash drive or Windows file system, temporary glitches, and so on. But, don’t worry! We have concluded this brief guide to help you find the perfect solution.
So, without further ado, let’s jump straight in!
1. Use a Large USB Drive.
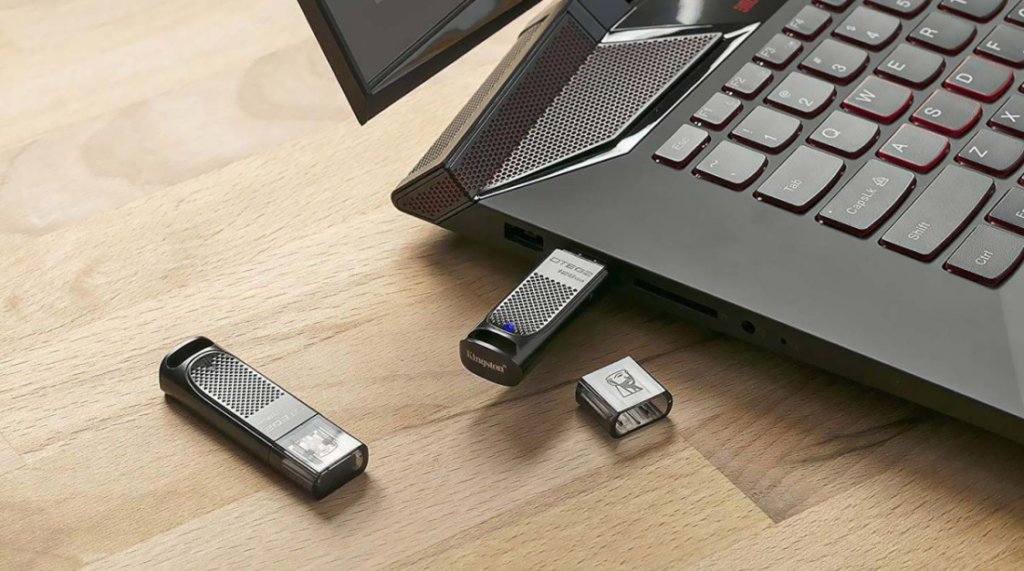
If you’re getting a “PC recovery drive is full” error, it means that your USB flash drive doesn’t have enough storage to create a recovery drive. In that case, it is recommended to get yourself a larger USB drive.
For Windows 10 64-bit, the minimum capacity for a USB flash drive is 16 GB. But, if possible, you should use a USB drive of 32 GB just to be on the safe side and not face any storage issues again.
Simply remove the old USB drive plug in the new one. Then, start creating the recovery drive the same way.
2. Format Your USB Drive.
This remedy is for times when the recovery drive error on Windows 10 occurs due to bad sectors in your USB flash drive. Note that the default formatting option is only a quick format and would not resolve to issue. Hence, you need to perform a full format to eliminate the error preventing the files from being correctly copied.
Below are the steps you need to follow:
- Begin by launching File Explorer on your PC.
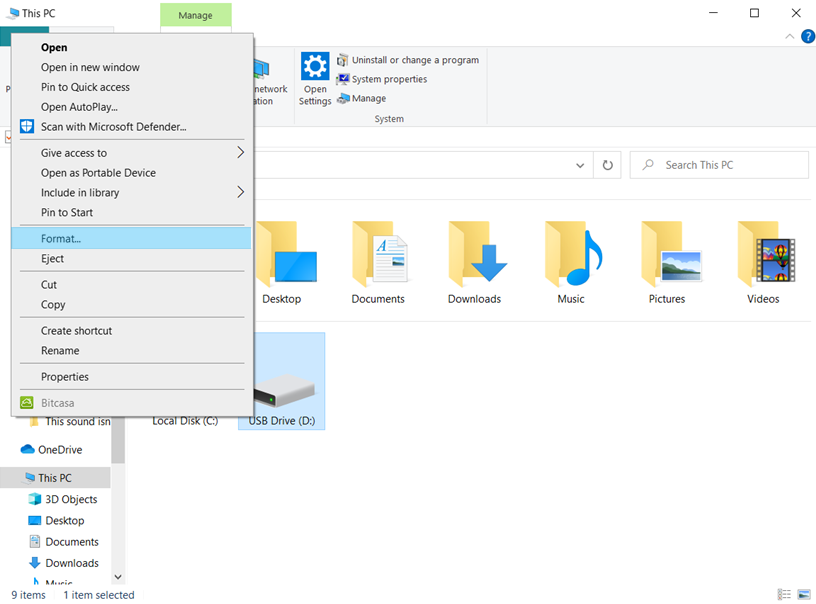
- Now, right-click on the drive you wish to make the recovery drive. From the options list, choose Format.
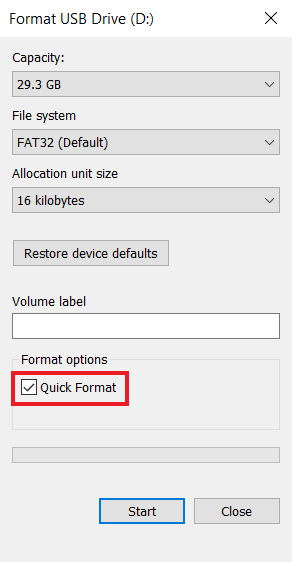
- Then, in the pop-up window, ensure that the Quick Format option under Format options is unchecked.
- Lastly, click on the Start button and wait patiently until the process finishes.
Once done, try to create a recovery drive again and check if the issue is resolved.
3. Run A Virus Scan.
The recovery drive error on Windows 10 can also occur due to a possible virus in your system. This is often indicated by a Microsoft Security notification pop-up on your screen, causing the recovery drive process to stop midway.
To get rid of it, you can click on the same notification and perform the instructions followed. If it doesn’t suggest any actions, use Microsoft Defender to run a full scan and remove the malware altogether.
Here’s how to do it:
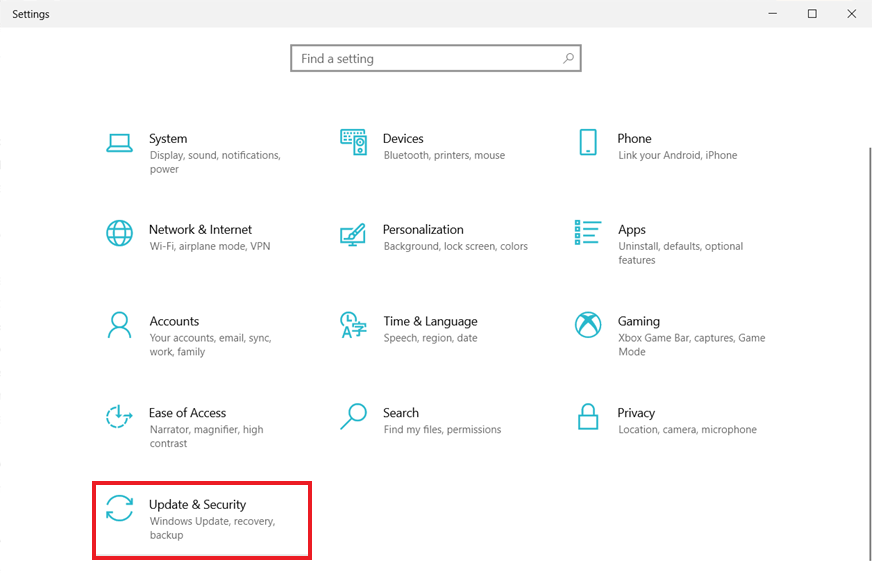
- To start, press the Windows key + i from your keyboard to launch Settings.
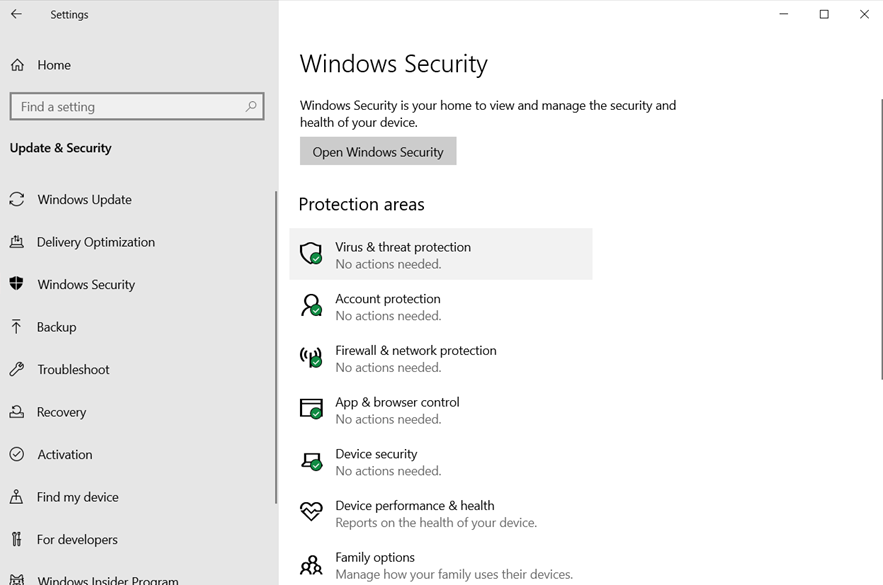
- Once it opens, go to Update & Security from the left pane of the window.
- Next, click on Windows Security.
- Now, click on Virus and threat protection under Protection areas.
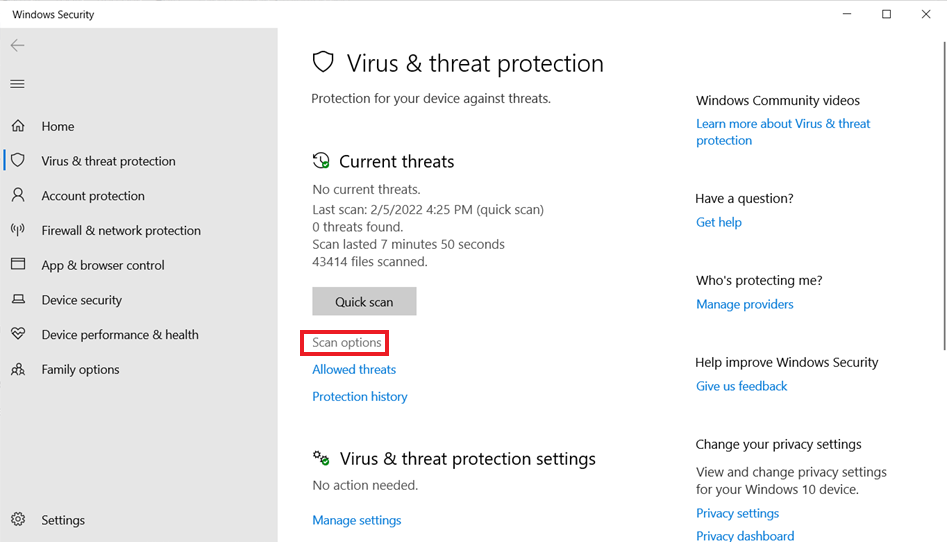
- Then, click on Scan options under Current threats.
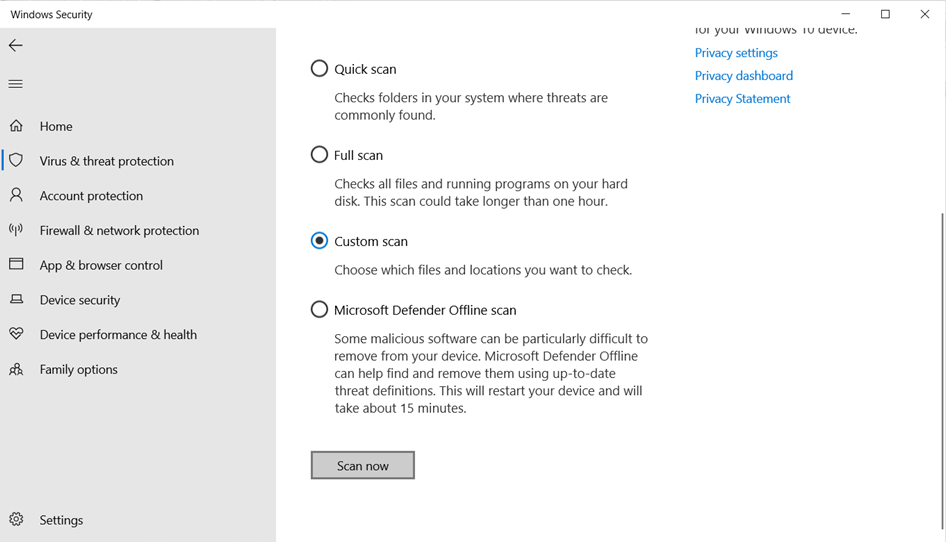
- From the options, choose Custom scan and click on the Scan now button.
- After that, select Primary drive (C:\) and click on Select folder to choose a specific folder.
- If Windows Defender finds malware, take the recommended steps to remove it from your system.
4. Run An SFC Scan.
SFC is an excellent built-in tool you can utilize to fix the recovery drive error on Windows 10. It requires a single click from your end to search for any corrupted files. Upon finding, the tool replaces them with the uncorrupted files stored locally.
Follow these simple steps to run an SFC scan on your PC:
- To start, press the Windows key + R on your keyboard to open the Run dialog box.
- Type ‘cmd’ and click on OK to launch the extended Command Prompt.
- Now, run the following command. This will start the SFC scan on your computer.
run /scannow- When the scan finishes, restart your computer.
Hopefully, creating a recovery drive will now be successful.
5. Use The DISM Tool.
If the SFC scan proves to be ineffective, you can use another similar tool known as Deployment Image Servicing and Management or DISM. By following this method, you’ll be able to diagnose and rectify any corrupted system files that may be producing the recovery drive error on Windows 10.
Here’s what you need to do:
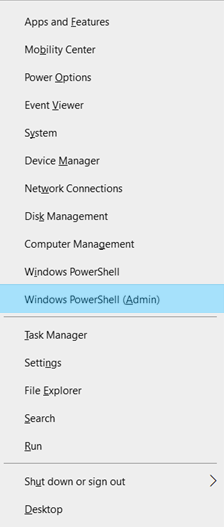
- Firstly, press Windows key + X and choose Windows Powershell (Admin) or Command Prompt (Admin).
- Then, enter the following command:
dism.exe /online /cleanup-image /scanhealth- When the process completes, the “Operation completed successfully” message will pop up on your screen. Now, type the following command and hit Enter:
dism.exe /online /cleanup-image /restorehealthWait for the operation to complete and try creating a recovery drive afterward.
6. Disable Antivirus Program.
Sometimes Antivirus programs on your PC prevent you from taking various actions. This could be why you may be failing to create a recovery drive. To combat this problem, all you have to do is simply disable your Antivirus for the time being.
If you own third-party Antivirus software, follow these steps to disable it:
- Simply right-click on the antivirus’ icon from the system tray.
- Choose Disable or Exit to disable the program temporarily.
Restarting your computer would enable the software again. Now, to disable Windows Defender, follow the steps below:
- Go to the Virus and threat protection settings from Windows Settings.
- Next, click on Manage Settings.
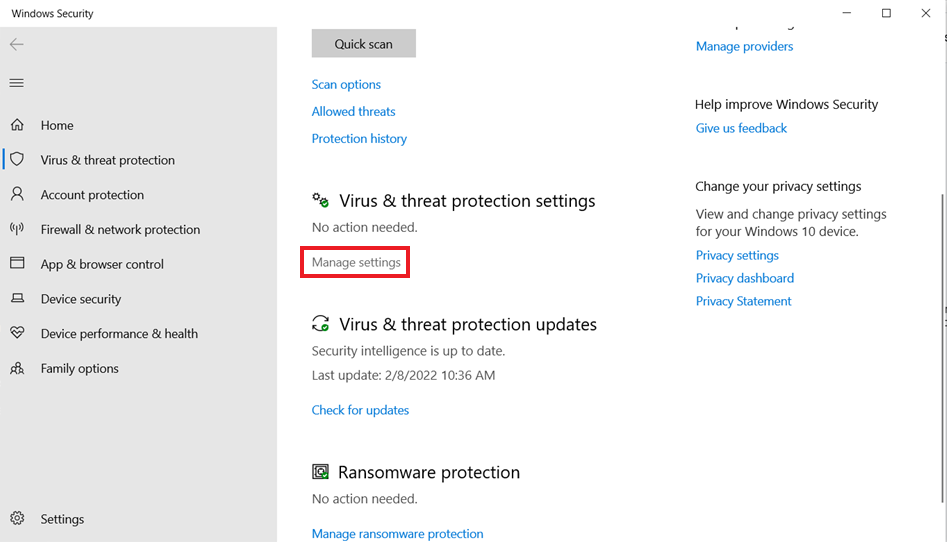
- Finally, turn off the toggle for Real-time protection.
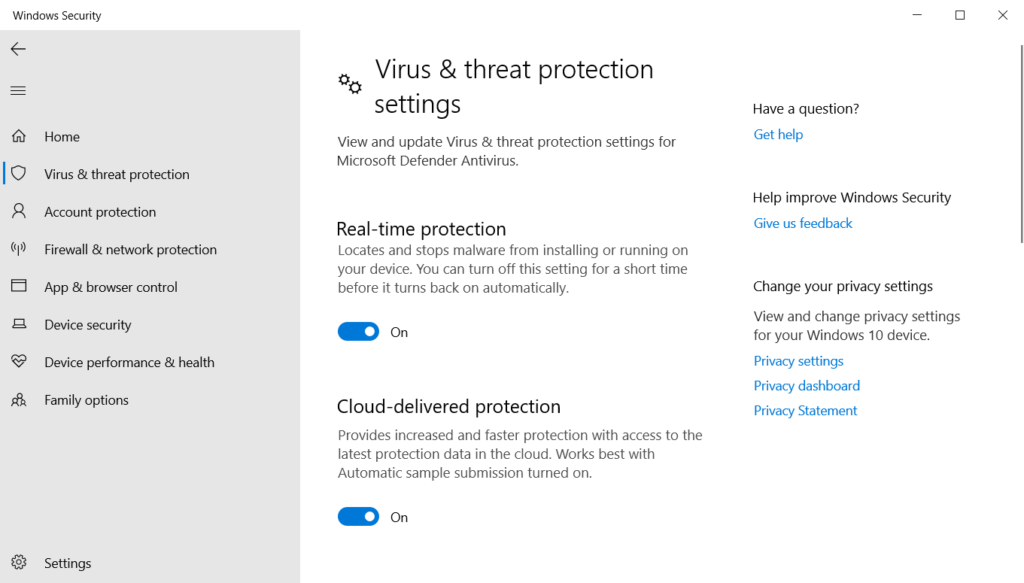
Follow the same steps to re-enable Windows Defender right after you successfully create the recovery drive.
7. Two-Step Method.
Another common remedy to get rid of the “A problem occurred while creating the recovery drive” error is to create the recovery drive twice, once without and the second time by backing up the system files.
Here’s how to do it:
- Start by pressing the Windows key. Then, type ‘recovery drive’ in the Search bar and press Enter.
- When the recovery drive wizard opens, unselect Back up system files to the recovery drive and click Next.
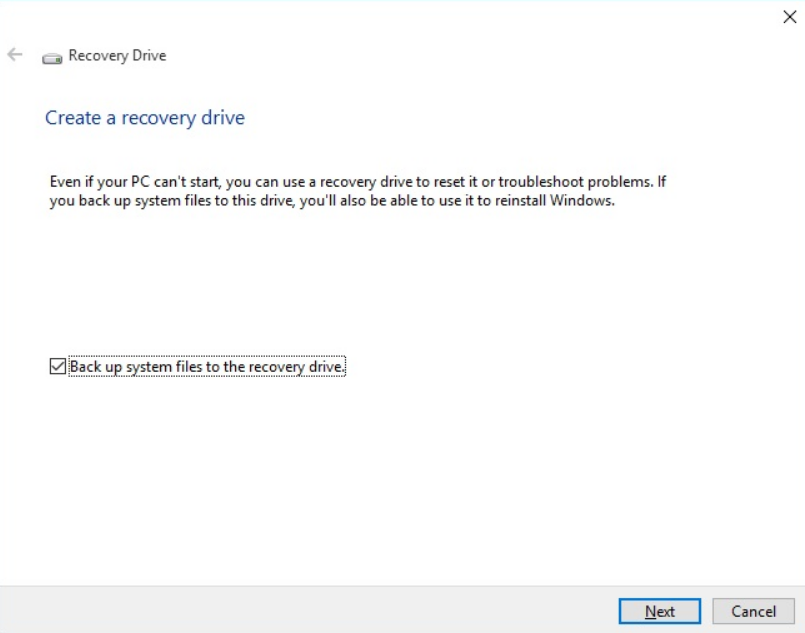
- Select a USB drive to create a recovery drive in and again click Next.
- Next, click on Create.
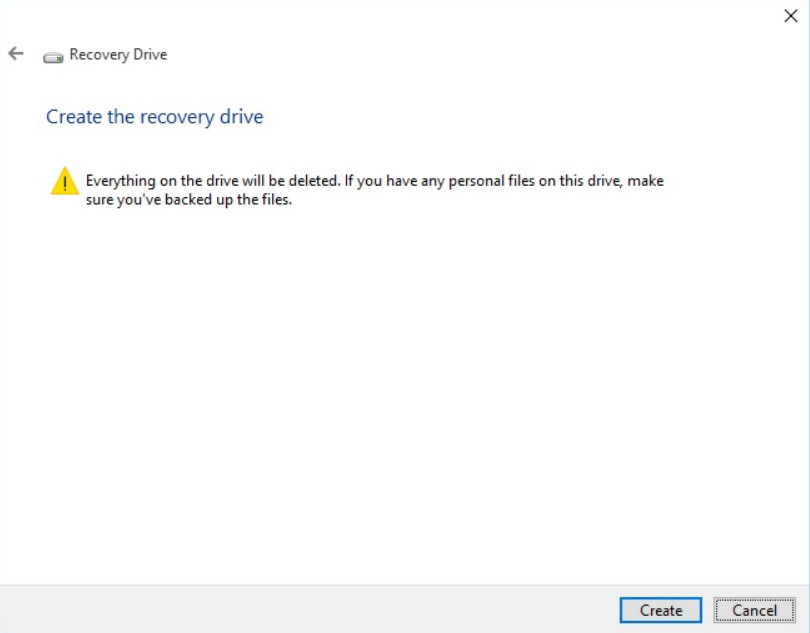
- When the process is completed, click on the Back arrow instead of Finish or Close. You can even press Alt + B from your keyboard to jump back to the first window.
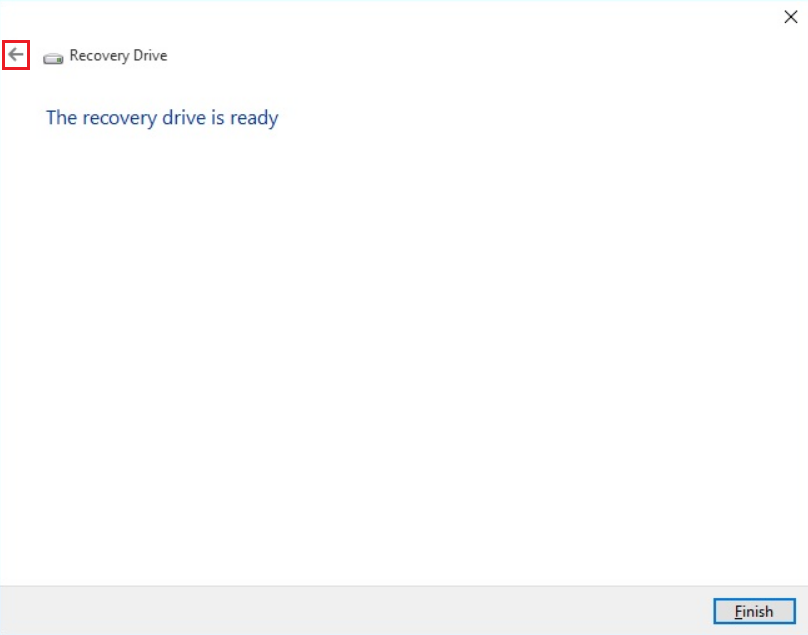
- This time, check the Back up system files to the recovery drive option and click Next. Then, repeat steps 3 and 4.
If you continue to get the same error, move to the following method.
8. Disable Microsoft Services Temporarily.
As strange as this solution may sound, disabling Microsoft services, particularly Word and Excel, has reportedly fixed the recovery drive error on Windows 10 for many users. One possible explanation is that Application Virtualization interferes and clashes with the process.
You can disable these applications temporarily by using System Configuration and blocking them from running during your next operation. To do so, follow the steps below:
- Firstly, press the Windows key and R simultaneously and type ‘MSConfig’ in the Run dialog box. Then, press Enter.
- This will open the System Configuration window. Now, click on the Services tab.
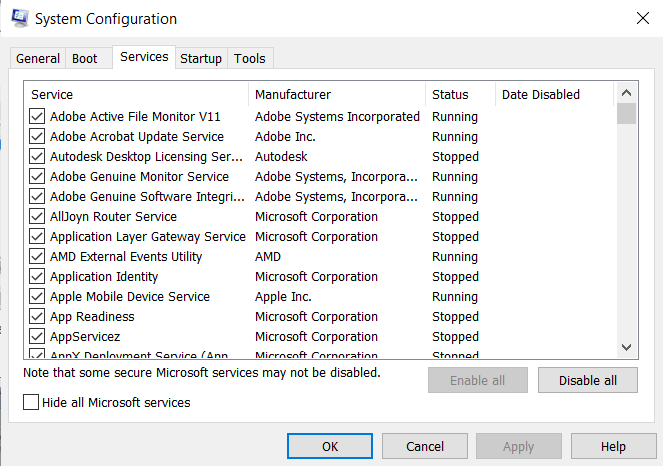
- Now, locate the Application Virtualization Service Agent, Application Virtualization Client, and Client Virtualization Manager services and deselect all of them.
- Finally, click on Apply to apply these changes.
Now, restart your PC and try to create the recovery drive again. After that, turn these services back on by following the same steps.
This brings us to the end of our guide. Now, you’d be well are of how to fix recovery drive error on Windows 10. If you still have any confusion, head to the comment section below. We’ll be happy to assist you further.
If this guide helped you, please share it. 🙂


