

Looking for ways to reset sound settings on Windows 11?
Windows 11 came out with a lot of new and improved features for its users. Especially in the sound department, the Enhance Audio feature gives you the option to enjoy a better sound quality altogether.
New features include a set of audio enhancements, such as Loudness Equalization, Bass Boost, etc. However, certain issues may arise within your system resulting in a low-quality sound. It may be due to an outdated or corrupted sound driver, misconfigured audio settings, or disabled sound services.
Regardless of the reason, if you find yourself in a similar condition, you’ve come to the right place. One way to solve your problem is to reset the sound settings on Windows 11. In this article, you will come to know about various methods that you can utilize to reset the sound settings.
So, let’s head right into it!
1. Reconnect Sound Device.
If you suspect that your PC has no sound, the first thing you should do is disconnect the output sound device from it. After that, reconnect the USB output device to a different USB port to allow it to restart. This is one way to fix the sound problem on your PC.
If this method doesn’t work, move to the next one to solve your issue.
2. Reset Sound Settings via System Settings.
Another way to reset sound settings on Windows 11 is through the System settings. This method will reset the audio settings for all the apps and programs installed on your PC.
Here’s what you need to do:
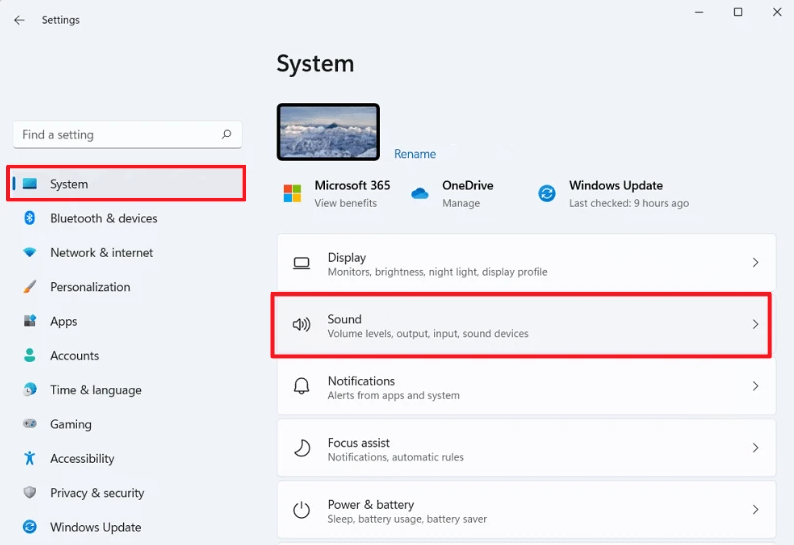
- Open the Settings app by pressing Win + i on your keyboard.
- Next, select System from the left pane.
- Now, click on Sound.
- After that, scroll down and click on Volume mixer under the Advanced section.
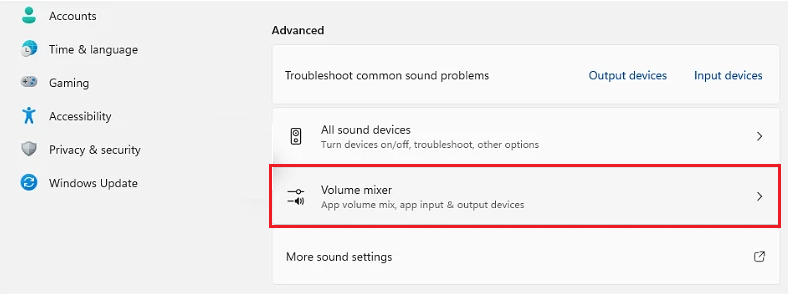
- Then, click on the Reset button from the bottom-right of your screen.
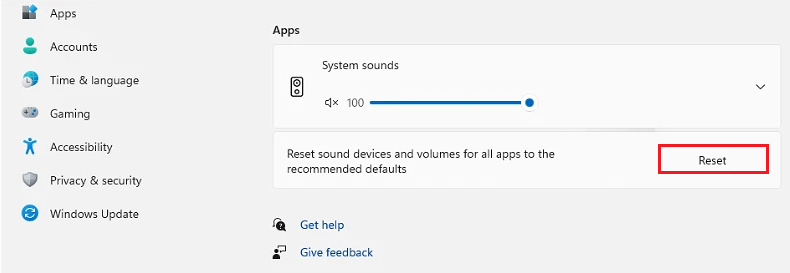
A checkmark will appear next to the Reset button. This indicates that the sound settings of your PC are set to default.
3. Update Audio Driver.
Windows occasionally releases Audio driver updates to enhance audio performance and get rid of any bugs within the system. So, if your PC audio is not working correctly, updating it to the latest version might solve the issue. You can either update it through the Windows website or via the Device Manager.
Follow the steps below to update the audio driver through the Device Manager:
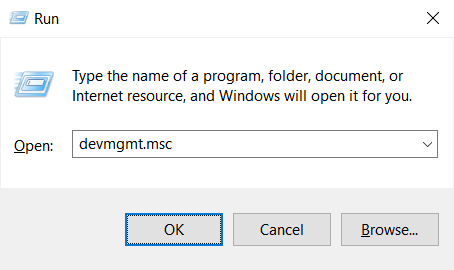
- First, press Win + R to open the Run dialog box.
- Then, type in devmgmt.msc and click on OK to launch the Device Manager.
- In the Device Manager, locate and double click on the Audio inputs and outputs.
- After that, right-click on the audio output device and choose Update driver.
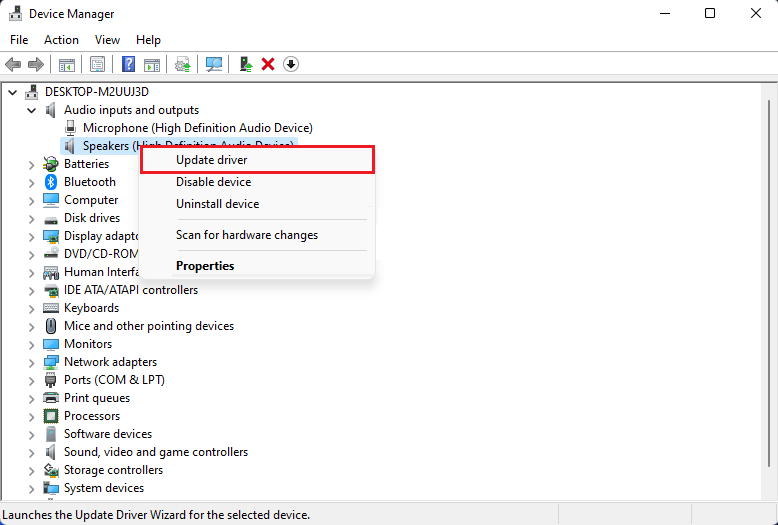
- Lastly, follow the on-screen instructions from the next window to update your audio driver.
4. Reset Audio Driver.
An outdated or corrupted audio driver may be the culprit behind your PC’s sound not working. So, the next option is to reset the audio driver if the above-mentioned methods did not fix the issue.
Here’s all that you need to do:
- Open the Run command box by pressing Win + R from your keyboard.
- Next, type in devmgmt.msc and press the Enter key to launch the Device Manager.
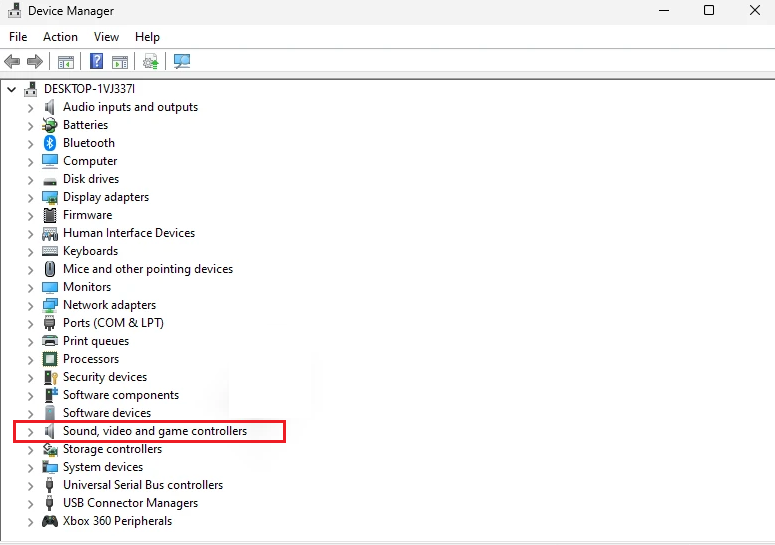
- Now, find and double-click on Sound, video and game controllers.
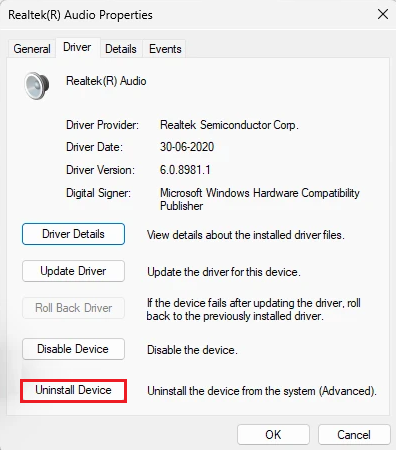
- After that, double-click on the audio driver that is causing the issue.
- From the pop-up Properties window, click on the Driver tab located at the top bar.
- Then, click on the Uninstall device button.
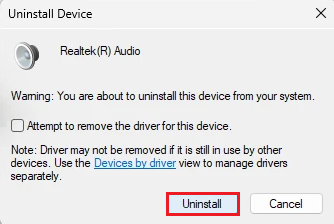
- A confirmation message will appear. Select Uninstall.
Once done, make sure to restart your computer so that the driver can be reinstalled automatically. Now, check if your computer’s sound is working or not. If not, proceed to the following method in this guide.
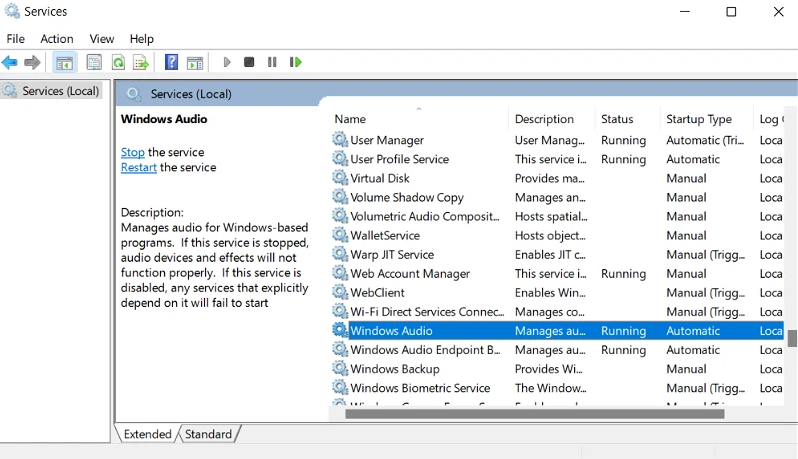
5. Restart Windows Audio Service.
Restarting the Windows Audio Service is another way to reset sound settings on Windows 11. Windows Services is an in-built program of OS that runs in the background and enables you to manage running processes on your computer. The program’s services include privacy, power, sound, etc.
To do so, follow these steps:
- To start, open the Start menu by clicking on the Windows logo from the bottom-left of your screen. You may also do it by simply pressing the Win key from your keyboard.
- Next, type in Services in the search bar and click on Open from the right pane.
- After that, scroll down and find Windows Audio.
- Right-click Windows Audio and select Restart.
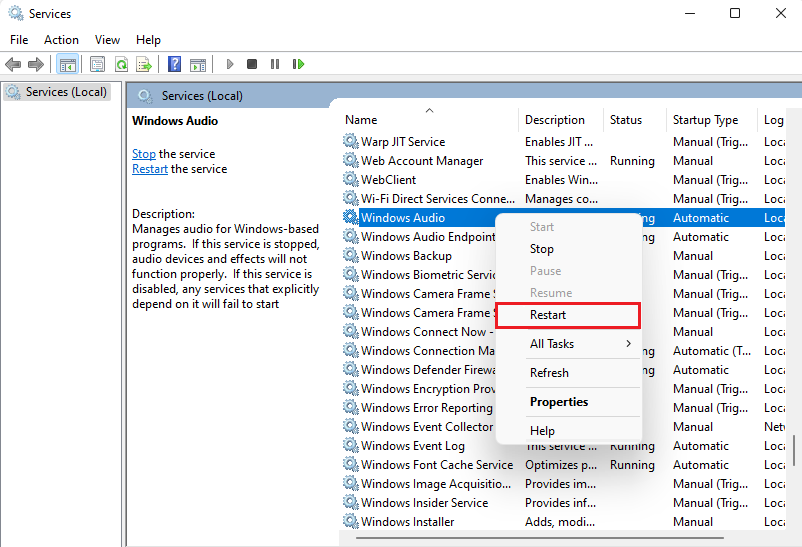
- Afterward, click Yes on the confirmation message that appears.
6. Troubleshooting the Sound Settings.
Windows Troubleshooter is a diagnostic tool that helps detect and fix OS issues. You may utilize this feature to diagnose the sound problems on Windows 11 and resolve existing issues accordingly.
Here’s how to do it:
- Launch the Start menu by pressing the Win key from your keyboard.
- After that, type in Troubleshoot settings and click Open from the right pane of the window.
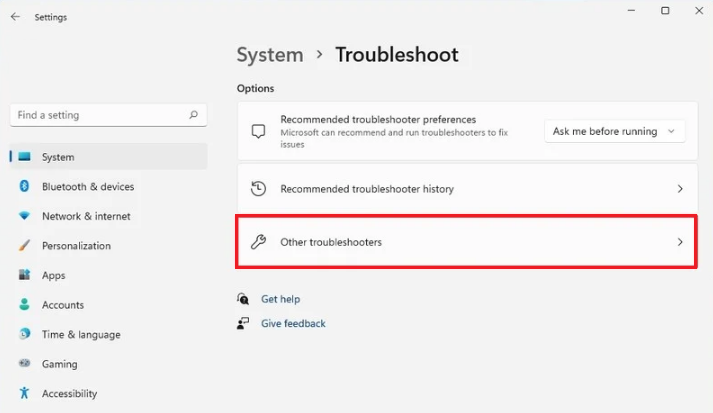
- Once Troubleshoot is opened, select Other Troubleshooters under the Options section.
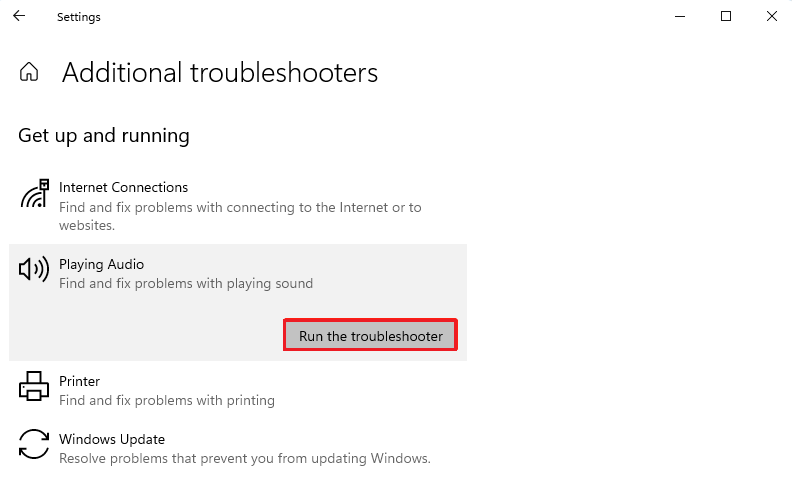
- Now, click on the Run the troubleshooter button found next to the Playing Audio option.
- After that, a Playing Audio pop-up window will appear. Click on the audio device you wish to troubleshoot, then select Next.
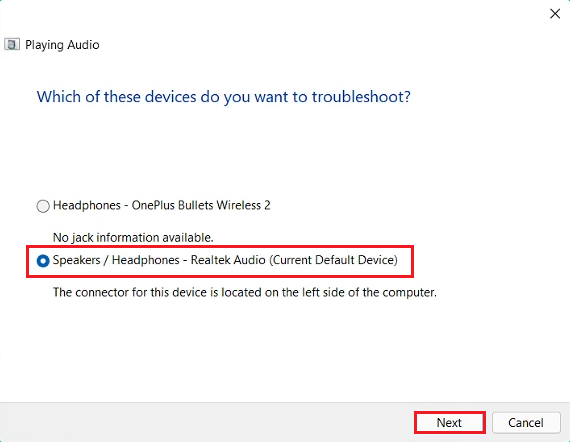
- Lastly, follow the on-screen instructions from the next window to detect and fix your issue through Troubleshoot.
7. Reset System Sounds.
Windows normally makes a sound to alert users in case new system events occur, such as Windows startup, an app notification, low power alert, etc. It also allows its users to Disable the Startup Sound or customize the sound settings.
However, if anything goes wrong with your audio, you can always reset system sounds on Windows 11. Follow the steps given below to do so:
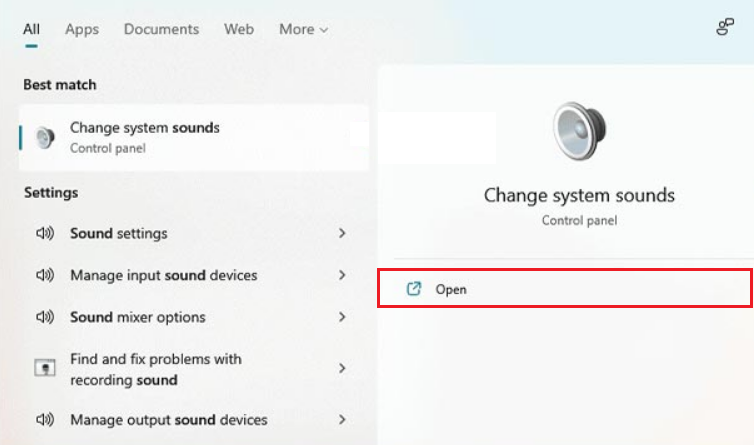
- Press the Win key from your keyboard to open the Start menu.
- Next, type Change system sounds and click on Open from the right pane.
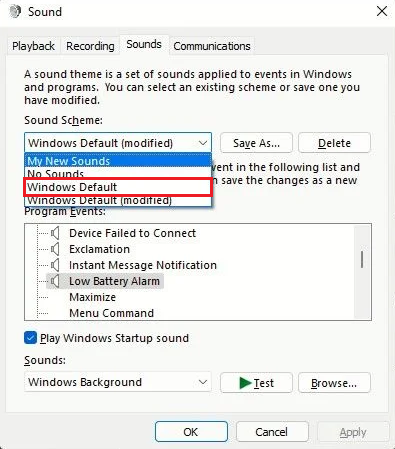
- Afterward, expand the box under Sound Scheme and choose Windows default.
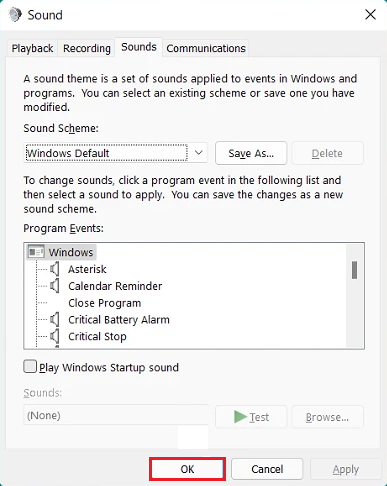
- Now, click on Apply and then OK to save the changes you just made.
And this brings us to the end of our guide on how to reset sound settings on Windows 11. Hopefully, you were able to succeed in fixing your audio settings by following the methods mentioned in this guide. If you have any confusion, feel free to use the comments section below. We’ll try our best to assist you further.
If this guide helped you, please share it. 🙂
