Want to know ways to fix Spotlight not working on Windows 11?
The Spotlight was instantly appreciated by the users when it was first released in Windows 10. Originally, it was available for the lock screen only, but with time, the developers decided to bring the feature to the desktop as well.
When Spotlight is enabled, users get to view fascinating pictures that keep changing every other day. The information about the place or image, in general, is also displayed. Windows downloads these pictures from Bing and may sometimes fail to work if the internet isn’t working properly.
However, that’s not the only reason why users encounter Spotlight not working on Windows 11. Other causes may include Firewall or DNS conflicts, broken cache and assets, corrupted background apps and services, and so on. If you’re looking to fix all these factors and get the Spotlight back in action, this guide is all you need.
So let’s take a look at the solutions for this issue!
1. Ensure You Have A Strong Internet Connection.
If you notice that the image featured in Spotlight isn’t changing, it’s probably because your PC doesn’t have an active internet connection. Since all the images and advertisements are downloaded from Bing, a poor internet connection will fail to feature new pictures.
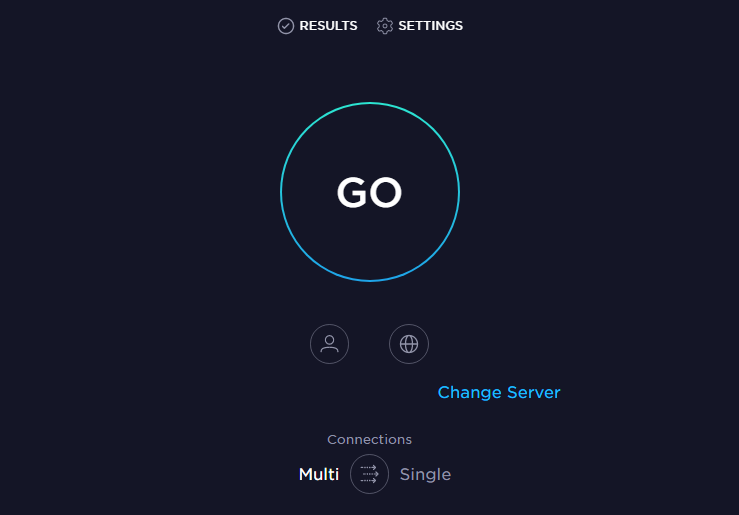
You can visit Speedtest by Ookla to check the speed of your internet. For unstable network connection, we recommend you restart your Wi-Fi router or switch to a different network, if possible. In case the problem persists, move to the following methods.
2. Check if the Background Apps Are Working Properly.
Windows Spotlight requires certain Microsoft services to function. These include Microsoft Edge, Microsoft Store, etc. The services and apps should be allowed to run in the background. Otherwise, Spotlight will fail to work.
To enable the apps, follow the steps below:
- Start by pressing the Windows key + i to open Windows Settings.
- Next, go to the Apps tab from the left pane of the window.
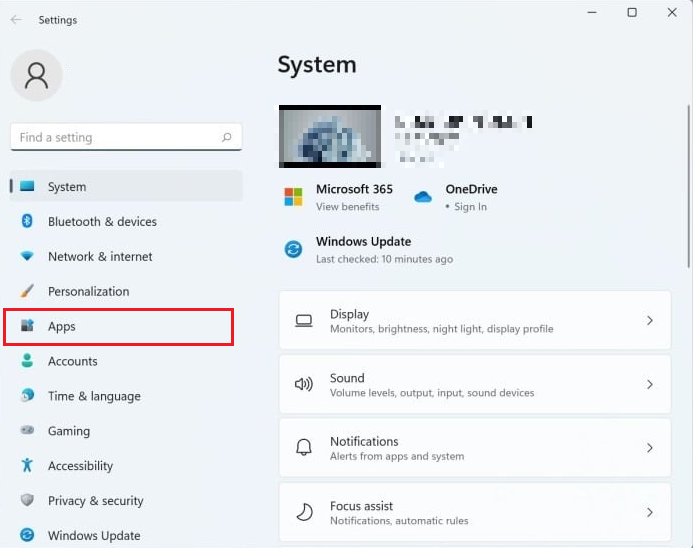
- Then, click on Apps & features from the right side.
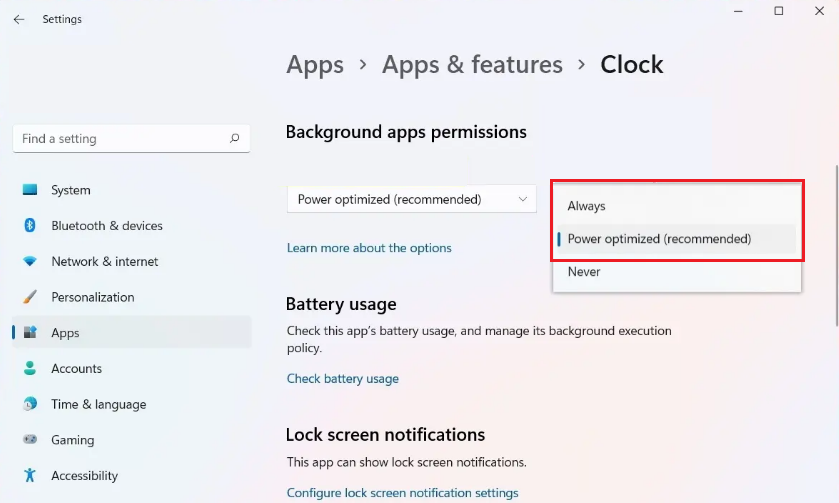
- Locate the app that needs to be enabled and click on the three vertical dots menu. From the options, choose Advanced options.
- Finally, under Let this app run in background, either choose Always or Power optimized.
3. Ensure Metered Connection Is Disabled.
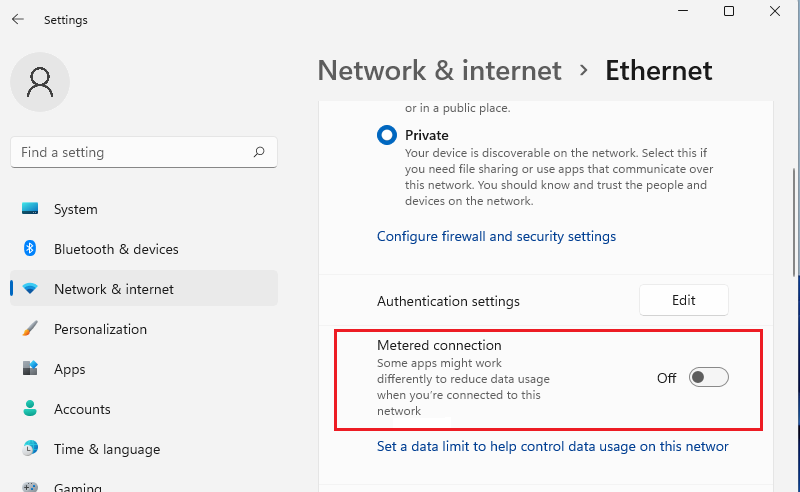
For many users, a metered connection is the culprit behind the Spotlight not working on Windows 11. Your computer will fail to download new images and consequently get stuck on one picture. But don’t worry, as you can simply turn off the metered connection to resolve the issue.
Here’s how to do it:
- Firstly, click on the Start menu and go to Settings. You may also opt for a keyboard shortcut and press Windows key + i to directly open Settings.
- Then, go to the Network & Internet tab from the left pane.
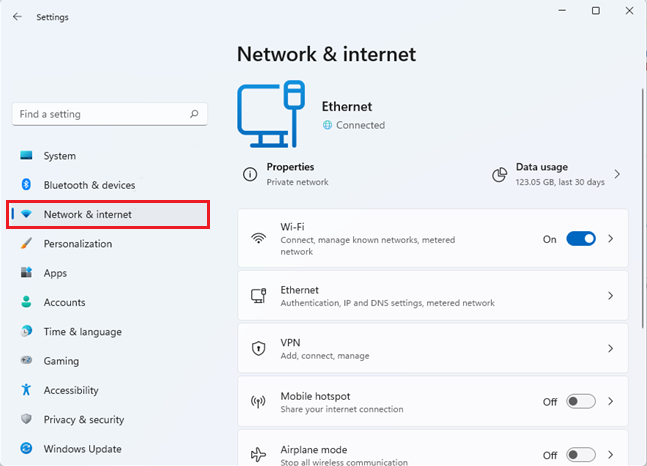
- Now, go to Ethernet from the right side of the window.
- Now scroll down to Metered connection and turn off its toggle if it’s enabled.
- To apply the changes, restart your computer.
4. Troubleshoot System Maintenance.
Windows offers a default troubleshooter known as System Maintenance. As the name suggests, it serves to assist your computer in running the maintenance task automatically. This is a hassle-free method to identify and resolve issues on your PC.
Here’s how to run the troubleshooter:
- To start, press the Windows key + X and select the Control Panel.
- When the window opens, choose View by: Large icons.
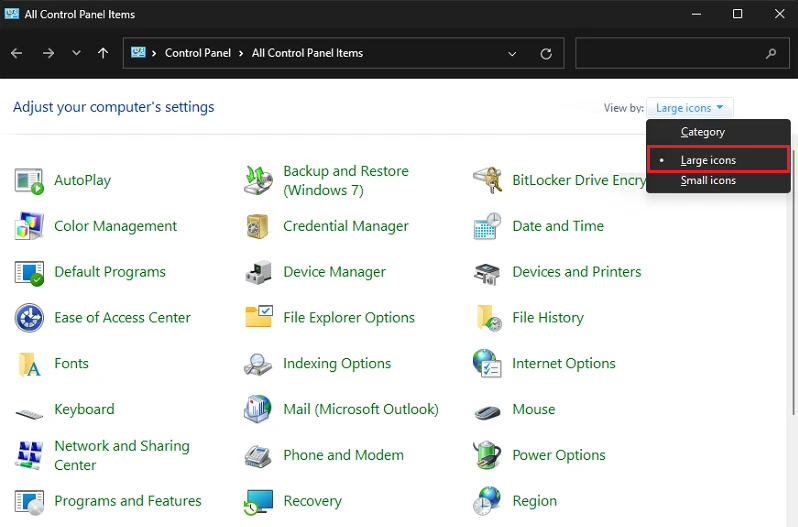
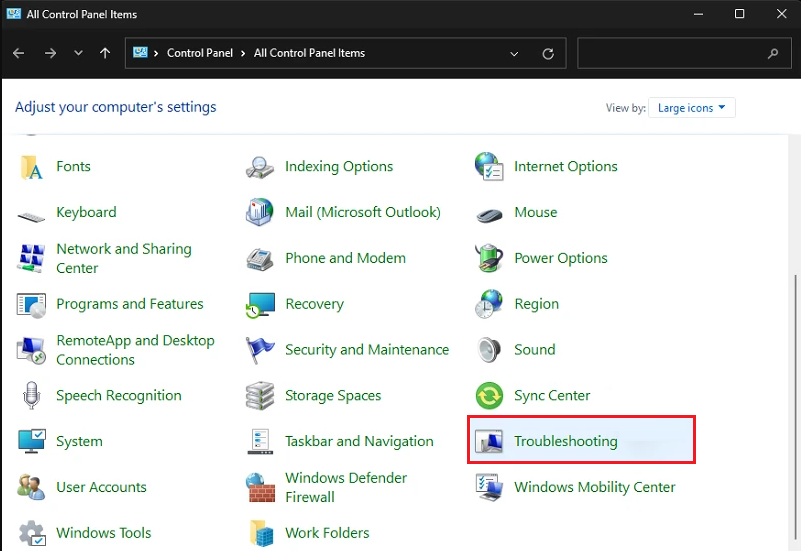
- Then scroll down and click on Troubleshooting.
- From the next screen, go to System and Security.
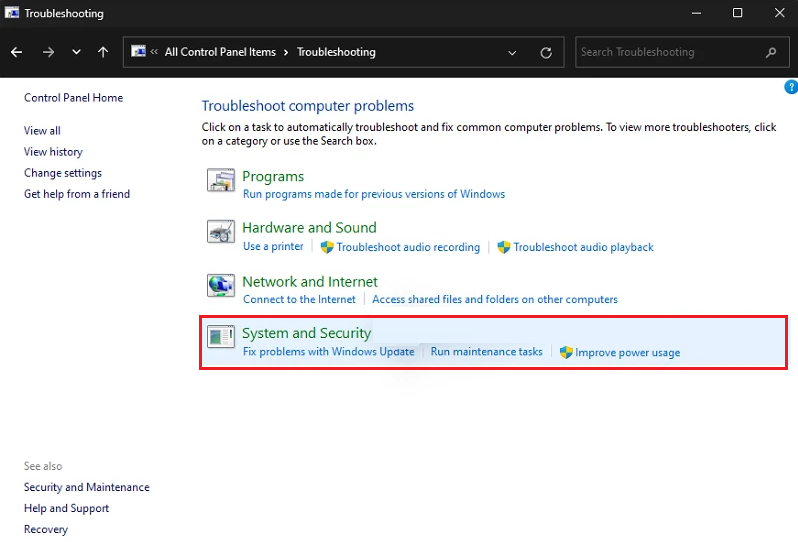
- Now, click on System Maintenance.
- Next, click on Advanced.
- Check the box for Apply repairs automatically and click on Next.
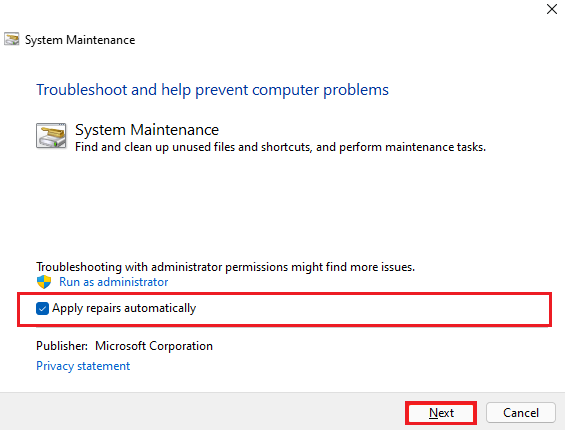
- Choose the Try troubleshooting as an administrator option to identify and resolve problems with administrator permissions.
- The scan will now start. Wait for it to run and display the results. After that, click on the Close button to exit the troubleshooter.
Hopefully, the Spotlight not working on Windows 11 will be resolved now. However, if it persists, continue to the next method.
5. Run the SFC Scan.
If the Spotlight feature on your PC isn’t working due to corrupted system files, then this method is for you. System File Checker or SFC is a built-in utility in Windows systems to locate and repair the damaged files on your PC.
To go about this method, here’s what you need to do:
- Click on the Search icon from the taskbar and type ‘cmd’ in the search bar. Then, click on Open as administrator.
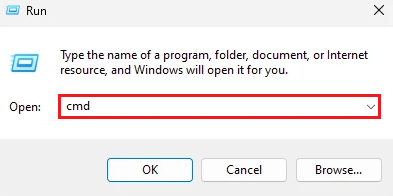
- Once the prompt opens, type the following command and hit the Enter key:
sfc /scannow
The process will be automatic from here. So just wait for the scan to finish and check if it fixes the issue afterward.
6. Re-Enable Windows Spotlight.
If some unknown error is causing Windows Spotlight to not work properly, you should consider disabling the feature and turning it back on after a few moments. This simple fix is effective in most cases, so you should also give it a try.
Follow the steps below to do it:
- Begin by launching the Settings app by pressing the Windows key + i from your keyboard.
- Once the window opens, go to the Personalization tab.
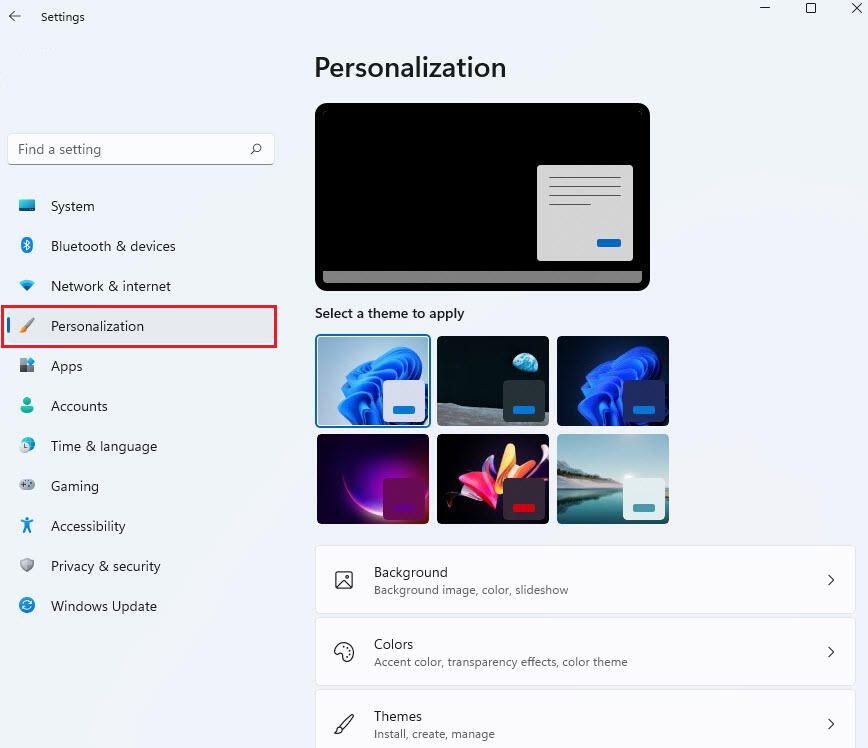
- Then, click on Lock Screen from the right pane.
- From there, click on the drop-down menu icon next to Personalize your lock screen. You’ll need to select Picture or Slide Show to deactivate Windows Spotlight.
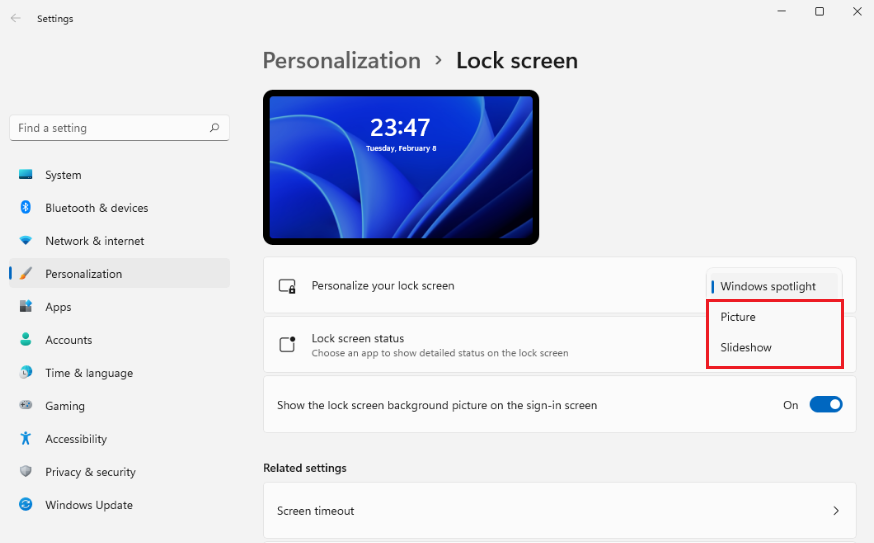
- Restart your PC to save these changes.
- After that, navigate to the same page on Settings and this time, choose the Windows spotlight option to re-enable the feature.
Lastly, restart your computer one more time and check if the Spotlight not working on Windows 11 issue has been resolved.
7. Clean Spotlight Assets.
If re-enabling didn’t work in resolving the issue, you might want to clear the Spotlight cache and assets to see if that fixes the problem. But before doing so, you’ll need to first disable the feature. Head to the previous method to see the instructions on how to do that.
Then, follow the steps below to clean Spotlight assets:
- Press the Windows key + R to launch the Run dialog box. Type the following command and click on OK:
%USERPROFILE%/AppData\Local\Packages\Microsoft.Windows.ContentDeliveryManager_cw5n1h2txyewy\LocalState\Assets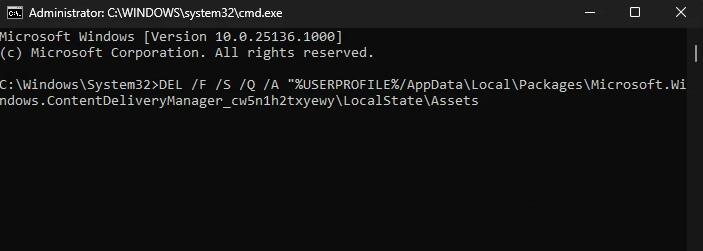
- You will be directed to the Spotlight Assets folder. There, press Ctrl + A to select all files and press Delete.
- Next, restart your PC.
Then, go back to the above method to re-enable Spotlight.
8. Re-Register Windows Spotlight.
Another method to combat the Spotlight not working on Windows 11 issue is to re-register it on your PC. You can perform this by using the PowerShell utility. But before that, you’ll first need to disable Windows Spotlight, as explained earlier in the guide.
Then, follow the steps below:
- Press Windows key + X and select Windows PowerShell (Admin).
- When the prompt opens, run the following command:
Get-AppxPackage -allusers *ContentDeliveryManager* | foreach {Add-AppxPackage "$($_.InstallLocation)\appxmanifest.xml" -DisableDevelopmentMode -register}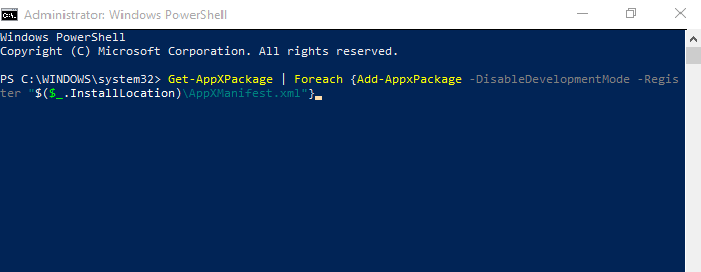
- Once you successfully execute the command, quit the PowerShell terminal and restart your computer.
Then re-enable the Windows Spotlight feature by following the steps explained in the earlier section of the guide.
Here, we end our guide on how to fix Spotlight not working on Windows 11. For more queries, head to the comment section below. We’ll respond to you as soon as possible.
If this guide helped you, please share it. 😊


