

Constantly getting the System Service Exception error on Windows 11?
The Blue Screen of Death or BSOD errors are common in all Windows OS, irrespective of the version running on your PC. They are extremely troublesome as all the system operations would stop midway whenever a major issue is detected, displaying the stop code error. Your computer will then reboot automatically to prevent further damage to the hardware and software components.
When you encounter such BSOD errors, Windows will also display a stop code like fltmgr.sys, Page Fault in Nonpaged Area, System Service Exception, and so on. You can search the stop code to learn more about it, like what causes the error and how to prevent its occurrence in the future.
This is probably what has brought you to this page. If you are experiencing the System Service Exception error on Windows 11 accompanied by the service or drive name, we have all the possible solutions you may need. Go through the listed troubleshooting methods to fix the issue on your own.
So without any delay, let’s get started!
1. Repair Your Drivers.
One of the main reasons for the System Service Exception error on Windows 11 is faulty drivers. Although Windows Updates continuously updates and repairs them, you may sometimes need to perform the task manually.
Here’s how to do that:
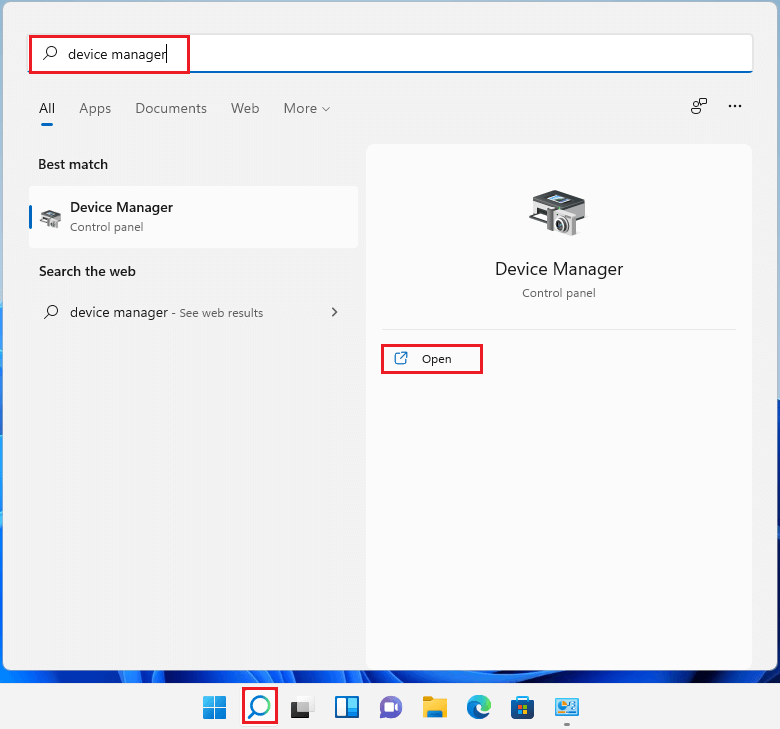
- Type ‘device manager’ in Windows Search and click on Open.
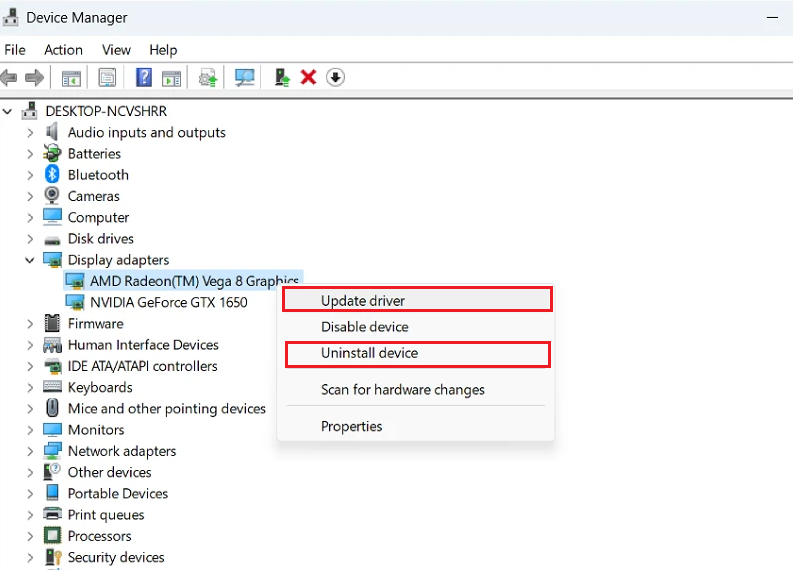
- Expand the options for the driver you need to repair.
- Right-click on the driver and choose Update driver or Reinstall device. Remember that damaged drivers need to be reinstalled, and incompatible drivers need to be updated.
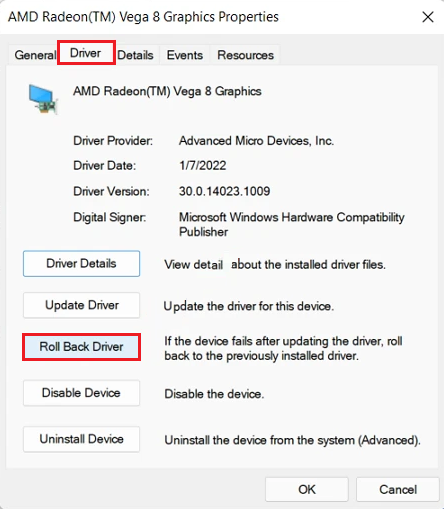
- However, if a recent driver update caused the error, you should roll back to the previous version by right-clicking on the driver and choosing Properties.

- Next, go to the Driver tab and click on the Roll Back Driver button.
- Choose an appropriate reason and click Yes.
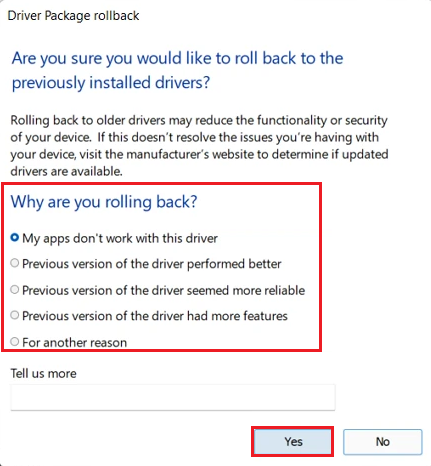
- Reboot your PC.
2. Perform All System Scans.
If you believe damaged or corrupted Windows images, system files, or the entire disk drives are the reason behind the BSOD error, then this method is for you. Fortunately, Windows has several built-in utilities that can automatically detect faults and resolve them as needed.
Below are the steps you must follow:
- Start by typing cmd’ in Windows Search and clicking on Run as administrator.
- Click on Yes in the User Account Control box.
- Run the following command to perform the SFC scan. It will inspect for any damaged or corrupted file and replace it with a cached copy.
sfc /scannow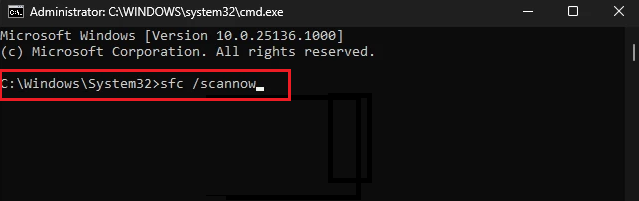
- For the Check Disk scan, execute the following command. Replace c with the drive letter you wish to run a scan on.
chkdsk /f /r c: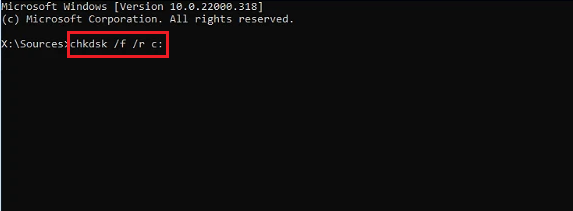
- Finally, run the DISM scan with the following commands:
Dism /Online /Cleanup-Image /CheckHealth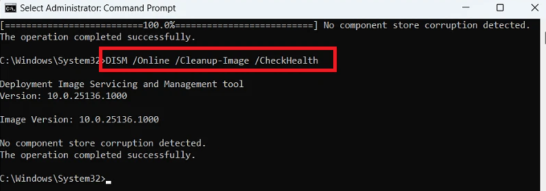
Dism /Online /Cleanup-Image /ScanHealth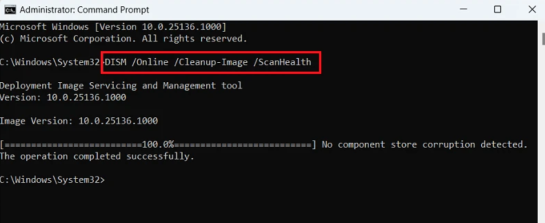
Dism /Online /Cleanup-Image /RestoreHealth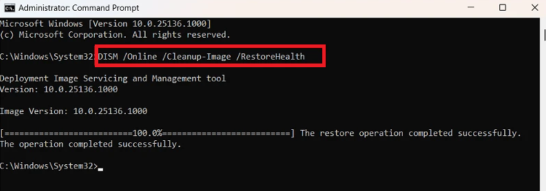
3. Perform Virus/Malware Scans.
If a virus or malware attacks your system, it can put your data, along with the computer’s hardware and software components, at risk. In this situation, you need an antivirus program to run a full scan and remove the potential culprits. You can also use built-in Windows tools for the same purpose.
4. Update or Roll Back Windows OS.
Outdated Windows versions may also trigger the System Service Exception error on Windows 11. For this reason, we advise you never to put any version update on hold.
If you have it pending, follow the steps below to install it on your computer:
- Click on the Start menu and choose Settings.
- Then, go to the Windows Update tab and click on the Check for updates button.
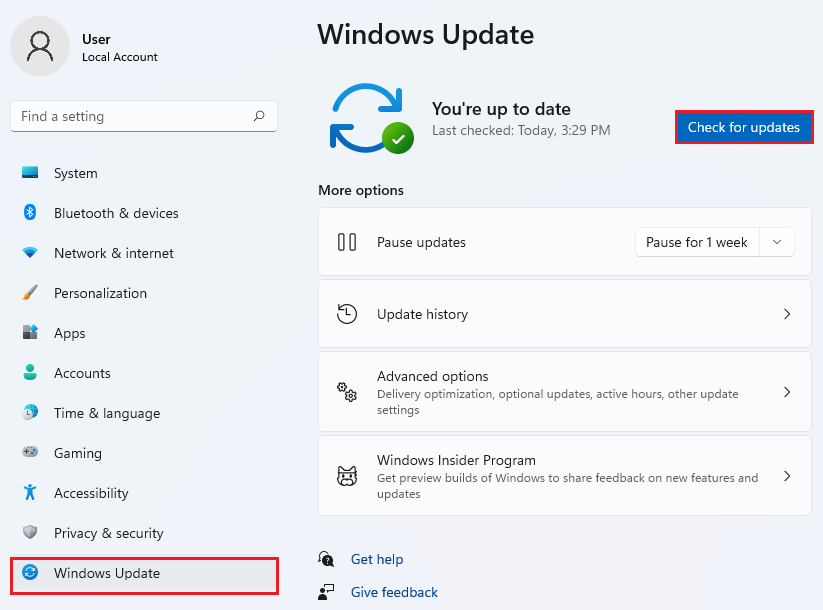
- If an update is available, it will now be automatically installed. In case it doesn’t, click on the Install all button.
On the contrary, if you start encountering the BSOD error right after installing a newer version, you need to uninstall it, as it may also contain a bug.
Follow the steps below to do so:
- From the Windows Update tab in your Settings app, go to Update history.
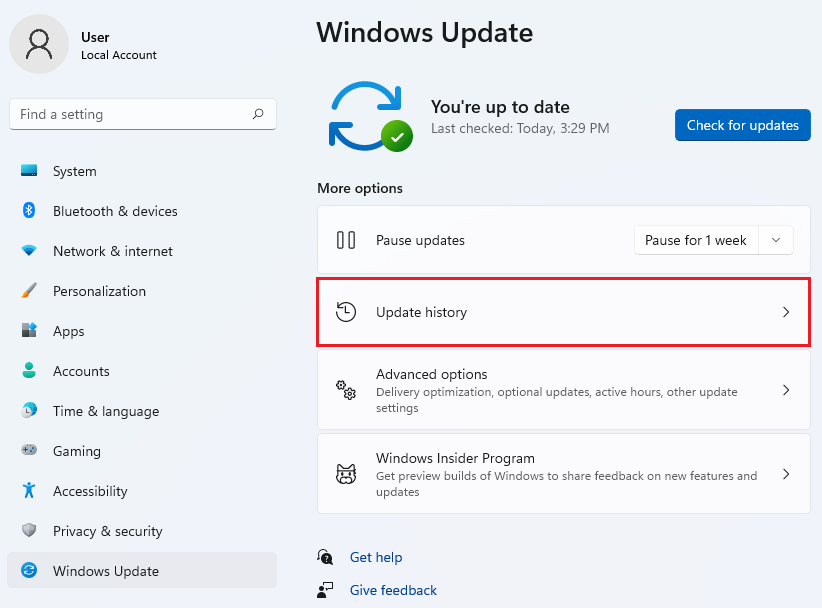
- Scroll down to Related settings, and click on Uninstall updates.
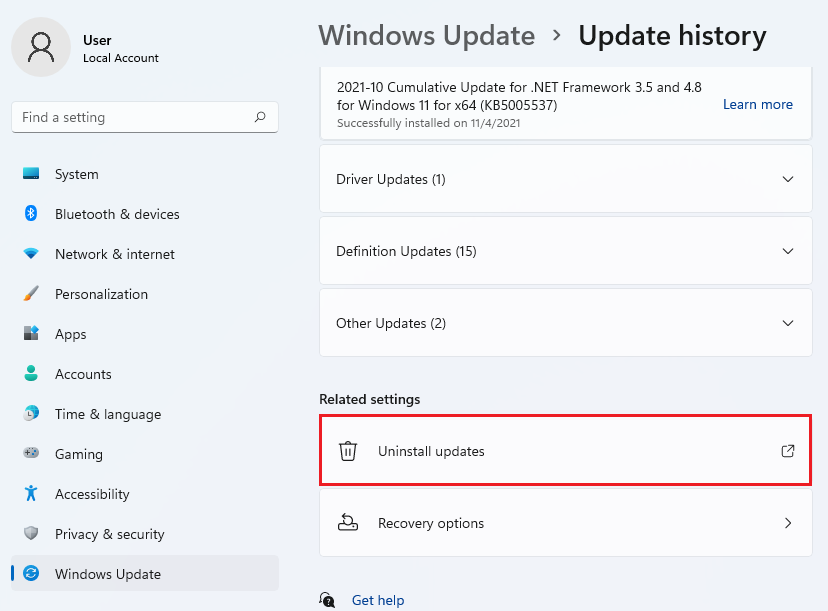
- This will display a list of updates. Click on the Uninstall button next to the update you wish to remove.
- Again, click on Uninstall for confirmation.
5. Uninstall Problematic Third-Party Apps.
Other applications installed on your computer can cause interference with the ongoing tasks and the overall performance. In extreme situations, it can even result in the Blue Screen of Death. When that happens, it’s best to remove the conflicting app to resolve the issue.
Here’s how to do so:
- Press the Windows key + i to launch Settings.
- Go to the Apps tab and click on Installed apps.
- Click on the three dots icon next to the problematic app and choose Uninstall.
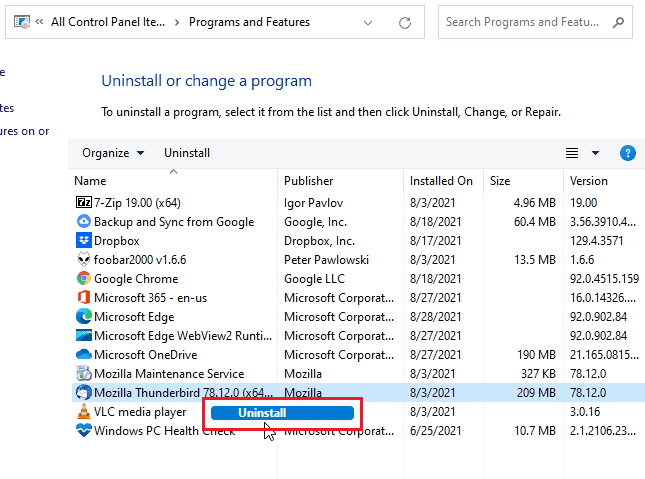
- Click Uninstall again to confirm your action.
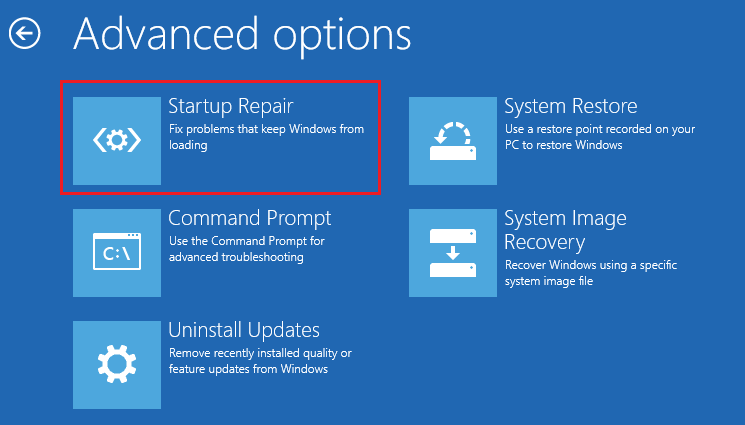
6. Perform Startup Repair.
If your computer is facing trouble starting up after the Blue Screen of Death, you need to boot your computer into Startup Repair. You’ll need a Windows installation media in a USB or a DVD for this purpose.
Then use the instructions below:
- First, boot your system from the bootable media for Windows 11.
- When the Windows Setup screen appears, click on Repair your computer.

- This will launch Windows Recovery Environment. There, choose Troubleshoot.

- Then, click on Advanced options.
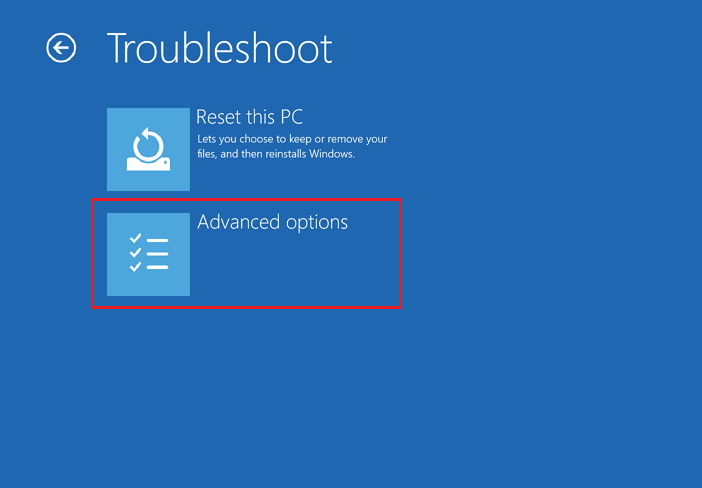
- Lastly, click on Startup Repair.
7. Disable Windows Biometric Service.
Windows Biometric Service allows users to use fingerprints, facial recognition, or eye scanner to authenticate their identity and access the protected data or device. Unfortunately, the support assistant tools associated with this feature can trigger the System Service Exception error on Windows 11.
You can disable Windows Biometric Service to resolve the issue. Here’s how:
- Press the Windows key + R to open the Run tool.
- Type ‘services.msc’ and click OK.
- Look for Windows Biometric Service. Right-click on it and choose Properties.
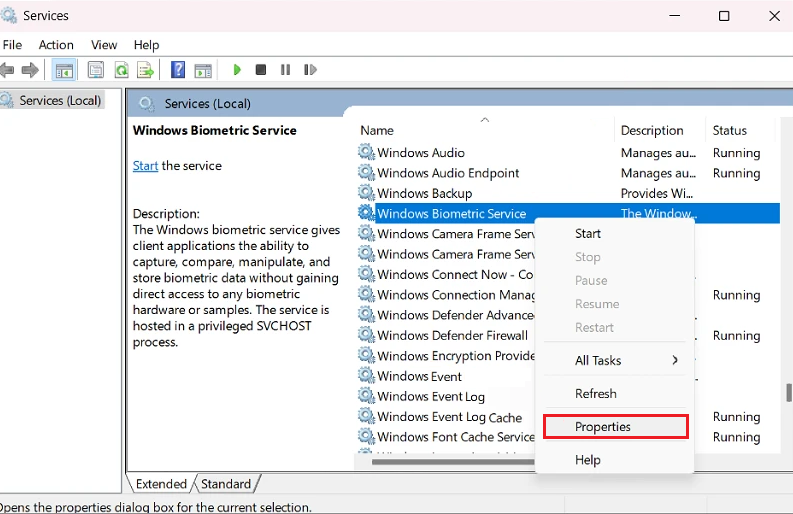
- From the Startup type drop-down menu, click on Disabled.
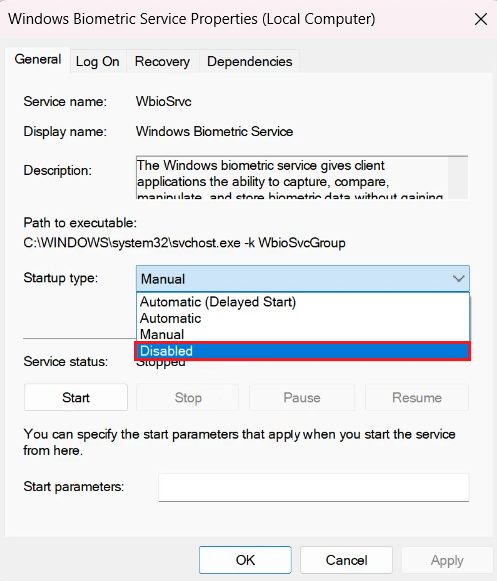
- Click Apply and OK to save the changes.
8. Perform Disk Cleanup.
When your computer storage gets full, its performance is greatly affected. Along with that, you may also encounter various kinds of issues, including the BSOD error. You can free up some space with the Disk Cleanup utility, which will remove all temporary data, cache, and other junk files from the system.
9. Use Windows Memory Diagnostic Tool.
The System Service Exception error on Windows 11 can also be related to your system’s memory issues. You can use the built-in Windows Memory Diagnostic tool to check your RAM and resolve all detected problems.
Follow the steps below to do it:
- In Windows Search, type ‘windows memory diagnostic’ and click on Open.
- When it launches, choose Restart now and check for problems (recommended).
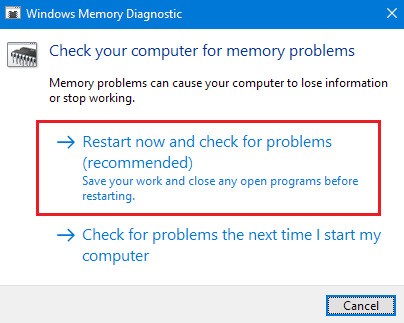
If any error is detected, take out your RAM and remove any dust or replace it if damaged.
10. Disable CPU and GPU Overclock.
Overclocking your CPU and GPU can cause your system to withstand more than average load. This results in your processor running at a higher speed and overheating the entire system, due to which the internal components and drivers may malfunction and give you the BSOD error.
You can disable the CPU and GPU overclock to fix this issue. If you use AMD Ryzen or MSI Afterburner to overclock your CPU or GPU, simply uninstall it. Otherwise, follow these steps:
- Enter the BIOS menu by restarting your computer and continuously pressing the associated key, depending on your manufacturer.
- Once there, press F9 and click Yes to access default settings.
- Then, press F10 and click on Yes and exit the BIOS utility.
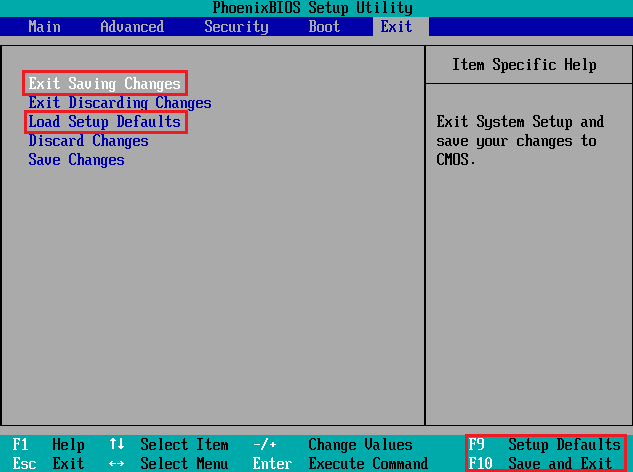
Let your system reboot automatically and check if the issue has been resolved.
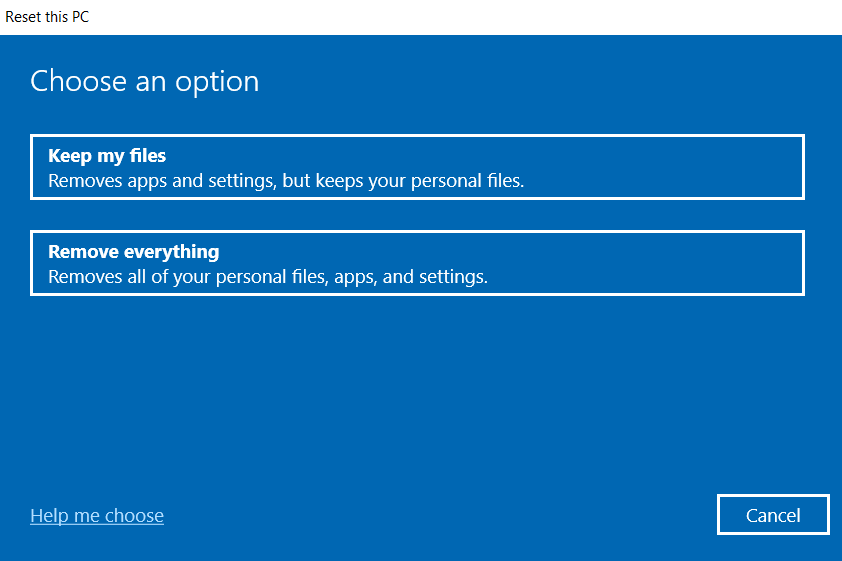
11. Reset Your PC.
As your last resort, you can reset your PC, which will return your computer to the default state. All your apps and settings will be deleted, and the Windows OS will be reinstalled, hopefully resolving the error.
Use the instructions below to do it:
- Press the Windows key + i to open the Settings app.
- Go to the System tab and select Recovery.
- Then click on Reset PC under Recovery options.
- Now either choose Keep my files or Remove everything.
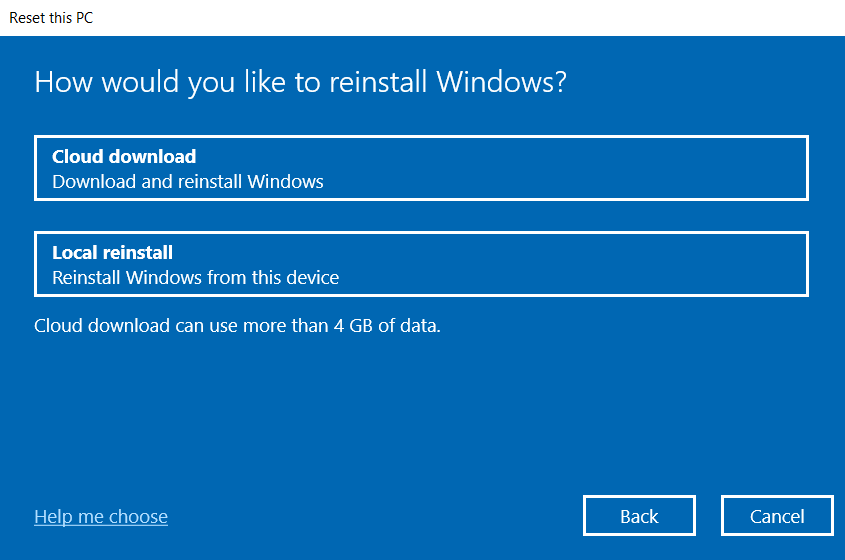
- Now choose how you would like to reinstall Windows.
- Continue clicking the Next button.
- Finally, click Reset.

Here, we conclude our guide on how to fix the System Service Exception error on Windows 11. For more tips and suggestions, head over to the comment section below. We’ll be happy to hear back from you.
If this guide helped you, please share it. 😊
