

Are you looking for ways to fix ‘Tap to Wake’ since it is not working on your iPhone?
After Apple released the ‘Raise to Wake’ feature in iOS 10, it followed the release of the ‘Tap to Wake’ feature afterward. It is currently supported on iPhone X and later models. With the ‘Tap to Wake’ feature, you just need to tap the screen to quickly wake and unlock your iPhone when you want to use it again.
However, some iPhone users started to notice that this feature does not always work. This causes annoyance to some, so they end up using the ‘Power button’ instead, which defeats the purpose of this new feature.
If you are one of these annoyed users, you’re in luck because you have stumbled on the right place! We are here to help you resolve this troublesome problem.
If you’re ready, let’s get started!
1. Enable Tap To Wake.
It’s a good thing that the ‘Tap to Wake’ feature is automatically turned on by default. However, if you have mistakenly turned it off, you will need to re-enable it manually on your iPhone for it to work. You can easily enable it by going to the Settings app.
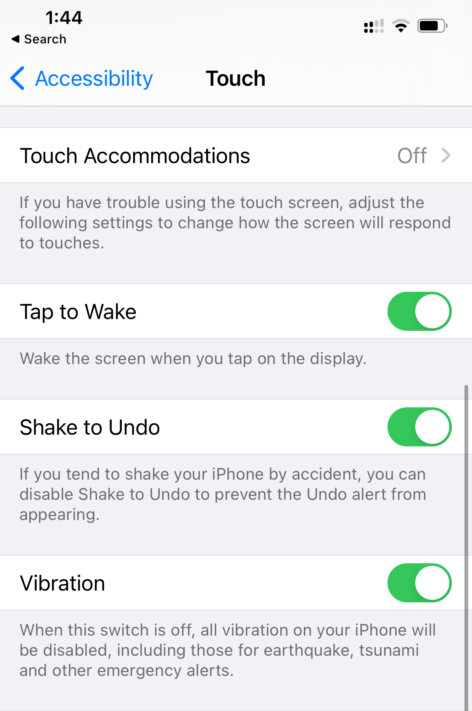
Here’s how you can enable ‘Tap to Wake’:
- Go ahead and open the Settings app on your iPhone, then go to Accessibility.
- Next, select Touch.
- After that, toggle the ‘Tap to Wake’ option to turn it on.
With that out of the way, it should now be working. But if the ‘Tap to Wake’ feature is still not working on your iPhone, you should prepare yourselves for some basic troubleshooting steps.
2. Remove The Phone Case.
Another thing that can cause the ‘Tap to Wake’ feature to not work is because your screen may have become unresponsive to touch. This can sometimes happen when you have a phone case. Although it provides an additional layer of protection for your iPhone, it can also limit your screen’s responsiveness.
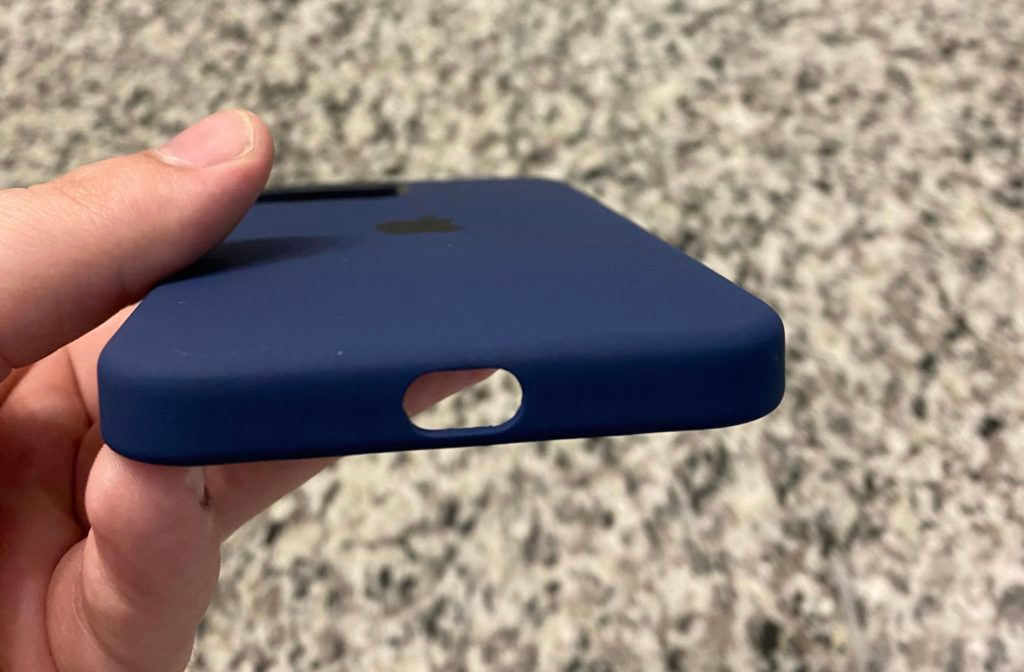
To add to that, it is not advisable if you are using phone cases that cover your iPhone’s screen. The additional layer of plastic or glass can eventually cause the screen to be unresponsive.
A quick way to find out if this is the problem is to remove the phone case. Afterward, you can check if your iPhone’s screen will become responsive. You’re lucky if this simple step resolves your issue.
3. Perform A Restart.
It may be a simple restart, but adding this to the list of your troubleshooting steps will go a long way. Your iPhone will definitely thank you for it. But just in case a single restart did not work, you just have to try it again to make sure that your iPhone has properly restarted.
Here’s how you can restart your iPhone:
- Go ahead and press and hold down the Side or Power button for a few seconds.
- Then a prompt with a red slider that shows ‘slide to power off’ will appear. Drag it to the right to trigger your iPhone to turn off.
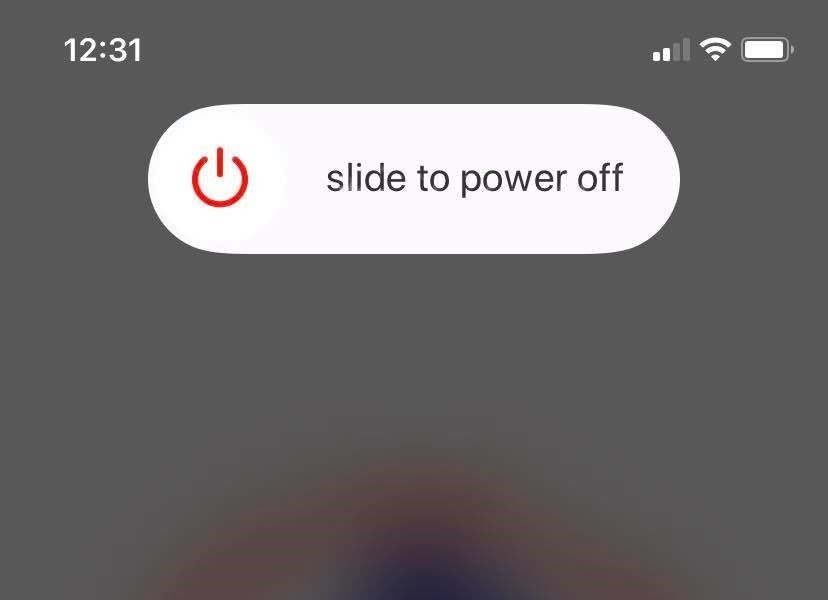
- Finally, press the Side or Power button again until you see the Apple logo. This will trigger your iPhone to turn back on.
Once you are done with all of that, check if the problem is still there. Do you know that if you are also experiencing error 9 when updating or restoring your iPhone, this step can also work? This is what we call hitting two birds with one stone, so go ahead and give it a try!
4. Reset All Settings.
Unfortunately, if the issue still persists, you can reset your ‘Network Settings’. This may or may not work 100% of the time, but it is still worth trying. But be informed that resetting your network settings will reset your Wi-Fi networks and passwords, cellular settings, and VPN settings.
Here’s how you can reset your ‘Network Settings’:
- Go ahead and open the Settings app on your iPhone, then go to General.
- Then click Reset and choose Reset All Settings.
- A window should open up on your screen, so click Reset All Settings to confirm your choice.
Like all the previously mentioned methods, we are hoping for positive results. But if this still fails, let’s head over to our next method.
5. Update To The Latest iOS.
If you haven’t updated your iOS to the latest version, this is the right time to do it. To do this, make sure that your iPhone is constantly connected to a stable Wi-Fi network and has at least 50% battery life. Moreover, remember that downloading and installing the update may take some time as this totally depends on your network.
Here’s how you can update your iOS:
- Go ahead and open the Settings app on your iPhone, then go to General.
- Then select Software Update and check if an update will show up.
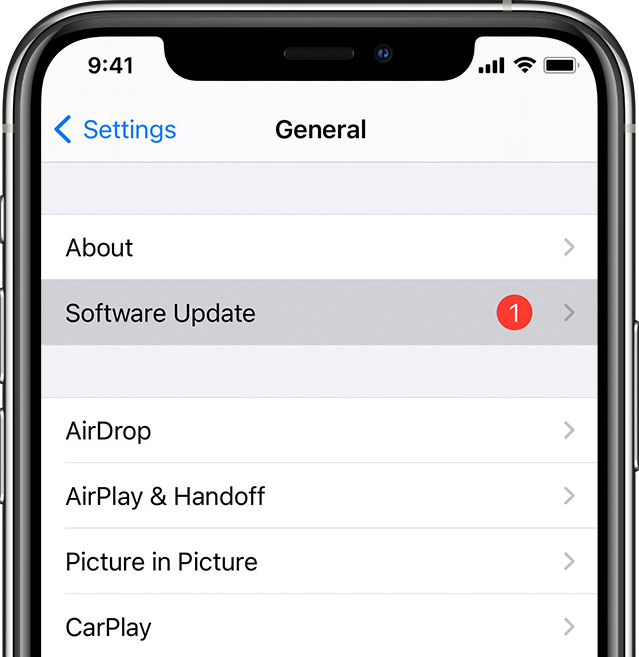
- Now, select Install Now to begin the update (if one shows up). This may take a couple of minutes to an hour.
- After that, your iPhone will automatically restart once the update has been completed.
When you’re done with all of that, you should confirm if the ‘Tap to Wake’ feature is still not working on your iPhone. But we’re hopeful that it’s now fixed!
6. Restore To Factory Settings.
Like it or not, a factory restore or reset should be tried in this scenario. Although it erases the information and settings on your iPhone, it actually cleans everything from the inside. So no matter how tedious it may be, don’t skip this step as this may be the solution you’ve been waiting for.
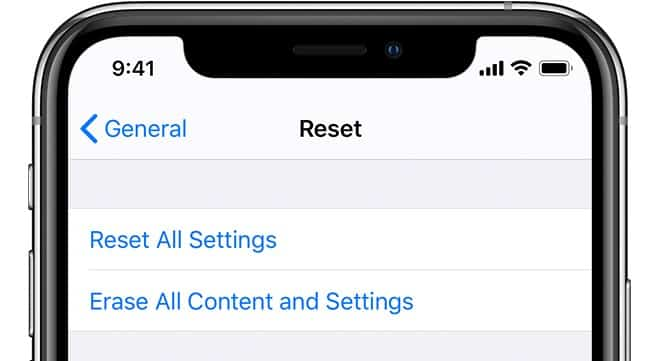
Here’s how you can ‘Restore’ your iPhone to its factory setting:
- Go ahead and open your iPhone’s Settings app and go to General.
- Then look for Reset and choose Erase All Content and Settings.

- Once you are asked, input your passcode or Apple ID password.
- Next, verify that you want to erase your device. It may take a few minutes to completely erase your data, depending on your device.
With that out of the way, you should be all set. We’re positive on this one, so we hope you will return to bring a happy iPhone user again.
7. Try Dr. Fone.
If you are out of options, don’t give up because the doctor is here to save the day!
It is true that Dr. Fone is popular with many users as it is an all-in-one tool for both iOS and Android devices. This is because it provides a complete solution for data recovery and transfer, system repair, and many more.
Moreover, common issues like accidental deletion of data and performance issues such as the screen time not working on iOS 14 can be resolved by using this tool, so your worries of using complicated apps for different issues have already been resolved.
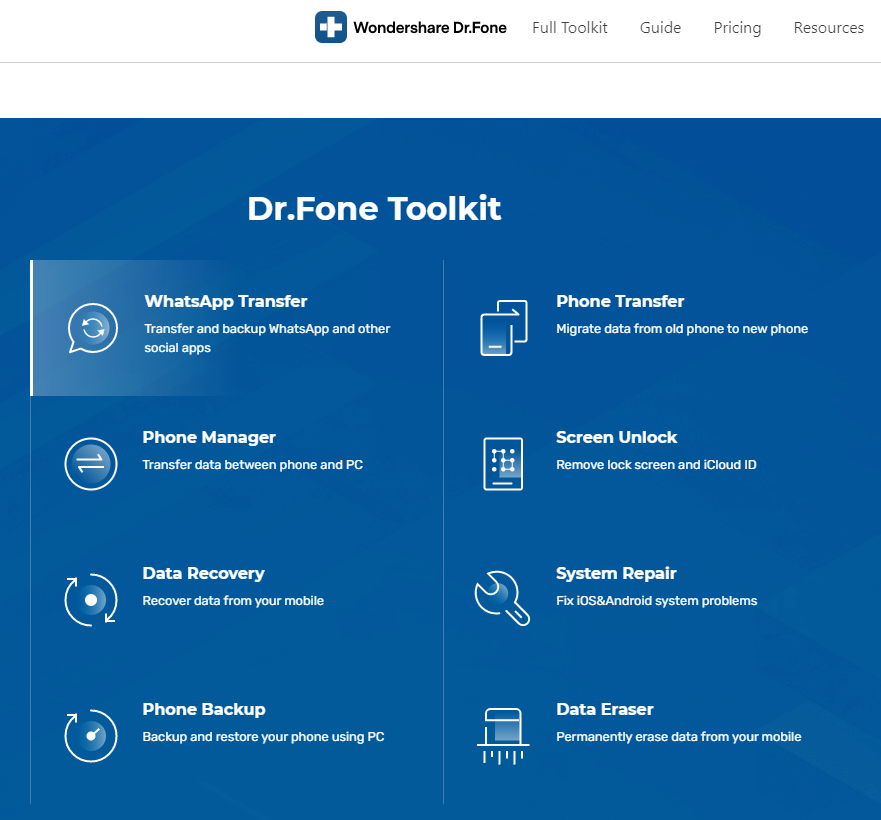
Additionally, Dr. Fone is user-friendly, so navigating through it is very easy even if you are not tech-savvy. Besides, it has received positive feedback from many respected media outlets such as PC World, Forbes, CNET, and many more. So you can be assured that this really works!
8. Contact Apple Support.
Sadly, if nothing in this guide helped you, you can go ahead and contact Apple Support. Don’t hesitate to reach out to them as they can always provide additional troubleshooting that you may have not previously tried.
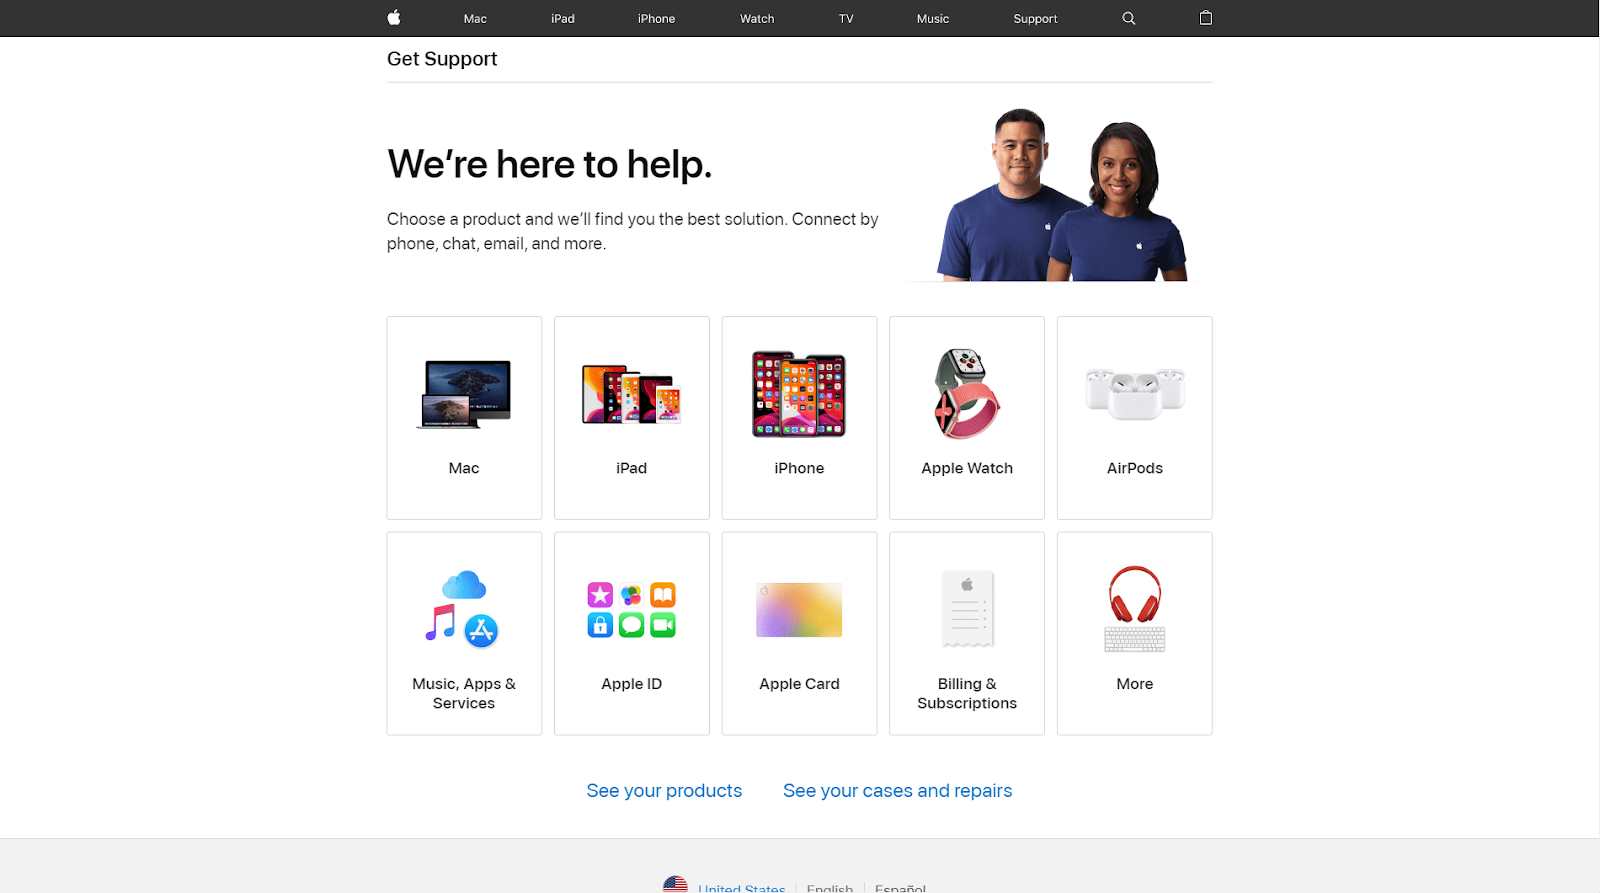
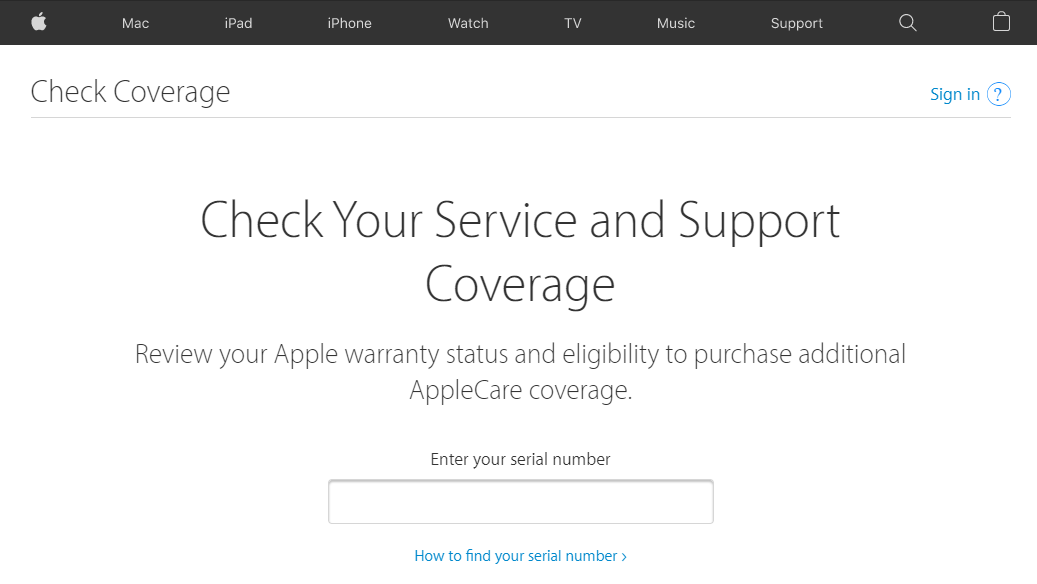
But if that is not your cup of tea, you can just go to your nearest Apple Store to have your iPhone checked by Apple-certified technicians. Though make sure to check your service and support coverage options before doing so!
We may have reached the end of our guide, but this is not truly the end. If you have any feedback or concerns, do not hesitate to let us know by entering your comment in the comments section!
If this guide helped you, please share it. 🙂
