

Keep getting the message “This volume is not formatted as APFS”?
If you are not familiar with APFS, it is a new file system developed by Apple which stands for Apple File System. Since the rise of micro design computers, they found a way to optimize SSD and flash memory through this. It is faster when it comes to data transfer as compared to older version file systems.
However, with this new improved file system, there is a slight disadvantage. Several Mac users have reported the issues that they’ve been constantly been getting the “This volume is not formatted as APFS” message. Now it’s important to note that APFS format is not backwards compatible with older version file systems. Transferring files from a hard drive that is using the old version file systems to APFS formatted disk is unsupported. Hence, we will need to convert your drive to APFS to remove that message being repeatedly thrown at your face. But the question is how do you convert your drive to APFS?
In this guide, we will be going over how you can fix the issues as well share a few alternative ways including formatting your existing drive to APFS in order to remove the annoying pop-up message once and for all.
Without wasting another second, let’s dive in!
TABLE OF CONTENTS
- Use Disk Utility App to Erase and Format
- Convert the Drive Using a Bootable Backup Drive
- Format the Drive Using Internet Recovery
- Reach Out to Apple for Support
How to Fix This Volume is Not Formatted as APFS: 4 Ways
1. Use Disk Utility to Erase and Format.
If you know someone who uses macOS Sierra or other similar macOS, you can actually use their computer to convert your drive to APFS format. The possible reason why your conversion option to APFS is greyed out is that you are using the hard drive to process. The concept of this is similar to your computer operating system. Your computer does not allow you to tamper the system files to prevent malfunctioning while you are using it.
However, since you are using another computer to do this for you, the process of conversion is now possible. But it’s essential that you know how to remove your hard drive from your computer and put it in a drive enclosure (sounds complex, we know, but bear with us 😅). If you know how to do it, you can use this method to convert your hard drive. The same process is also applicable to convert your external hard drives and flash disks to APFS. Again if this all sounds complex and nerdy for you, simply follow along with the below steps in order to achieve it.
Note
We strongly recommend that you back up your files on your macOS computer before you proceed with the steps below. This is because we will be erasing the disk and then reformating it to the APFS format which will erase all the data on your Mac. Alternative less risky solutions are provided below in this post so be sure to go through the entire guide first before settling down on a solution!
Here’s how you can do it:
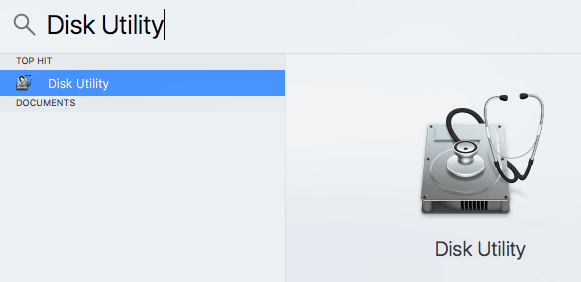
- Go ahead and click on the Spotlight Search icon and search for Disk Utility to launch the app.
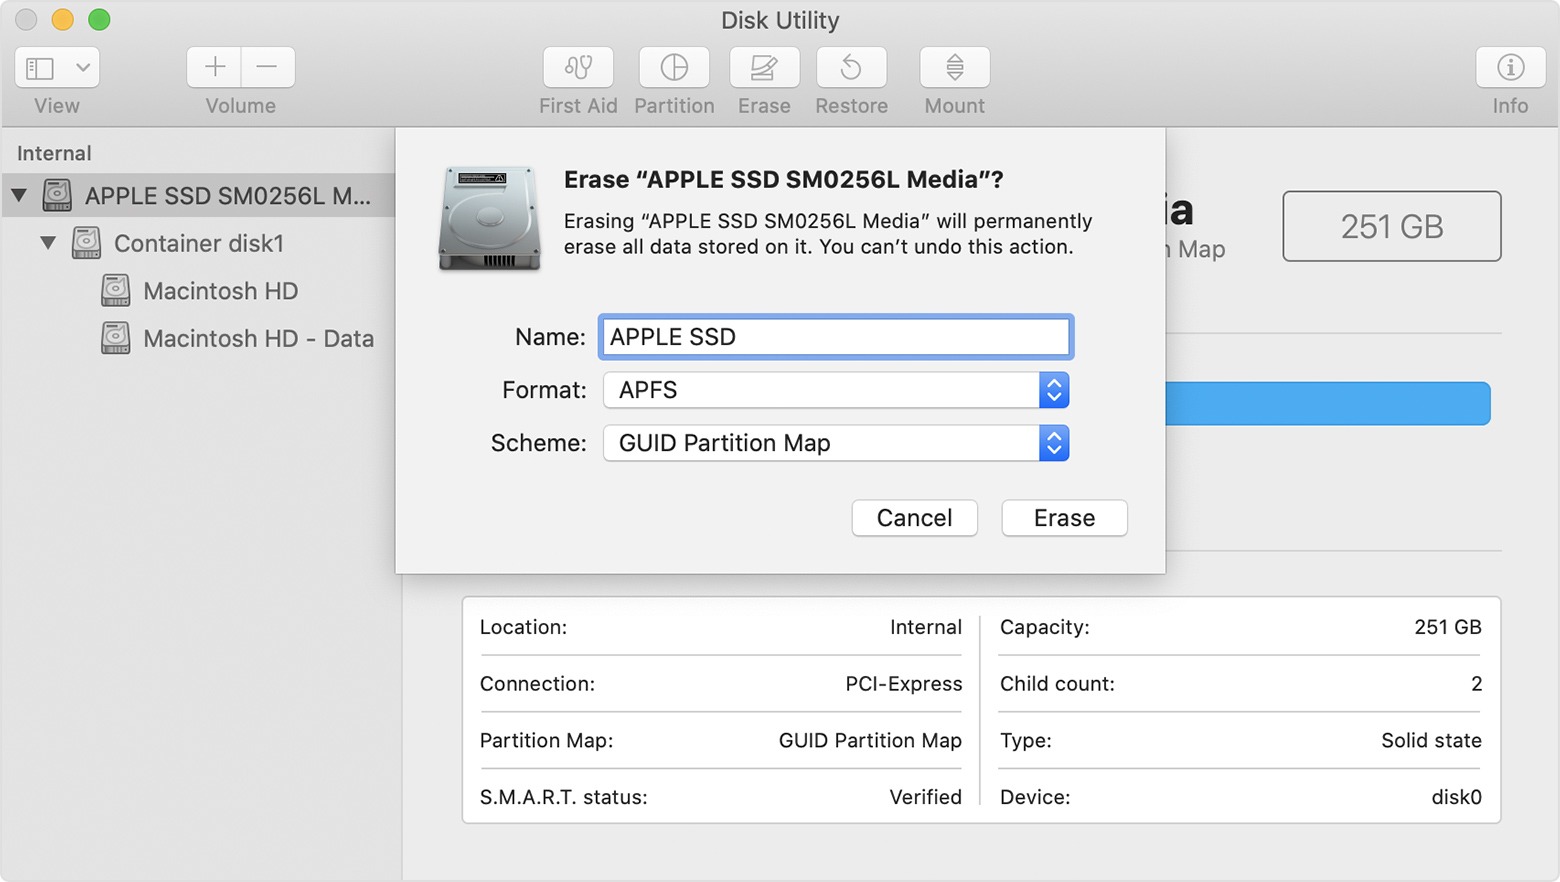
- Then, find and select your external hard drive on the hard drive list on the left side section. Click on the Erase option.
- Finally, rename your hard drive that is erased and change the value on the Format option to APFS format. Click on the Erase button.
With the old format deleted and after having converted your drive to APFS, this should definitely remove the file system compatibility issues as well as the annoying “This volume is not formatted as APFS” message you keep getting. For your hard drive, you will be able to proceed and install the latest macOS version that uses the APFS file system.
2. Convert the Drive Using a Bootable Backup Drive.
Another method that you can use is to convert your drive to use a macOS bootable disk. If you don’t have another macOS computer to use to format your drive, then this method is suitable.
You will still, however, need to load the Disk Utility app from another source so you can make changes to your hard drive. The use of your external hard drive, or possibly use a flash disk if capacity is enough in order to make this happen.
Now again, before you do this, you must back up your data on your Mac, since you will be cloning the hard drive, once you are done with the backup and then deleting all the large files on your computer to lessen the time of the cloning process. Don’t worry, you can restore all your files from the back up after the process, so you’re not essentially losing anything from trying this. 🙂
Here’s how you can do it:
- First, connect your computer to the internet using Wi-Fi or Ethernet cable. Download the SuperDuper app into your macOS computer.
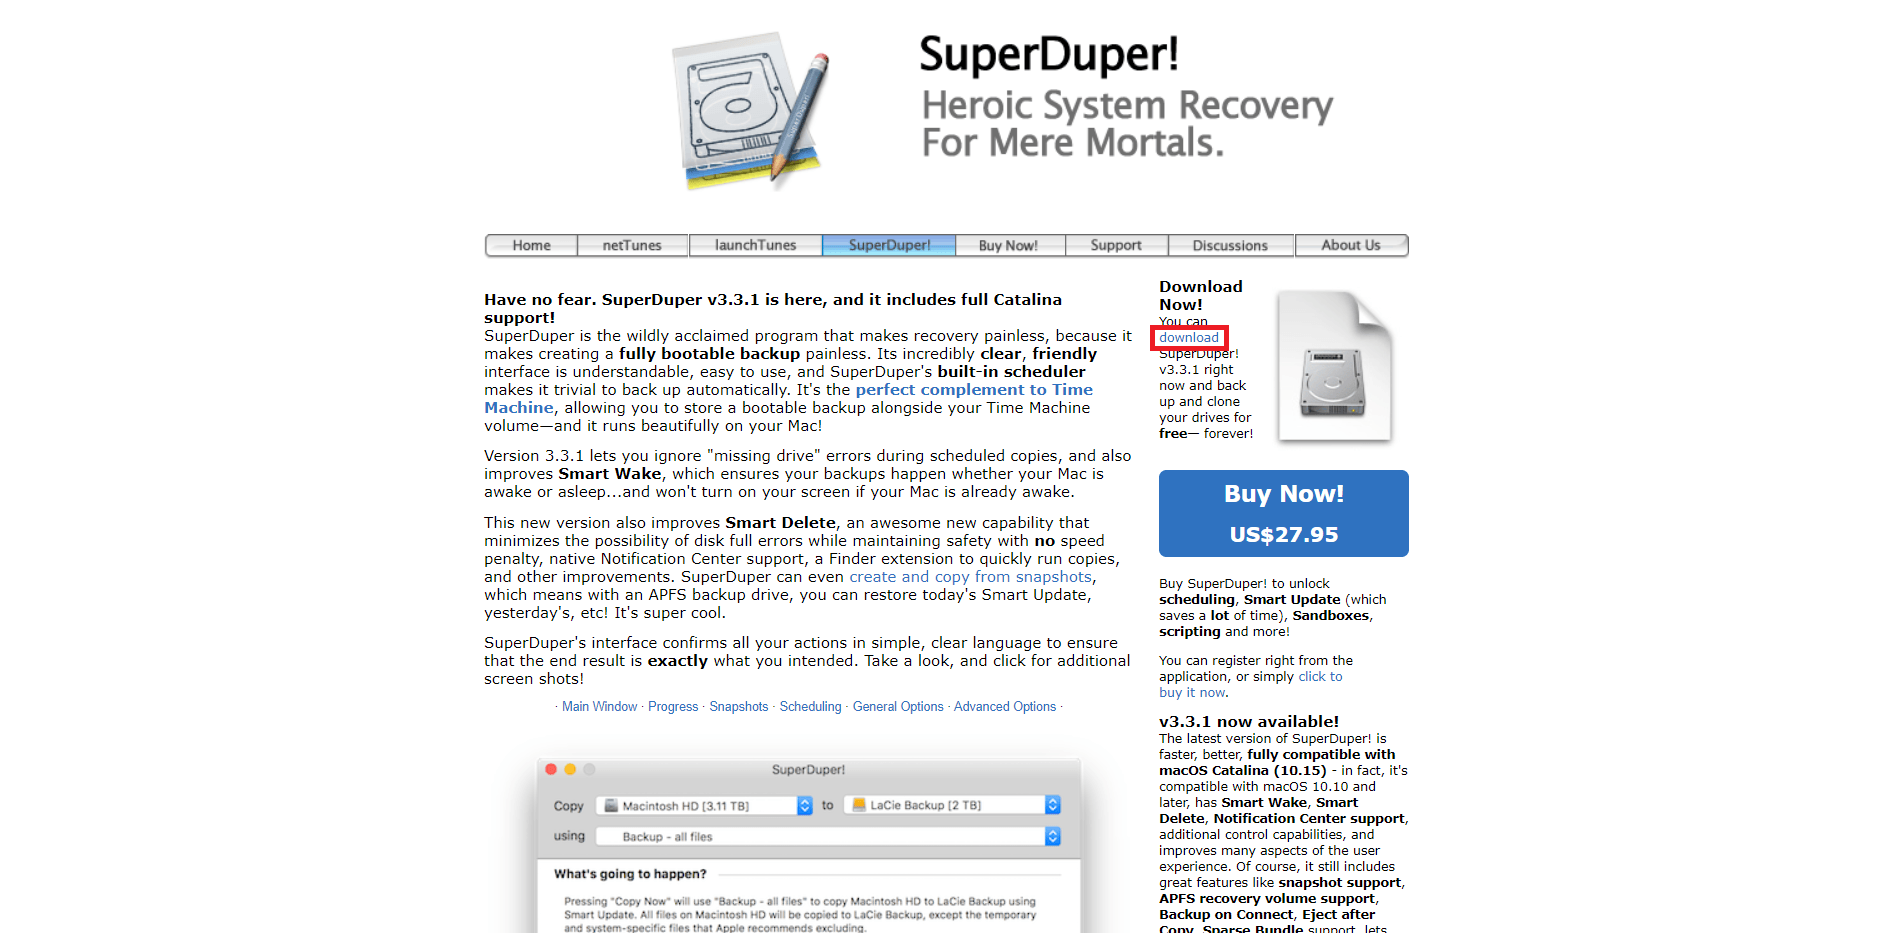
- Then, click on agree to the licensing terms option. Drag the SuperDuper app to the Applications folder and launch it.
- Next, create a clone of your hard drive and select your main hard drive in the first drop-down menu. Then, select the backup drive in the second drop-down menu and Backup – all files option in the third.
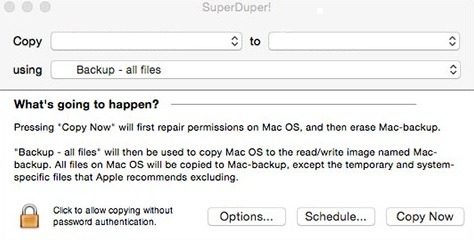
- Now, click on the Copy Now option and wait for the cloning process to complete. This will take a few hours depending on how many files you have on your computer.
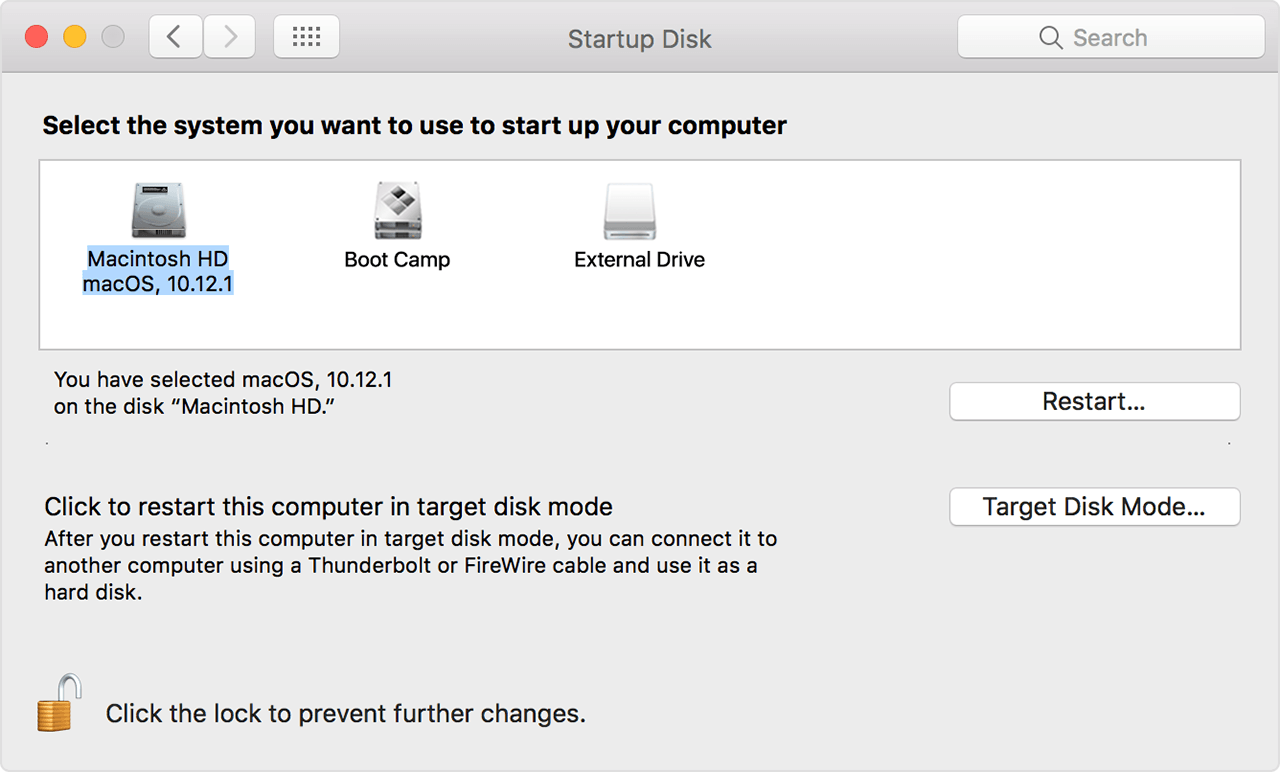
- Once the process is done, click on the Apple menu icon, then System Preferences and click on the Startup Disk. Select the backup disk as the bootable drive and restart your computer.
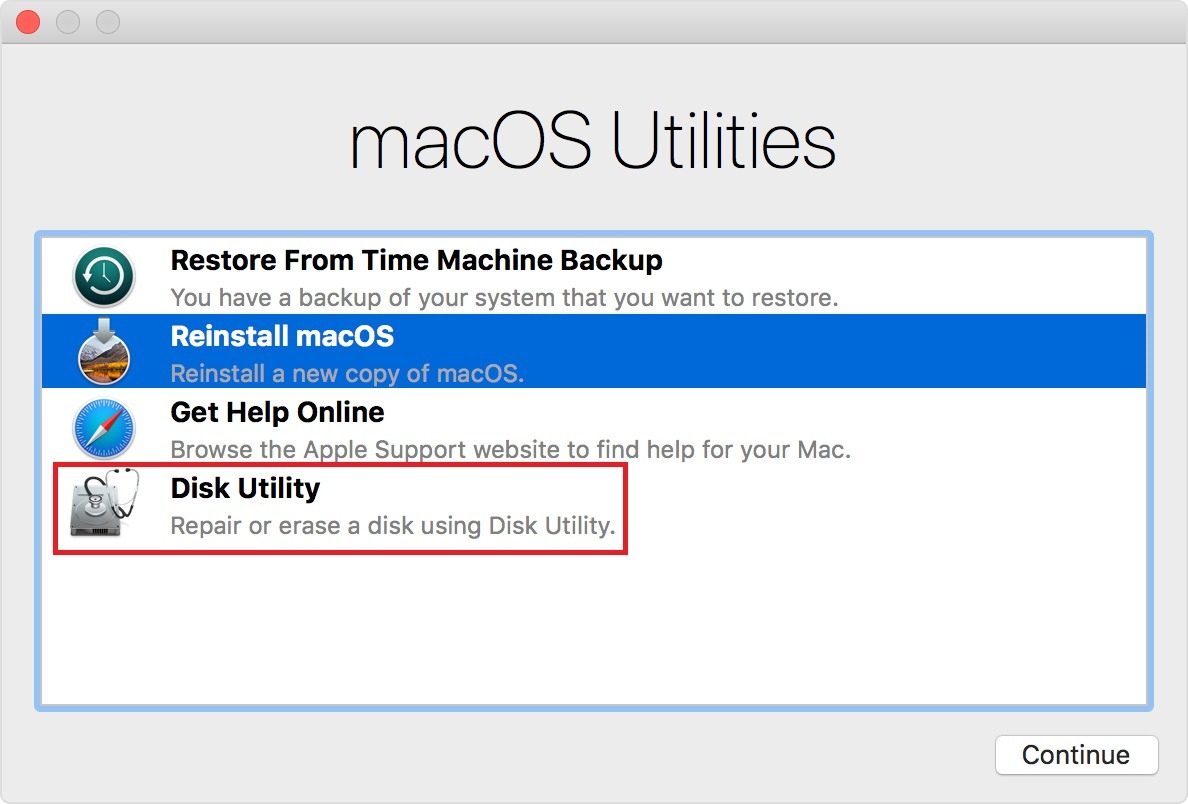
- During the startup process, press and hold the Command and R keys until the computer reboots again and open the Recovery Mode screen.
- Then, click on Disk Utility on the macOS Utilities screen and click on the Continue option.
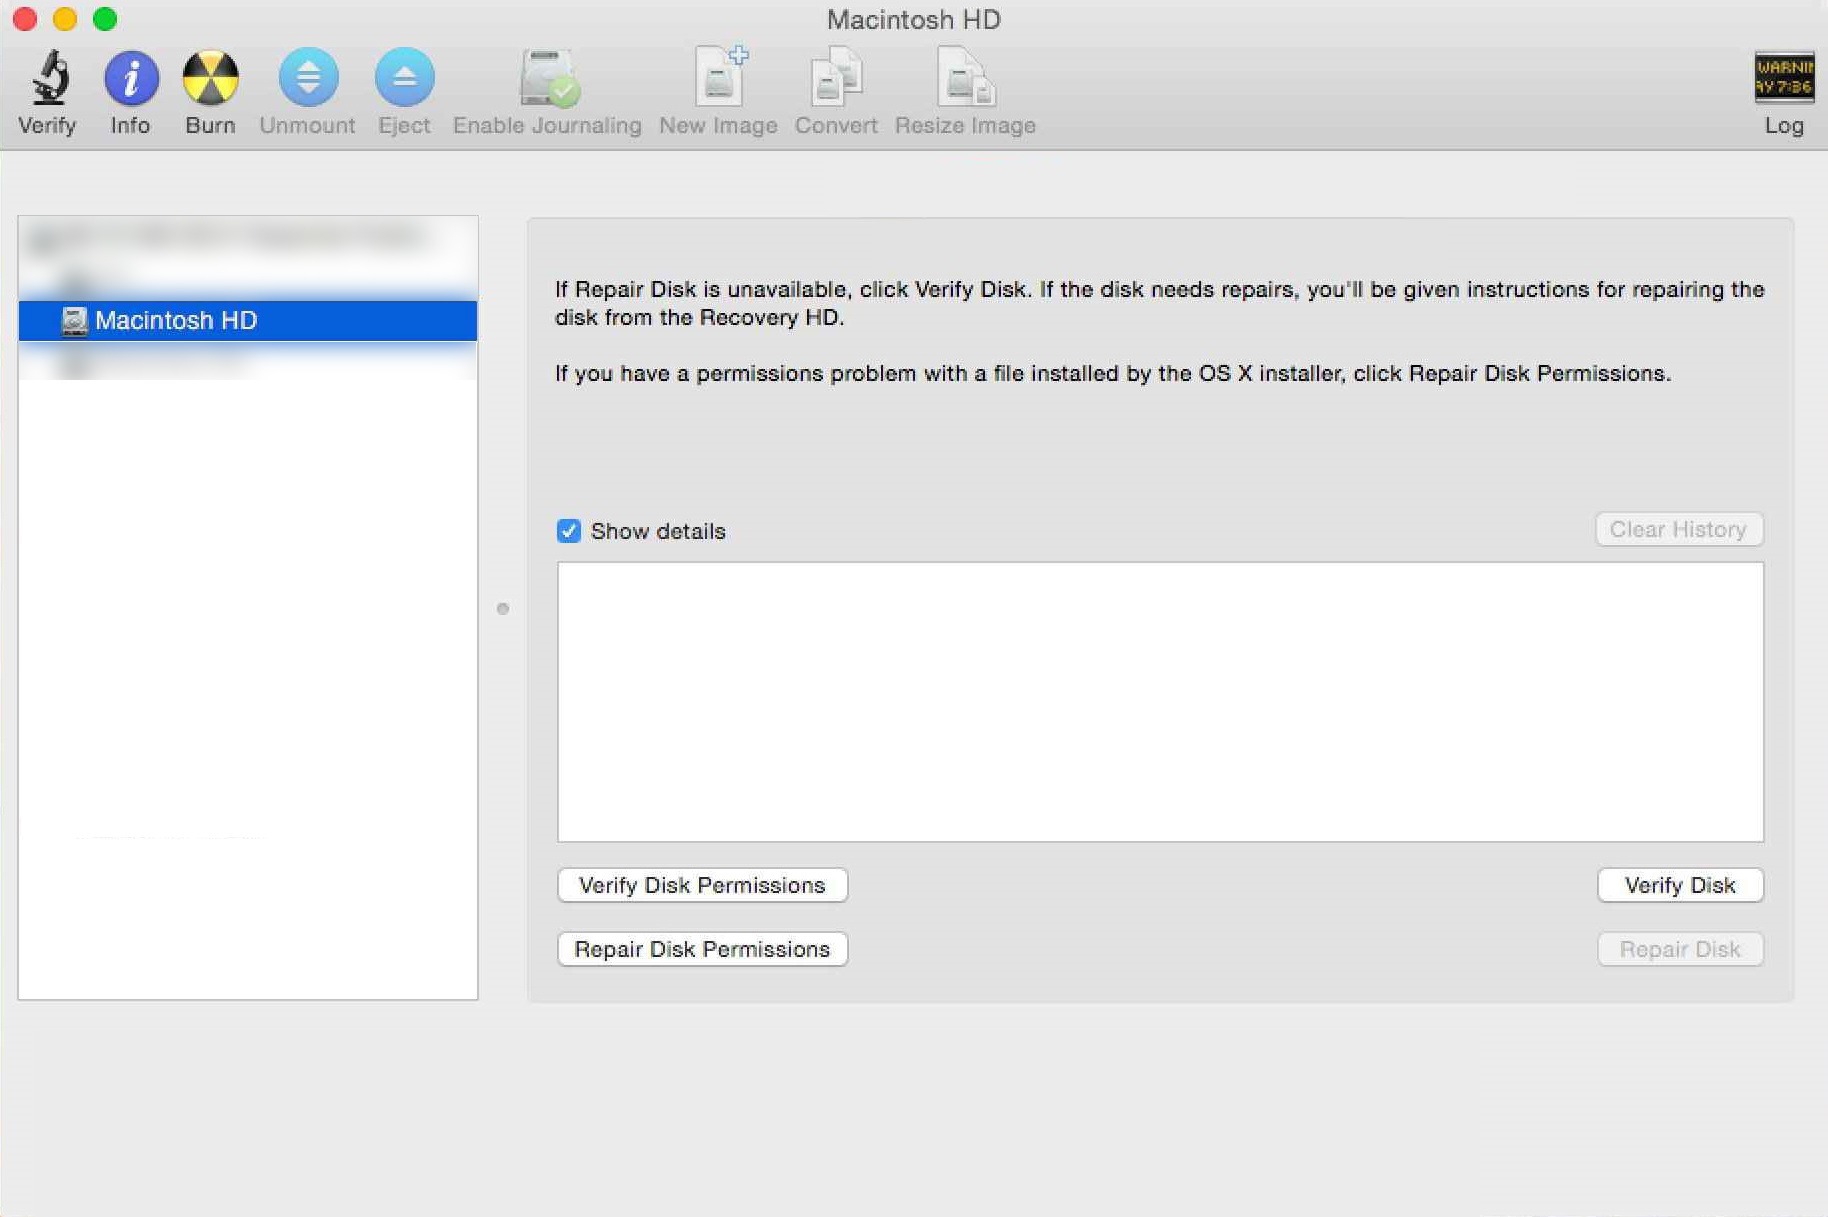
- Select the main hard drive on your computer on the list of drives found in the left side section of the screen.
- Click the > icon beside the hard drive label to view drive partitions that are currently installed in the drive.
- Next, select the OS partition and click on the File option, then click Unmount. Do the same process for the other partition and the Bootcamp partition under the hard drive if there’s any.
- After that, select the main partition and click the Edit option from the top menu. Find and click the Convert to APFS option from the drop-down menu.
- Finally, click the Convert button from the message prompt to confirm the process. Wait for the conversion process and click on the Done option after the process.
Now you can proceed to install the newest macOS using the bootable disk. Restart the Mac and as your Mac restarts, press and hold on the Option key on your keyboard to select the startup disk. You can now click on your bootable disk with the installed macOS from the list of startup disk option. Then, click on Continue to install the macOS on your computer. Agree on the licensing terms and your computer will begin working as normal.
3. Format the Drive Using Internet Recovery.
Alternatively, you can also make changes on your hard drive to load the Disk Utility using the internet recovery method. Again, this method does not rely on your hard drive to load the utility app. Instead, it gets the data from the internet. Thus, you will be able to convert your hard drive from your computer with no restrictions.
It is also possible that the reason why your conversion to the APFS option is not available is that your Mac version is outdated. Since this method is loading from the Apple server via the internet, you can be sure that the Disk Utility app is up to date. With the latest version, there is an option to convert your hard drive to APFS.
Here’s how you can do it:
- Go ahead and make sure to connect your computer to the internet using Wi-Fi or Ethernet cable.
- Then, shut down the computer by clicking on the Apple menu icon and click on the Shutdown option.
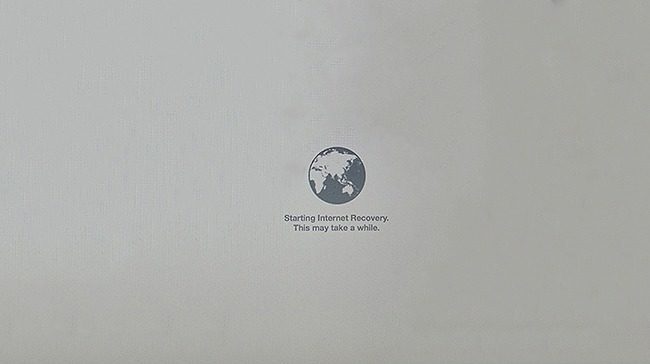
- Next, press and hold the Option + Command + R keys (or Alt + Command + R in other Mac keyboards) and press the Power button.
- Now, hold down those keys until a spinning globe appears on the screen and the message “Starting Internet Recovery. This may take a while” prompts.
- Wait for the progress bar to fill until you see the macOS Utilities screen appears.
- Then, click on Disk Utility on the macOS Utilities screen and click on the Continue option.
- Select the hard drive you want to edit on the list of drives found in the left side section of the screen.
- Click the > icon beside the hard drive label to view drive partitions that are currently installed in the drive.
- Next, select the OS partition and click on the File option, then click Unmount. Do the same process for the other partition and the Bootcamp partition under the hard drive (if there is any).
- After that, select the main partition and click the Edit option from the top menu. Find and click the Convert to APFS option from the drop-down menu.
- Click the Convert button from the message prompt to confirm the process. Wait for the conversion process and click on the Done option after the process.
You can also opt to select the current startup disk and click on the Erase option at the top portion of the screen. Label the drive and choose APFS from the list of file systems. After that, just click on the Erase button to confirm the deletion process. This will delete the drive but will convert your drive to the APFS file system.
Now you may proceed to install your macOS using APFS format using a bootable disk. You can then plug in your external hard drive that has your backup and restore it using the Migration Assistant app.
4. Reach Out to Apple for Support.
If you are not familiar with the technicalities of the process, it is better to have an expert handle this for you. You can visit your nearest Apple Store where Apple-certified technicians will be able to help you. They are capable of handling issues on the application, operating system, and hardware level. Be sure to check your warranty options for your Mac before you visit.
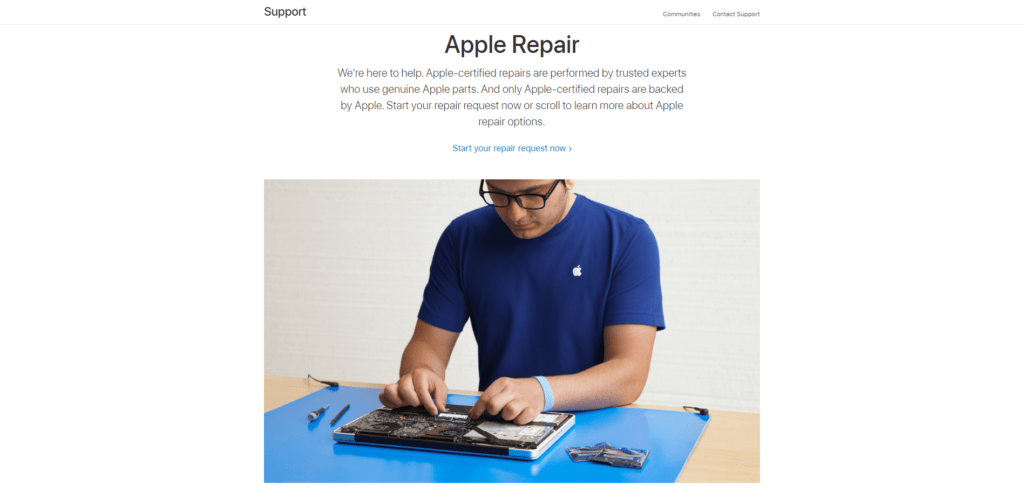
However, if you don’t have an Apple Store near you, check out the available support in your country. You can choose to set up an appointment for repair online so Apple-certified technicians can complete this process for you remotely. The only caveat to this is that you will have to send them your device through a carrier where they can fix it in their lab. Don’t worry, you will be able to monitor the repair progress online through their website.
And this wraps up our guide for today. We hope that this article has helped you with how to fix this volume is not formatted as AFPS issue on your Mac. Thank you for reading this guide and for your continuous support. If you have questions related to this topic, please feel free to leave a comment below.
If this guide helped you, please share it. 🙂