Want to know how you can resolve the ‘VLC input can’t be opened’ error on Windows 11?
VLC is a popular media player that has been around since 2001. It is known for its wide range of compatibility with various media formats.
Despite its popularity, this doesn’t mean that VLC does not come with its own issues.
One of the most common errors that users face on VLC is the ‘input can’t be opened’ error when playing videos on Windows 11.
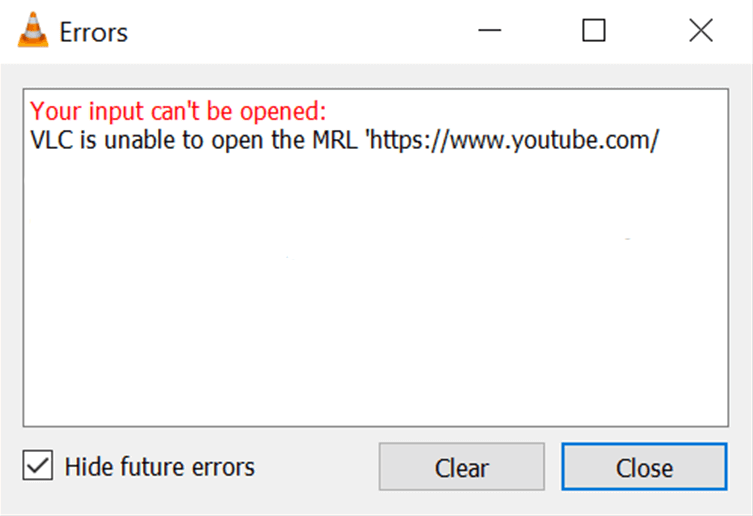
Improper configurations usually cause this issue on VLC. It can also be due to outdated software, third-party apps, or corrupted data.
Today, we’ll show you how to resolve the ‘VLC input can’t be opened’ error on Windows 11.
Let’s get started!
1. Restart Your PC.
Restarting your computer can resolve minor issues with your operating system since it clears your system memory and stops unnecessary processes.
This also reloads your system components ensuring your software is correctly initialized.
Here’s how you can restart your computer:
- Start by clicking the Windows icon on your Taskbar.
- Now, click the Power icon in the lower right corner of the Start Menu.
- Choose Restart from the pop-up menu.
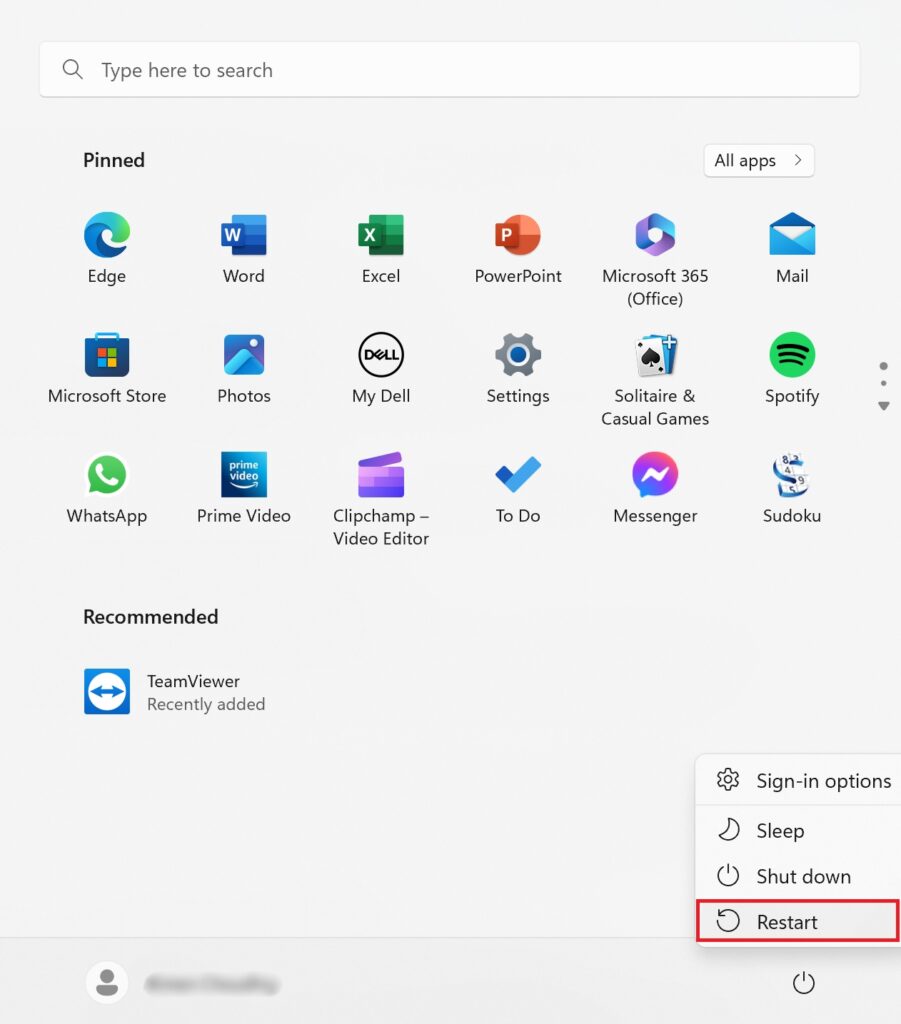
Go back to VLC afterward and see if the problem is solved.
2. Check the File Path.
Make sure that the path of the media file you’re trying to play is correct.
Your file may not be in the location VLC expects it to be in, causing the ‘input can’t be opened’ error.
To check the path, you need to find the file you are playing and ensure that it is in the right location.
- Launch Windows File Explorer on your computer.
- Find the file you’re trying to play on VLC.
- Right-click on the file and access Properties.
- In the Properties tab, you’ll see the file path under the ‘Location’ field.
Make sure that the file path matches the path VLC is trying to access.
If the file path doesn’t match, move your file to the correct location and try playing it again.
3. Run VLC As Admin.
Your system could be preventing VLC from accessing the file you’re trying to play. This can also cause the ‘input can’t be opened’ error.
To prevent this from happening, run VLC as an administrator to give it full access to your system.
See the steps below to run VLC as admin:
- Go to your desktop and find VLC.
- Right-click on it and choose Properties.
- Now, open the Compatibility window.
- Under Settings, enable the ‘Run this Program as an Administrator’ option.
- Click OK to save the changes.
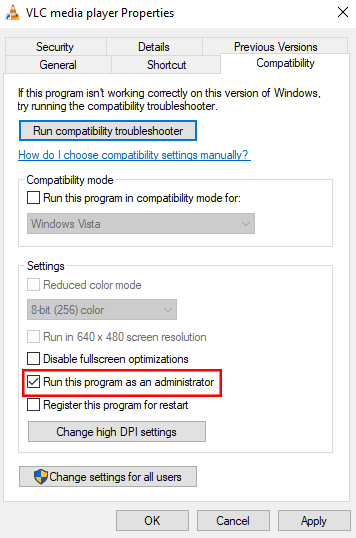
Relaunch VLC and see if you can now open your file.
4. Update VLC.
The version of VLC you’re using might have an issue that causes the ‘input can’t be opened’ error.
To rule this out, follow the steps below to update the app:
- Open VLC on your computer.
- In the menu bar, click on Help.
- Select Check for Updates and follow the prompts.
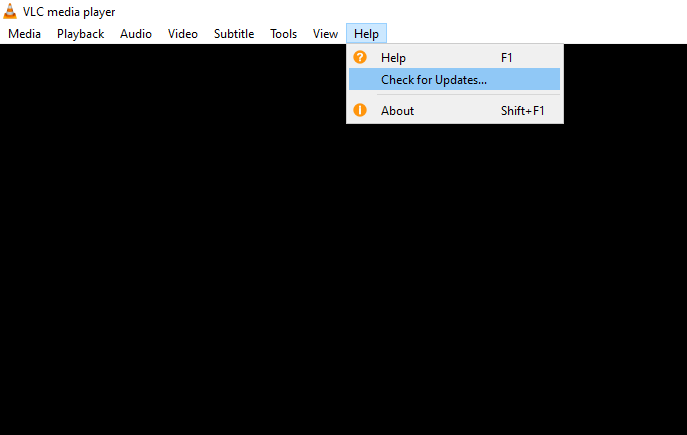
Once done, restart VLC. Try playing some media files to check if the problem is solved.
5. Disable Hardware Acceleration.
Hardware acceleration is a feature that allows VLC to use your graphics card to play media files.
Although hardware acceleration improves performance, it can also cause problems with VLC.
To check if the feature causes problems to your system, here’s what you need to do:
- Launch VLC on your computer.
- Now, press the CTRL + P keys on your keyboard.
- Inside the Preferences window, click on Input/Codecs.
- Find the Hardware–Accelerated Decoding option and disable it.
- Click Save to apply the changes.
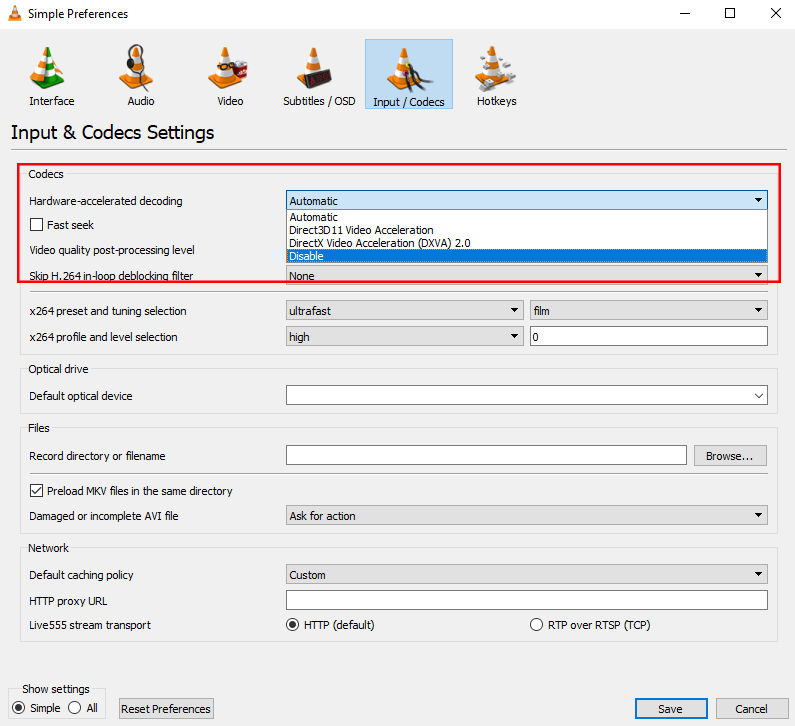
Try playing another file to check if the ‘input can’t be opened’ error is solved.
6. Clear VLC Cache.
Clearing VLC’s cache can resolve issues with temporary files. Over time, these files can accumulate and become corrupted.
To be sure, follow the steps below to clear VLC’s cache:
- On VLC, click on Media in the menu bar.
- Hover your cursor on the Open Recent Media option.
- Click on Clear to delete VLC’s temporary files.
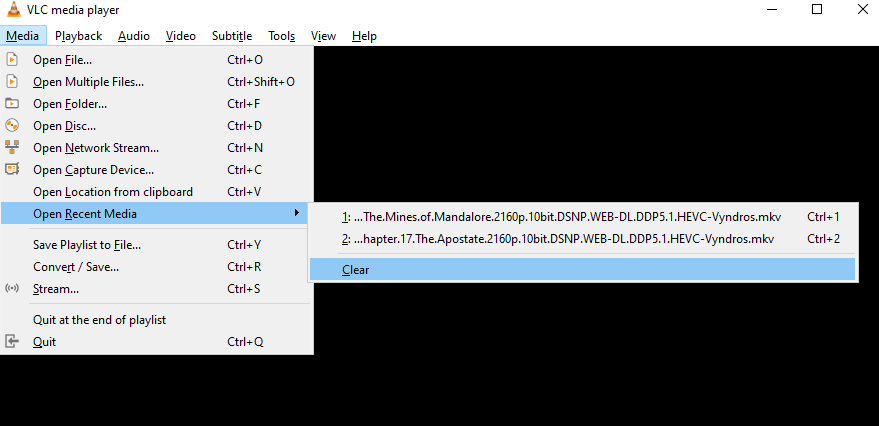
Restart the software afterward and check if the problem is solved.
7. Allow VLC Through Your Firewall.
Allowing VLC through Windows Firewall should give it access to your media files. If your firewall is active, add VLC’s executable file to the exception list.
Here’s what you need to do:
- First, open the Start Menu by pressing the Windows key on your keyboard.
- Look for ‘Allow an app through Windows Firewall’. Click Open.
- Now, click on Change Settings in the upper right corner.
- Find VLC from the list and make sure it’s allowed to access your Private and Public networks.
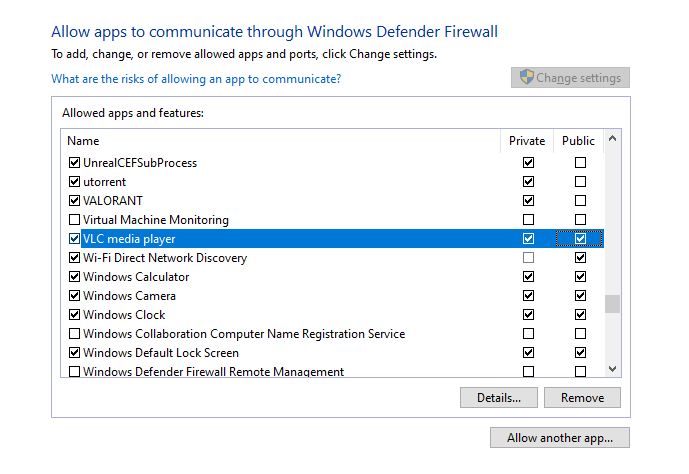
- If you can’t find VLC on the list, click the Allow Another App option. Locate VLC’s executable file and add it.
Once done, restart VLC and see if the error message would still occur.
8. Disable Antivirus.
If you are using third-party antivirus, we recommend disabling it before using VLC. Possibly, your antivirus is preventing VLC from accessing your media files.
To avoid problems, temporarily disable your antivirus protection.
You can also add VLC to your whitelist if your antivirus supports the feature. By doing this, you’ll prevent your antivirus from restricting VLC.
9. Reinstall VLC.
If none of the solutions above worked, we recommend reinstalling VLC on your computer. This way, we can ensure that there are no issues with the installation package.
Here’s how you can uninstall VLC:
- Go to the Start Menu and find the Control Panel.
- Inside the Control Panel, click on Uninstall a Program under the Programs tab.
- Locate VLC from the list and right-click on it.
- Choose Uninstall and follow the prompts to delete the app.
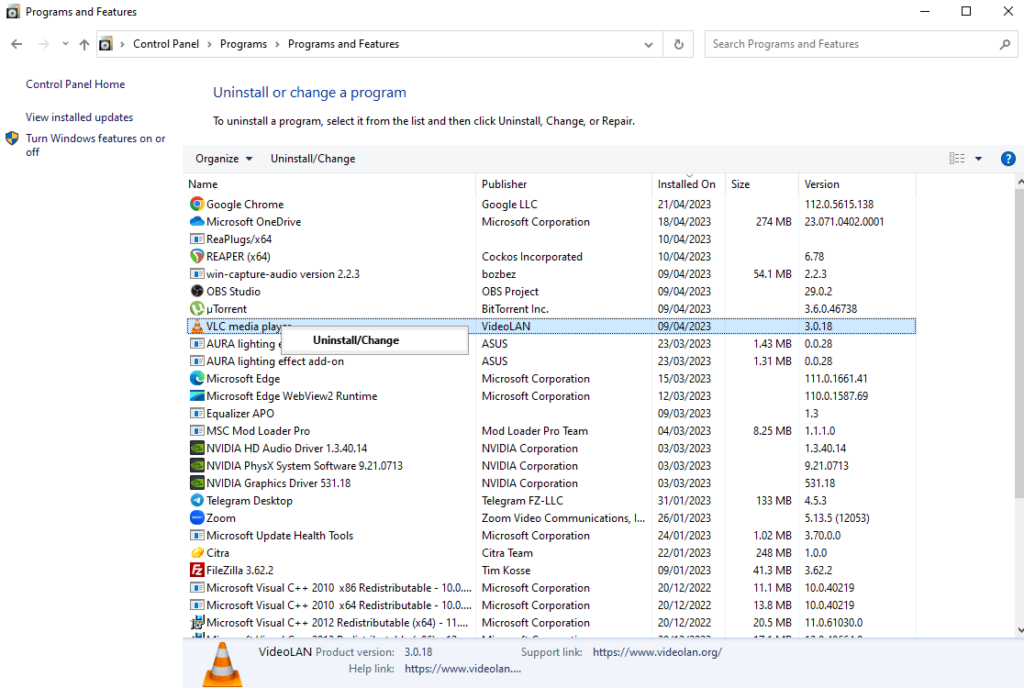
Once done, visit VLC’s website and download the latest version of the media player.
Install VLC on your computer and see if the error would still occur.
That ends our guide for fixing the ‘VLC input can’t be opened’ error on Windows 11. If you have questions, please drop a comment below, and we’ll do our best to respond.


