

Wondering how to fix Windows Media Creation Tool error 0x80042405 – 0xA001B?
A Media Creation Tool lets you download a Windows 10 installation file onto a flash drive (or DVD) that you can then use to reinstall Windows 10. It is extremely useful in the event something goes wrong with your computer. Furthermore, it is helpful to have a hard copy of the operating system.
Recently, several users reported that their screens display error 0x80042405 – 0xA001B when they attempt to create a bootable USB drive using Windows Media Creation Tool. We had a look into this issue and discovered that this issue is typically caused when the tool fails to format your USB drive. There is also a chance that a partitioning issue with the USB might be causing the issue.
If you find yourself in a similar situation, you are in the right place because in this guide, we will walk you through the relevant troubleshooting steps in detail.
Let’s get started!
1. Run Windows Media Creation Tool as an Administrator.
The first thing that you should do in case of the error at hand is run the Windows Media Creation Tool as an administrator. Doing so will provide you administrative privileges to run the app while preventing any background apps to interfere with its processes.
Here is how you can do that:
- Navigate to the location of the executable and right-click on it.
- Select Run as administrator and then click Yes in the User Account Control prompt.
Hopefully, doing so will fix the issue at hand.
2. Manually Format USB
You might be experiencing the error message in question due to the Windows Media Creation Tool failing to erase the data on your USB drive. In such a case, you can format the USB drive manually yourself before creating the bootable USB drive with the Windows Media Creation Tool.
Here is how you can do that:
- Connect your USB drive to your computer.
- Launch File Explorer and right-click on the USB icon.
- Now select Format from the context menu and in the Format window, choose NTFS as the File System.
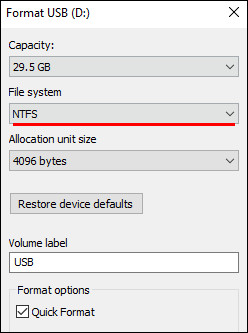
- Click on the Start button and wait for the process to complete.
Now run the Windows Media Creation Tool again to check if doing so resolved.
3. Re-Partition USB Drive with DiskPart.
As we mentioned earlier, a partitioning issue with the USB can also be resulting in the error at hand. If this scenario is applicable, then re-partitioning the USB drive using DiskPart can help you resolve the issue.
Before proceeding with the steps, make sure that your USB device is connected to your PC.
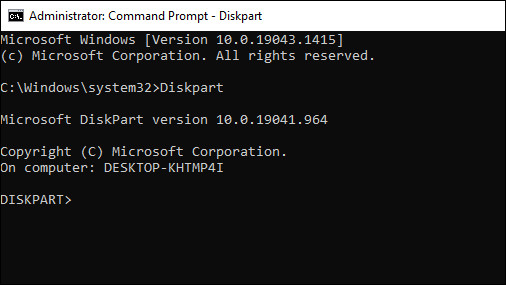
- Type cmd in the search bar and click on Run as administrator to launch elevated Command Prompt.
- Inside the Command Prompt window, type the command mentioned below and hit Enter to execute it.
Diskpart
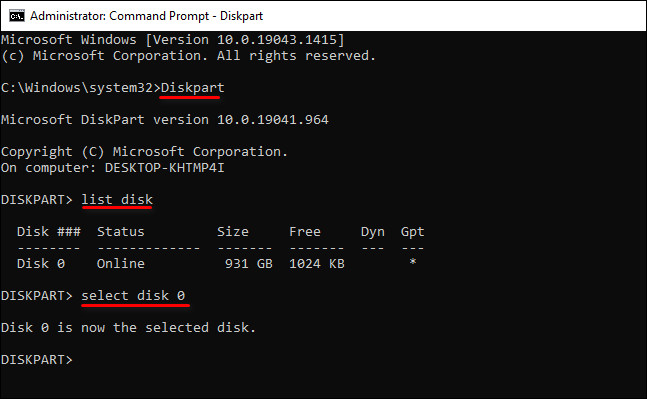
- Once done, execute the command mentioned below.
list disk
- Now identify the targeted USB disk’s number by looking at the size of the disk. Once identified, select the disk by entering the executing the select disk # command as shown below. Here, # is the number of your disk.
- Next, type clean in Command Prompt and press Enter to clean the disk.
- Now that you have cleaned the disk, it is time to create partitions. For that, execute the command mentioned below.
create partition primary
- After that, execute the following command to select the partition you just created.
select partition 1
- Next, type active in Command Prompt and hit Enter to activate the partition.
- Finally, it’s time to format the drive. Execute the command mentioned below in that regard.
format fs=ntfs quick
- Once that is done, you can assign a letter to the drive. For that, execute the command mentioned below.
assign letter=g
- To close the process, type exit and hit Enter.
As simple as that!
4. Try Using CleanMyPC.
Did you recently clean out your computer and remove files that had taken up space on it? There is a high likelihood that you are experiencing the error under consideration due to these corrupt junk files if it has not happened recently.
The simplest way to remove these junk files is by using an efficient PC cleaner. If you’re looking for a recommendation, we recommend CleanMyPC.

A simple yet effective cleaner, CleanMyPC will scan your operating system and fix any issues on its own. It comes with a wide range of system maintenance tools like a Multi-Uninstaller, Registry Cleaner, and Speed Booster that can take care of all your PC-related issues in no time.
Install CleanMyPC now and get your PC up and running like new in no time!
5. Install KB4505903 Update.
It is likely that you are experiencing the issue because you are running an older version of the Windows 10 operating system. The KB4505903 update addressed this problem and included a fix. As a result, you must install the KB4505903 update to resolve the issue.
- Navigate to the Microsoft Update Catalog website.
- In the search bar, type KB4505903 and hit Enter.
- Click on the Download button and wait for the process to complete.
- Once done, restart your PC.
This should resolve the issue once and for all.
This brings us to the end of our guide on ways to fix Windows Media Creation Tool error 0x80042405 – 0xA001B. We tried walking you through all the steps in detail and hope that one of the methods mentioned in this post did the trick for you. In case you still have any confusion about the steps, please let us know in the comment section below!
If this guide helped you, please share it. 🙂
