Wondering how to fix Windows Update error 0x800b0101 on Windows 10?
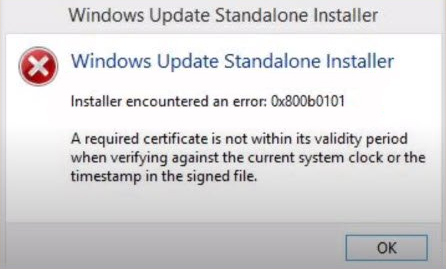
Recently, several users reported that they are encountering the 0x800b0101 when trying to install a pending update via the Windows Update Standalone Installer. This can also occur during an attempt to install a different Windows component via Windows Installer.
We had a look into the issue and discovered that it can be caused due to a number of factors including:
- Incorrect date & time
- Missing update requirements
- Faulty AccountRight installer
- System file corruption
If you are facing a similar issue, you are in the right place because in this guide, we will walk you through the methods of resolving the issue in detail.
Let’s get right into it!
1. Adjust the Time and Date.
Accurate time, date, and time zone on your PC are essential as they help several programs function properly. These programs check your system for certain certificates before performing specific actions, and if the time or date is incorrect, the certificates are rejected.
Here is how you can adjust the date, time, and time zone on your operating system:
- Type Date & Time in the search bar and select Open to launch the Settings window.
- Verify the Time Zone and enable the Set time automatically option.
- Under Synchronize Your Clock, click on Sync Now.
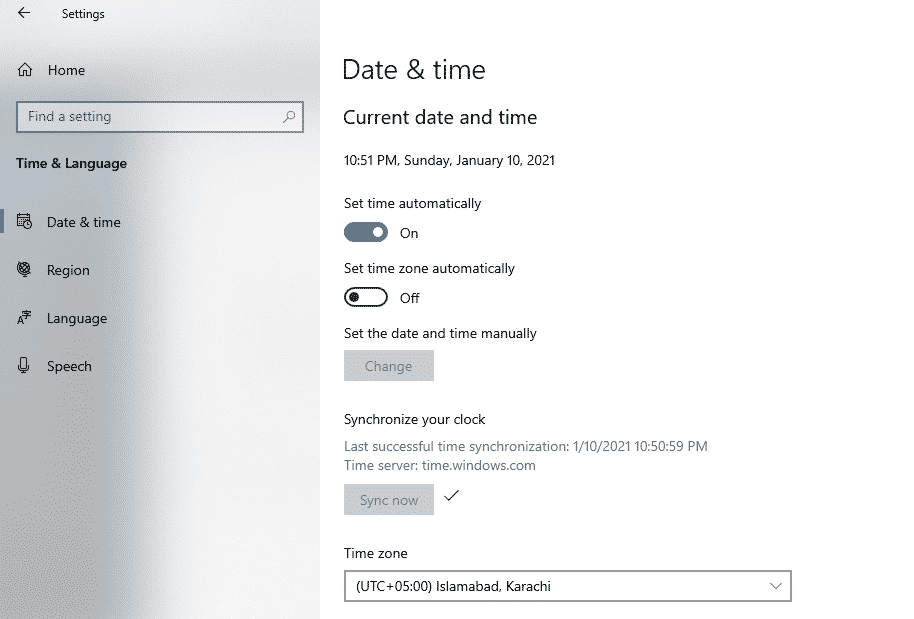
If you are facing the said issue due to an incorrect date and time, the error should go away once you adjust these settings.
2. Run SFC and DISM Scans.
Microsoft has packed Windows with several handy built-in troubleshooting utilities that can help identify and resolve the issue in no time.
Two such utilities are the System File Checker (SFC) and DISM (Deployment Image Servicing and Management) tool. SFC is designed to scan the protected system files for corruption errors, while DISM scans the whole operating system. If any potential issues are identified, both the tools will resolve them with little to no user input.
As we mentioned earlier, errors like the one at hand can be caused by corruption errors and bugs within the system, which is why we recommend running SFC and DISM scans.
Here is what you need to do:
- Type cmd in the search bar and click on Run as administrator to launch elevated Command Prompt.
- Inside the Command Prompt window, type the command mentioned below and hit Enter to execute it.
sfc /scannow
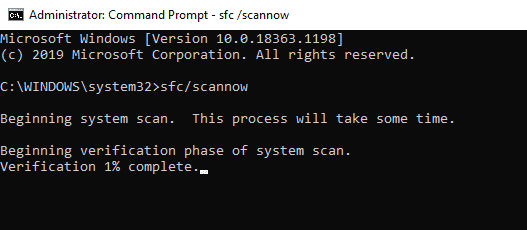
- If the System File Checker detects issues, it will resolve them. Once done, open Command Prompt by following the first step again.
- Now type the command mentioned below in the elevated Command Prompt and hit Enter to execute the command.
DISM /online /Cleanup-Image / ScanHealth

- Next, execute the following command.
DISM /Online /Cleanup-Image /RestoreHealth
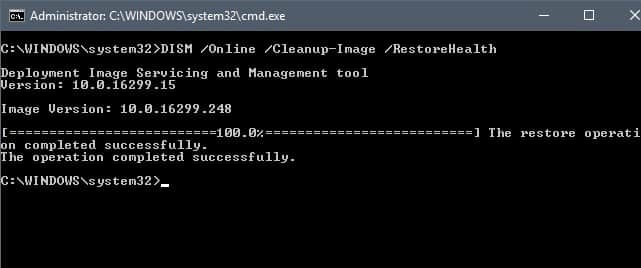
- Once done, restart your PC and check if doing so resolved the issue.
If system file corruption was causing the Windows Update error 0x800b0101 on Windows 10, following the steps mentioned above should fix the issue.
3. Use the Windows Update Catalog.
Another easy yet effective solution to fix Windows Update error 0X800B0101 is to install the updates manually using the Windows Update Catalog. Installing the updates manually will take some time, but since it has worked for several users, we encourage you to give it a shot.
Here is what you need to do:
- Launch your browser and navigate to the Microsoft Update Catalog page.
- Type KB2756872 in the search bar and hit Enter.
- Your screen will display a list of results. Select the one that is compatible with your operating system and download it.
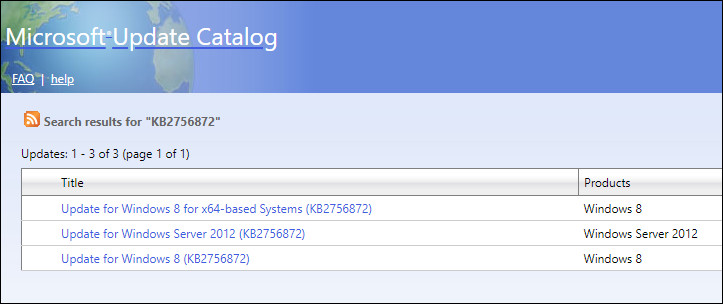
Note: In case you do not know about the architecture of your operating system, go to the File Explorer and navigate to This PC. Right-click anywhere in the window and choose Properties. Then look for the System type and check your OS version from there.
- Once the update is downloaded, navigate to the location of the download and right-click on the .inf file.
- Select Install and follow the on-screen instructions to proceed.
- After the installation process is complete, repeat steps 2-5 with the remaining updates.
You must install all the pending updates using the Microsoft Update Catalog.
4. Try Using CleanMyPC.
In the event that the SFC and DISM scans were not successful, you may need the assistance of a reliable PC cleaner.
With PC cleaner, your entire computer, including Windows Registry is scanned for damaged and corrupted files and repaired without user intervention. However, it is important that the PC cleaner you use is capable of performing these advanced functions.
We recommend CleanMyPC as a cleaner for those who are having trouble finding one that is effective.

CleanMyPC is a powerful system-maintenance program that can fix even complex problems with PCs, such as slow performance and privacy issues. If this is something your PC is in desperate need of, install CleanMyPC now and give your PC a much-needed performance boost.
5. Download the latest version of AccountRight.
In most cases, if you encounter error code 0x800b0101 while updating or installing AccountRight, the issue is caused by an invalid certificate that was attached to the download version of the product.
The issue arises from a mistake made by AccountRight developers, who assigned years old expiration date to the certificate. Luckily, AccountRight released a patched version to fix the issue. If this scenario is applicable, then downloading the patched version should resolve the error for you.
Here is what you need to do:
- Launch your browser and head over to this page to install the patched version of AccountRight.
- Once the download is complete, right-click on the downloaded file and select Run as administrator.
- When the installation prompt appears, check the box that says I agree to the license agreement and terms of use, then click on Install and follow the on-screen instructions to proceed.
- Upon finishing the installation, restart your computer and then try re-installing your required updates.
This should fix the issue once and for all.
This brings us to the end of our guide on ways to fix Windows Update error 0x800b0101 on Windows 10. We tried walking you through all the steps in detail and hope that one of the methods mentioned in this post did the trick for you. In case you still have any confusion about the steps, please let us know in the comment section below!
If this guide helped you, please share it. 🙂


