

Want to save Live Photos as GIFs on iOS for easy sharing?
iPhone cameras feature a Live Photo option that captures moments in the form of a quick video. When you take a photo, your device captures 1.5 seconds of movement before and after the shutter is pressed.
However, you can only view this short video on your iPhone. When you share it across various social media platforms, it is sent and received as a still image, which defeats the purpose of taking a Live Photo in the first place.
What you can do is convert the Live Photo into a GIF, which is a highly portable file format. In fact, today’s online communication cannot survive without sharing GIFs. Fortunately, Apple offers a built-in feature through which you can easily save Live Photos as GIFs on iOS.
Read on to find out how!
1. Turn On the Live Photos Feature on Your iOS Device.
Before you proceed with saving Live Photos as GIFs, you need to ensure that the feature is enabled on your iOS device. Although Apple has it turned on by default, you never know when your settings have been switched around.
Here’s how to do it:
- First, open the Settings app from the Home Screen.
- Next, scroll down to Camera and tap on it.
- Now, go to Preserve Settings.
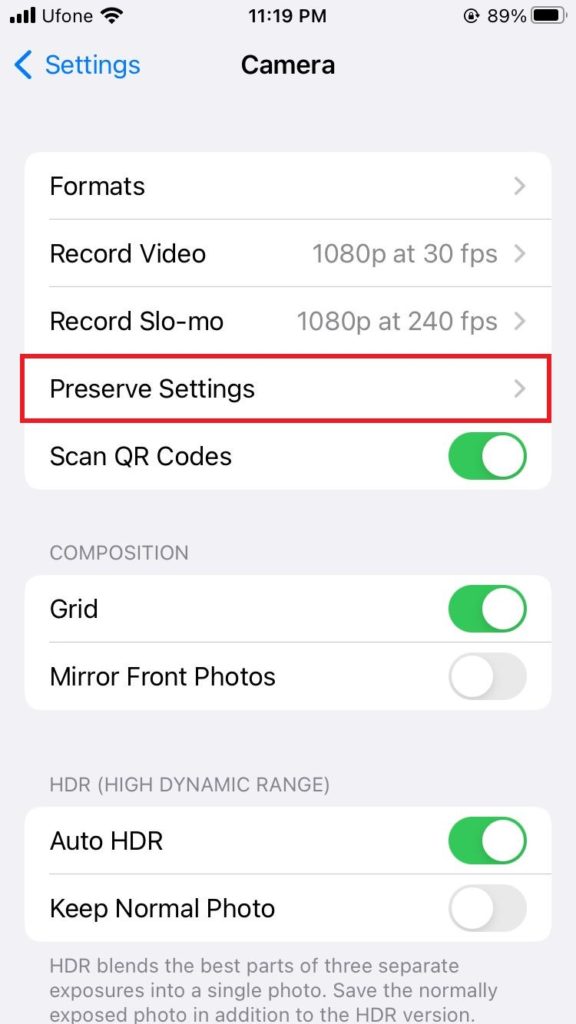
- Finally, ensure the toggle for Live Photos is switched on.

Doing so will make Live Photos your default camera settings. But if you only want to turn the feature on for the time being, here’s what you should do instead:
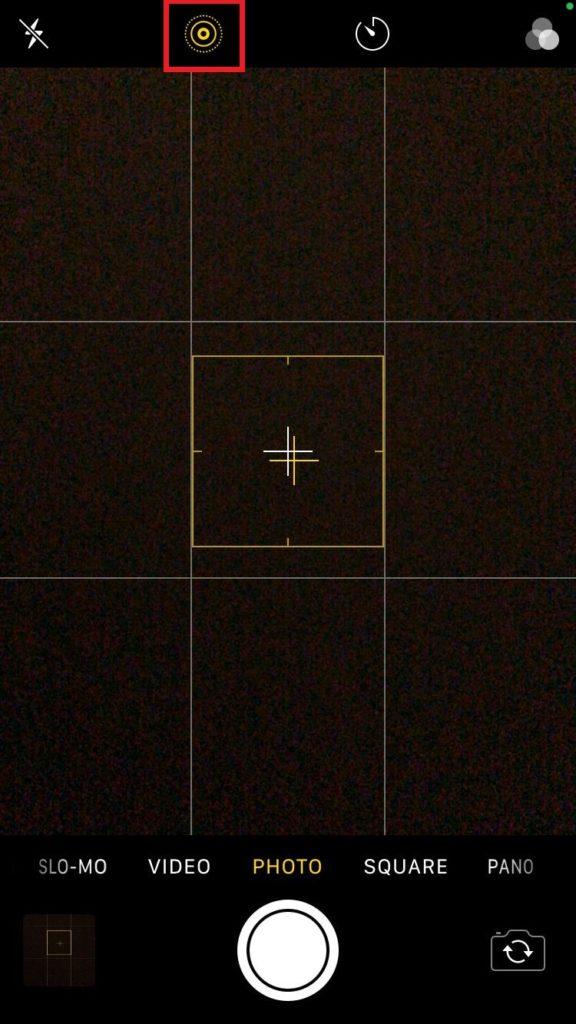
- Start off by launching the Camera, either by swiping left on the Lock Screen or from its app on the Home Screen.
- Then, swipe to the Photo view.
- Now, tap on the small concentric circle icon at the top bar to toggle the feature on or off.
After the Live Photo feature has been enabled on your iOS device, take photos like you usually do.
2. Save Live Photos as GIFs on iOS Using the Photos App.
iPhone has integrated certain default features that allow you to save your Live Photos as GIFs. However, it is noteworthy that the outcome would not be considered an actual GIF as it will only be your Live Photo being played like a GIF.
For the same reason, when shared across a non-Apple device, the receiver will only be able to view it as a still picture. But this method is simple and convenient when you only want to save it as a GIF on your own device or share it with someone that also owns an iOS device.
Below are the steps you need to follow:
- To get started, open the Photos app on your device.
- Then, tap on the Live Photo you wish to convert into a GIF.
- On the top left corner, tap on the drop-down arrow next to Live Photos.
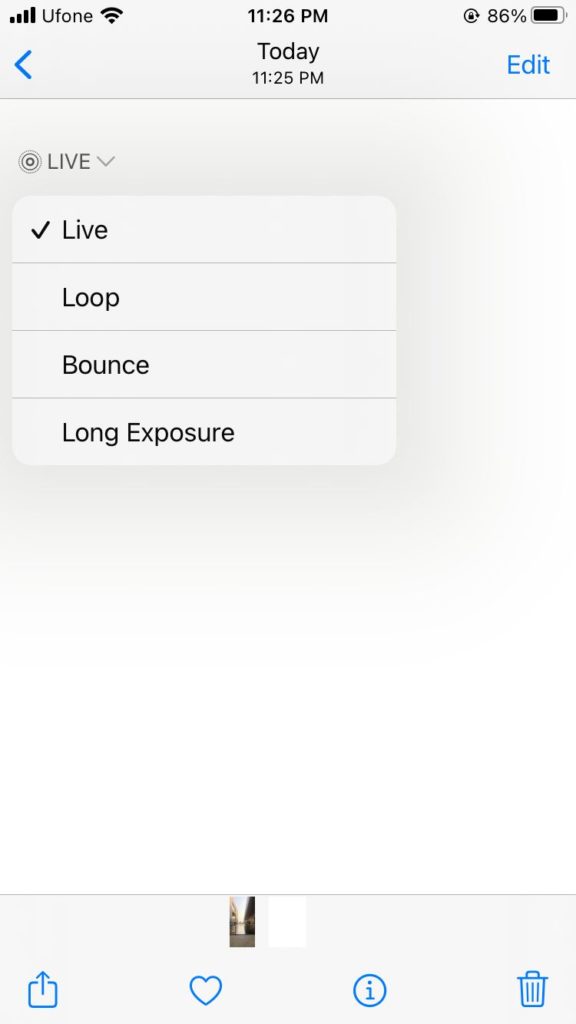
- Tap on Loop from the options. This will turn your Live Photo into a GIF, but instead of simply jumping back to the start, it will fade out before repeating.
- You can also choose Bounce from the same menu. However, this will make your quick video go forward and reverse instead of repeating from the beginning.
Now, every time you’re swiping through your Photos gallery, your Live Photo will be played in the chosen mode. Furthermore, you can change the mode anytime you like.
3. Use the Shortcuts App on iOS.
If you were not convinced by the default method to save Live Photos as GIFs on iOS, this solution is for you. This method requires you to take a few extra steps, but you’ll get a satisfying result that can easily be shared across multiple platforms.
We’ll be using one of the iPhone’s default applications known as Shortcuts. It is a very diverse software that you can use to perform various functions quickly, including the Speed Dial in Home Screen on iPhone.
Follow the steps below to create the Make GIFs shortcut:
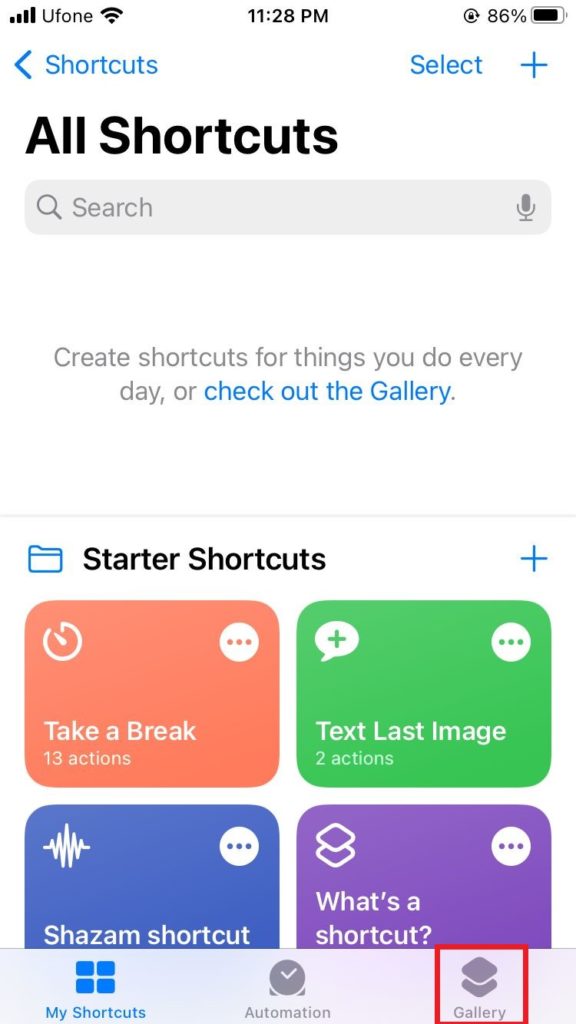
- Begin by opening the Shortcuts app on your iOS device. If, for some reason, you uninstalled it earlier, download it from the App Store.
- Then, head over to the Gallery tab from the bar below.
- Now, tap on the Search bar and type ‘Make GIF’.
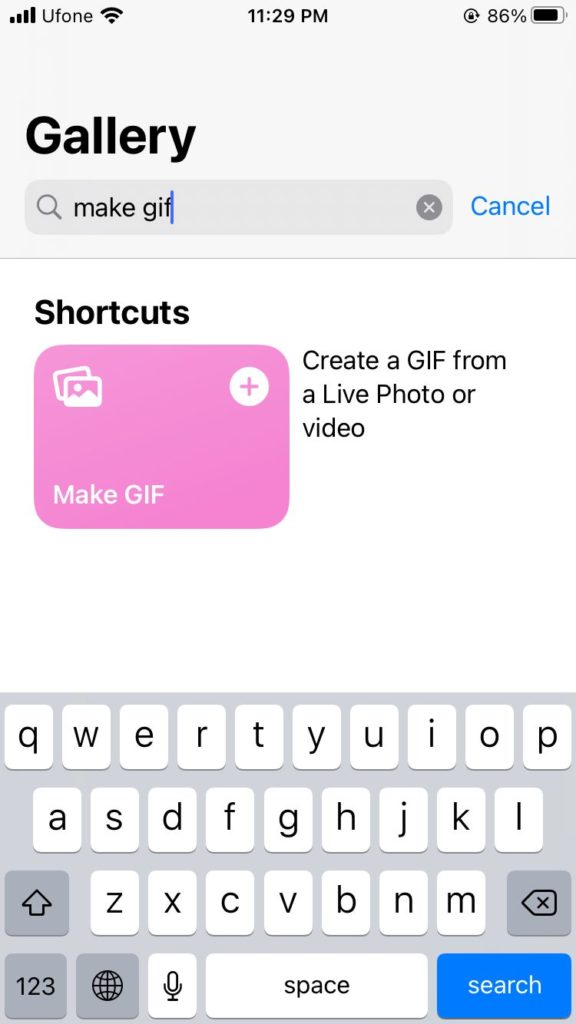
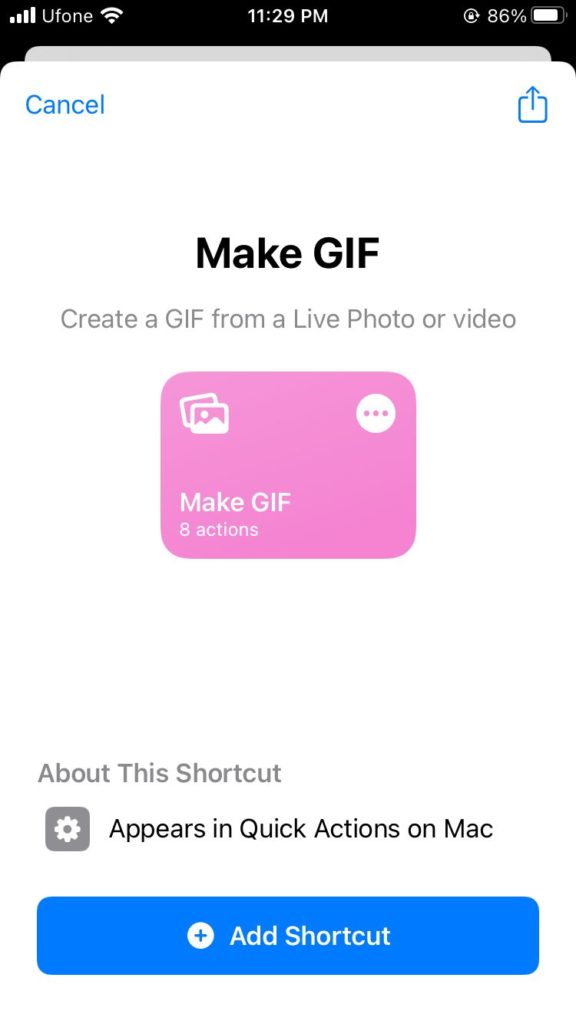
- Tap on the shortcut that’s displayed. Read the description under About This Shortcut to discover different ways you can run it.
- Then, tap on the Add Shortcut option.
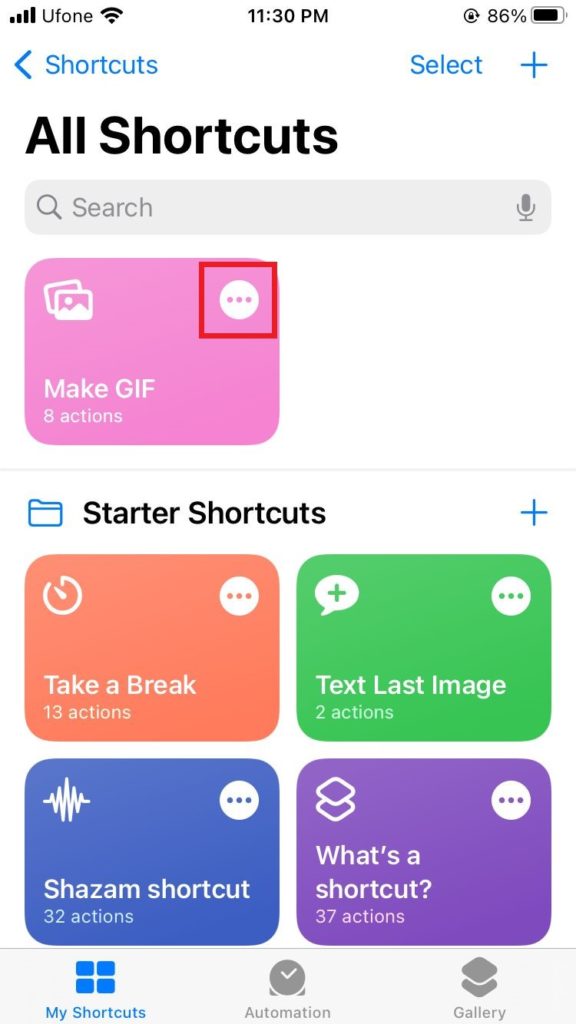
- After that, go back to the My Shortcuts tab from the bottom bar.
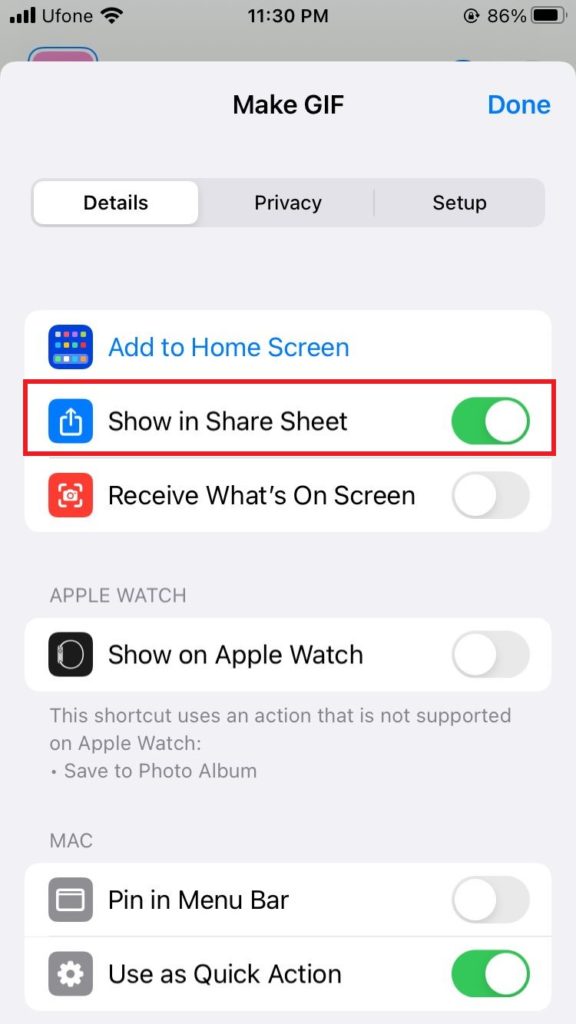
- Tap on the three dots icon at the top right corner of the Make GIF shortcut.
- On the next screen, tap on the blue Filters icon at the top right corner of your screen.
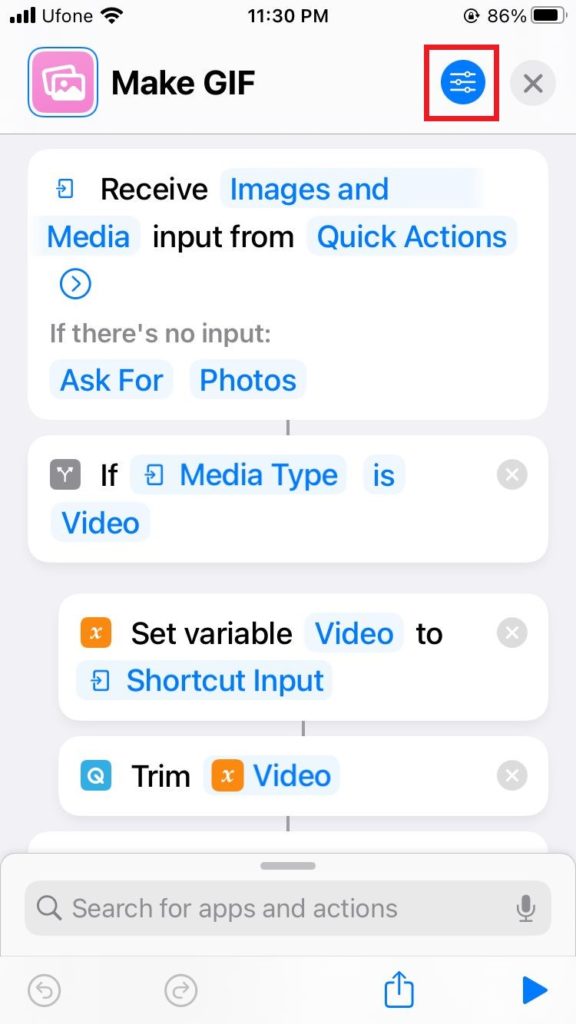
- Finally, toggle on the Show in Share Sheet option.
This was all on how to set up the shortcut for making GIFs. To utilize this shortcut and save Live Photos as GIFs on iOS, follow these steps:
- Firstly, launch the Photos app on your device.
- Open the Live Photo you want to save as a GIF.
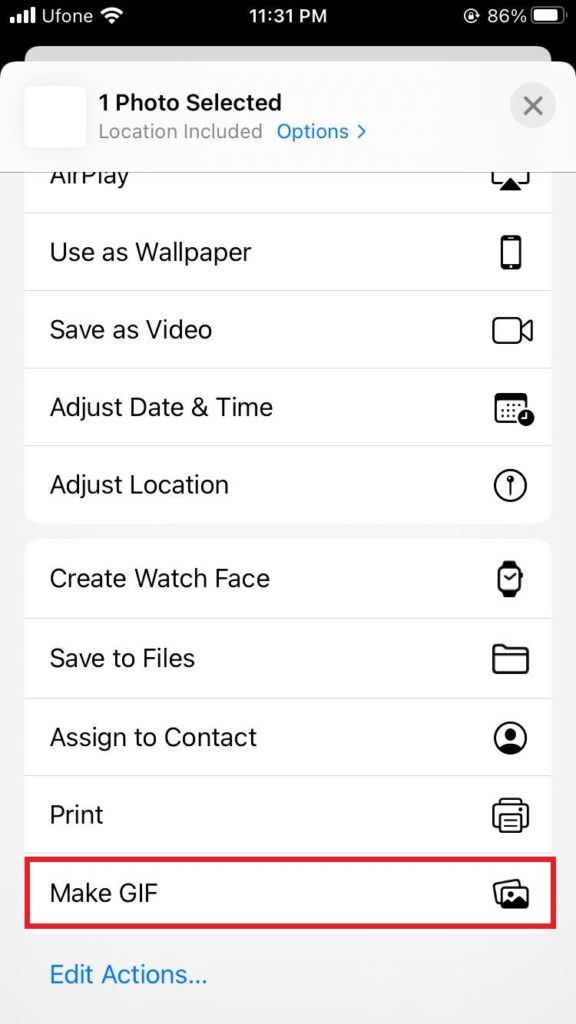
- Then, tap on the Share icon located at the bottom bar.
- From the pop-up options, scroll down to Make GIF and tap on it.
- Wait a couple of seconds for the Live Photo to get saved as GIF.
- Once finished, you’ll see a Done option. Tap on it.
- Now, navigate to the Recents album to find the GIF you just made.
You can now save any Live Photo easily with only a single tap.
4. Use the GIPHY App on iOS.
If you prefer adding a touch of your creativity to the GIFs you create, GIPHY would be your best option. It’s a vast application that not only allows you to create and share your own GIFs with other users but also view and download the ones created by the members of the GIPHY community.
- To start, install the GIPHY app from App Store on your iOS device.
- Once installed, launch the application.
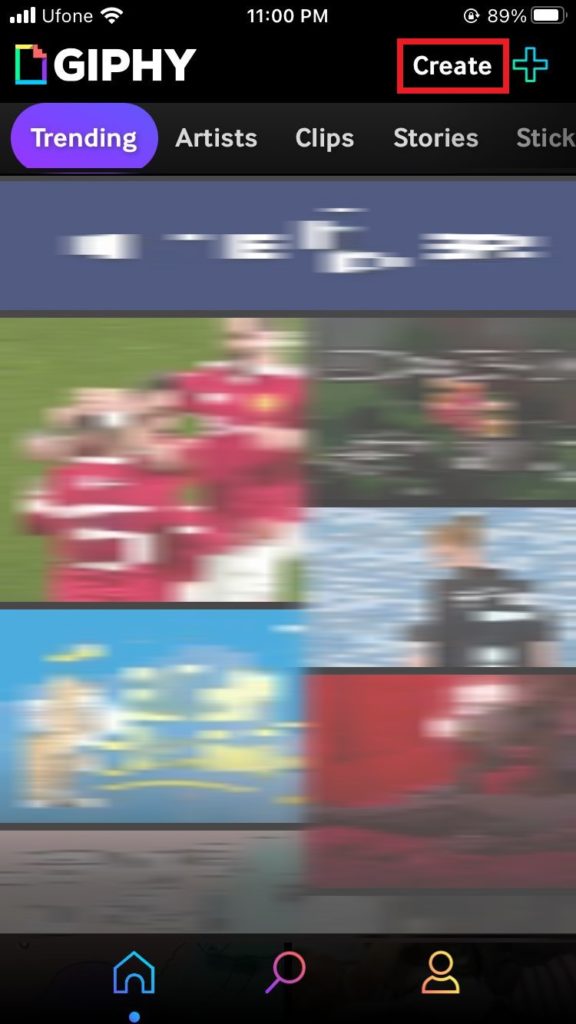
- Then, tap on Create at the top right corner.
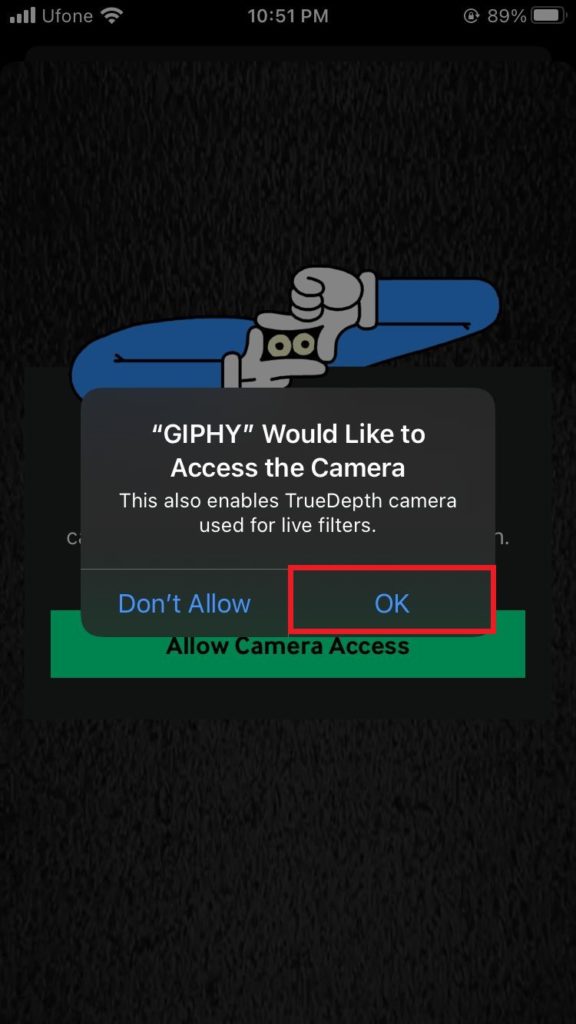
- Now, tap on Allow Camera Access and then Ok on the confirmation box.
- Next, tap on the Photos icon at the bottom right corner of your screen.
- From the pop-up options, either choose Select Photos or Allow Access to All Photos.
- Go to the Photos icon from the bottom and select the one you’d like to convert.
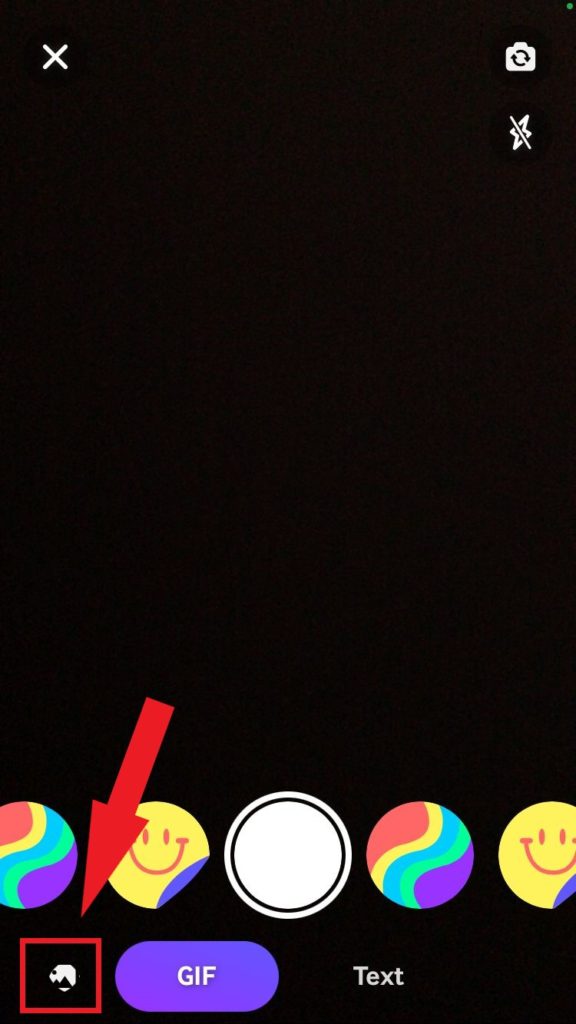
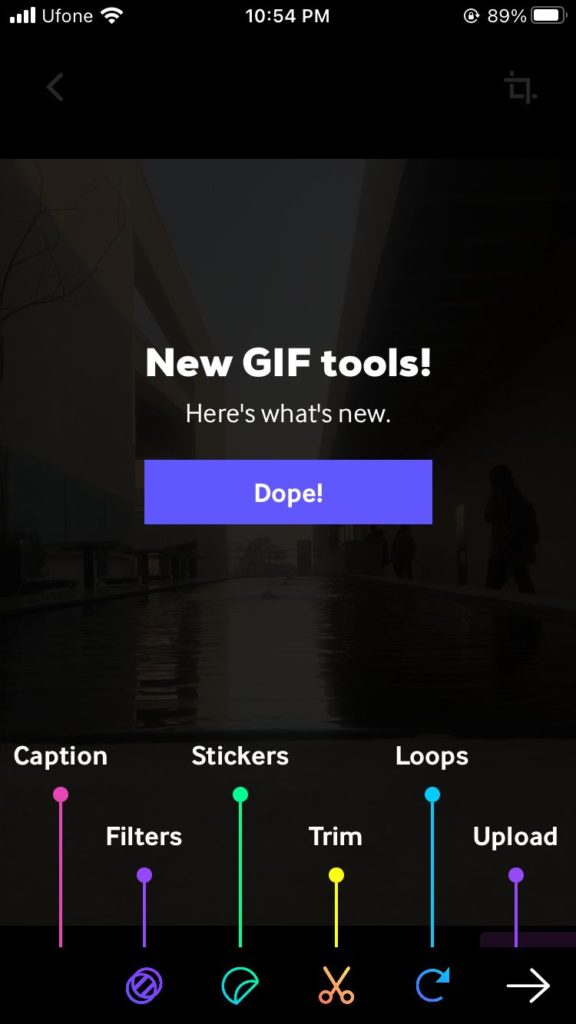
- GIPHY will introduce you to various editing options. Tap on Dope and edit the Live Photo as you like.
- When done, tap on the purple Forward arrow icon from the bottom right.
- If you only want to share this GIF, tap on the Share GIF button. Otherwise, tap on Upload to GIPHY.
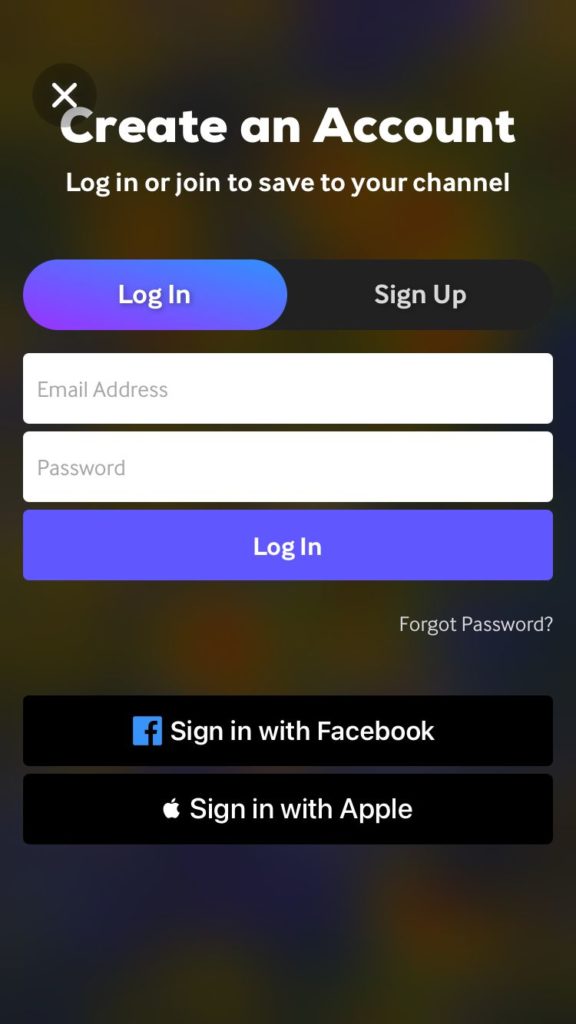
- This will bring you to the Create an Account screen since uploading requires you to own a GIPHY account.
- After successfully creating the account and uploading the GIF, tap on the three vertical dots and choose Save to Camera Roll.
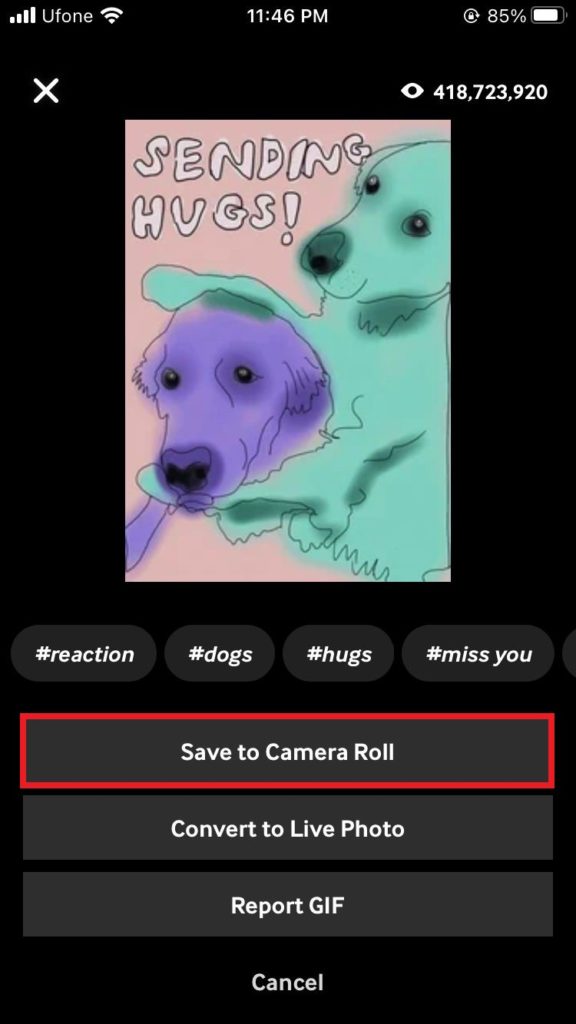
The saved GIF will be clean, unlike the one created from the iPhone’s built-in options.
This concludes our guide on how to save Live Photos as GIFs on iOS. For further queries, head to the comment section below. We’ll respond to you shortly.
If this guide helped you, please share it. 🙂
