

Can’t delete a Microsoft Store app due to an App removal failed error on Windows 11?
Removing apps from your PC not only helps clean the system storage but may also eliminate certain bugs hiding in the software. While the process is usually smooth and quick, you may have unexpectedly encountered the App removal failed error on Windows 11, bringing you to this page.
The error also displays a stop code 0x80073CFA, which you can search on the internet for a quick fix. Usually, a simple system reboot resolves the issue, while other times, you may have to dig a bit deeper.
So let’s go through the various remedies discussed below!
1. Run Windows Store Apps Troubleshooter.
The App removal failed error on Windows 11 with a stop code 0x80073CFA only occurs when you try removing Microsoft Store apps. You can run the in-built Windows Store Apps troubleshooter tool to diagnose and resolve most of the app-related issues if not all.
Here’s how to do it:
- First, go to the Search icon on the taskbar.
- Next, type ‘troubleshoot settings’ in the search bar and press the Enter key.
- Once the window opens, click on Other troubleshooters from the right side of the screen.
- Scroll down and locate Windows Store Apps, then select the Run button next to it.
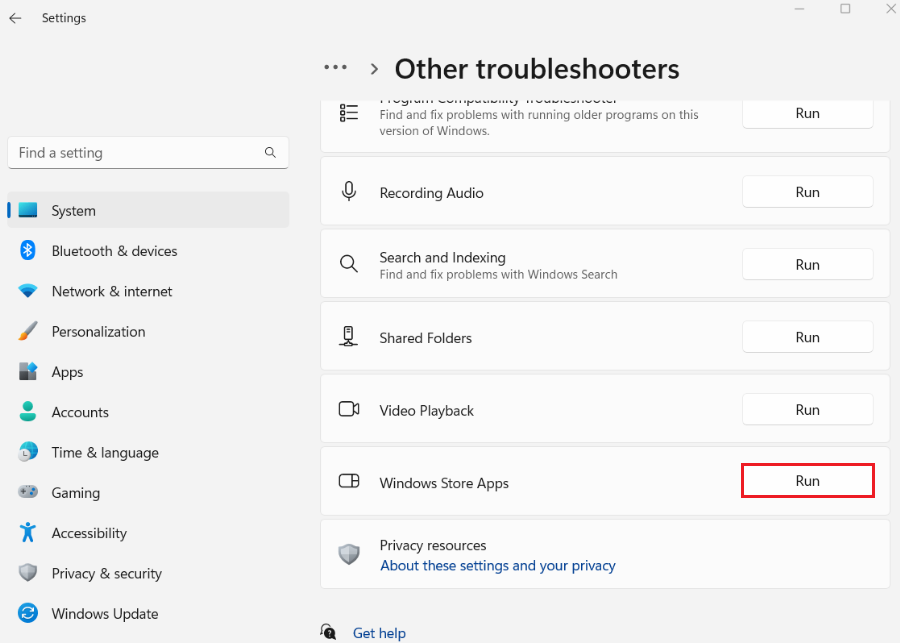
- After that, see if you can remove the app.
2. Clear Microsoft Store Cache.
- Start by pressing the Windows + R shortcut keys to launch the Run dialog box.
- Then, type ‘wsreset.exe’ in the bar and press the Enter key. This will make the Command Prompt appear on the screen for a few seconds until the Microsoft Store cache is removed. Now you can try removing the app.

3. Reset the Problematic App.
If you’re only encountering the App removal failed error on Windows 11 when trying to uninstall a specific app, we recommend you reset it. This will bring the application back to its factory settings, all the while deleting all its related data, which might’ve been the culprit.
Below are the steps you need to follow:
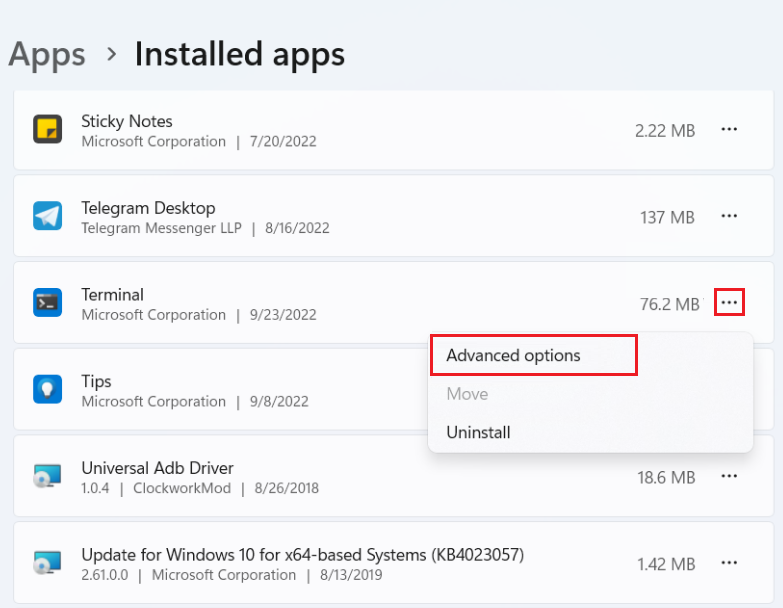
- First, right-click on the Start icon from the taskbar.
- Next, click on Installed apps from the list of options.
- Once the window opens, scroll down and locate the faulty app, then click on the three dots icon next to it.
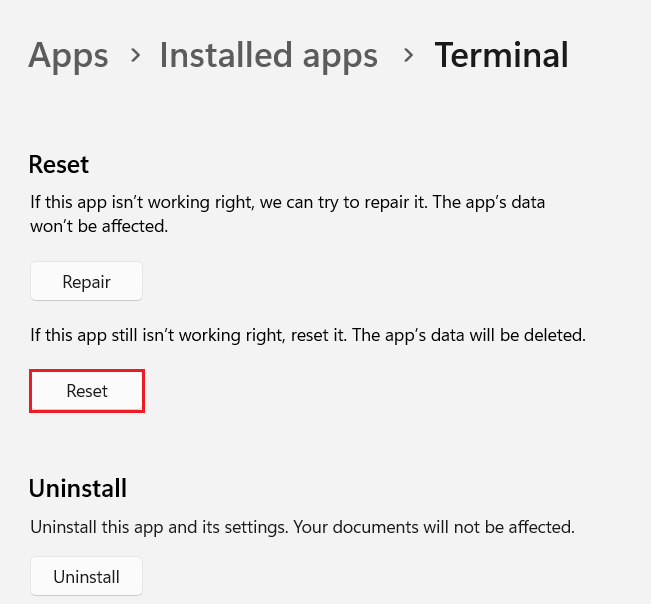
- From the options, select Advanced options.
- Then, navigate to the Reset section and click on Reset. The windows will reset the app.
4. Use PowerShell to Uninstall the App.
When you’re having trouble uninstalling applications from the standard method, you can force delete the programs using Windows PowerShell. This command-line shell can perform the task in seconds with only a few commands.
Here’s what you need to do:
- Click on the Search icon from the Taskbar.
- Then, type ‘Windows PowerShell in the search bar.
- Click on Run as Administrator on the right pane.
- A User Account Control prompt will appear on the screen. Click on the Yes button.
- Copy and paste the following command and press the Enter key.
Get-Appxpackage -Allusers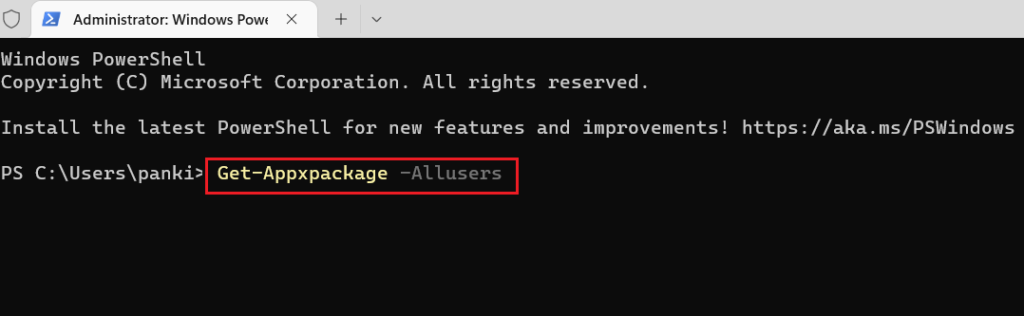
- A list of apps will appear on the screen. Locate the problematic app and copy its full package name.
- Then, copy and paste the following command into the console and press the Enter key. Also, replace ‘PackageFullName’ above with the package name you copied in the previous step. This will remove the problematic app.
Remove-AppxPackage -Package PackageFullName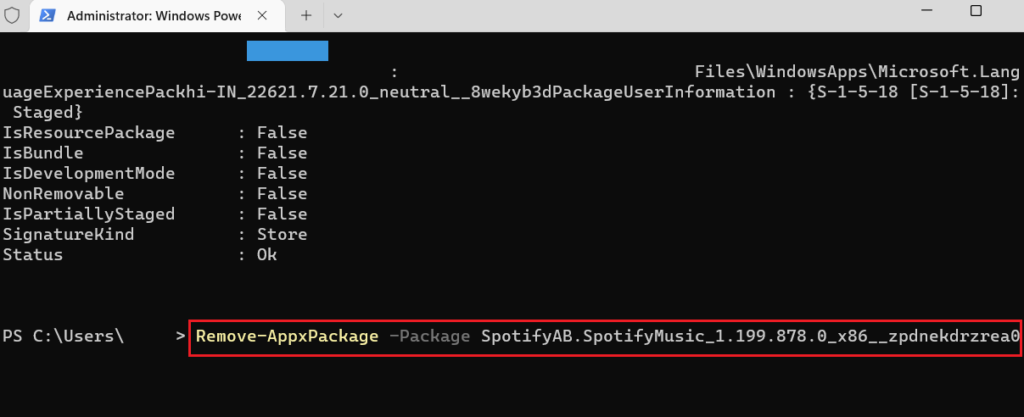
When following the instructions above, be sure to copy the commands cautiously, as any mistake can corrupt the registry or the entire system. We also recommend creating a Registry backup beforehand, in case anything goes wrong.
5. Use an Administrator Account.
At times, you may need some advanced privileges to make changes in your computer, such as removing certain programs. A lack of these permissions may prevent you from doing so and display the App removal failed error on Windows 11.
In case you’re using a standard account, use the instructions below to switch to an admin account:
- Press Windows + R keys to open the Run dialog box.
- Then, type ‘Control Panel’ in the command box and click on OK.
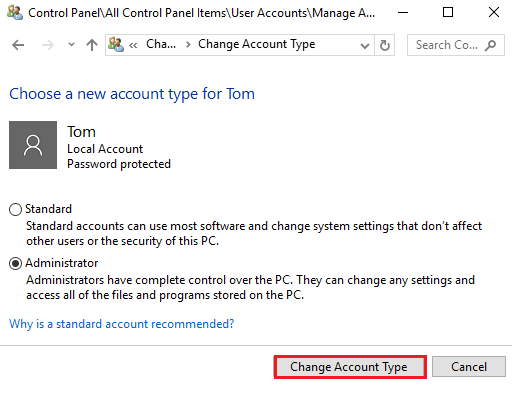
- From there, select User Accounts.
- Next, select the Change the account type option from the right pane.
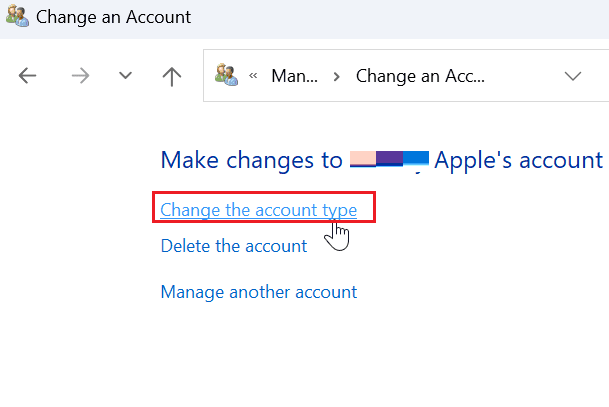
- Then, select the Administrator option.
- After that, click on the Change Account Type button.
- Restart your PC and check if you can remove the app.
6. Run DISM and SFC Scans.
You could also be encountering the App removal failed error on Windows 11 due to corrupted or missing system files. Fortunately, you can repair or replace them with built-in command-line scans.
These are System File Checker and Deployment Image Servicing and Management. To run these scans, follow the steps below:
- Begin by right-clicking on the Start icon.
- From the list of options, choose Terminal (Admin).
- If the User Account Control prompt appears, click on the Yes button.
- Copy and paste the following command and press Enter.
sfc /scannow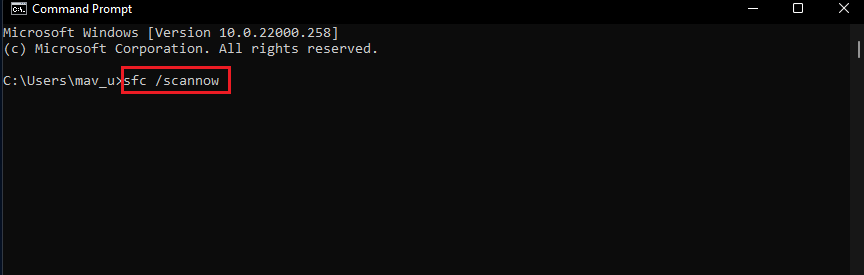
- After that, enter each of the following commands one by one to run the DISM scan.
DISM /Online /Cleanup-Image /CheckHealth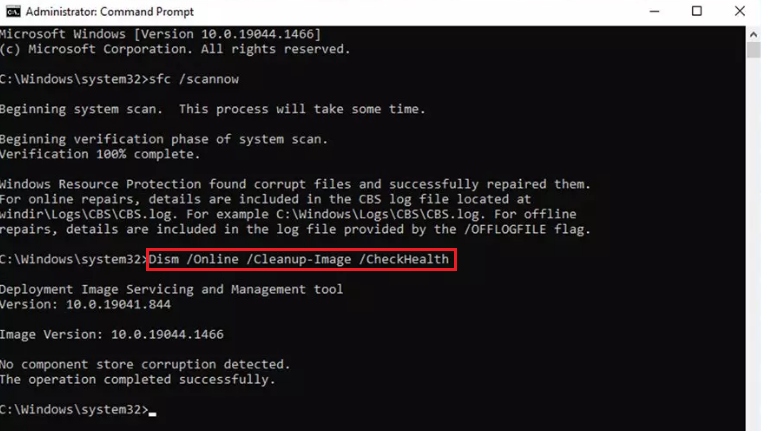
DISM /Online /Cleanup-Image /ScanHealthDISM /Online /Cleanup-Image /RestoreHealth- Once the scan is complete, restart your computer and see if the issue is resolved.
7. Remove the App in Clean Boot Mode.
Clean Boot mode allows your computer to start with a minimum number of drivers and programs. This reduces the chances of interference of programs that may be preventing certain apps from getting uninstalled.
Clean Boot differs from Safe Mode as it only blocks third-party applications and not the default ones.
So, try this method by following the steps below:
- First, press the Windows + R keys to open the Run dialog box.
- Then, type ‘msconfig’ in the text box and press the Enter key.

- This will open the System Configuration window. Go to the Services tab.
- Click the box next to Hide all Microsoft services.
- Then, click on the Disable all button.
- After that, go to the Startup tab.
- Select Open Task Manager.
- Once the Task Manager window opens, choose a third-party app and click on the Disable button near the top of the window screen.
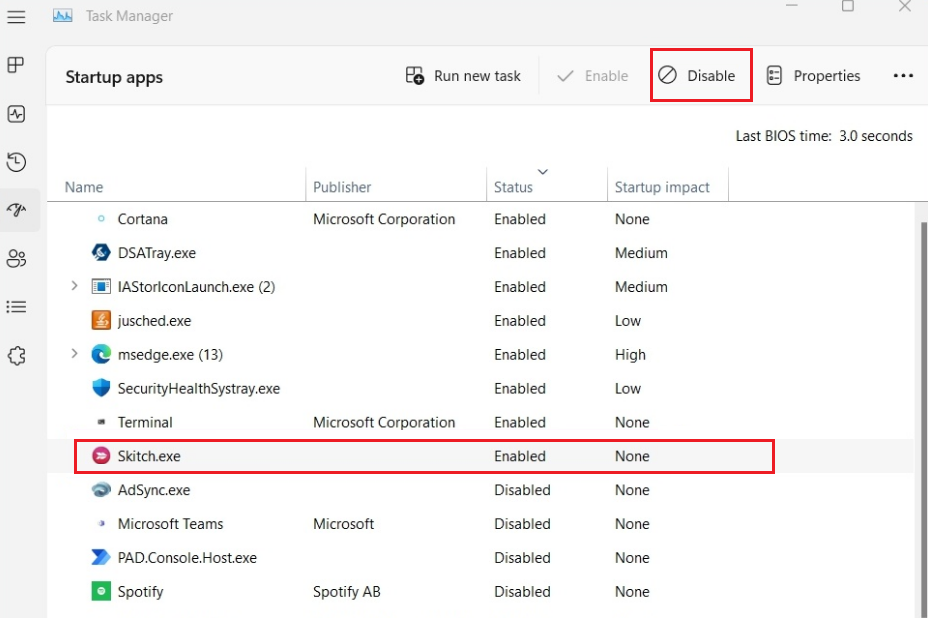
- After disabling all the third-party apps, restart your computer in Clean Boot Mode and remove the faulty app.
8. Use a Third-Party App.
Many users were able to remove the conflicting apps successfully by using a third-party app such as 10AppsManager. The app is free to download and features a simple interface to not further trouble the users.
This sums up our guide on how to fix the App removal failed error on Windows 11. In case you have any confusion or query, use the comments section below. We’ll try our best to assist you further.
If this guide helped you, please share it. 😊
