

Software updates are the primary reason iPhones last longer than their Android counterparts.
While installing updates on iOS is straightforward, you can also run into issues.
In this guide, I’ll show you how to fix the “Unable to check for update” error on your iPhone.
TL;DR Version
If you can’t edit messages on your iPhone, you can do the following:
Before Anything: Check Apple Servers
iOS updates are delivered through Apple’s servers.
If you encounter issues updating your iPhone, it’s likely due to server outages or scheduled system maintenance.
Visit Apple’s system status page to confirm any problems with the servers.
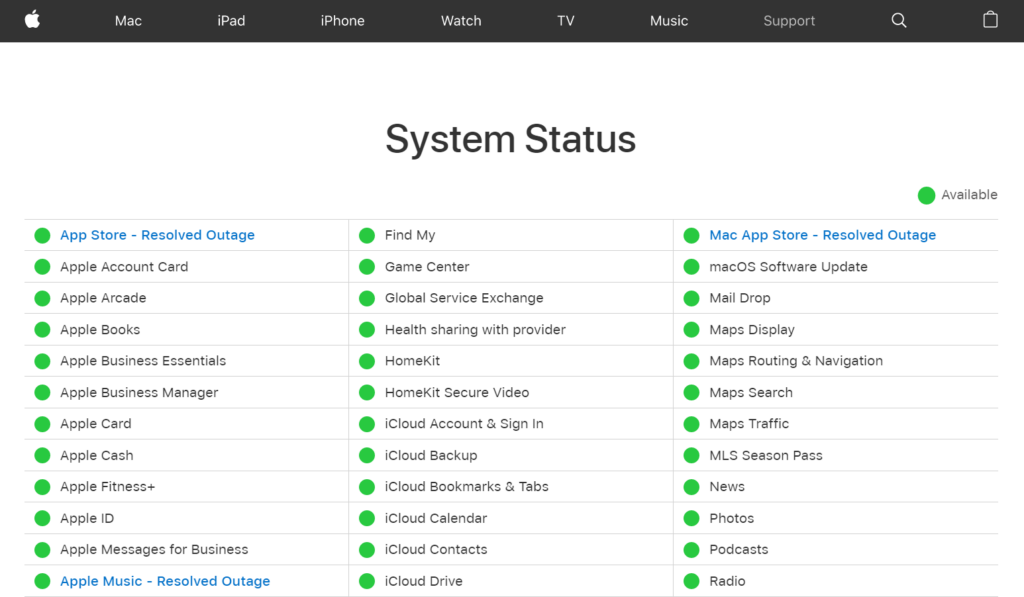
Unfortunately, server-related issues can’t be resolved on your end. It’s best to leave the matter to the experts and wait for Apple to sort everything out.
1. Check Your Connection
A stable internet is required when downloading software updates.
If there’s nothing wrong with Apple’s servers, your internet connection should be the second possible cause you should look into.
Run a speed test on your network to confirm if you’re receiving the correct bandwidth indicated on your plan.
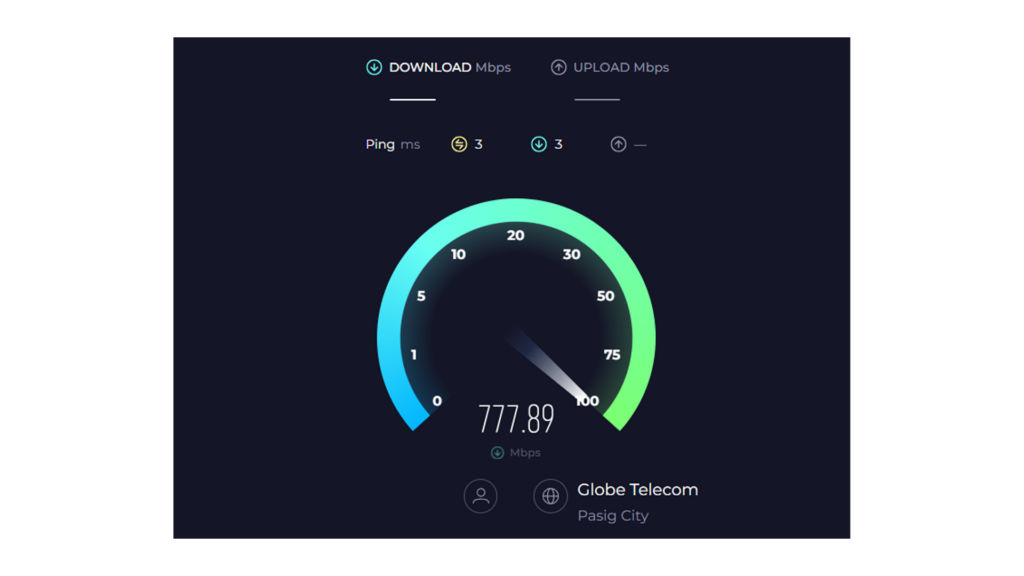
If the speed test indicates an issue with your connection, restart your router or refresh your cellular data.
To restart your router:
- Unplug your router from the wall outlet.
- Wait for at least 5 seconds.
- Plug back in your router.
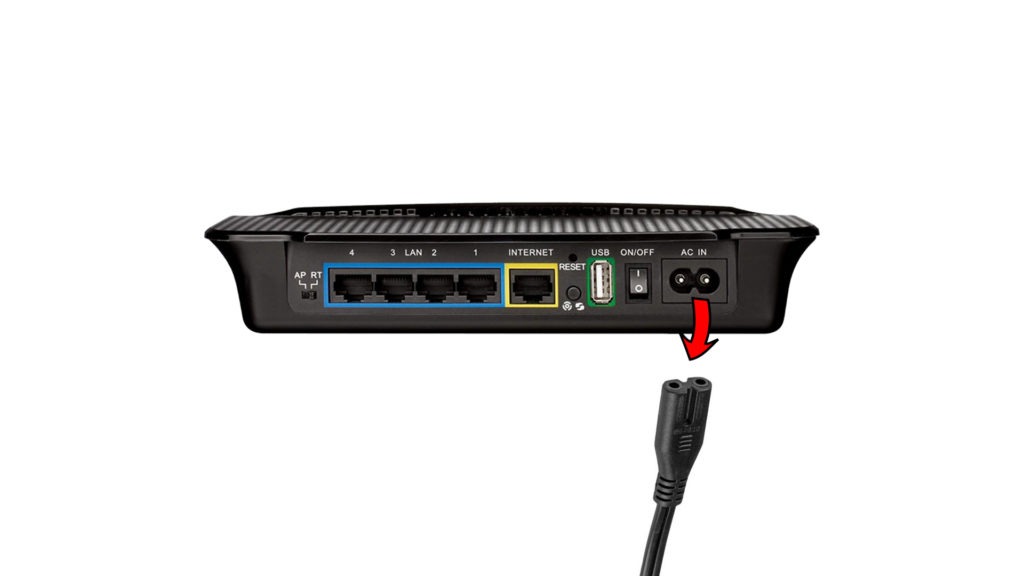
Note
If your router isn’t plugged into the wall, find the power button to turn it off.
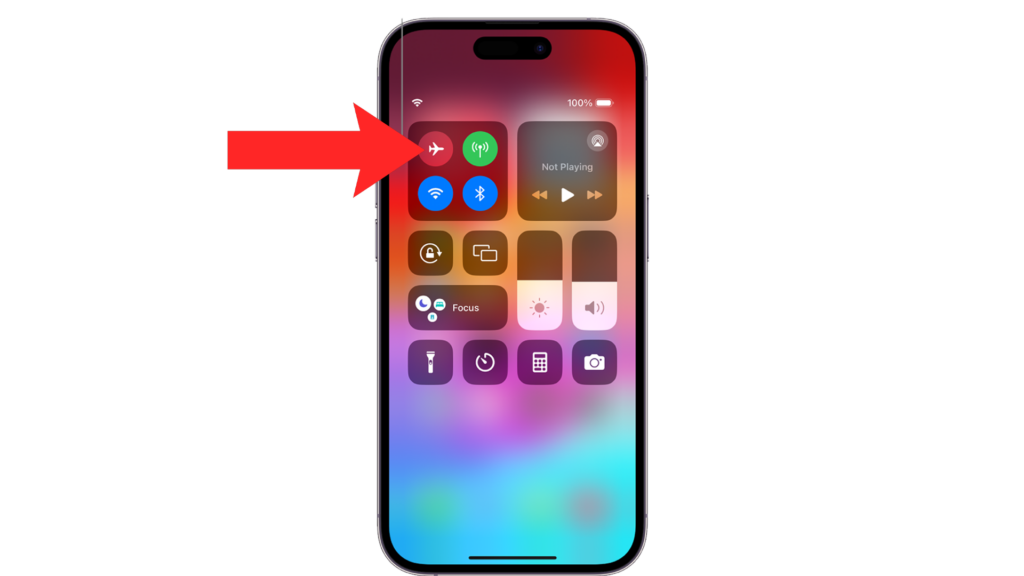
To refresh your cellular data:
- Swipe downwards from the upper right corner of your screen to access the Control Center.
- Now, tap the Airplane icon to enable Airplane Mode.
- Wait for the icon to turn gray.
- Tap the Airplane icon again to enable cellular data.
2. Check Your Monthly Bandwidth
If you are using a metered connection or mobile data plan, check with your provider if you have enough data to download the software update.
Some iOS updates can reach around 6-8 GB, consuming all your monthly allowance.
I recommend connecting to a Wi-Fi network with unlimited bandwidth when downloading software updates to avoid problems.
3. Check Date & Time Settings
If your iPhone’s date and time settings are wrong, Apple’s servers might flag your device as suspicious.
This prevents your iPhone from checking for updates, which explains the error.
Follow the guide below to update your date and time settings:
- Open the Settings app on your iPhone.
- Go to General > Date & Time.
- Find the Set Automatically option and enable it.
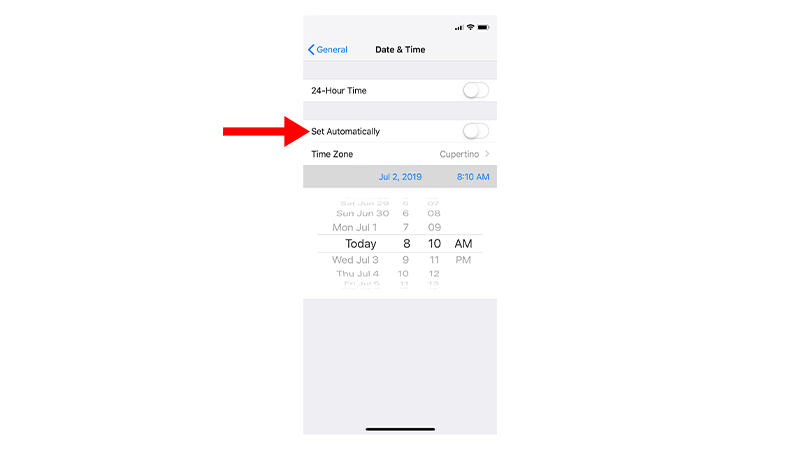
Try checking for updates again.
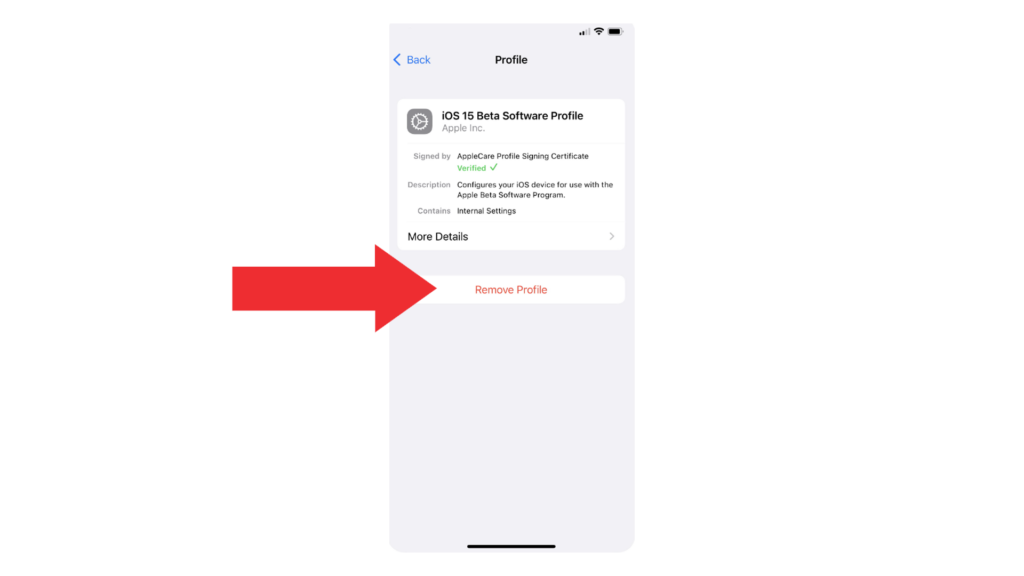
4. Delete Beta Profile
If you’ve signed up for Apple’s BETA program, it might be why you can’t check for software updates.
The BETA program allows users to download BETA versions of iOS to try out all the new features before the official release.
However, this can sometimes interfere with normal updates.
If you’re a BETA tester, delete your BETA profile and see if the problem persists:
- Go to Settings on your iPhone.
- Now, tap on General > VPN & Device Management.
- Open the iOS & iPadOS Beta Software Profile.
- Tap on Remove Profile and follow the prompts to continue.
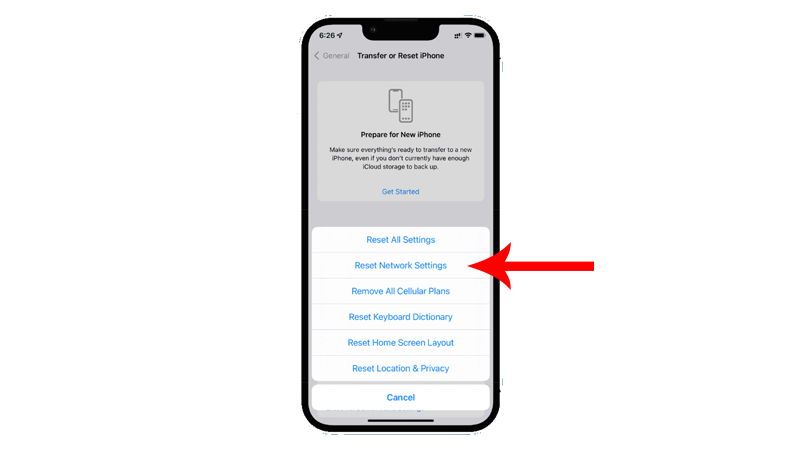
5. Reset Network Settings
If you still see the “Unable to check for updates” error on your iPhone, try resetting your network settings.
An app may have changed some of your network preferences, or you’ve enabled some options by mistake.
Here’s how to reset your iPhone’s network settings:
- Open the Settings app on your iPhone.
- Go to General > Transfer or Reset iPhone.
- Tap on Reset.
- Select Reset Network Settings and follow the prompts.
Note
- Your iPhone will immediately restart upon resetting your network configurations.
- It may be stuck in the Apple logo. Wait for the process to complete, which usually takes 5 to 10 minutes.
6. Try Google or Open DNS
If none of the solutions above worked, try changing your DNS.
Your service provider might be experiencing issues at the moment that affect your internet connection.
See if using Google’s DNS or Open DNS solves the issue.
- Open the Settings app on your iPhone.
- Go to Wi-Fi and tap the (i) icon next to your network.
- Scroll down and tap on Configure DNS.
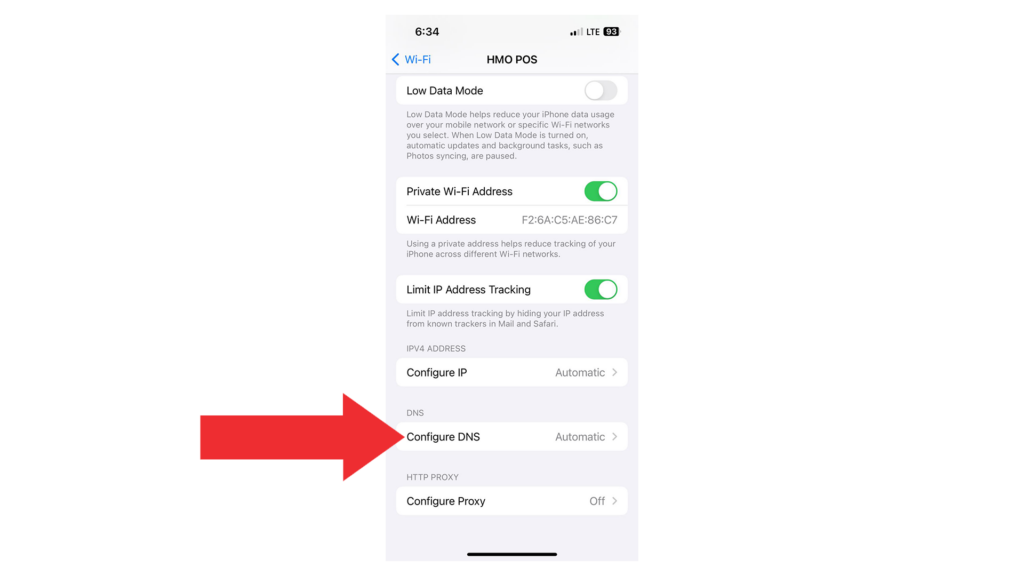
- Tap on Manual and select Add Server.
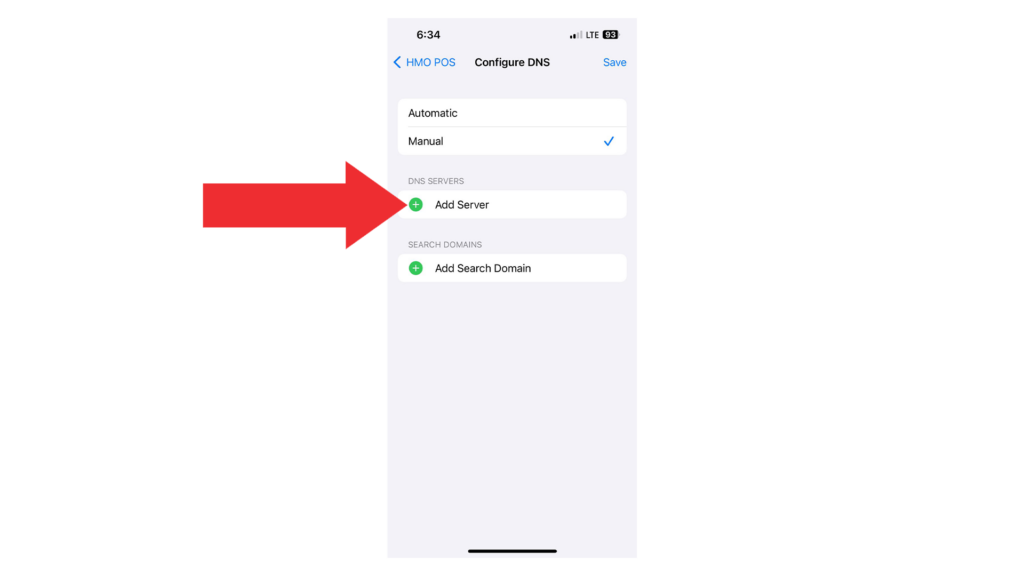
- Use any of the DNS server addresses below:
Google’s DNS: 8.8.8.8

OpenDNS: 208.67.222.222- Tap Save to confirm the changes.
FAQs
1. Your iPhone doesn’t support the latest software.
2. Your device was not able to reach Apple’s update server.
3. The update took too long to download or install.
