

Frustrated with the DNS server not responding issue on Windows 11?
Despite the many benefits that come with the latest Windows 11, there are still a few lagging features that are often the source of inconvenience for users. Of all the errors encountered by the operating system, nothing frustrates users as much as the DNS server not responding issue.
Immediately, you’ll lose access to all websites on the Internet, and your browser will fail to display any activity. Although situations like this can be easily handled by troubleshooting your network connection, it is not applicable in this case. Your computer will only show a “DNS server not responding” message without providing any solutions.
This means you’ll need to dig up the internet yourself to solve the problem. Lucky for you, you’ve landed on the right page. In this guide, we’ll be taking a deeper look into numerous fixes to help you combat the DNS server not responding issue on Windows 11.
So without any delay, let’s get started!
1. Change Your DNS Manually.
DNS is a decentralized naming system that identifies the traffic sent and received by your PC to display the required information. However, your computer may sometimes fail to connect to an IP address, resulting in a network error. This leads to the DNS server not responding on Windows 11.
The issue usually occurs when you’re using the default DNS, and a way to overcome it is to switch to any free DNS service manually.
Below are the steps you’ll need to follow:
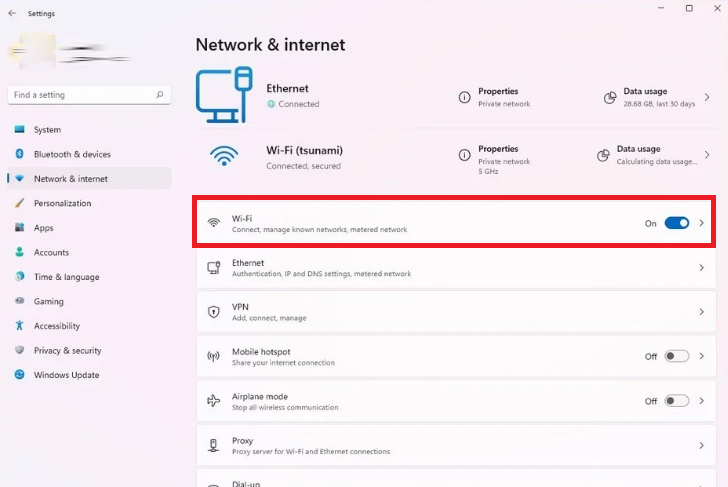
- To get started, press the Windows key + i on your keyboard to launch Settings.
- From the left pane, go to Network & Internet and select Wi-Fi.
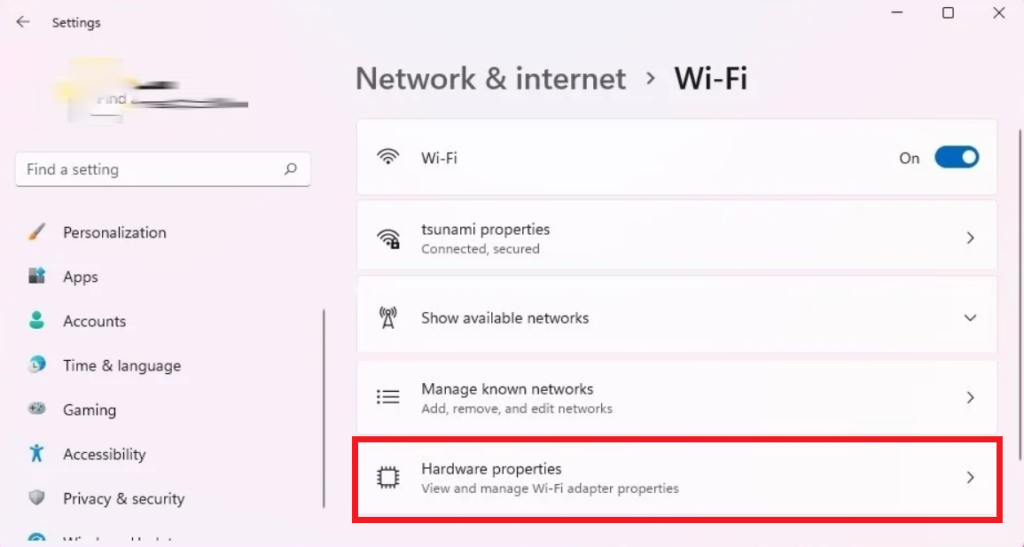
- Next, go to Hardware properties.
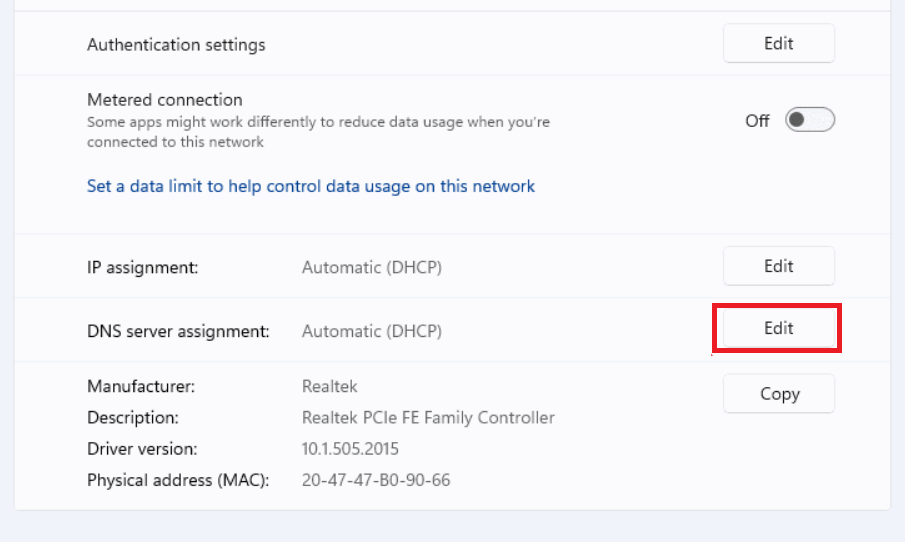
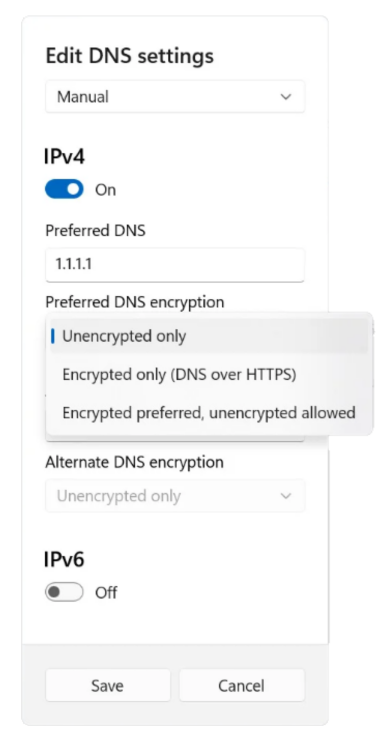
- Now, click on the Edit button next to the DNS server assignment.
- From there, click on the drop-down menu and choose Manual.
- Then, turn the toggle on for IPv4 and/or IPv6.
- Finally, enter the Preferred DNS and Alternate DNS in the given fields (refer to the next part for this information).
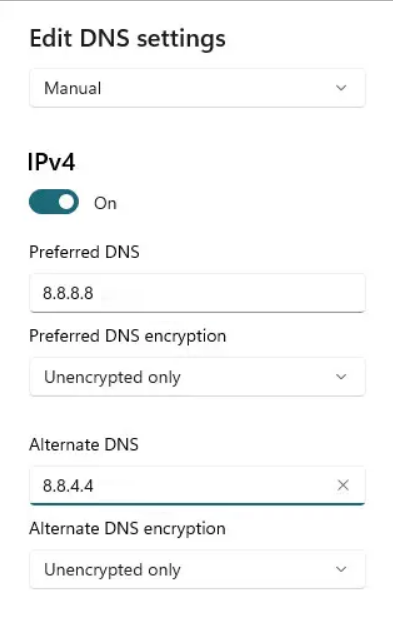
- At last, click on the drop-down menu and turn on encryption. Also, click on Save to apply these changes.
Here’s a list of Preferred and Alternate DNS addresses for various free DNS providers:
- Google: 8.8.8.8, 8.8.4.4
- Quad9: 9.9.9.9, 149.112.112.112
- Cloudflare: 1.1.1.1, 1.0.0.1
2. Disable Third-Party Antivirus.
Another very common reason behind the DNS server not responding issue on Windows 11 is multiple third-party apps interfering with your system’s functions. This is especially true for antivirus programs such as Avast, AVG, and McAfee, as they have the ability to create hindrances in the DNS services.
For this reason, you need to disable such third-party antiviruses. Keep in mind that doing so would not leave your PC exposed to virus attacks as Windows Defender will be activated for protection.
To follow this fix, simply open your Firewall’s settings and disable the Secure the DNS or Block Internet Connection Sharing option. This is a temporary fix until an official update is available, after which you can reactivate the antivirus.
3. Flush Your DNS.
One common way to resolve the DNS server not responding issue on Windows 11 is to renew the DNS. This fixes all the misconfigured settings and restarts your connection.
Follow the steps below to do it:
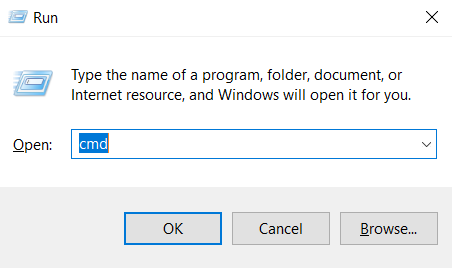
- First, press the Windows key + R to open the Run dialog box, type ‘cmd‘ and click on OK. Alternatively, press Ctrl + Shift + Enter on your keyboard to run Command Prompt as administrator.
- Now, paste the following commands one by one and press Enter each time:
ipconfig /flushdnsipconfig /registerdnsipconfig /releaseipconfig /renewnetsh winsock reset- After that, restart your computer to determine whether the issue has been resolved.
4. Update the Drivers.
Your PC may be failing to detect the DNS server or respond accurately because of corrupted files or glitched drivers. For this reason, you need to check for available updates as it often contains fixes for reported bugs.
Here’s what you need to do:
- To start, press the X and Windows keys on your keyboard simultaneously.
- From the pop-up list, click on Device Manager.
- When the window opens, look for your Network Adapter. Then, right-click on it to view options and choose Uninstall.
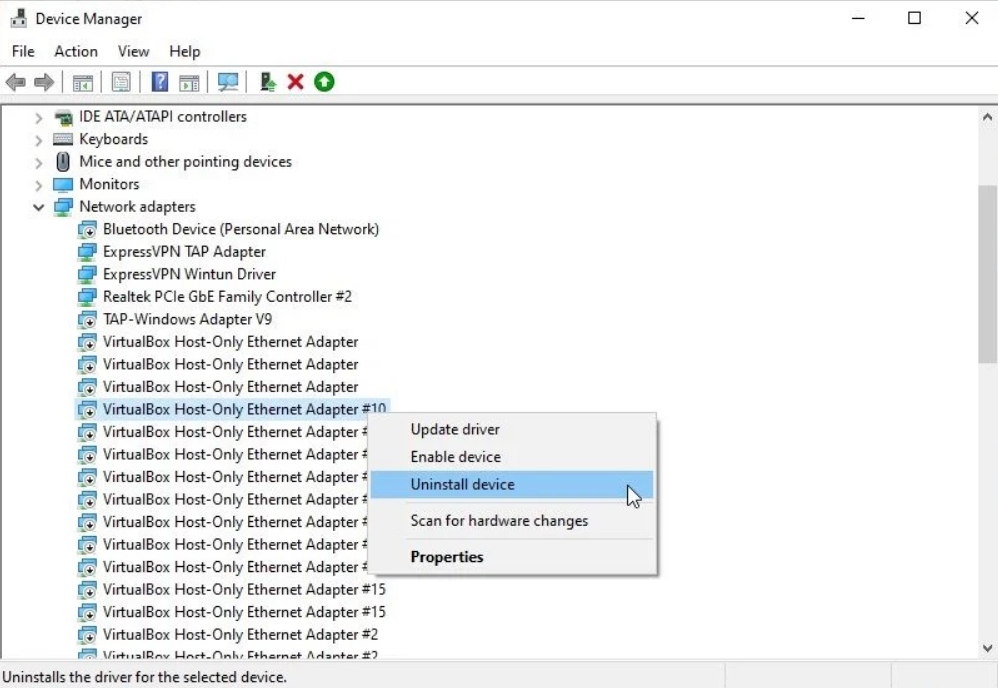
- A pop-up confirmation dialog box will now appear. You need to check the box for Delete the driver software for this device and click on the Uninstall button.
- After that, restart your PC.
- Upon restart, your computer will automatically install the latest default drivers.
Already downloaded a version of the driver you wish to install on your PC? Follow these steps:
- In the Device Manager window, select the drop-down arrow for Display Adapters.
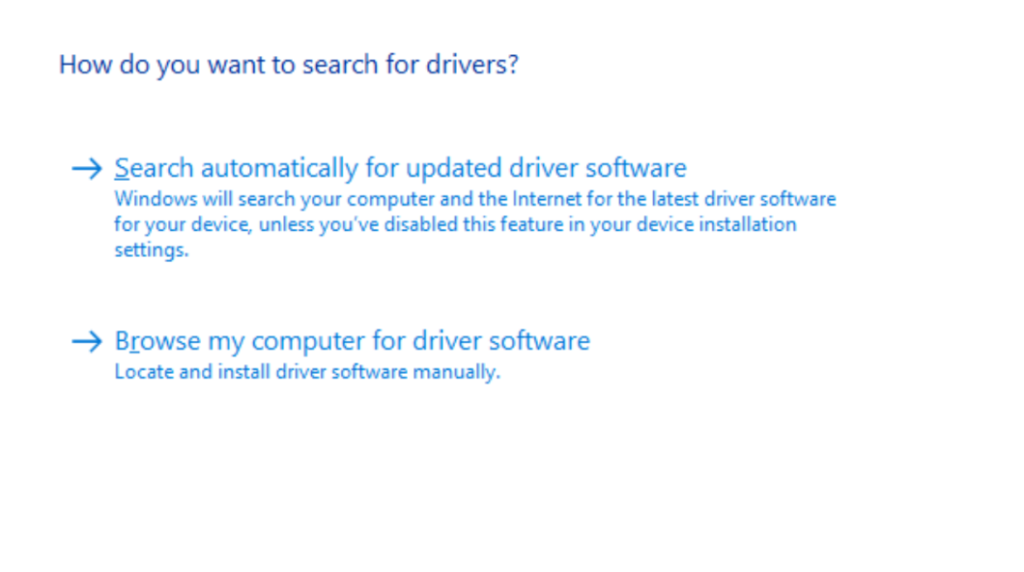
- Simply right-click on any component and select Update driver.
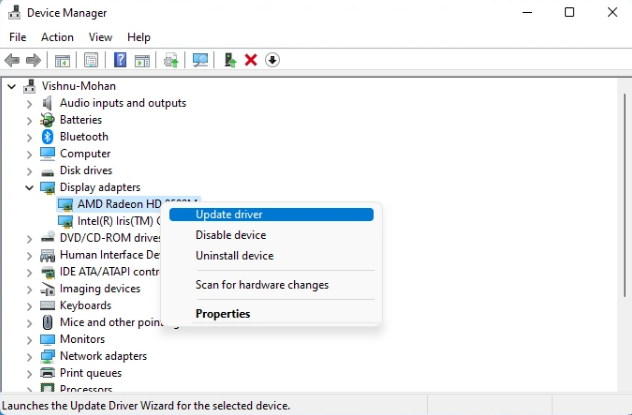
- Now a pop-up window will appear. If you have the drivers installed on your PC, Browse my computer for driver software to locate the file. Or, click on Search automatically for updated driver software.
5. Boot Into Safe Mode.
If you cannot locate a cause for the DNS server not responding issue on Windows 11, try booting into Safe mode.
Below are the steps you’ll need to follow:
- Begin by launching the Start menu.
- Then, click on the Power icon followed by the Restart option while holding down the Shift key on your keyboard.
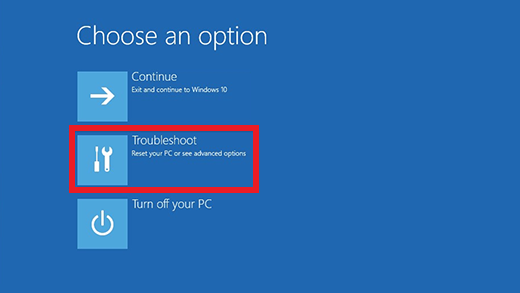
- Once at the Recovery Options screen, click on Troubleshoot.
- Next, go to Advanced Options, select Startup Settings.
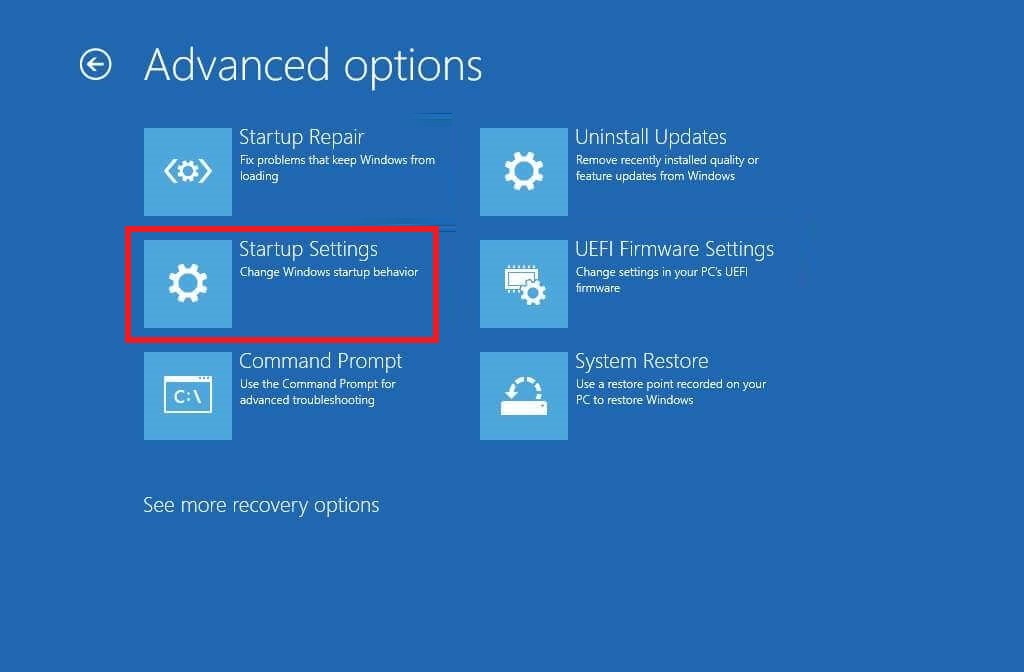
- After that, click on Restart.
- Press F5 and click on Safe Mode with Networking while your PC is restarting to enter Safe mode successfully.
If the error disappears after that, then a third-party app is probably hindering your computer’s performance. In this case, you may try disabling each app separately to find out which software is causing issues.
6. Restore to a Previous Restore Point.
If the DNS server error persists, you may want to consider bringing your PC to a previously known restore point before you encountered the issue. This will revert any changes that may have developed after that point, resulting in the malfunctioning of your network.
Apart from your settings being restored to their previous state, the apps you installed afterward will also get deleted. All this information will be displayed on the restore screen. Moreover, you may encounter a Restore Point error that requires additional fixes.
7. Contact Your Wi-Fi Provider.
If no other solution works for you, it could be an issue with your network connection. In that case, you’ll need to contact your Wi-Fi provider. A representative will visit your location, check the connection, and resolve any software or hardware-related issues.
8. Reset Your PC.
For your last resort, you need to reset your PC entirely. Although it may clean your system to its default setting, you can always store the important files and data on a hard drive. In retrospect, resetting might not be such a bad idea, since a PC without a network connection would be pretty useless.
That’s it! You’ve made it to the end of our guide on how to fix the DNS server not responding issue on Windows 11. For further queries, head to the comment section below. We’ll be happy to assist you further.
If this guide helped you, please share it. 🙂
