Wondering why you see a ‘cannot find valid editing modes’ message on Adobe Premiere Pro?
Adobe Premiere Pro is one of the best video editing software globally. It is a timeline-based video editing software developed by Adobe Inc. and published as part of the Adobe Creative Cloud program.
Premiere Pro is currently available for Windows and macOS and was first launched in 2003.
While Adobe Premiere Pro is undoubtedly one of the best, it’s not perfect and comes with its own issues.
One common problem that you could encounter is the ‘cannot find valid editing modes’ message. This issue occurs at launch, which prevents you from accessing the editing software on your computer.
If you use Adobe Premiere Pro for professional work, this error must be fixed right away so you can get back to your projects.
Today, we’ll show you how to fix the ‘cannot find valid editing modes’ error on Adobe Premiere Pro.
Let’s get started!
1. Restart Your Device.
As a common practice, the first thing you should do when you encounter issues with Adobe Premiere Pro is to restart your system. This allows your computer to reload its resources and eliminate temporary bugs that could cause the error.
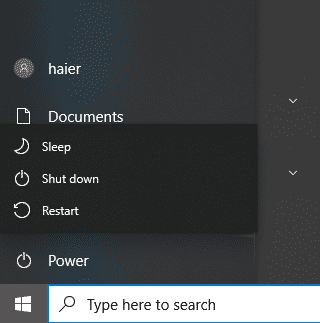
For Windows users, here’s how you can restart your system:
- On your computer, access the Start Menu by pressing the Windows icon on the Taskbar.
- After that, open the Power Options tab.
- Finally, click on Restart to reboot your computer.
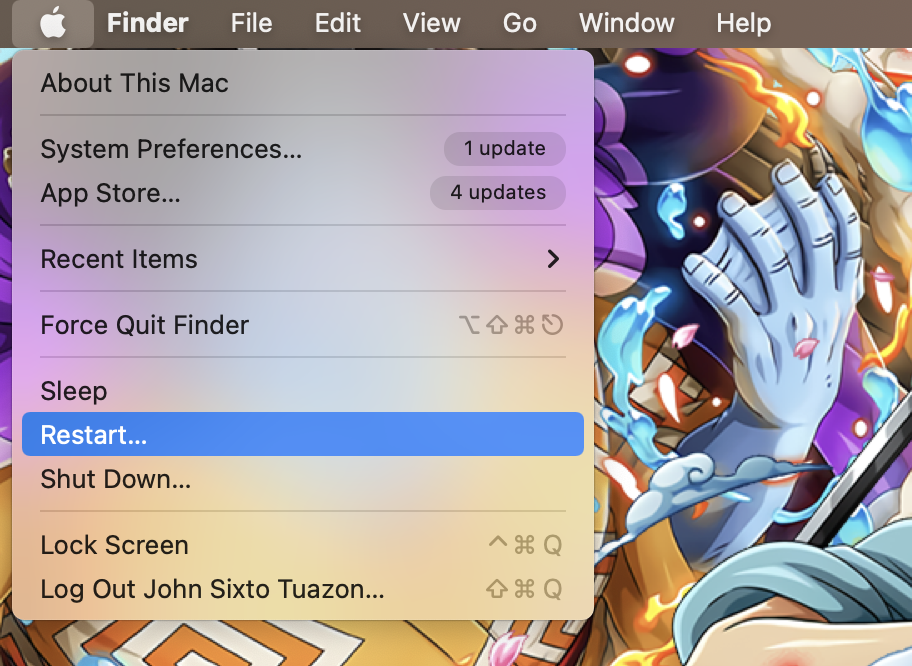
If you’re on macOS, see the guide below to restart your computer:
- First, click on the Apple icon on the upper left corner of your screen to open the Apple Menu.
- Next, select the Restart option.
- Lastly, click Restart on the dialog box to confirm your action.
Once done, go back to Adobe Premiere Pro to check if the problem is solved.
2. Update Adobe Premiere Pro.
One of the most common reasons for the ‘cannot find valid editing modes’ error on Adobe Premiere Pro is outdated versions of the software. If you encounter this issue on your computer, try updating Premiere Pro.
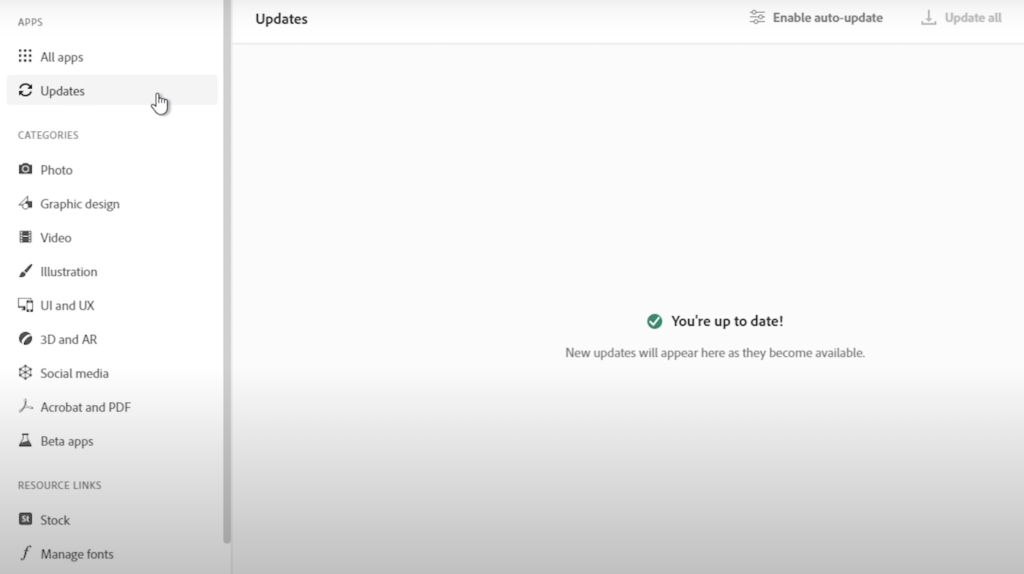
See the guide below to update your Creative Cloud apps:
- Launch Adobe Creative Cloud on your computer.
- Now, go to the Updates tab.
- Finally, hit the Update button next to Adobe Premiere Pro.
Restart your system after the update and check if Adobe Premiere Pro will work.
3. Run Adobe Premiere Pro As Administrator (Windows).
Windows could be blocking Adobe Premiere Pro from accessing vital system resources that are needed by the software to function. To rule this out, try running Premiere Pro as an administrator on your system.
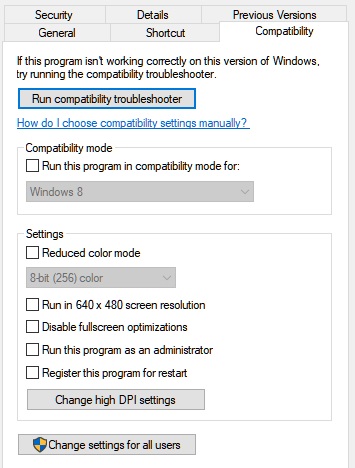
Here’s what you need to do:
- On your desktop, right-click on Adobe Premiere Pro.
- Next, choose Properties and go to the Compatibility tab.
- Lastly, enable the ‘Run this Program as an Administrator’ and save the changes.
Relaunch Adobe Premiere Pro to check if the error message is gone.
4. Update Your Graphics Drivers.
Adobe Premiere Pro uses your graphics card to render frames faster. This enhances the performance of the software and reduces the load on your CPU. However, Adobe Premiere Pro may not work correctly if your GPU drivers are corrupted.
To rule this out, see the guide below to update your display drivers:
- On your keyboard, press the Windows + X keys to open the Quick Menu.
- Next, click on Device Manager.
- Expand the Display Adapters tab and right-click on your GPU.
- Finally, choose the Update Driver option.
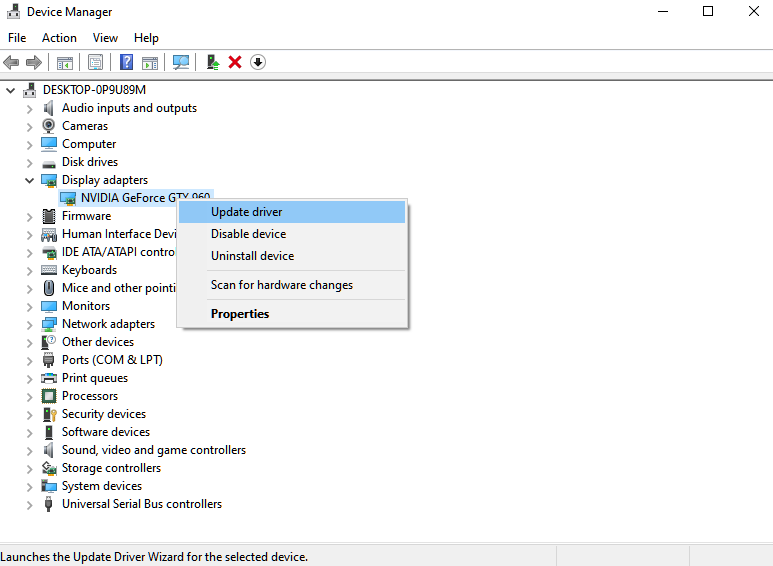
Restart your system afterward to apply the changes. Go back to Adobe Premiere Pro to check if the software is working.
5. Turn Off Your Antivirus.
Third-party antivirus could also be why Adobe Premiere Pro is not working on your computer. While antivirus software works well to prevent malware and virus from infiltrating your system, they can get too protective and restrict legitimate applications.
If you’re using third-party antivirus on your computer, try turning it off before using Adobe Premiere Pro.
You can also add the software to your antivirus safelist or allow list if it supports that feature.
6. Reinstall Adobe Premiere Pro.
At this point, the last thing you can do is reinstall Adobe Premiere Pro on your computer. This should ensure that there are no corrupted files on your system and that you have the latest working version of Adobe Premiere Pro.
On Windows, see the guide below to remove Adobe Premiere Pro:
- First, launch the Control Panel on your computer.
- Now, click on Uninstall a Program and locate Adobe Premiere Pro.
- Lastly, right-click on Premiere Pro and choose Uninstall.
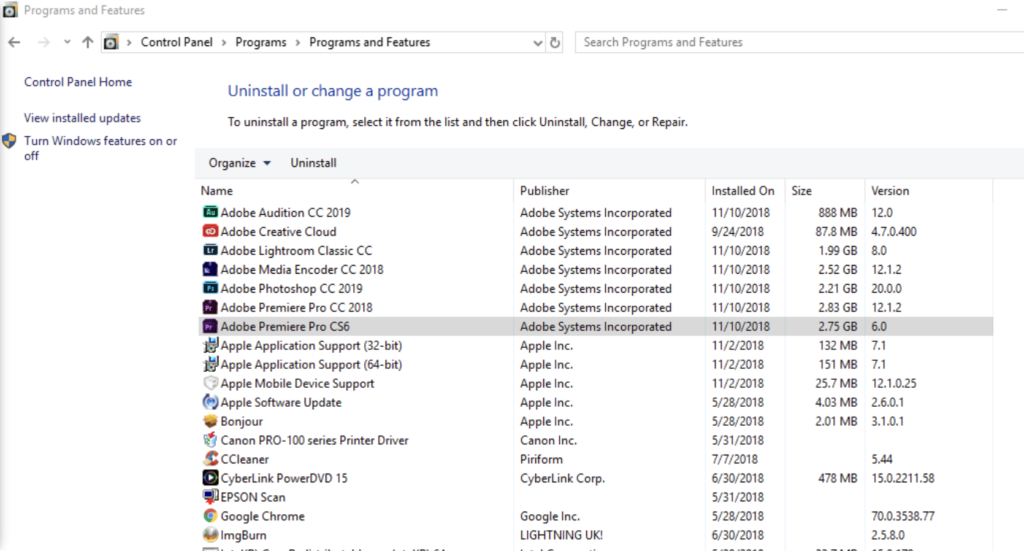
If you’re using a Mac, go to Finder > Applications and drag Adobe Premiere Pro to the Trash to delete it.
Go to Adobe’s website afterward to install the latest version of Premiere Pro on your system.
That wraps up our guide on how to fix the ‘cannot find valid editing modes’ error on Adobe Premiere Pro. If you have questions, please drop a comment below, and we’ll do our best to answer them.
If this guide helped you, please share it. 🙂


